Flashings prevent water intrusion where the roof changes direction or meets another part of the home, e.g. a wall, chimney, or roof penetration. They are also installed at the eaves and sidewalls, where they can prevent water from wrapping under the roofing (drip edge flashings) or driving into the home (kick-out flashings). Roof valleys are also flashed. The majority of roof leaks occur at the flashings. Properly-installed systems rely primarily on a mechanical exclusion of water. Overall repairs using caulks or roofing cement should be considered temporary. The flashing on roofing materials that have a very long EUL should be inspected closely. Slate, and clay or concrete tiles can easily outlast the flashings, especially older installations that used galvanized steel flashing.
Inspect all visible flashings for deterioration, damage, missing or loose sections, gaps, lifted areas, and unsealed exposed nail heads. Nails driven through the exposed flashing is permitted only in certain applications. Inspect all caulked edges for gaps, or deterioration. Modern practices allow counter flashings to be nailed in place and the upper edges caulked.
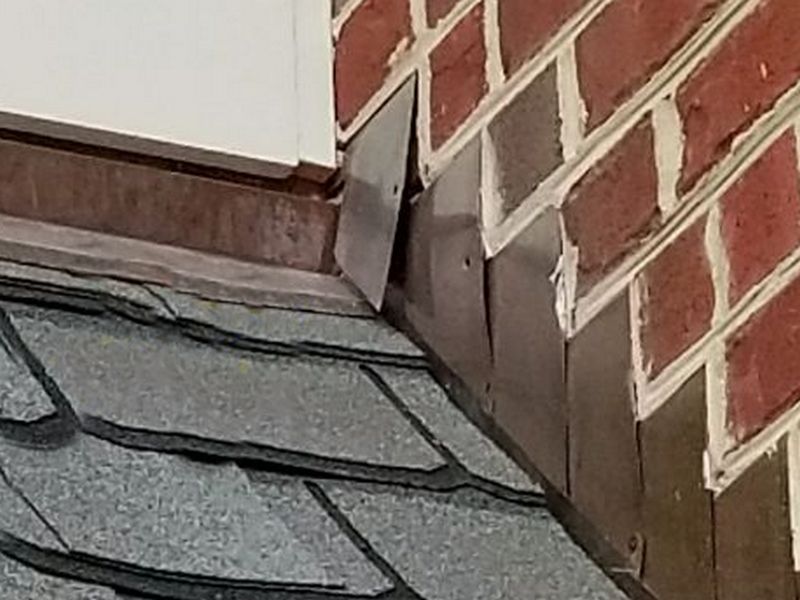
Step flashing is required where the sloping side of a roof meets a wall, chimney, or skylight. Individual L-shaped pieces are placed on top of each course of the roofing before the next course above is installed. A single piece of flashing should not be used instead of step flashing. It is unreliable and should be reported.
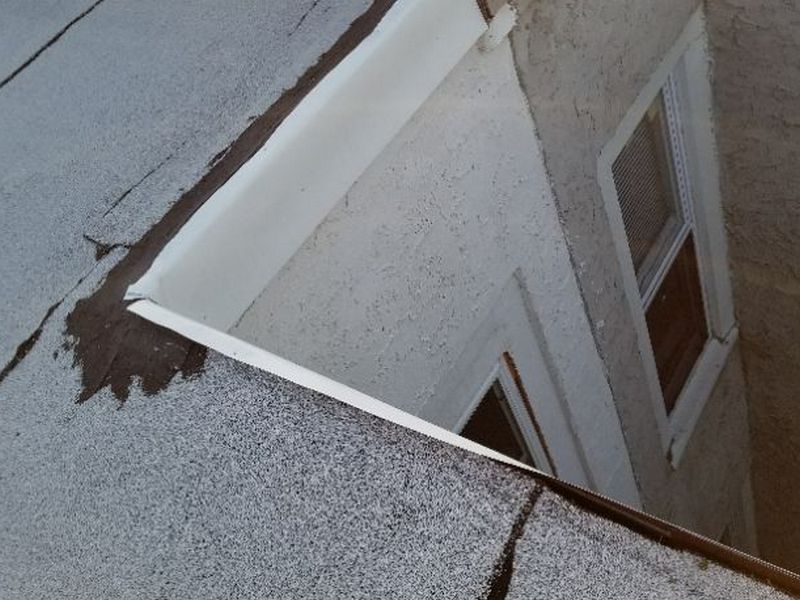
For walls, the step flashings should be installed before the siding. The vertical portions are covered by the siding, leaving only about 2” exposed. On a chimney, or a stucco or masonry home, a counter flashing is used. After all step flashings are in place, the counter flashing is installed. In older or high-quality installations, the top of the counter flashing is bent inwards into a cut groove, or reglet, and caulked. Modern practices nail the counter flashing to the surface and caulk the upper edge. Flashings should also be present at the top of the shingles parallel to a wall or a chimney’s downhill side. The lower portion of the flashing lays on top of the roofing. The vertical portion goes underneath the siding. On a home with solid siding (stucco or masonry) or a masonry chimney, a counter flashing should be installed. The top edge of the counter flashing should be let into a reglet or nailed and caulked.
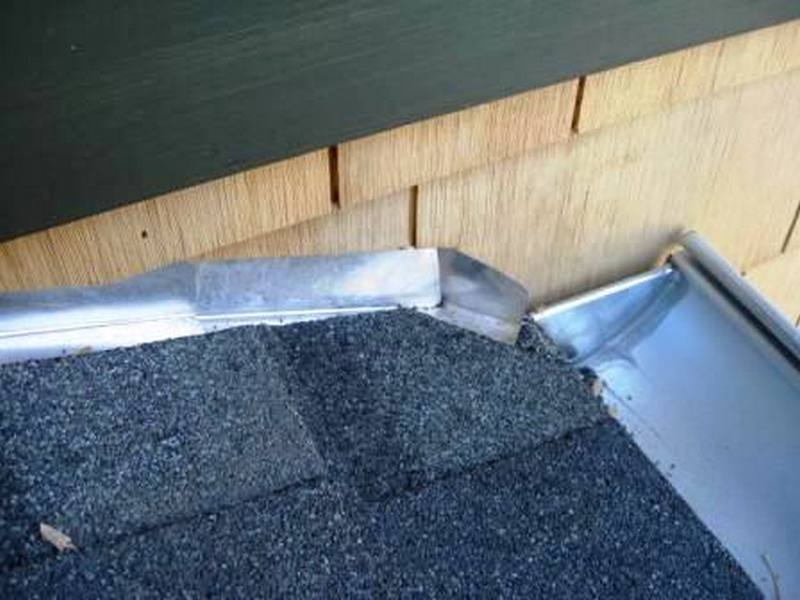
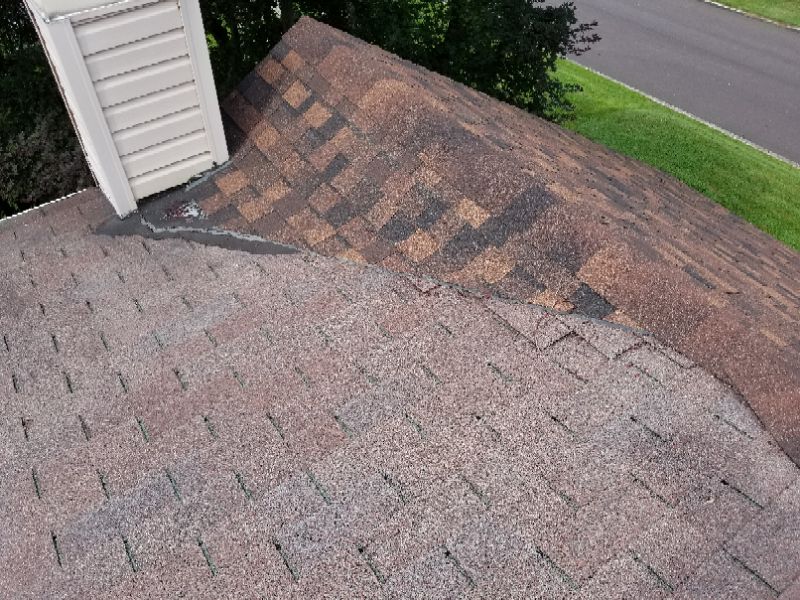
The step flashing is missing. The lack of this flashing, or the use of a single-piece flashing, will allow leakage. Hire a roofer for repairs or replacements as needed.
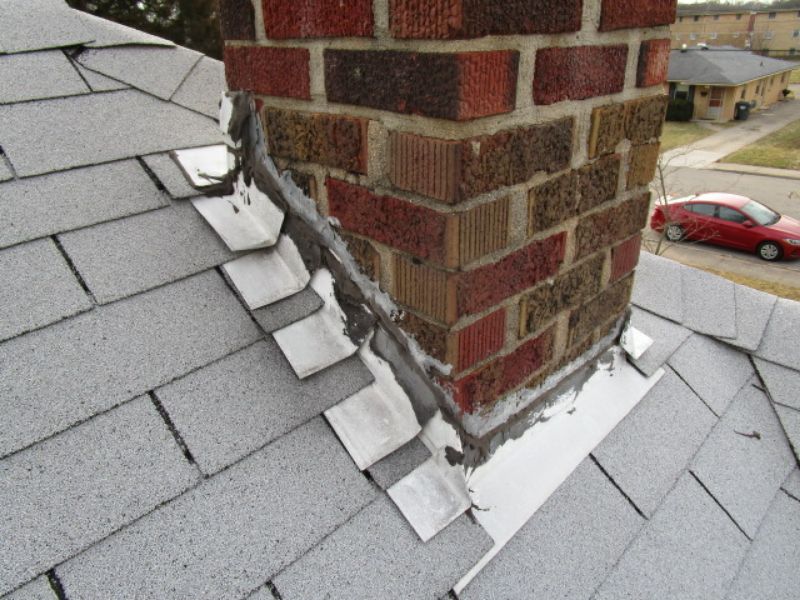
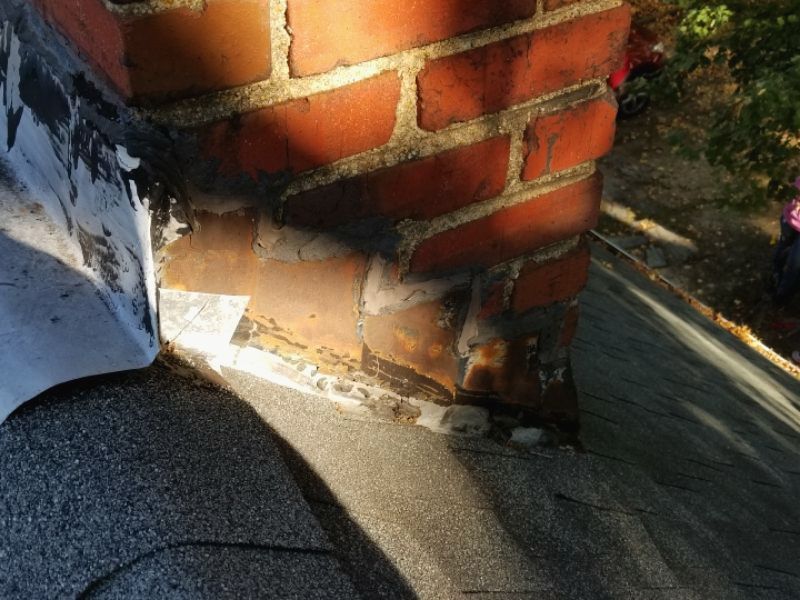
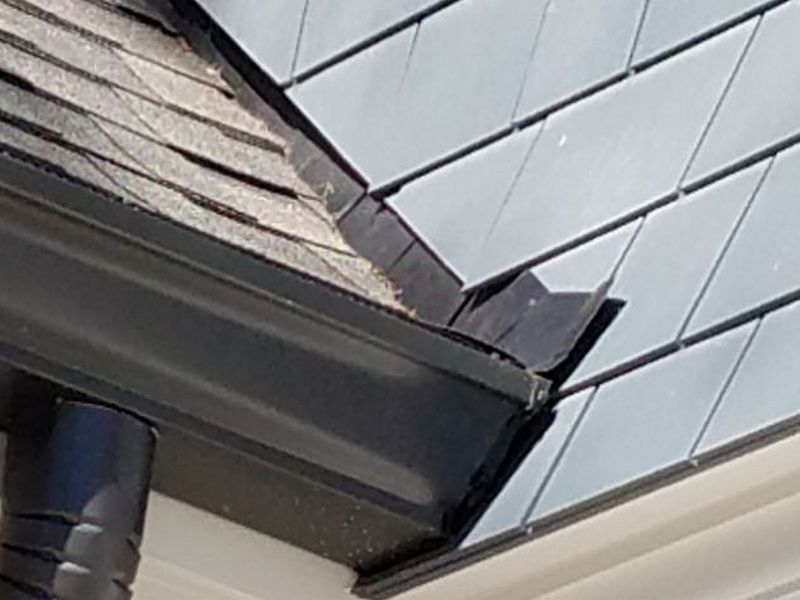
The counter flashing is missing above the step flashing. This will allow leakage. Hire a roofer for repairs or replacements as needed.

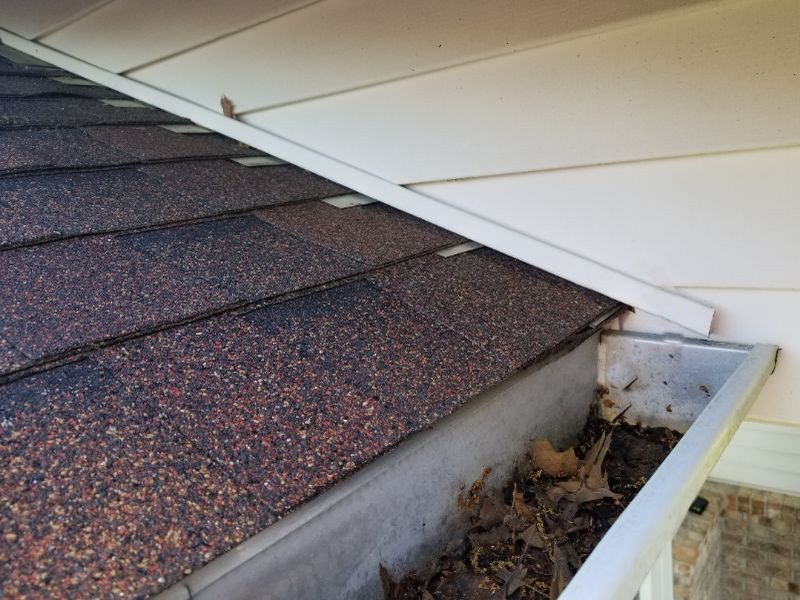
The flashing is missing. This will allow leakage. Hire a roofer for repairs or replacements as needed.
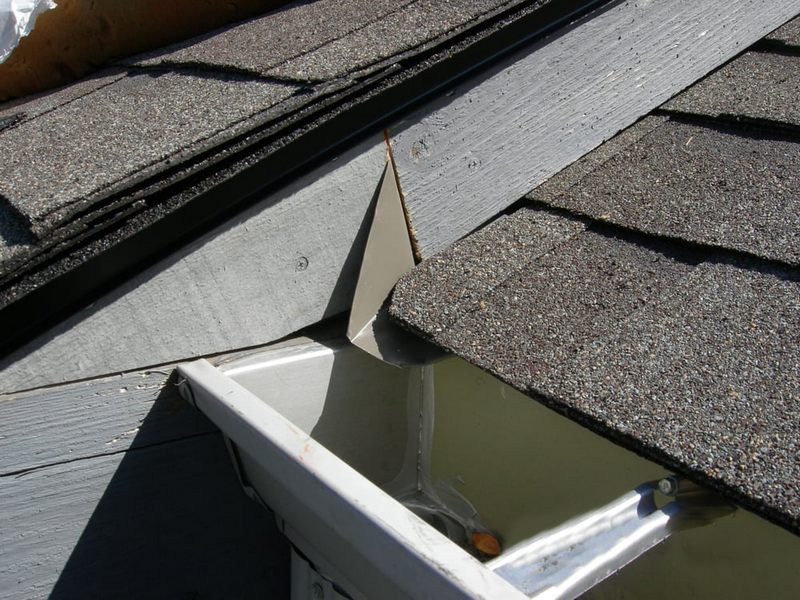
There is a gap in the flashing. This can allow water to enter, causing deterioration of the materials behind and under the flashing. The condition of the materials behind and under the flashing could not be determined and hidden damage may exist. Replace the flashing and repair any damage which may be revealed.

The flashing is loose. This permits water penetration. Secure or replace the flashing.
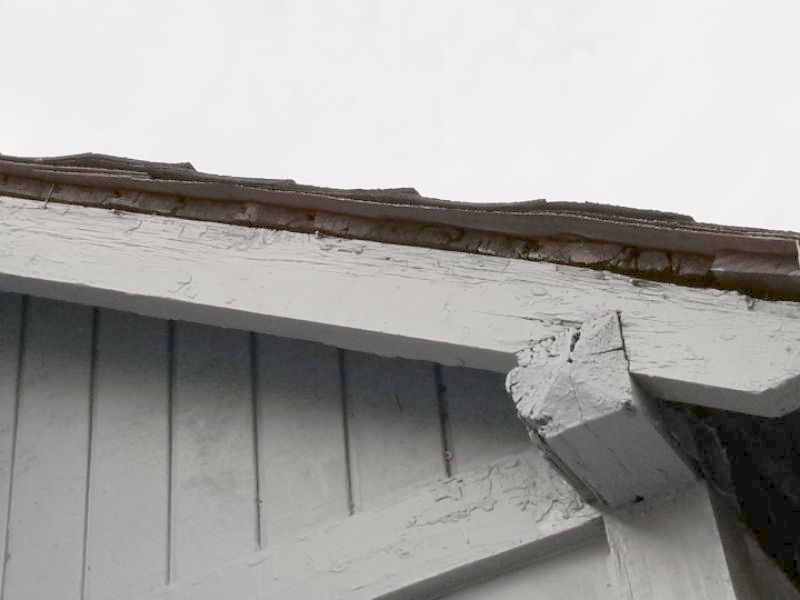
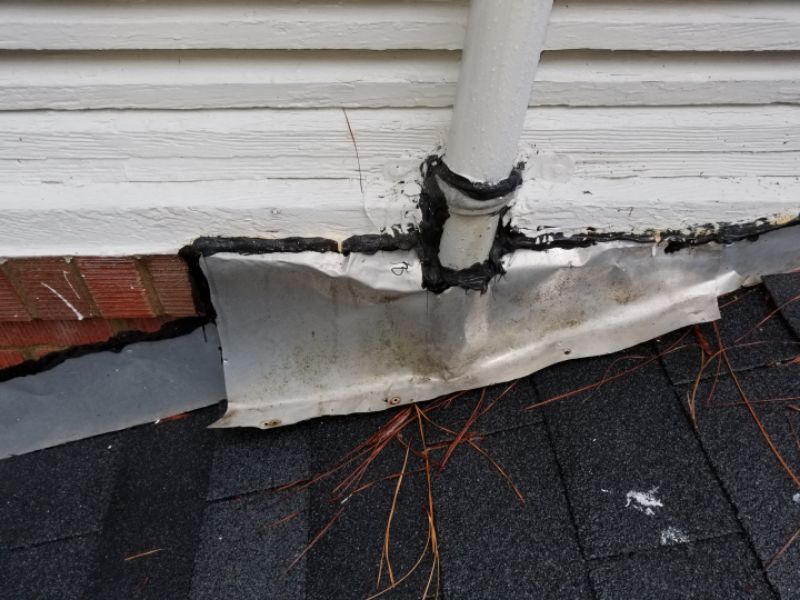
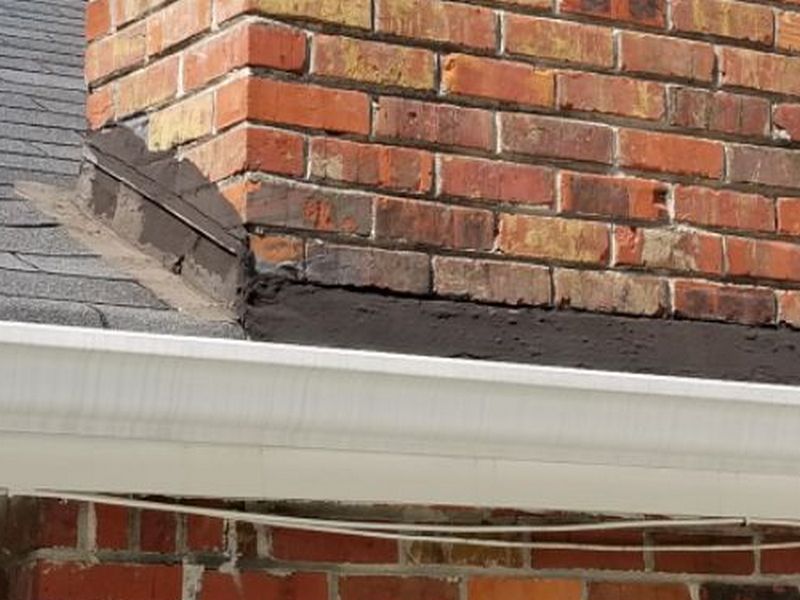
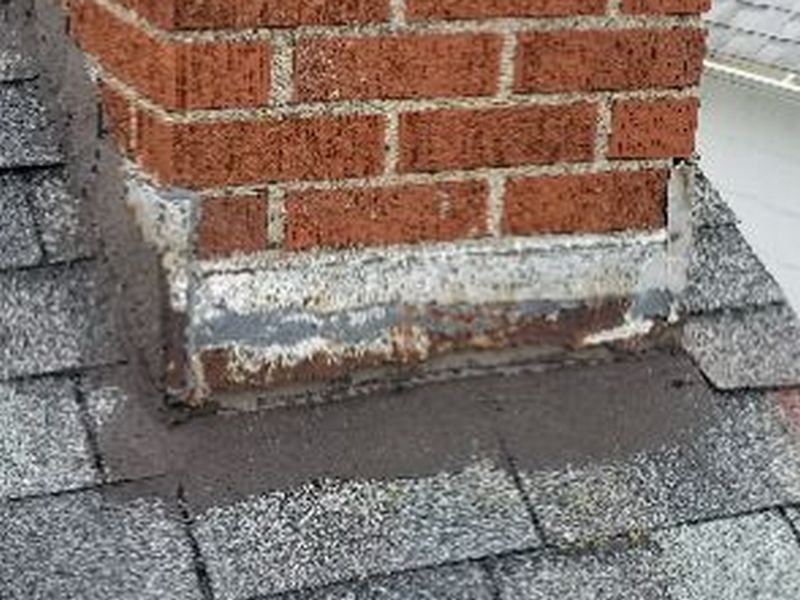
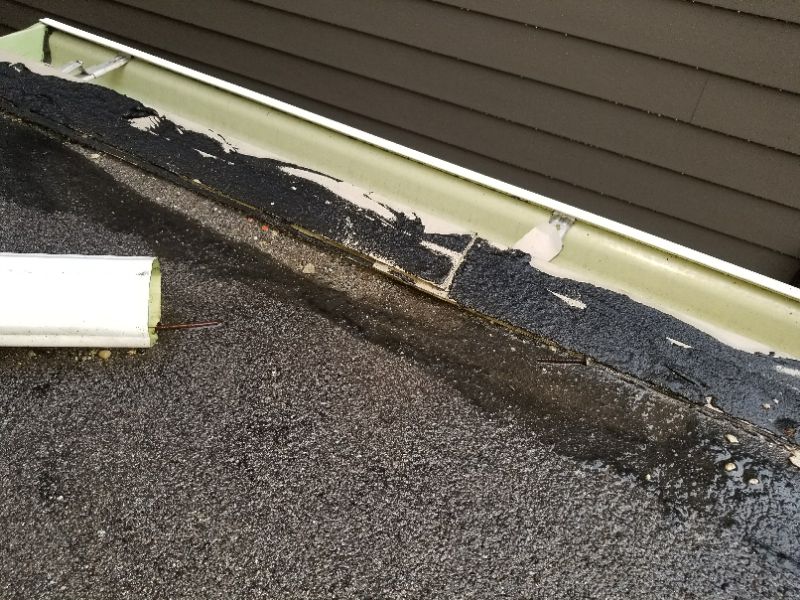
There is excessive tar or caulk applied at the flashing. This is considered a temporary repair that will fail. Replace the flashing.
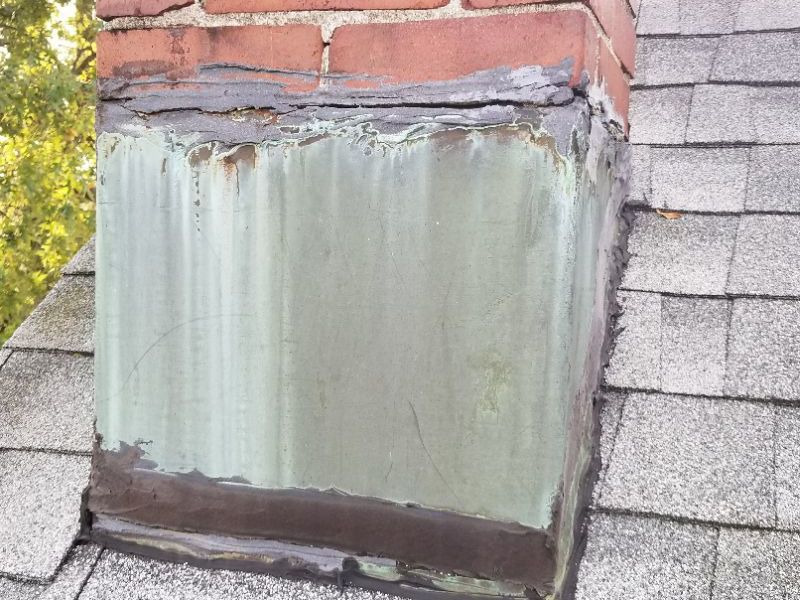
The flashing is corroded. It is at the end of its service life and is unreliable. Replace the flashing.
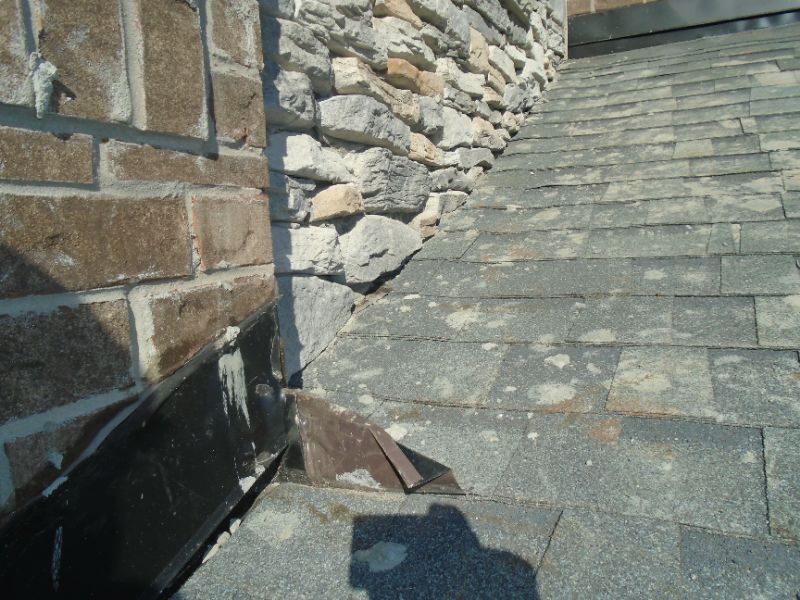
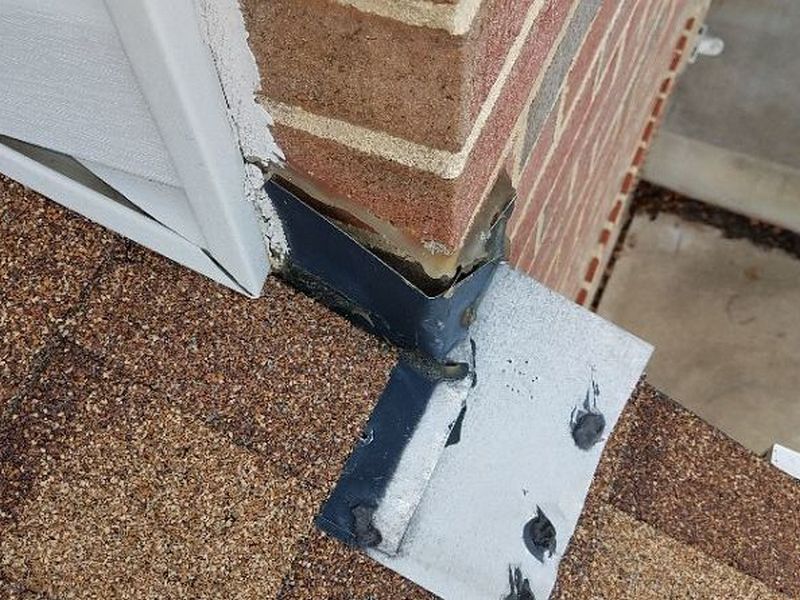
Kickout flashings should be installed at the bottom of any roof slope where the wall or chimney continues past the eave or gutter. They serve to divert water away from the sidewall or chimney and help prevent it from driving into or behind the cladding. Kickout flashings should be an integral part of the roofing/siding installation. They must be behind the siding and step flashing, and under the roofing. They should not be applied on top of shingles or siding. They should have sealed seams, and extend at least 4” to 6” above the eave and away from the sidewall.
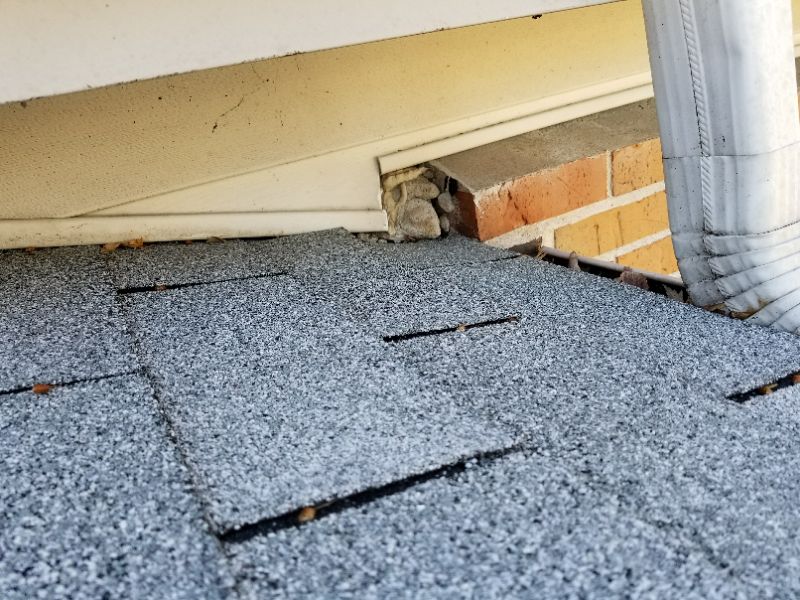
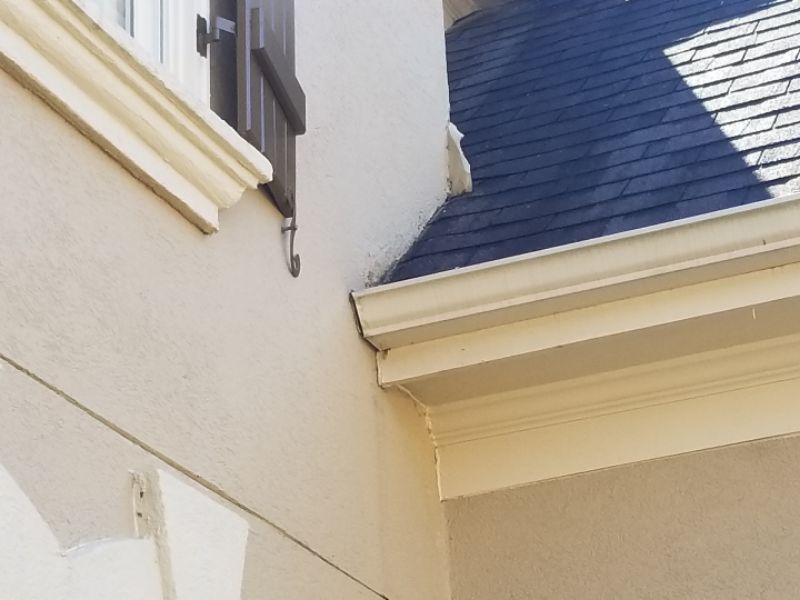
The kickout flashing is missing at the juncture of an exterior wall and roof. This can allow water penetration. Replace the flashing and repair any damage which may be revealed.
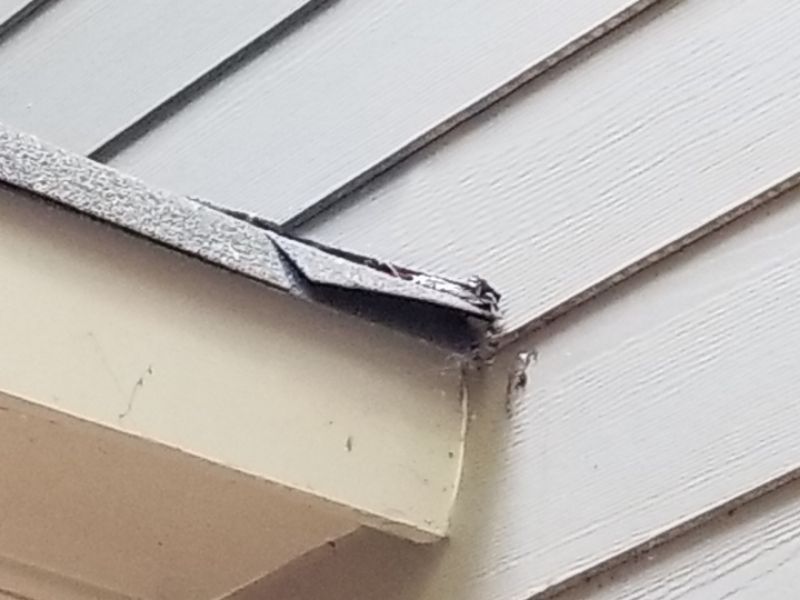
The kickout flashing is damaged at the juncture of an exterior wall and roof. This can allow water penetration. Replace the flashing and repair any damage which may be revealed.
The kickout flashing is inadequate. It should be installed behind the step flashing and siding, and under the roofing, and project 4″-6″. This can allow water penetration. Replace the flashing and repair any damage which may be revealed.

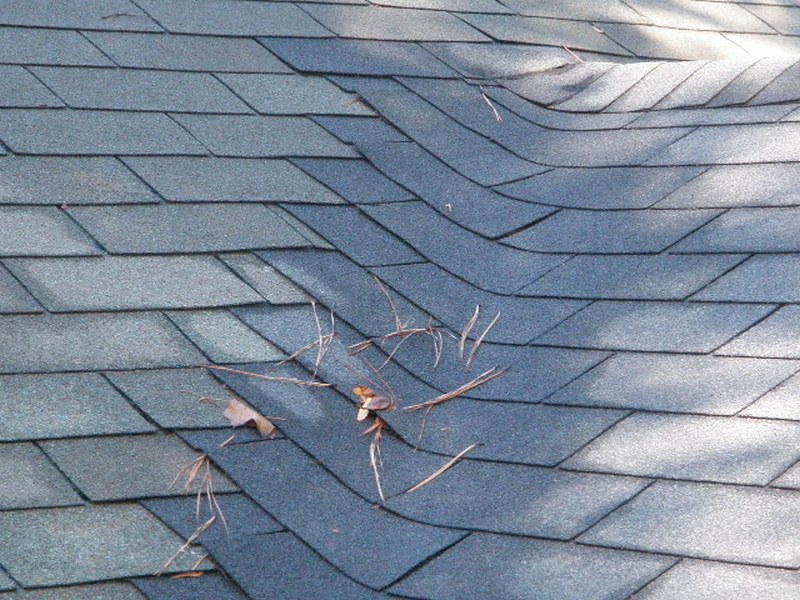
Closed valleys can either be “closed cut” or “woven.” Waterproof membranes should be installed in the center of the valley, but this is usually not visible. A woven valley has the shingles from each roof plane extending across the valley in alternating courses. This type of installation can only be done with 3-tab shingles. Each course must extend at least 12” across the valley on to the intersecting roof. No nails can be within 6” of the valley’s center, and the roofing must be pressed into the valley decking so no bridging is present.
Closed cut valleys can be installed with dimensional shingles. Only the bottom course is woven. After that, shingles on the smaller or lower sloped side of the valley are installed. After the one side is shingled, the larger or steeper slope is installed. Those shingles must also extend past the center line of the valley. Then the larger/steeper side shingles are cut back in a straight line at the valley’s center. The upper corner of each shingle is trimmed at a 45° angle to help direct water out of the valley. A line of sealant should be applied under the edge of the top shingles. The steeper roof, or the larger of equal-slope roofs, must always be “on top”.
The closed, woven valley is improperly installed. The overlap is not correct, and will allow leakage. Hire a roofer for repairs or replacements as needed.
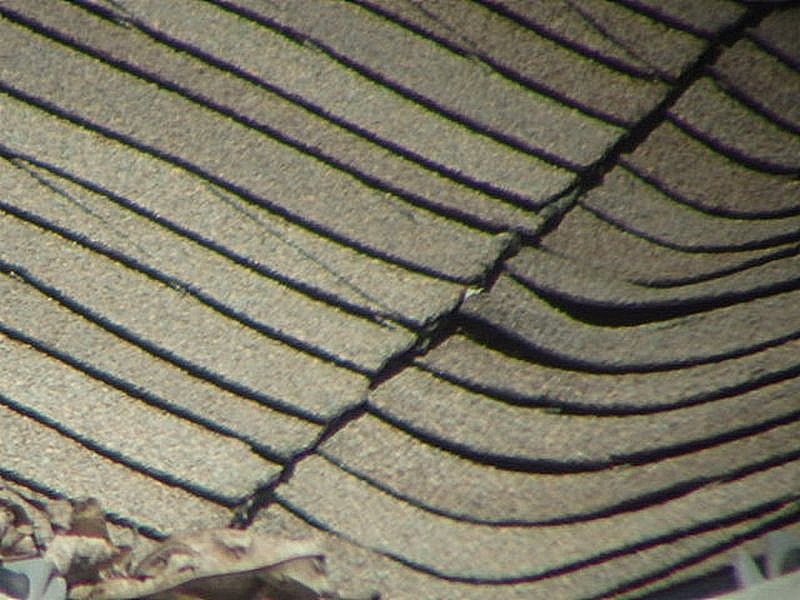
The closed, cut valley is improperly installed. The overlap has been cut back too far, and will allow leakage. Hire a roofer for repairs or replacements as needed.
The closed valley has been repaired with tar or caulk. This is considered a temporary repair that will fail. Hire a roofer for repairs or replacements as needed.
Open valleys have metal flashing down the length of the valley. Any upper section must be on top of the lower one. Be alert to any signs of buckling. The bottom edge of the valley flashing should extend at least ¾” beyond the eave, and should extend at least 12” up under each side of shingles. The gap of exposed flashing should be 6” wide at the top of the valley, and widen by 1/8” per foot moving towards the bottom. The upper corner of each shingle is trimmed at a 45° angle to help direct water out of the valley. A line of sealant should be applied under the edge of the shingles.
There is excessive tar or caulk applied at the flashing. This is considered a temporary repair that will fail. Repair or replace the flashing as needed.
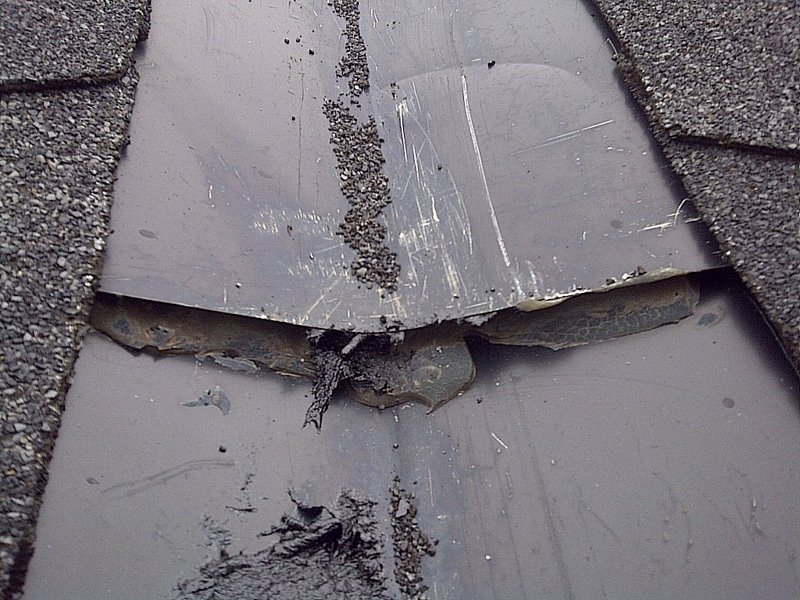
The open valley flashing is rusted. This makes it unreliable and prone to leakage. Hire a roofer for repairs or replacements as needed.
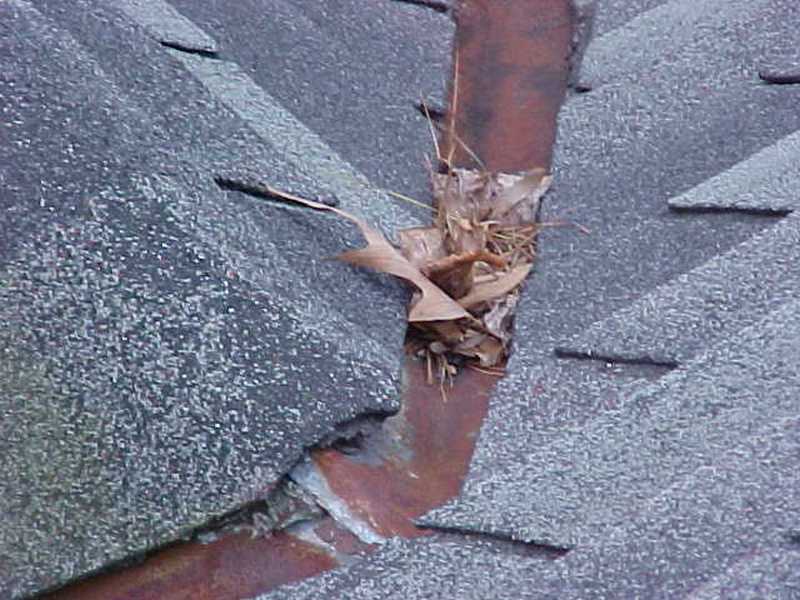
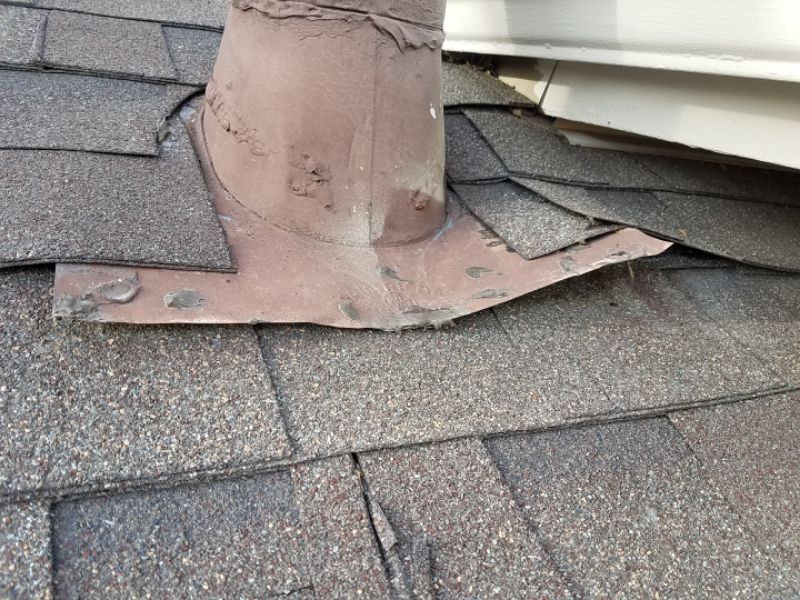
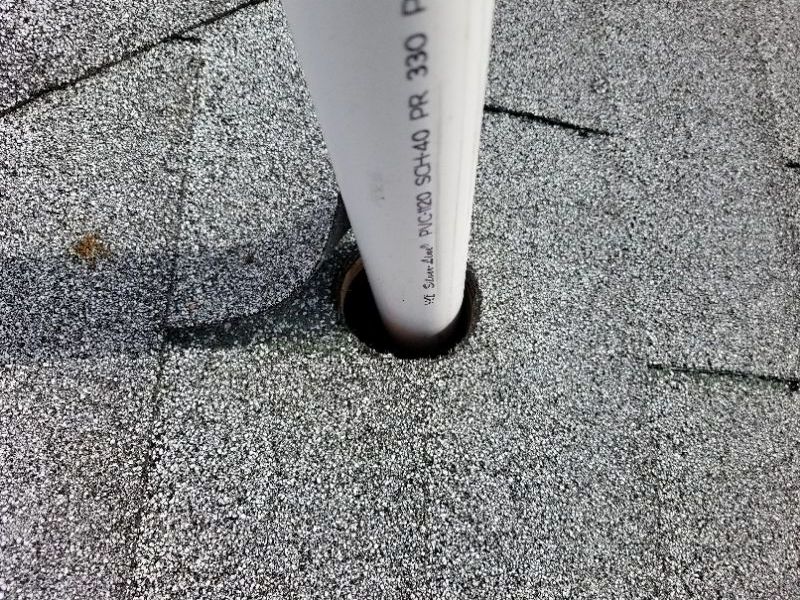
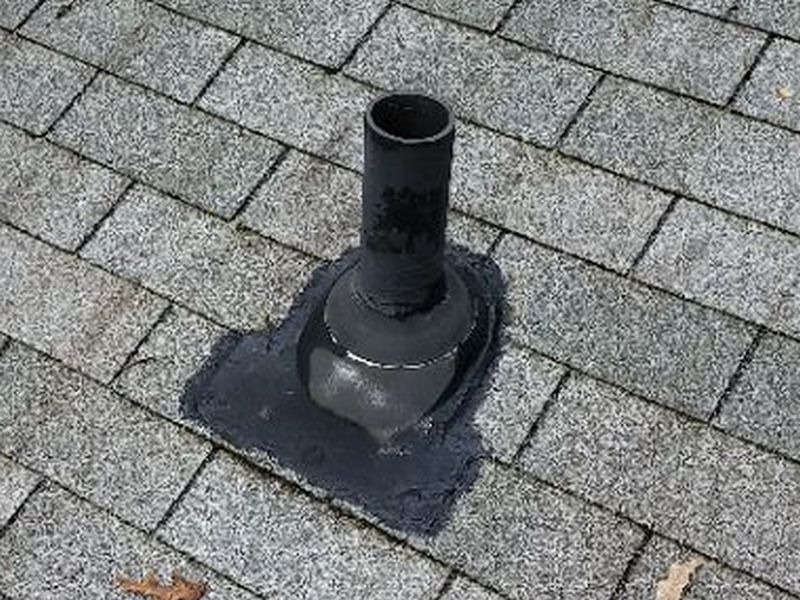
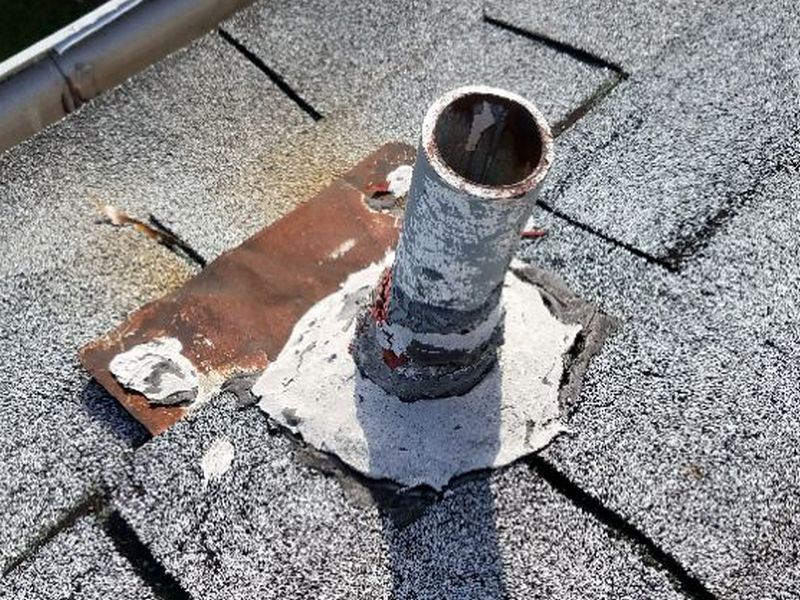
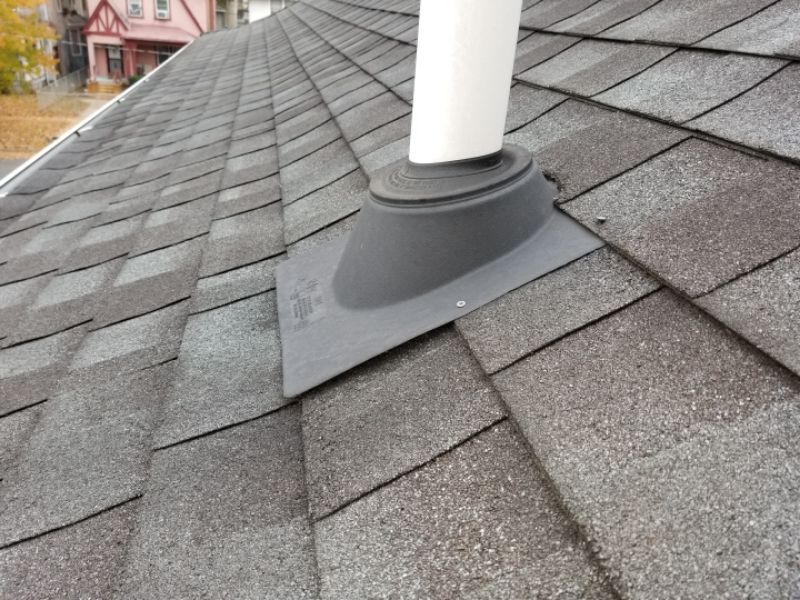
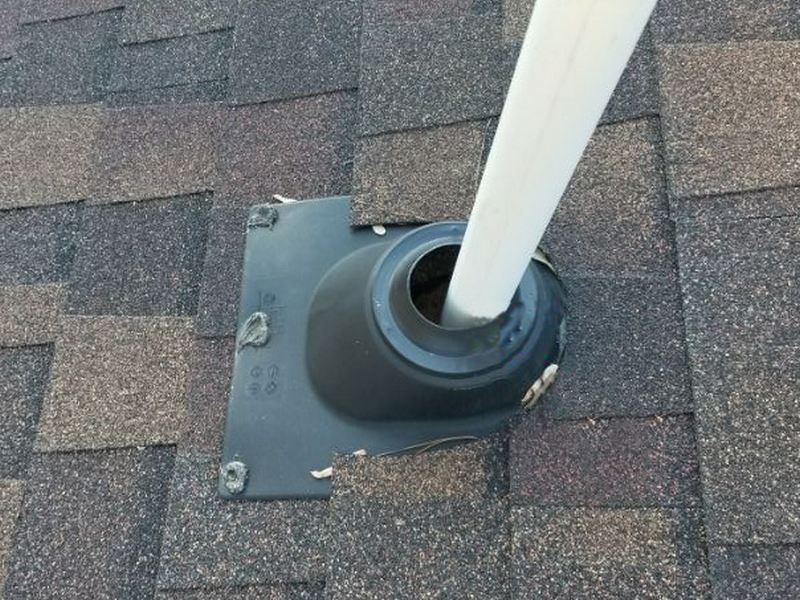
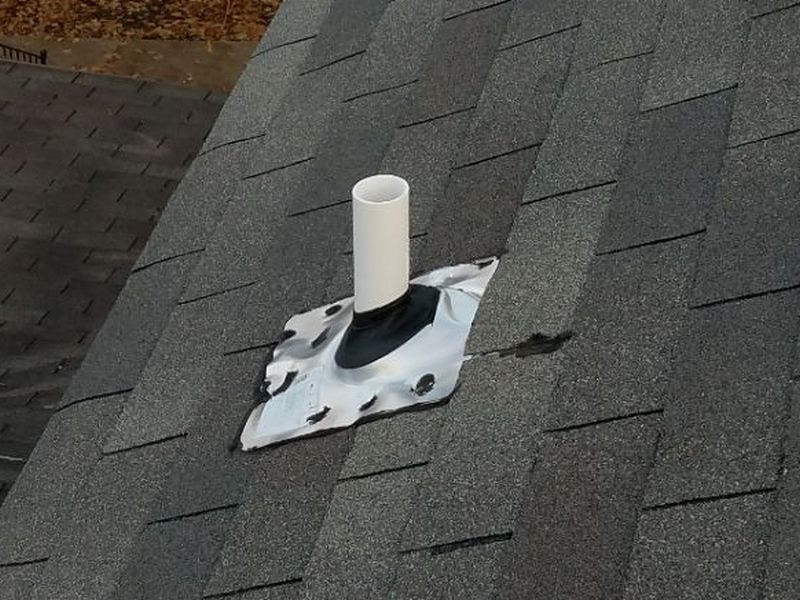
These are used where a DWV vent pipe or a flue penetrates the roof. Entry points for electrical service wires at the mast and HVAC linesets will also use them. They should rely on mechanical exclusion of water as it flows down the roof’s slope. The top forms a saddle flashing. It should be under the roofing, along with the side flashing that’s at and above the roof penetration. Below the penetration the lower portion, or skirt, must be on top of the roofing. Any rubber or flexible sections must be intact and free of openings, tears, or deterioration. Excess tar should be reported as a temporary repair. The flashing should lay tightly on the roofing.
The flashing is lifted. This permits water penetration. Secure or replace the flashing.
The flashing is missing. This allow water penetration. Install flashing and repair any damage which may be revealed.
There is excessive tar or caulk applied at the flashing. This is considered a temporary repair that will fail. Replace the flashing.

The flashing is damaged or deteriorated. This permits water penetration. Replace the flashing and repair any damage which may be revealed.

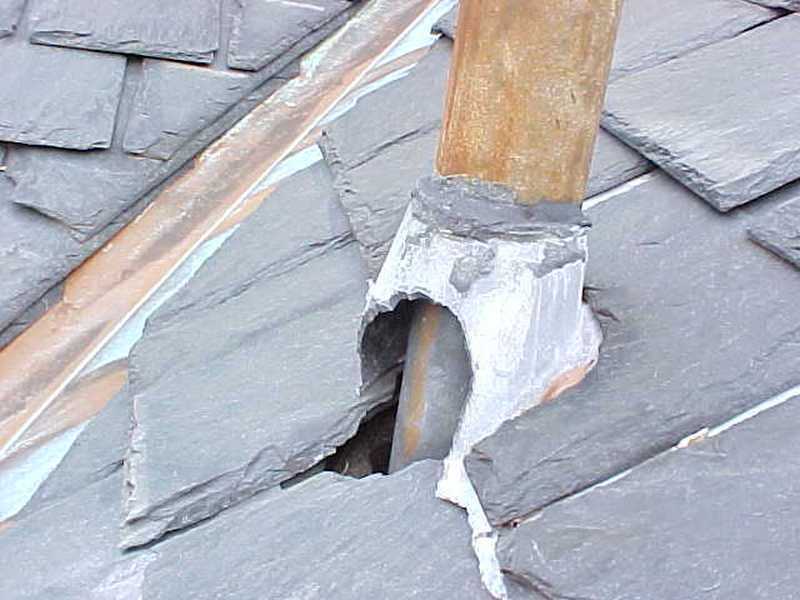
The flashing is damaged or deteriorated. The repairs are unworkmanlike and are not considered reliable. This permits water penetration. Replace the flashing and repair any damage which may be revealed.

The flashing is improperly installed. This permits water penetration. Replace the flashing and repair any damage which may be revealed.
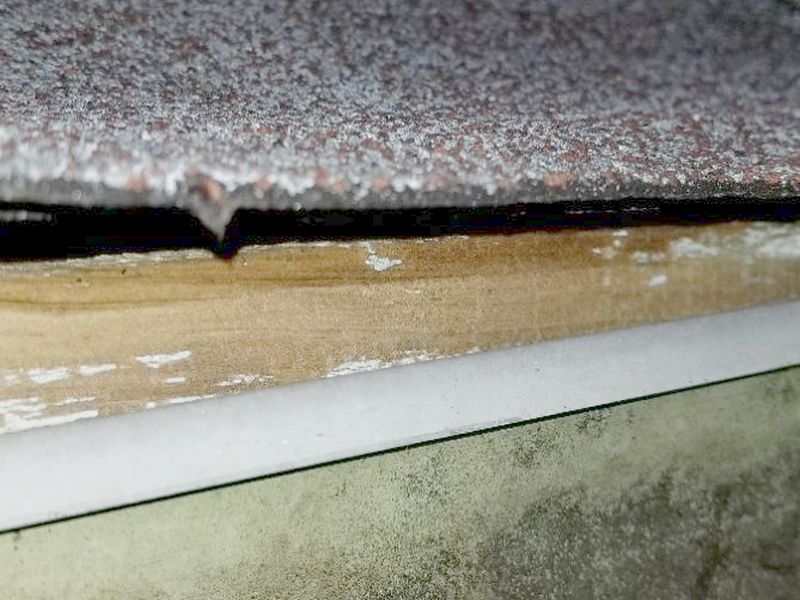
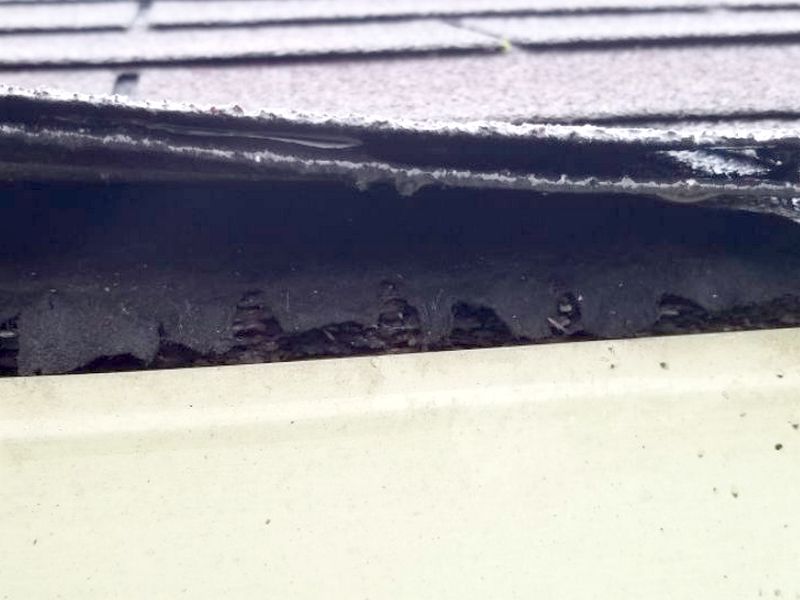
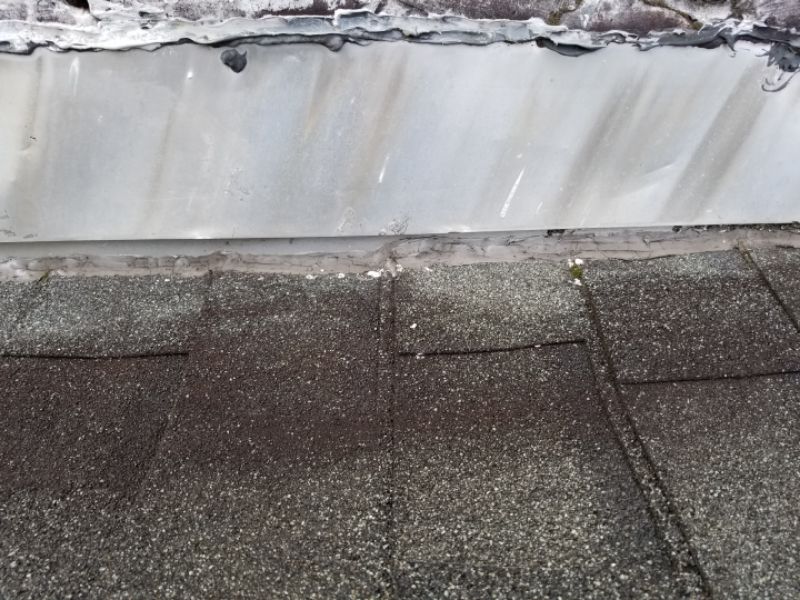
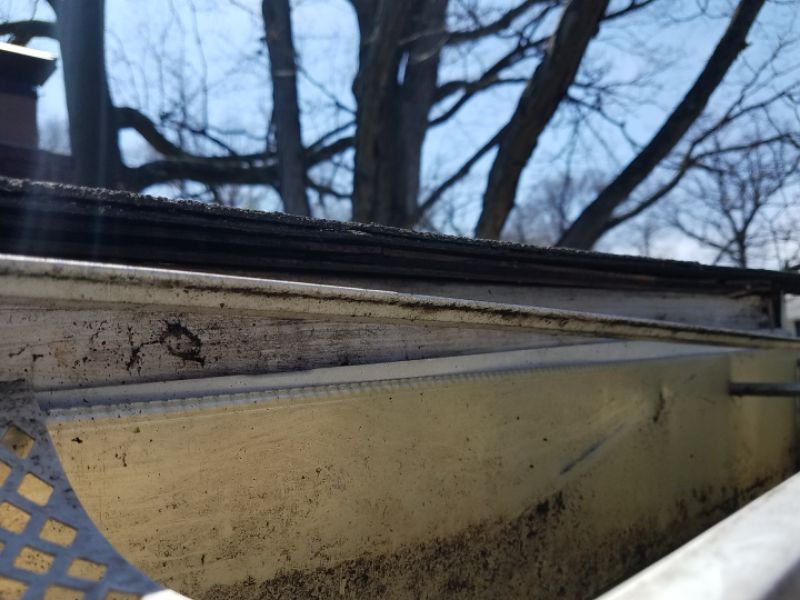
Installing drip edge flashing is a roofing best practice, but may not have been required at the time and location of a given installation. Drip edges are installed at the edges of a roof, i.e. the eave and the rake. They serve to move water away from the roof. Water has a tendency to stick to a surface and will wrap around an edge, driving back into the fascia or rake board. Drip edges are shaped to carry the water outward where it will release into the gutter or fall free past the side of the home.
Inspect the flashings to ensure that they are installed on top of the tar paper and below the roofing. It should be well-secured, but fasteners should not be over-driven or backing out. Each section of drip edge should overlap the next. The trim directly below any edge without a flashing should be inspected carefully for deterioration.
The drip edge flashing is loose. This allows water penetration. Repair or replace the flashing.
The drip edge flashing is improperly installed. The roofing should be on top of the flashing. This will allow leaks and damage. Replace the flashing and repair any damage which may be revealed.
The drip edge flashing is missing. This will allow leaks and damage. Install flashing and repair any damage which may be revealed.