- Inspect
- Roofing materials
- Flashings
- Skylight and any roof penetrations
- Describe
- Roofing materials
- Method(s) used to inspect the roofing
- Not required
- Antennae
- Other installed accessories
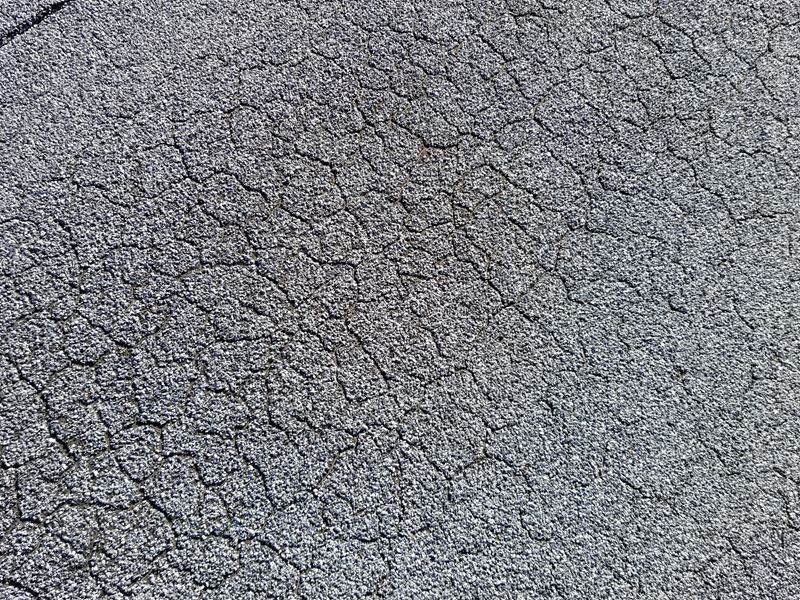
Roof Covering
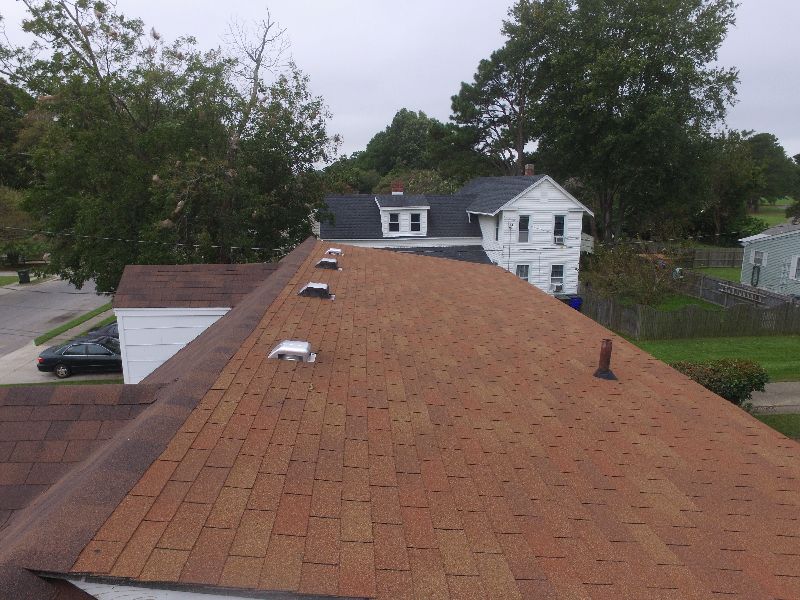
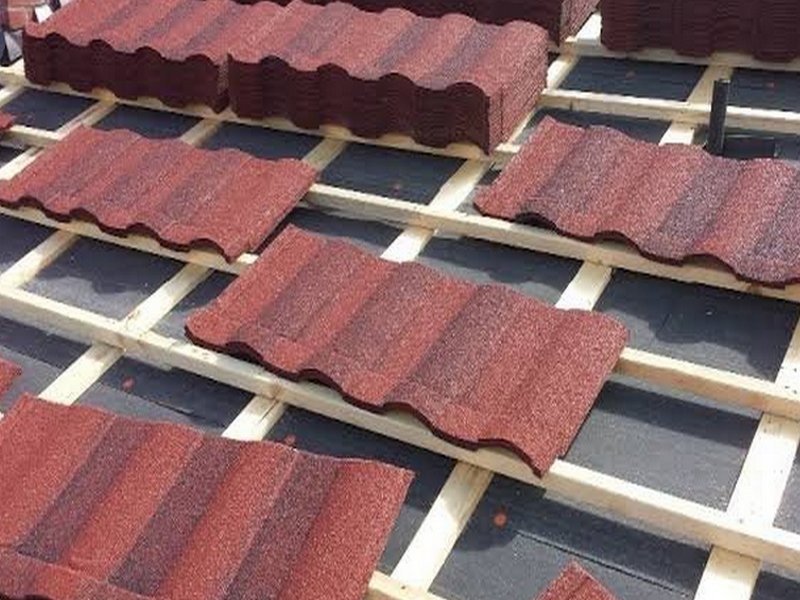
Inspect and report each specific roofing material of a specific age range as a separate “Roof Covering” Component, i.e. Roof Covering 1, Roof Covering 2. Each covering’s material, location on the home, estimated age, and method(s) of inspection must be reported. Gain as full and complete an access to the roof as safely possible. Take “General Photos” of each Roof Covering, as well as at least 1 representative close-up photo, and photos of any limiting factors, e.g. solar panels.
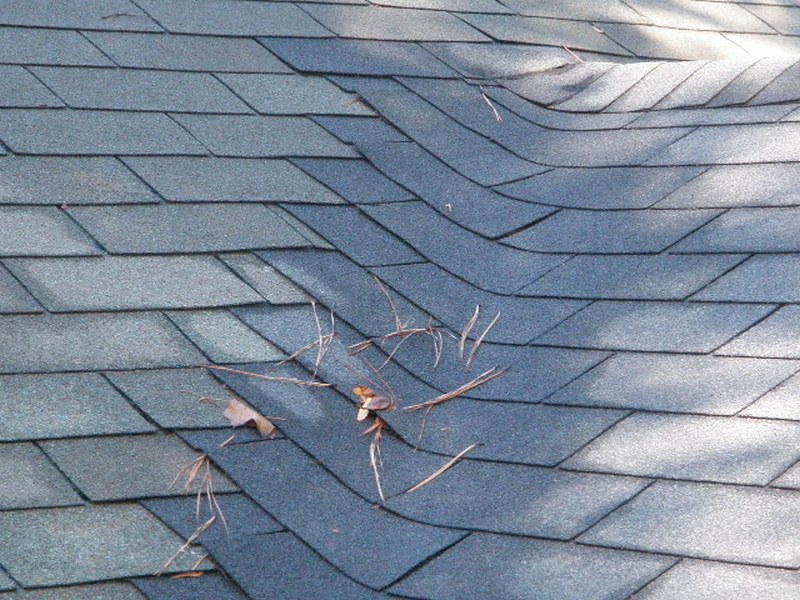
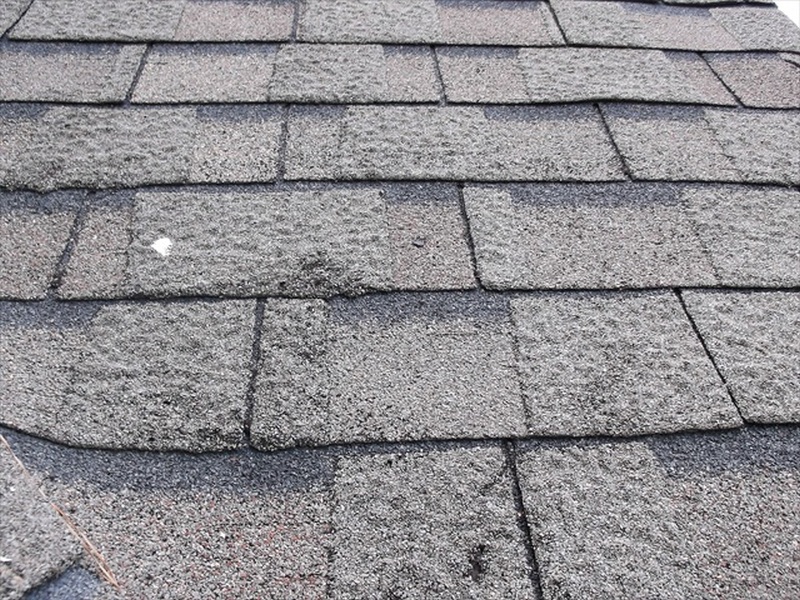
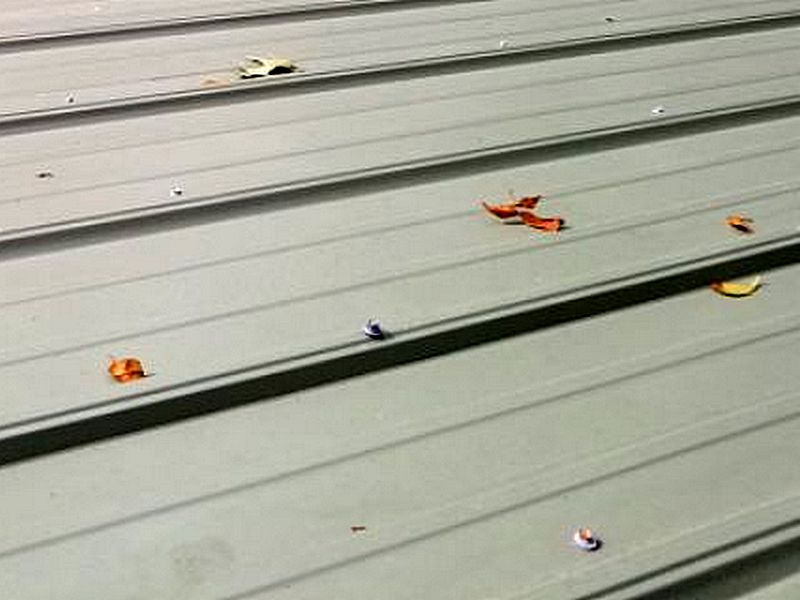
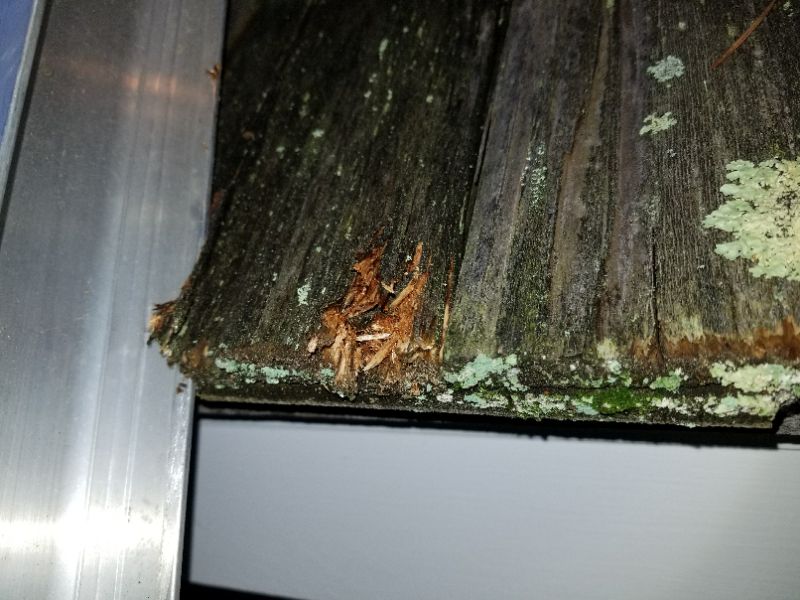
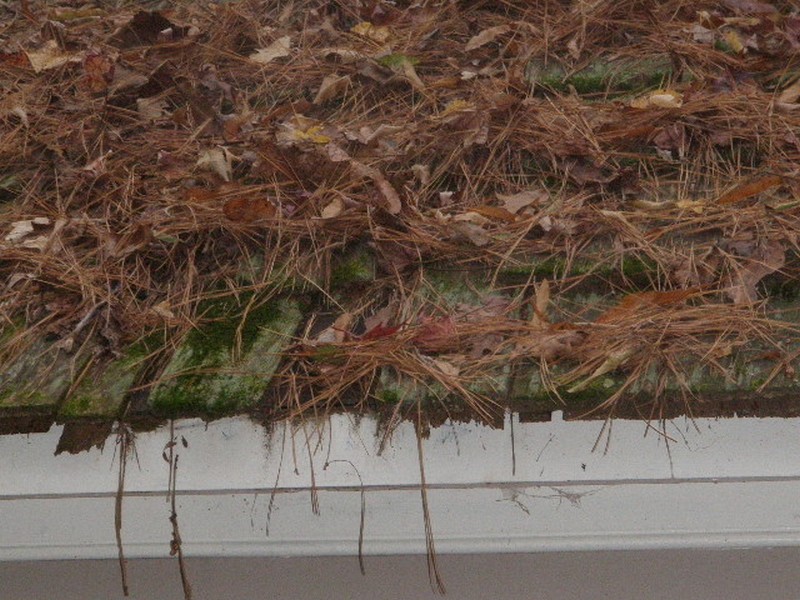
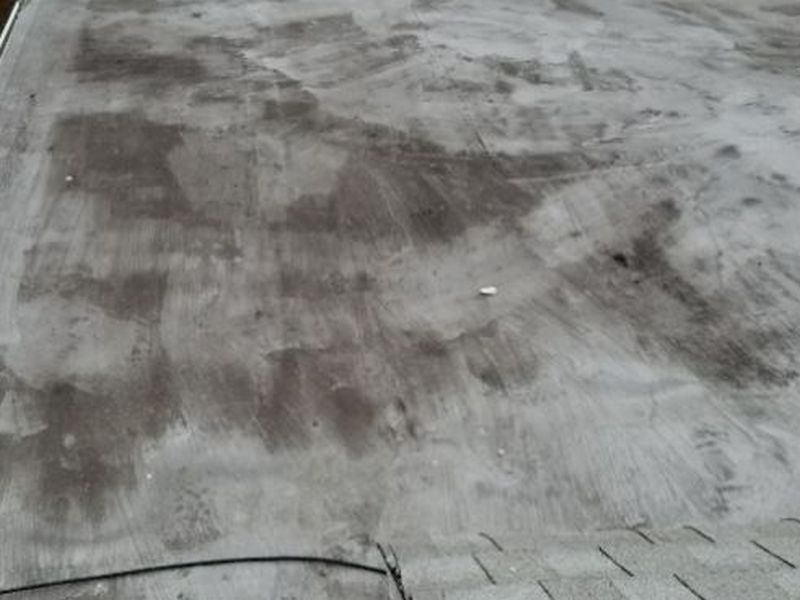
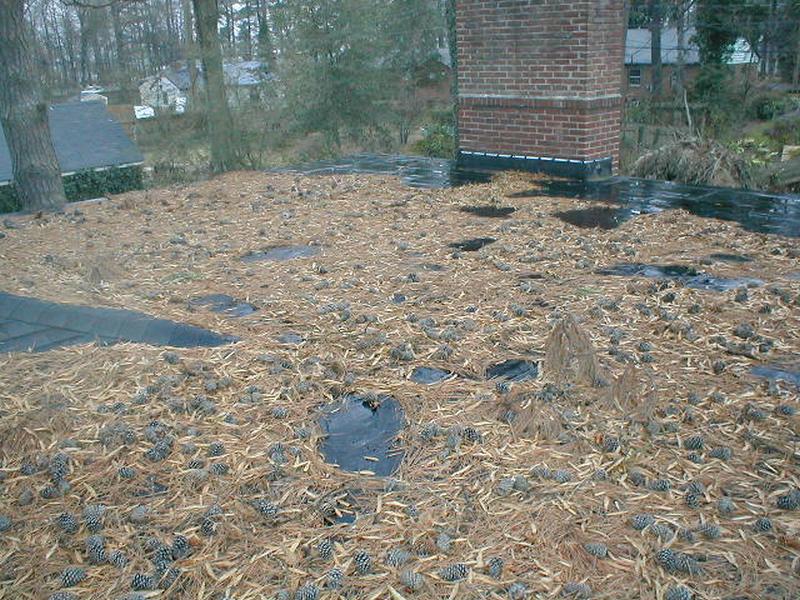
Inspect and report damage or deterioration. General defects should be reported. These include, but are not limited to, branches very close to or touching the roofing; debris; biological buildup; devices attached to the surface without flashings; unworkmanlike installations; unworkmanlike or temporary repairs, e.g. tar or asphalt. Inspect as possible the underlayment, especially for roof coverings that are “single piece”, e.g. slate, clay and concrete tiles, and wood shakes/shingles. These materials rely on the underlayment (tar paper or ice and water shield) for the actual water exclusion.
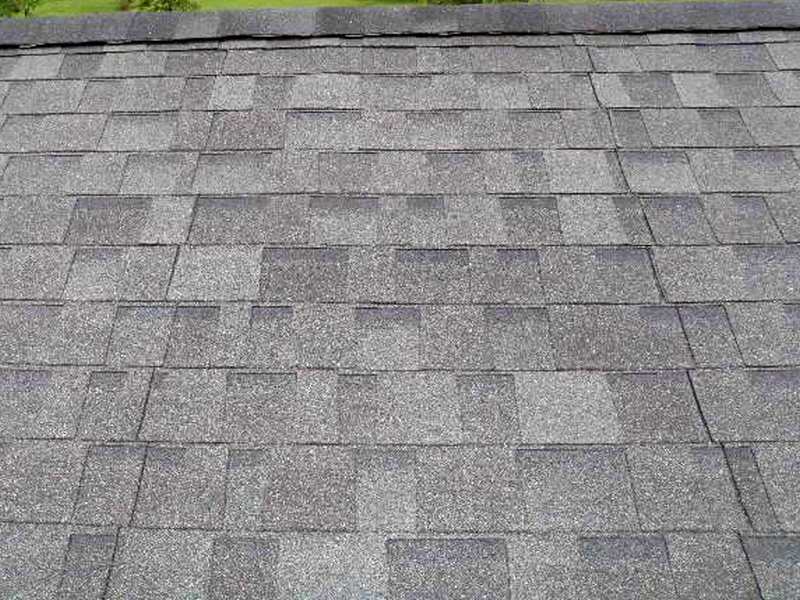
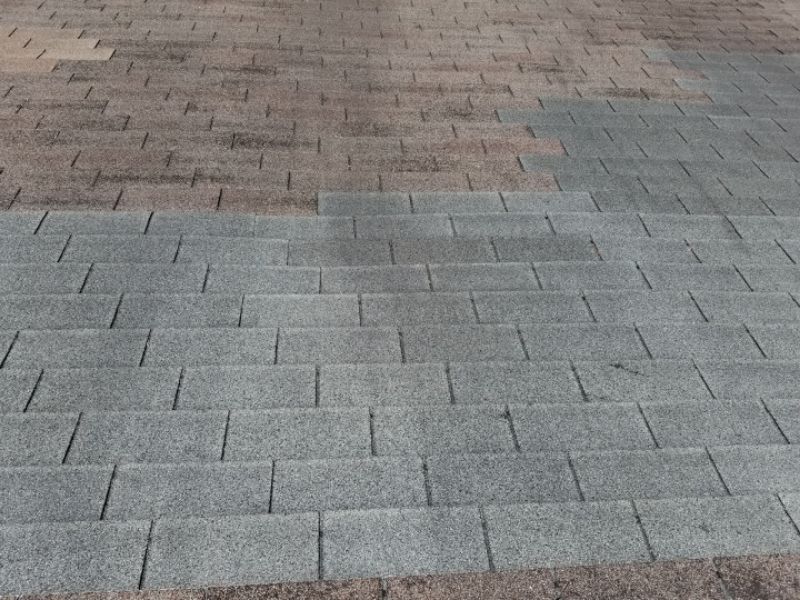
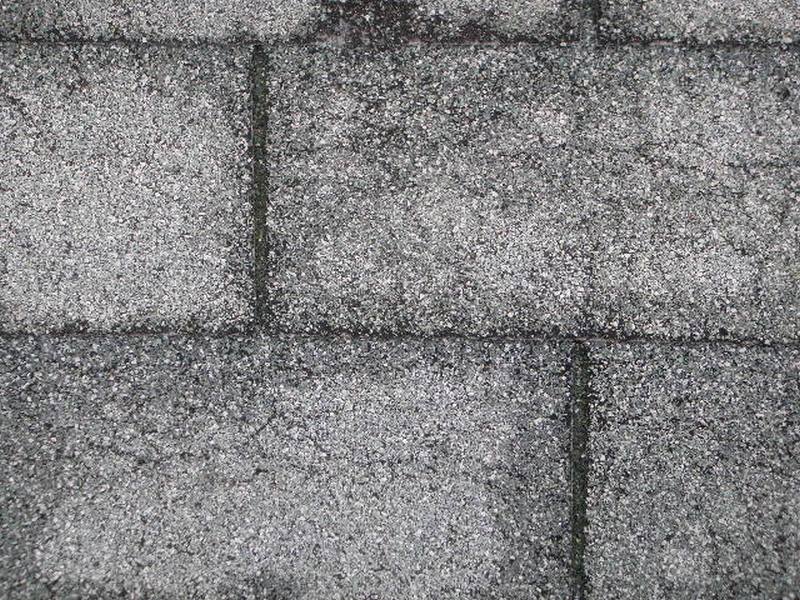
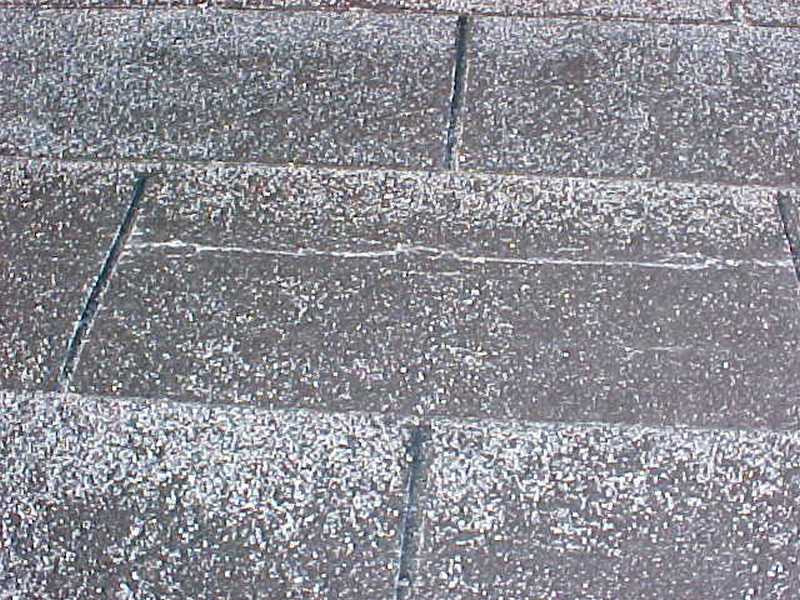
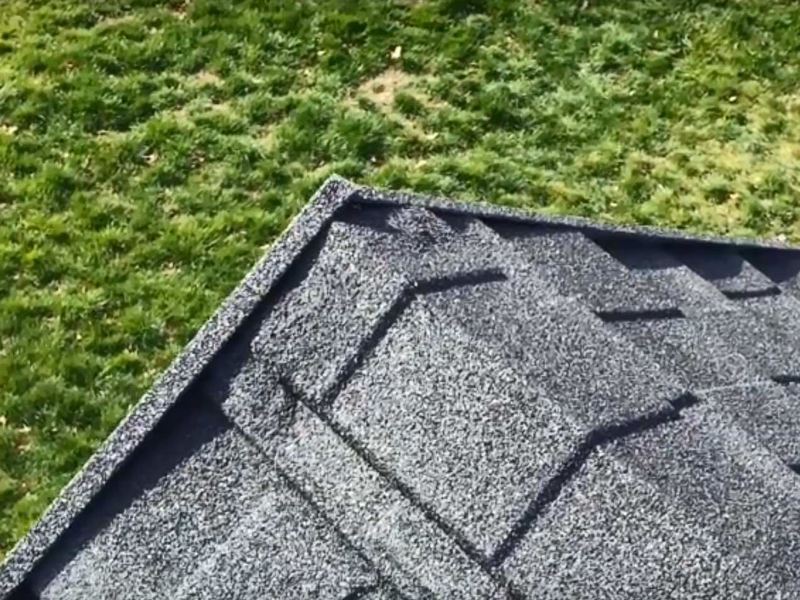
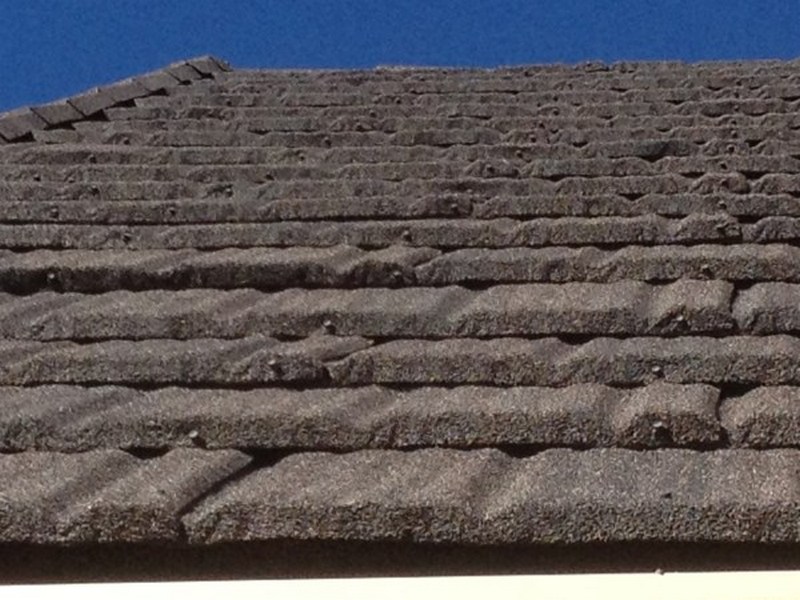
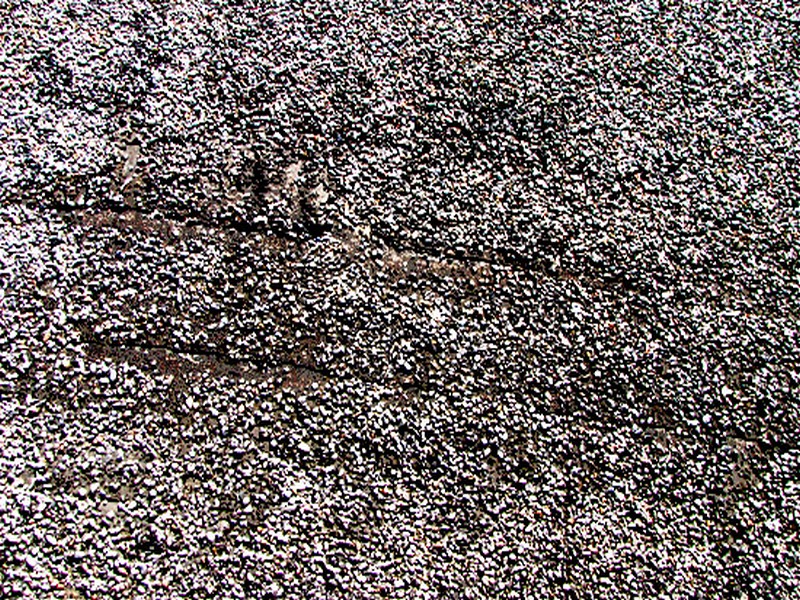
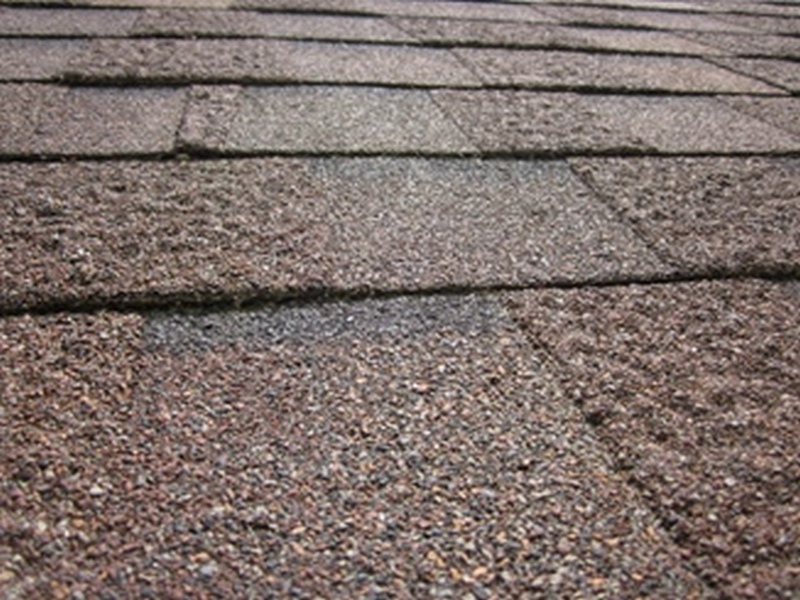
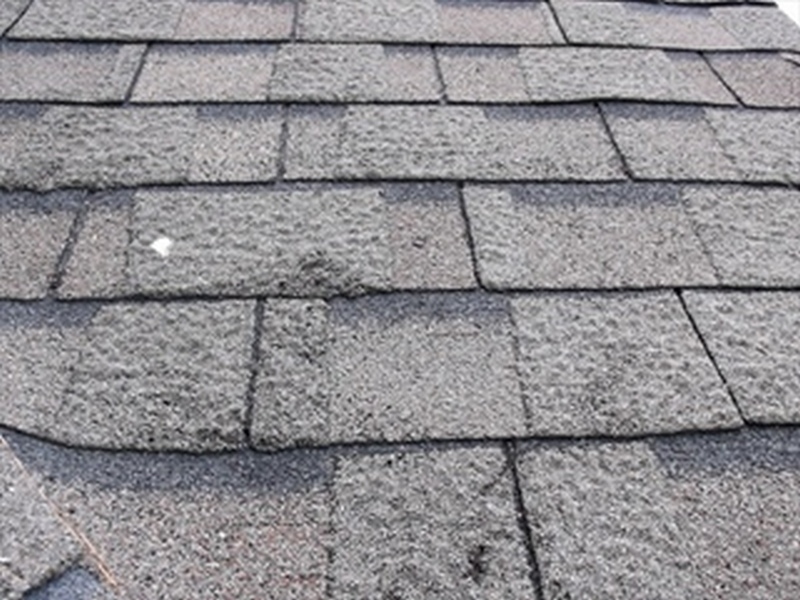
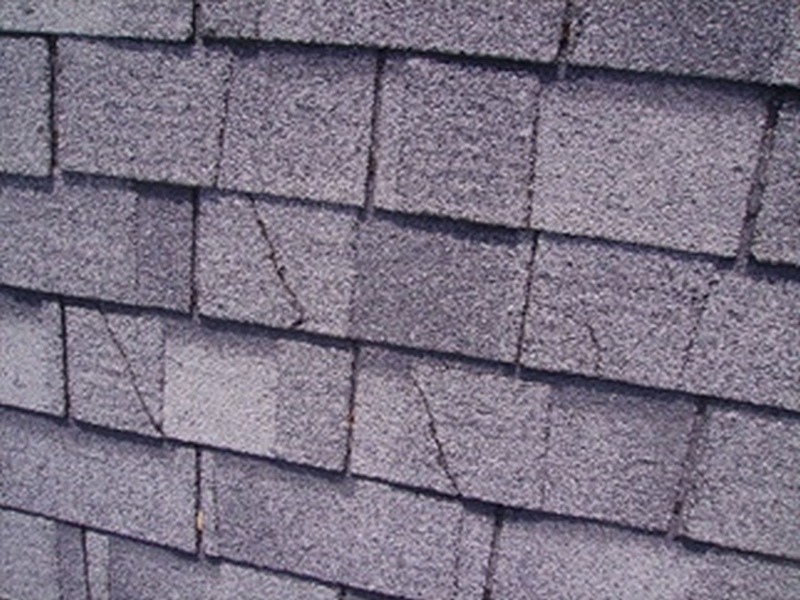
Inspect the shingles for excess granule loss, cracking, cupping and curling, or other signs of advanced age or premature failure. Report any shingle installations on roofs that are too shallow. A surface with a slope between 4/12 and 2/12 must have less shingle exposure and a complete underlayment of doubled roofing paper or a self-sealing membrane on the entire roof. In high wind areas additional fasteners are also required. Surfaces less than 2/12 cannot have shingles installed at all.
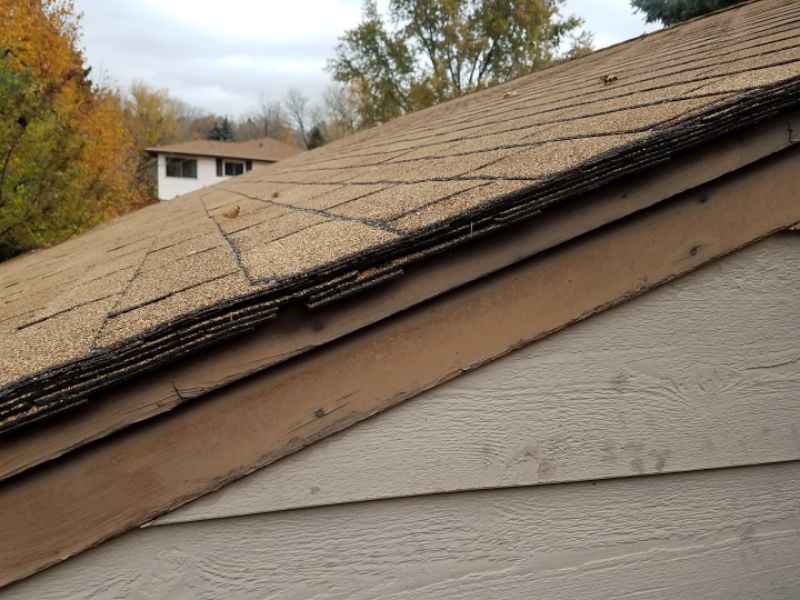
Inspect the eave edge for the presence of a proper starter course. Observe the gables edges for inadequate or excess overhang. Report any “nail pops” where the fasteners have backed out of the sheathing. If it can be done without damaging the roofing, always attempt to lift a sampling of shingles to inspect the nailing pattern. Report any fasteners installed through the exposed shingle faces. The ridge is an exception. Any fasteners that are exposed by necessity should be sealed.
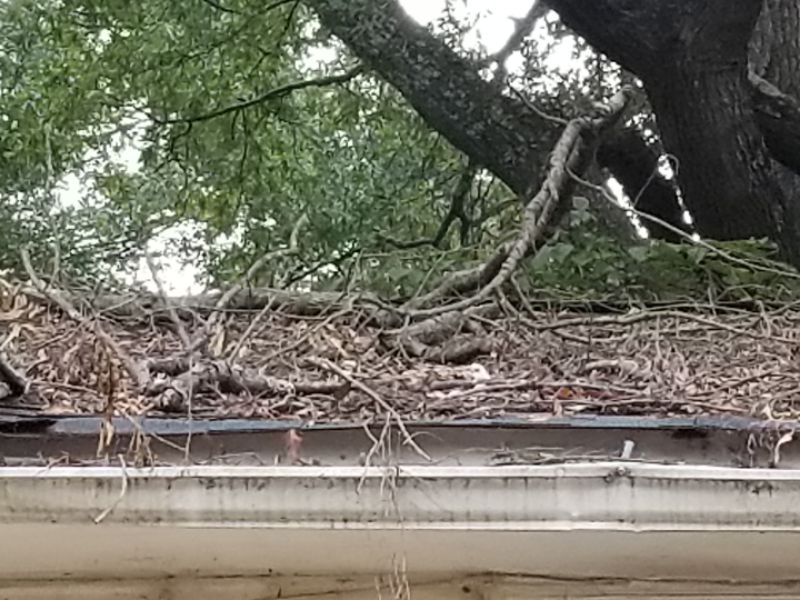
There are tree limbs touching or near the roof. This can damage the roofing and permit water penetration. Remove the tree limbs.

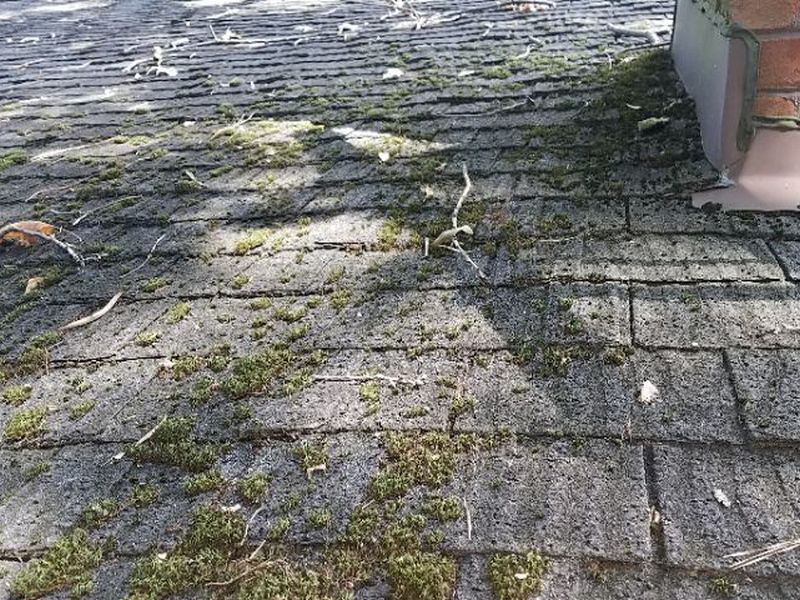
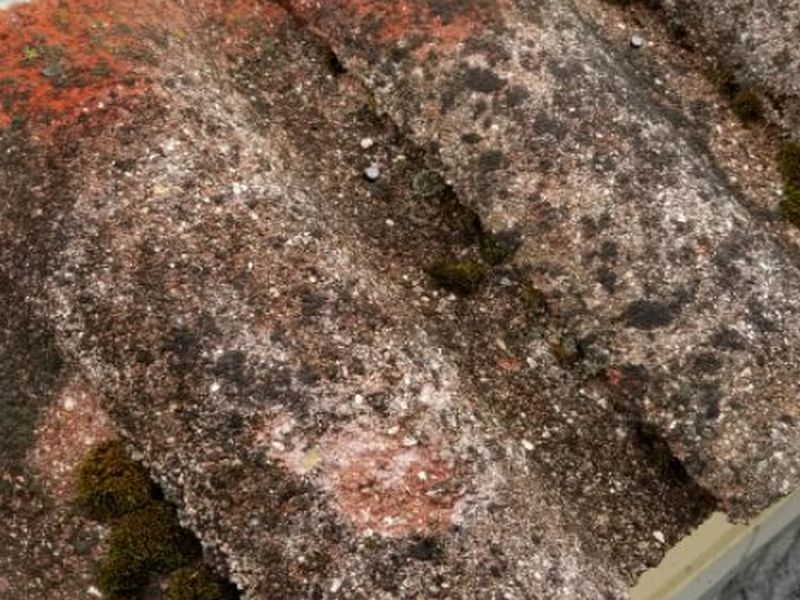
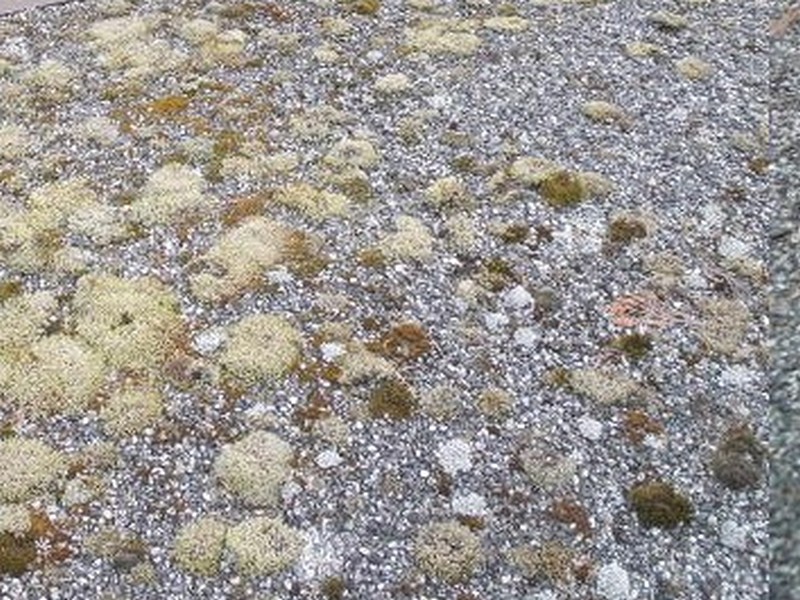
There is moss, mold, or other biological build-up on the roof covering. The growth may damage the roof covering and cause premature deterioration or failure. Clean the roof covering.
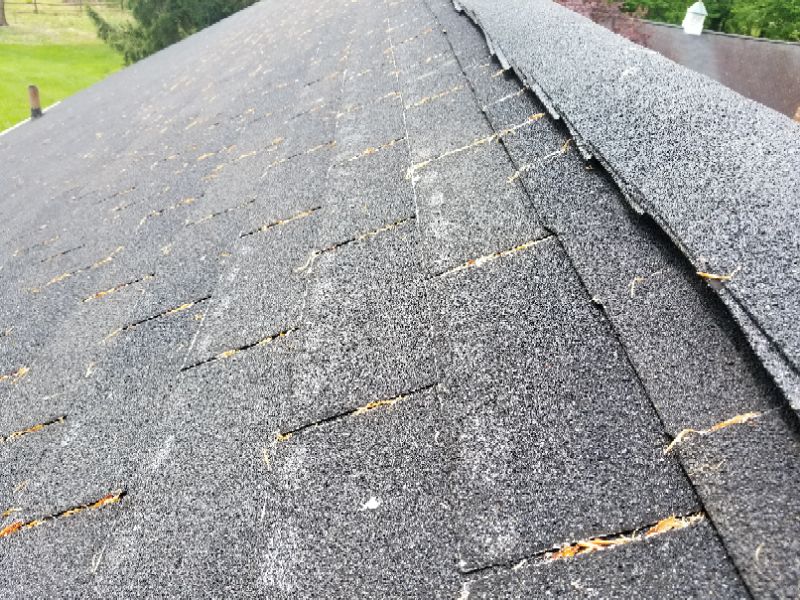
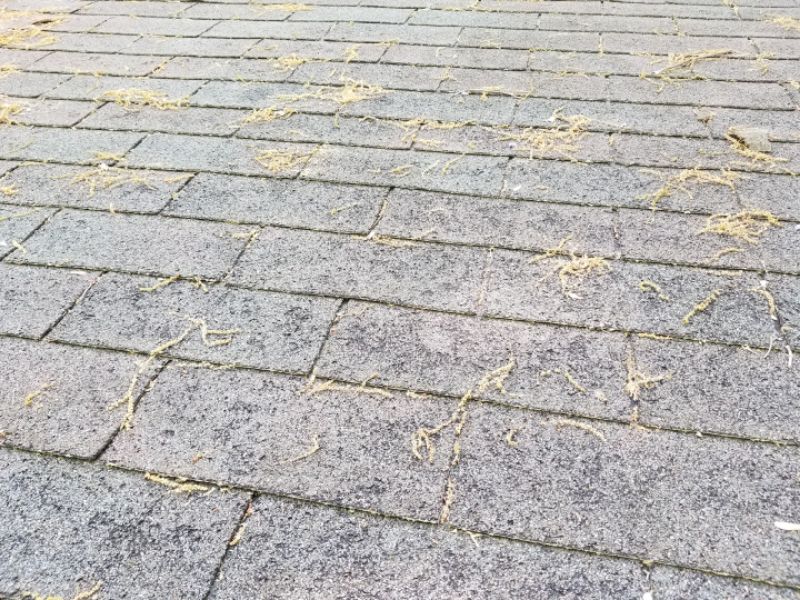
There is debris on the roof. This can damage the roofing and permit water penetration. Clean the debris.
The roofing is damaged. This permits water penetration. Repair or replace the roofing.
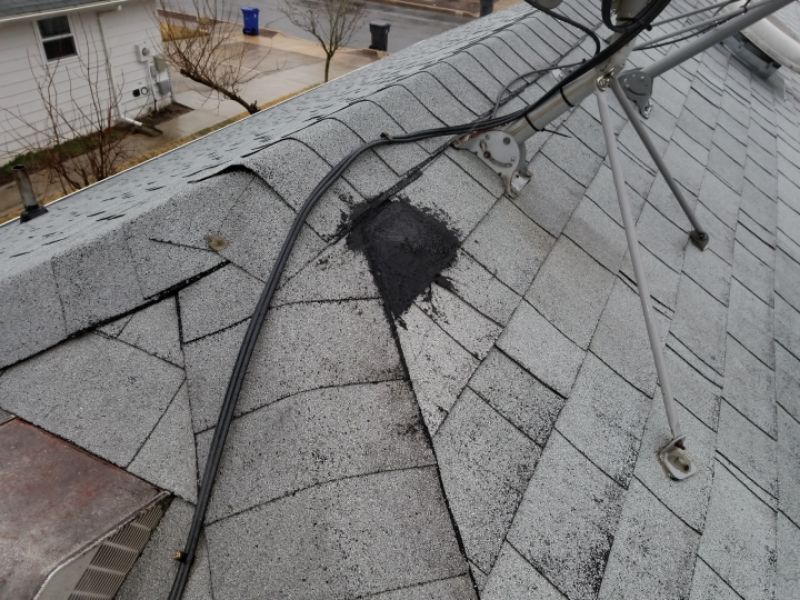
There is a satellite dish or other equipment attached directly to the roof covering. This can damage the roofing and permit water penetration. Monitor the area frequently for water penetration; consider relocating the equipment.
There are exposed nail heads. These are prone to rusting and permit water penetration. Repair the roofing to eliminate the exposed nail heads.

There are nail pops. Nail pops permit water penetration and further damage. Secure and seal the nail pops, and reseal the bottom of the shingle tabs.
The shingles are improperly installed. The tabs edges are not offset from the tabs above and below them. This will allow leaks. Hire a roofer to reinstall the shingles.
The valley shingles are improperly installed. This will allow leaks. hire a roofer to reinstall the roofing.
The starter course of shingles is missing at the eaves. This will allow leaks and deterioration. Hire a roofer to install a starter course.
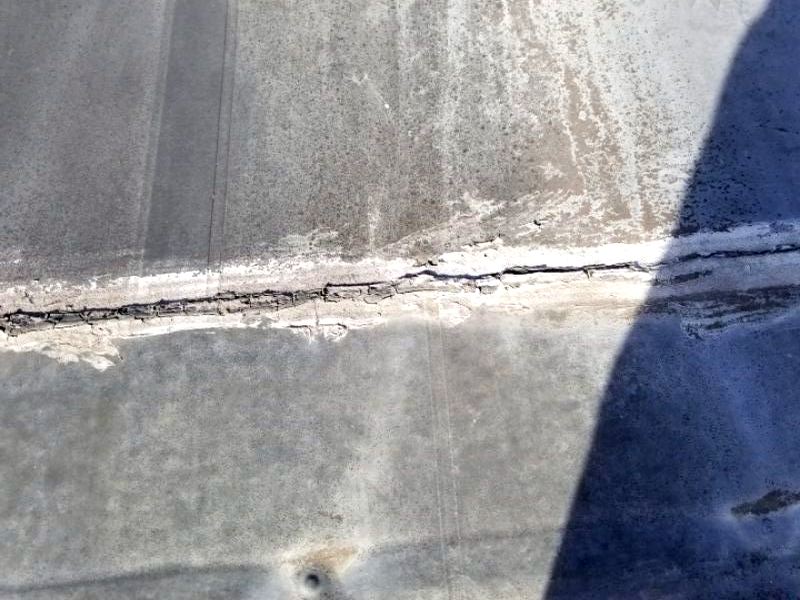
There have been repairs to the roof covering. It is difficult to evaluate the cause, extent and quality of the repairs. Monitor the repairs to consider if additional action is required. Hire a roofer as needed.
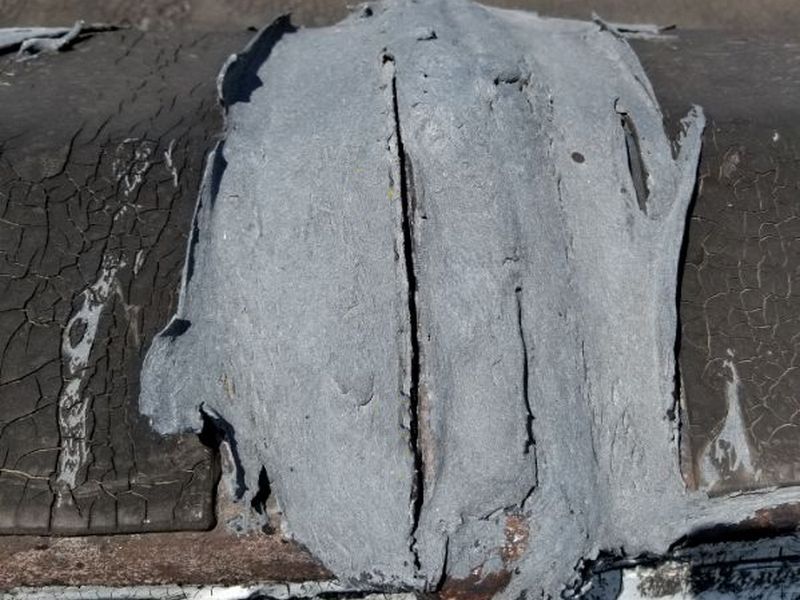
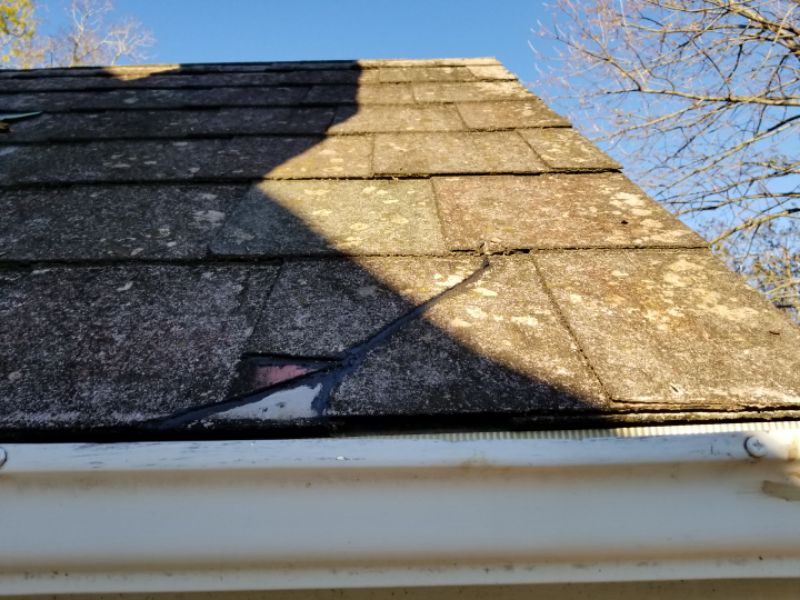
There have been repairs to the roof covering with asphalt or caulking. This type of repair is subject to failure and should be considered temporary. Hire a roofing contractor to evaluate the condition and to make repairs as required.
The roofing is deteriorated. This permits water penetration. Hire a roofing contractor to provide repairs or replacement as needed.
The roof covering is old, worn, and deteriorated. Repairs would not be practical or reliable. Replace the roofing.
The roof covering is not appropriate for a low-pitched roof. This increases the likelihood of leakage and will cause the roofing to wear prematurely. Hire a roofer to replace the roofing with a system acceptable for low-sloped roofs.
The roof has more than two layers of asphalt composition shingles. The roof framing is not designed to carry the additional load. Remove all of the existing layers of roofing materials and install a new roofing system. Sheathing and/or framing repairs may be necessary.
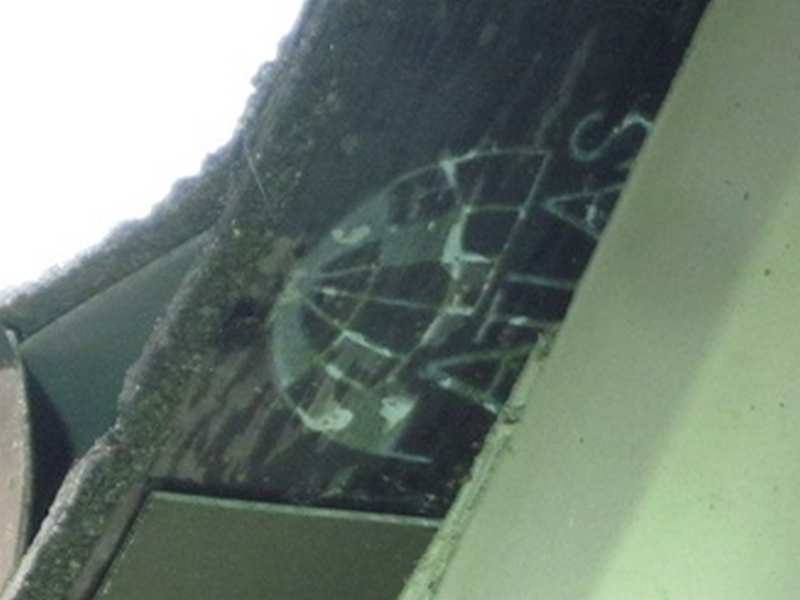
The roof covering appears to be Atlas Chalet or CertainTeed “organic” shingles, which are subject to class action lawsuits due to allegations of blistering, cracking, delamination, and premature failure. This roofing cannot be repaired and roof replacement usually is required. Replace the roofing.
This is a low-quality roofing material generally reserved for sheds and animal pens. Its use on a home as a primary roof covering should be inspected very carefully. The product resembles 36” sheets of a material similar to fiberglass/asphalt shingle, but it is thinner and less durable. Mineral roll roofing can be installed with and without an underlayment, fully adhered or edge/overlap adhered only, and with hidden or exposed fasteners. Side edges should have drip flashings rather than an overhang. NOTE: Don’t mistake Single Ply Modified Bitumen for this product. They are very different in quality.
Inspect for signs of damage or deterioration as with fiberglass/asphalt shingles. Blistering is usually a sign of excess adhesive applied under the sheet and should be reported. Wrinkling and loose areas indicate poor surface adhesion and/or a non-adhered, improper installation, and/or inadequate fastening.
This smooth, non-granular membrane with a reflective coating is Single Ply Modified Bitumen, not “Mineral Roll roofing.”
If you see “bleed-out” of tar at the roofing’s edges, it’s almost assuredly Single Ply Modified Bitumen.

The mineral roll roofing is wrinkled and has raised areas. This is usually due to an improper installation and excess adhesive, and will likely fail prematurely. Hire a roofer to provide repairs or replacements as needed.
There are seams on the mineral roll roofing membrane which need resealing to prevent further damage and leaks. Hire a roofer for repairs or replacements as needed.
The roofing is deteriorated. This permits water penetration. Hire a roofing contractor to provide repairs or replacement as needed.
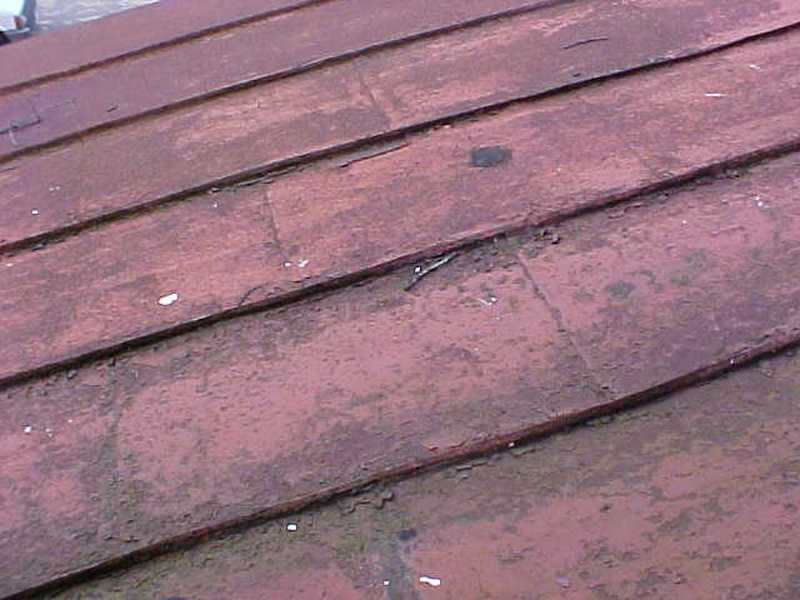
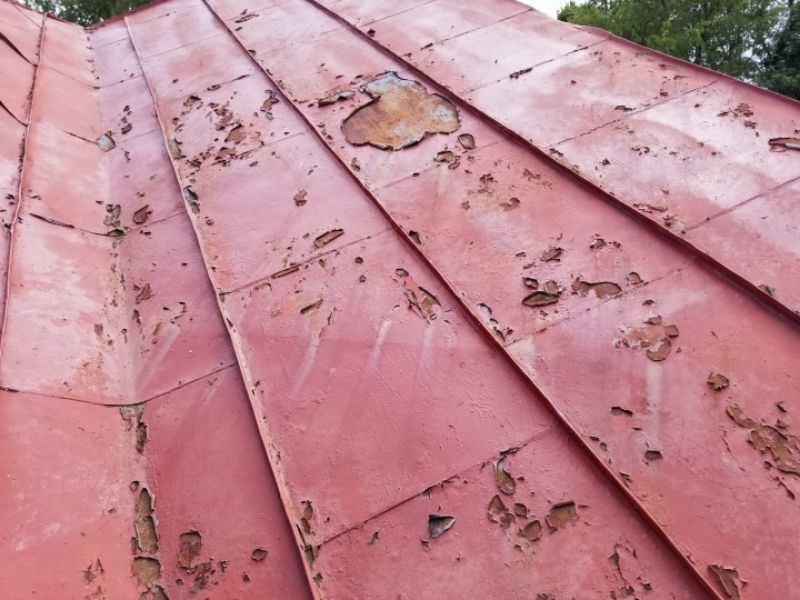
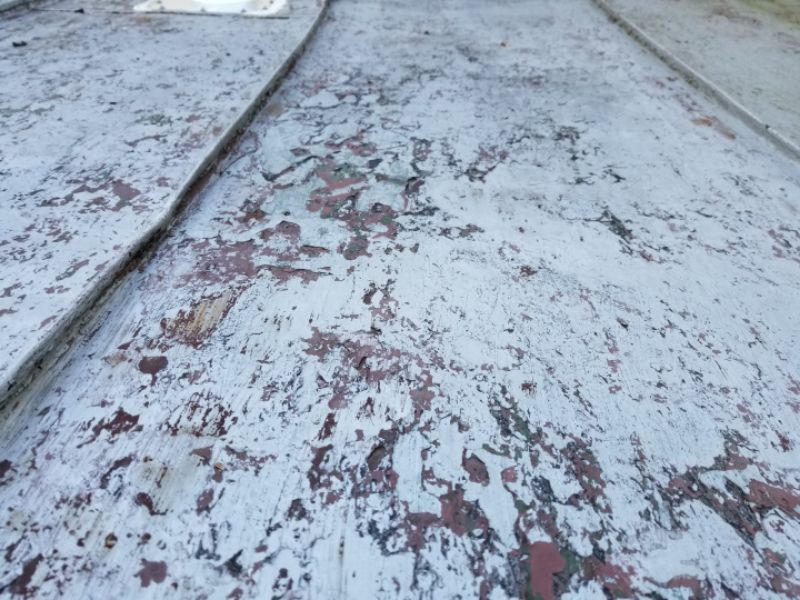
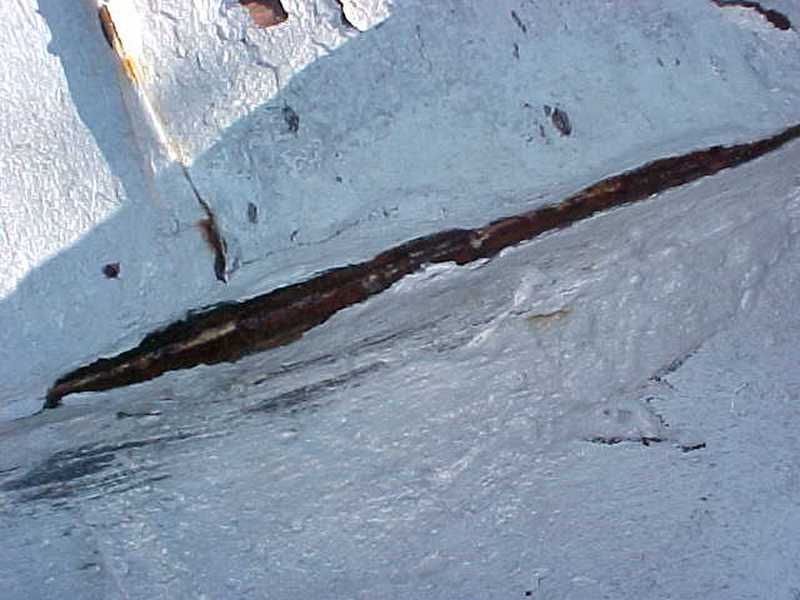
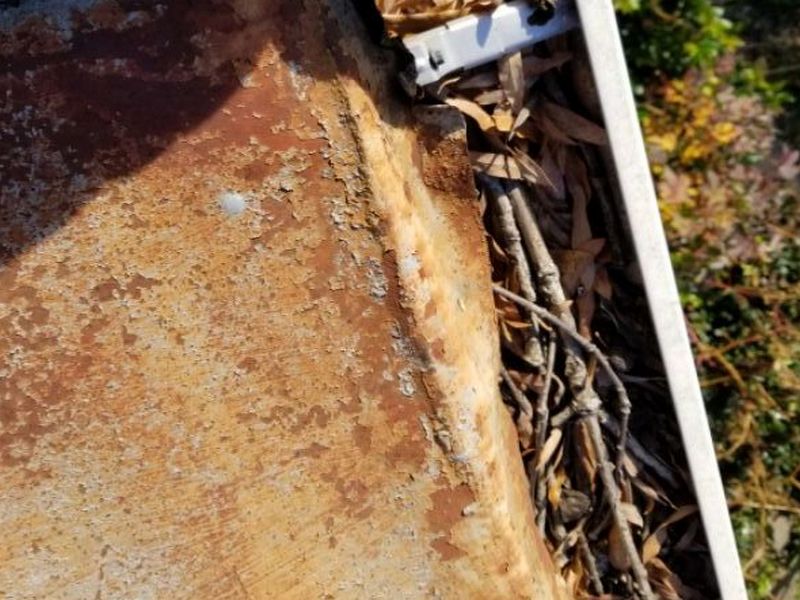
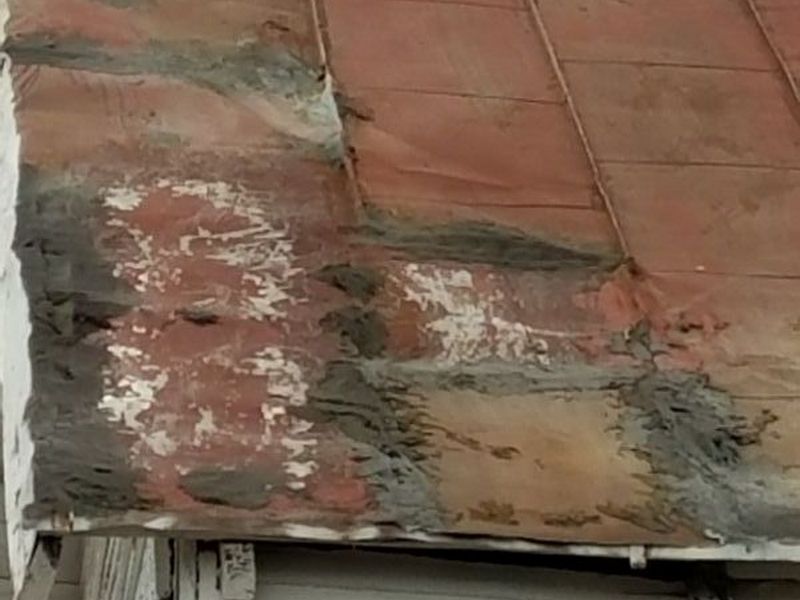
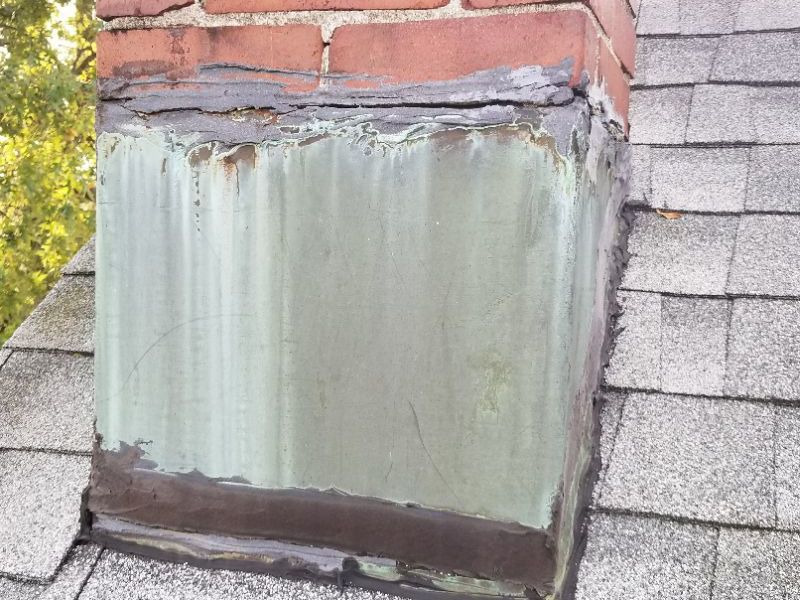
Terne roofing is an “old house” product consisting of metal sheets dipped in a tin/lead alloy. Seams are standing or flat, and without exposed fasteners. It relies on a sacrificial painted coating for proper service and longevity. With a diligent maintenance recoating every 4-7 years Terne roofs have a very long service life, often over 100 years. By the same token, neglect and/or improper repairs and maintenance will cause the roof to fail, or at a minimum, require a constant and very short service regimen.
Never walk on the seams of a metal roof; walk only on the flat areas. Terne roofs must have a viable paint coating. Peeling, flaking, and/or bare areas should be reported. A “crunchy” sound or feel underfoot indicates excess corrosion that may not be visible. The application of thick oil-based sealants (tar and asphalt patching) is the most common way that Terne roofing is damaged. This must be reported. Terne roofing seams are especially vulnerable, and are often improperly repaired and/or maintained. They must be inspected for damage and/or corrosion. Be alert to signs of ponding and poor drainage, e.g. standing water or puddle stains.
The paint on the metal roofing is failing. This is an important component of the roof system as it protects the roofing itself from corrosive elements. Paint the roofing.
The metal roofing has been improperly repaired using asphalt or caulk. These materials will trap moisture against the metal and cause further deterioration. Hire a roofing contractor for an evaluation and to provide repairs or replacement as needed.
The seams on the metal roofing are damaged or deteriorated. This will allow leaks and further damage. Hire a roofing contractor for an evaluation and to provide repairs or replacement as needed.
The metal roofing is deteriorated, and has unworkmanlike repairs. These are unlikely to be reliable. Hire a roofing contractor for an evaluation and to provide repairs or replacement as needed.
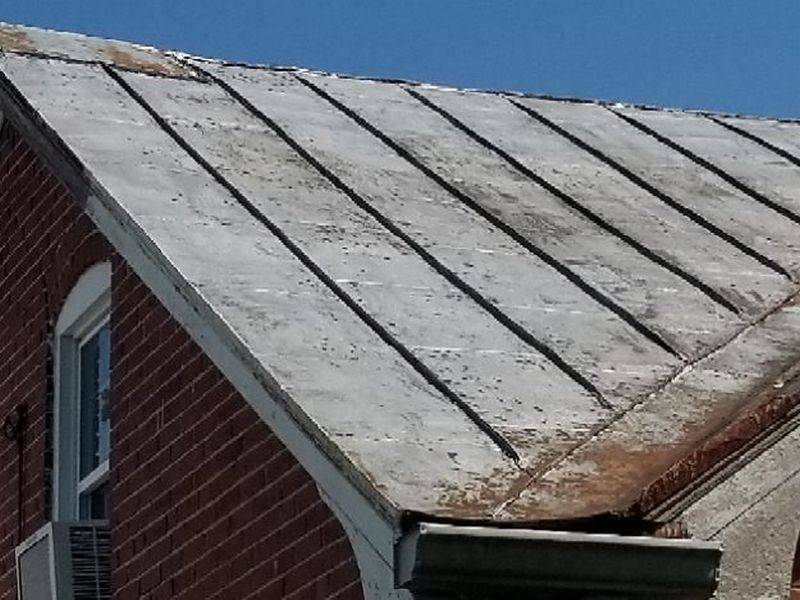
This is essentially a modern version of Terne metal roofing. Galvanized and “5-V” metal sheets fall into this category, although the galvanized products are considered a low-cost option more suitable for sheds and farm buildings. The minimum pitch for these systems is 3/12.
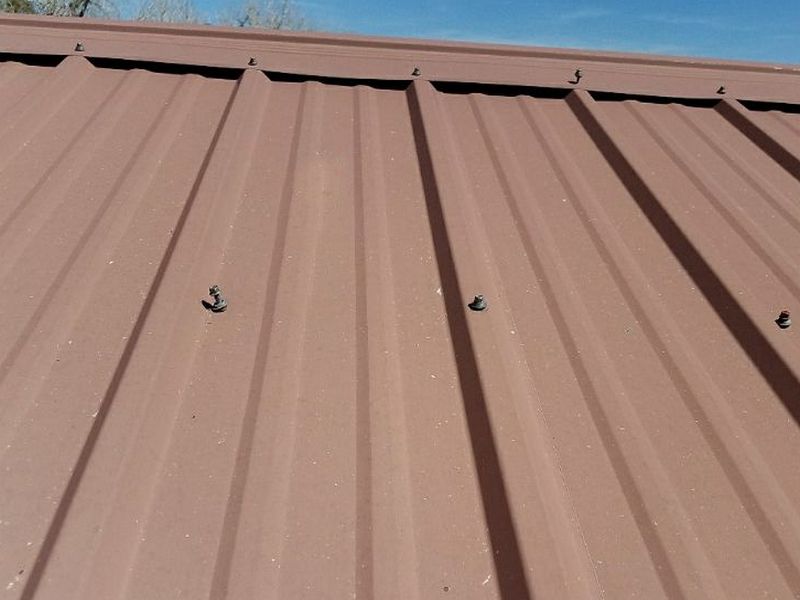
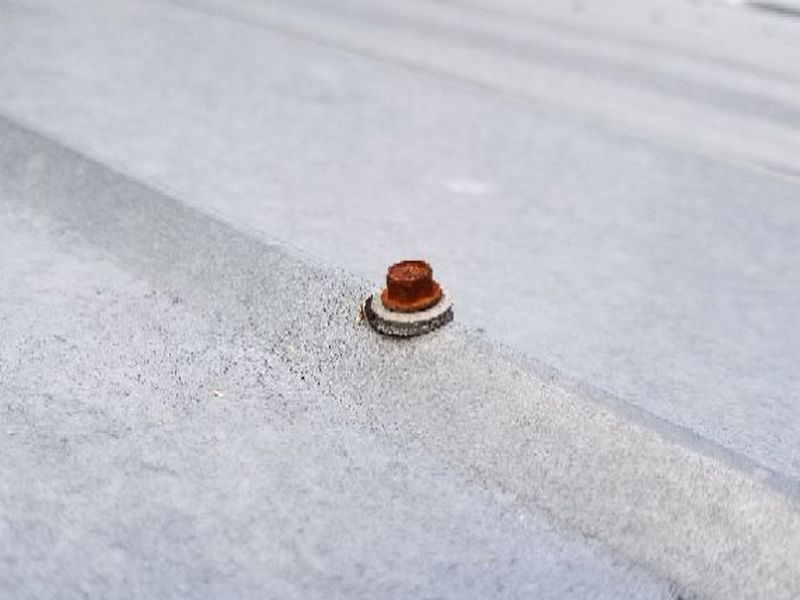
Always walk on the flat areas, never on the raised portions or seams. Pre-Coated metal roofs can be hidden fastener systems or exposed fasteners. Regardless, they both rely on mechanical exclusion of moisture. Flashings, counter-flashings, and overlaps are required. Caulk and sealants are not acceptable. Panels that are damaged or have holes must be replaced. Exposed fasteners must have integral rubber washers, and cannot be over-driven (causing a dimple in the sheet) or raised above the surface. The metal pans should be installed snug to a solid sheathing. Loose, flapping, or tented sections should be reported.
The roofing screws are located at the low areas of the metal roof, rather than on the ridges. This is contrary to manufacturer guidelines and can allow leaks. Hire a roofer for repairs or replacements as needed.
There are loose fasteners. This allows water penetration and may permit the roofing to loosen and shift out of position. Hire a roofer for repairs as needed.
There are rusted fasteners. This allows water penetration and may permit the roofing to loosen and shift out of position. Hire a roofer for repairs as needed.
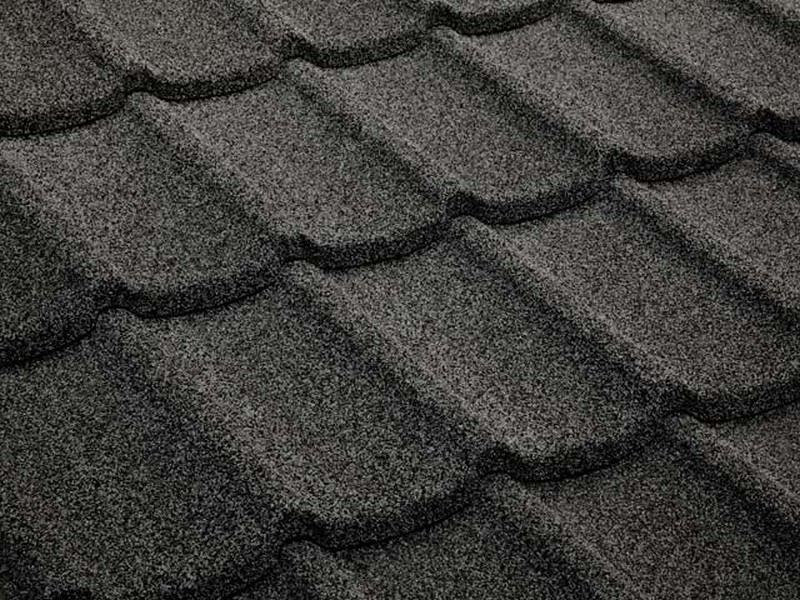
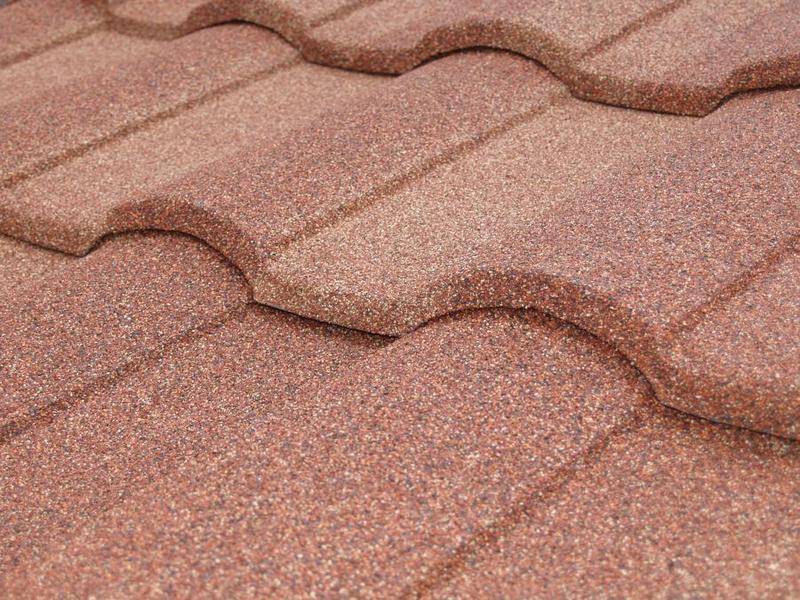
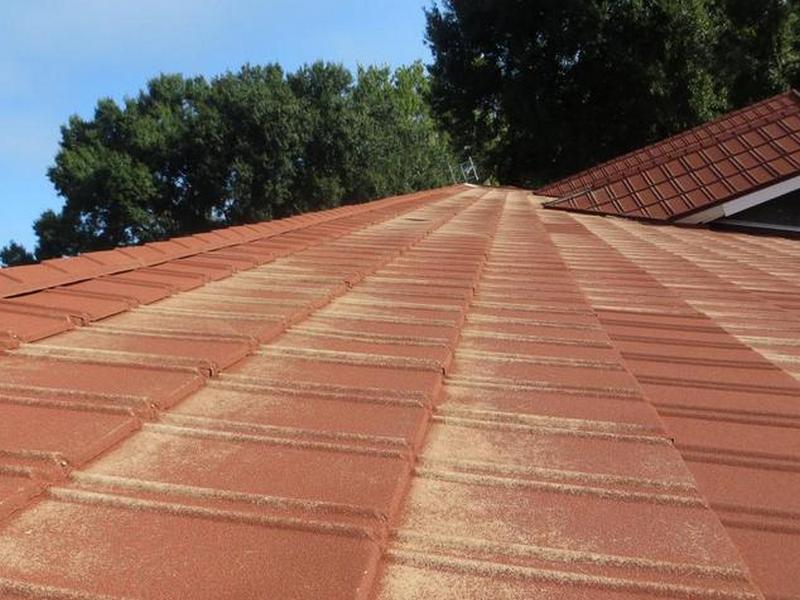
Stone-Coated Metal roofing is a premium product usually seen only on high-end properties. It consists of heavy metal pans with natural stone chips embedded in a surface layer of acrylic. A baked-on UV inhibiting top coat is usually applied. They must be installed on a minimum slope of 3/12.
Care must be taken if walking on the surface. Side edges and high areas cannot be walked on, nor can the upper exposed portions of overlapped tiles. Some of these systems are installed over battens, and must be walked only on the battens. If in doubt, do not walk on the roof. A batten installation system should not be used in high wind or hurricane zones.
Stone-coated metal roofing should be inspected for damaged, missing, loose, or slipping sections. The pieces should be overlapped for weather-tightness, and be free of caulking. The roofing can still perform with granule loss as long as the sections are not corroded, but this is a sign of a roof nearing its EUL.
Stone-coated shingles are generally resistant to hail damage.
Stone-coated shingles being installed over battens.
Gable edge detail
A few of the Stone-Coated Metal shingle varieties
There is granule loss on the stone-coated metal shingles. This has a significant effect on their longevity and reliability. Hire a roofer for repairs or replacements as needed.
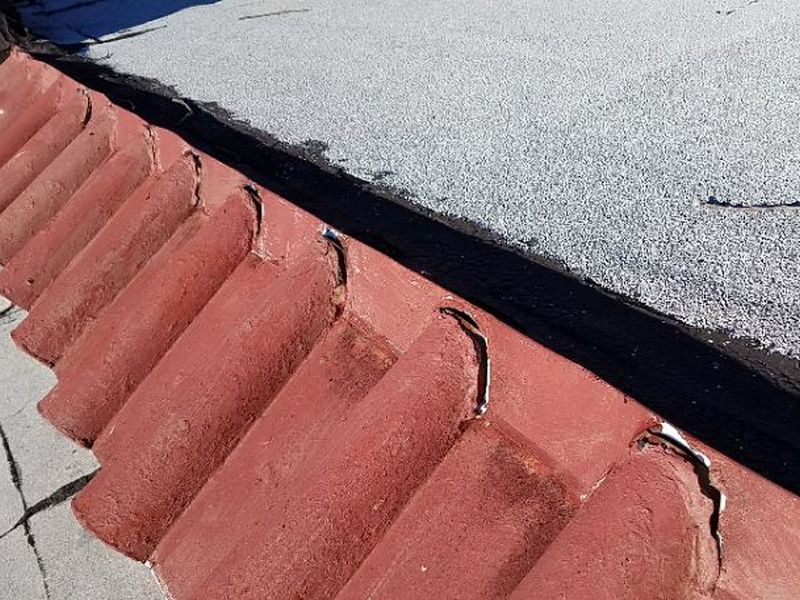
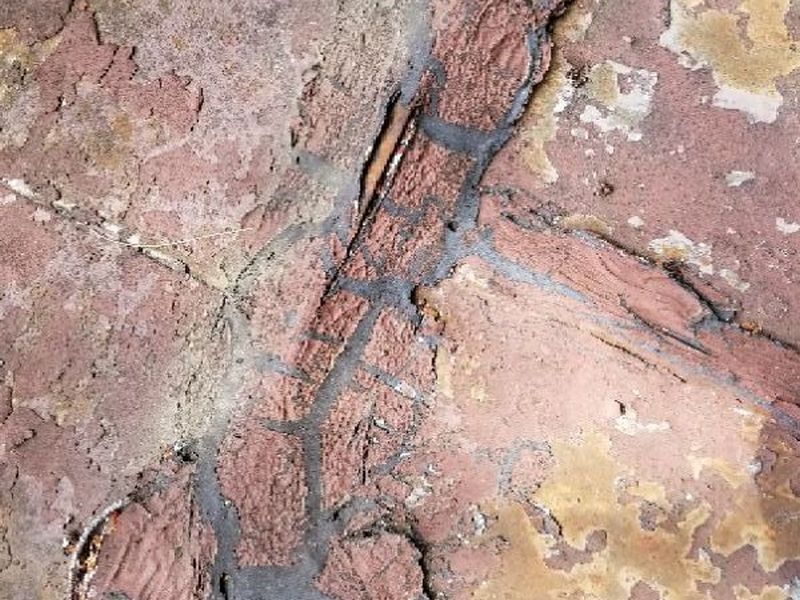
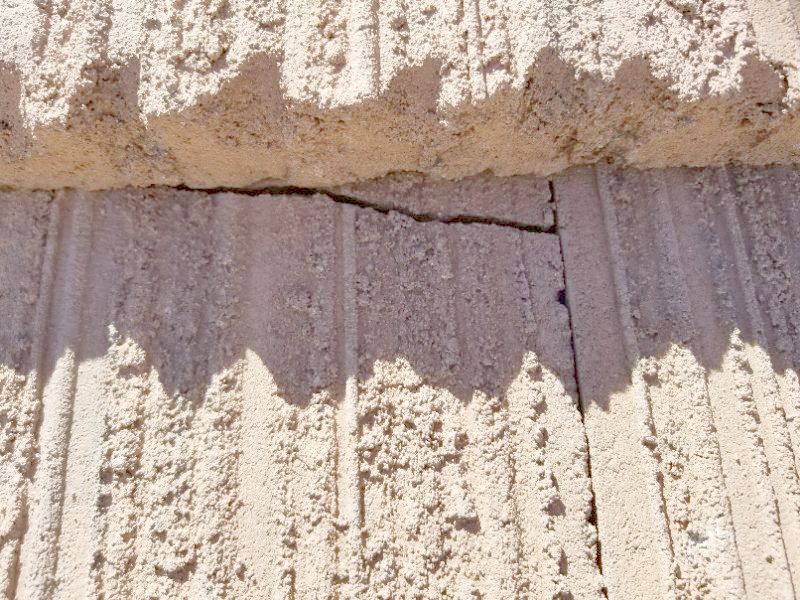
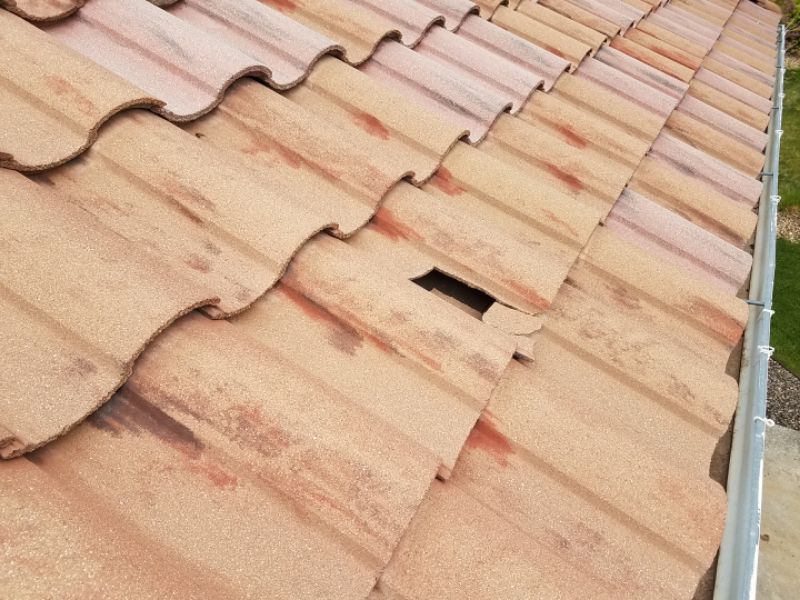
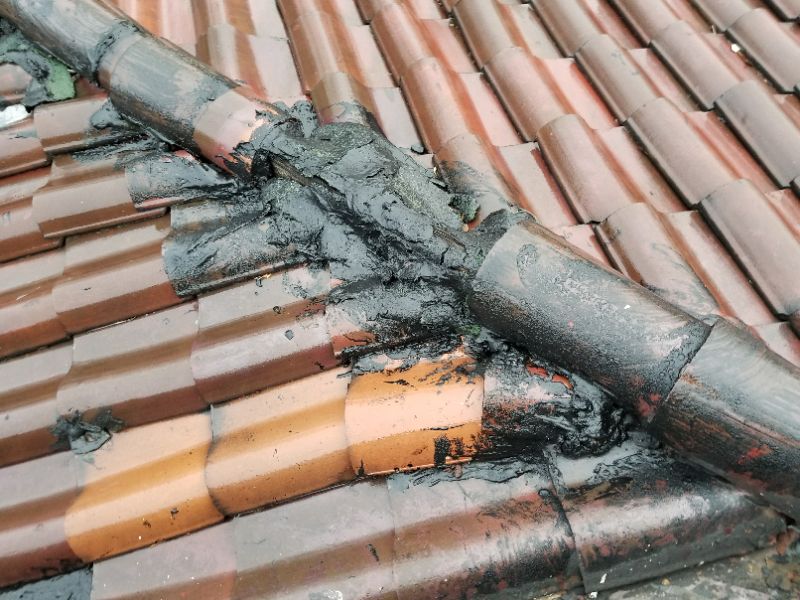
Tile roofs should not be walked on. They are not recommended for slopes less than 3/12 unless installed as purely decorative over a waterproof system. Inspect for damaged, slipping, loose, or missing pieces. Cracks are not uncommon; tar and caulking is a temporary repair. The eave edges of roofs covered in curved tiles (“mission” or “barrel”) should have “bird stops” installed or some method of preventing pests from entering under the tiles.
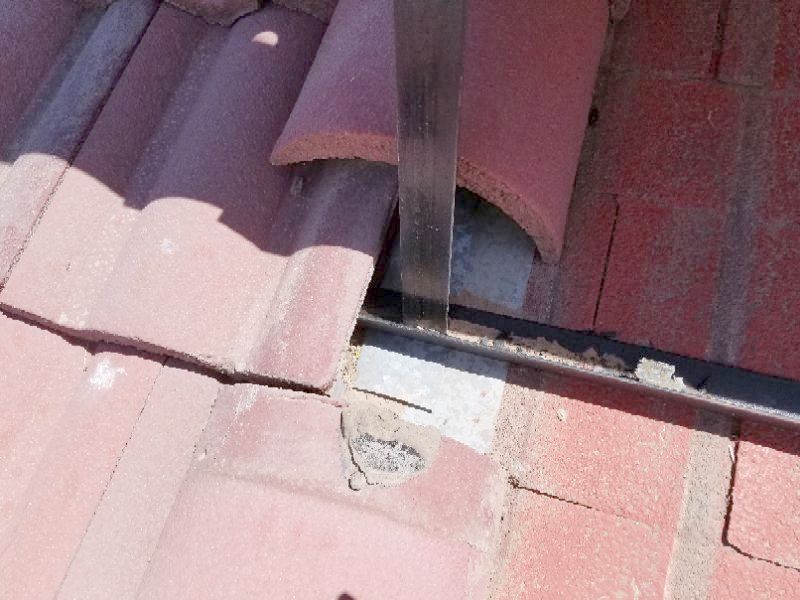
Both clay and concrete tiles can be glazed on the exposed side. Overall age and the wearing-off of a glazing will permit moisture absorption through the tiles. When observed, careful attention must be paid to the attic or interior inspection and the use of Infrared to detect possible water intrusion. Signs of overall wear should be reported with an EUL information statement. A common issue with any roofing material that lasts as long as tile is that it can outlast both the fasteners used to secure the pieces as well as the roof’s flashings. Pay close attention to the flashings and any signs of loose or slipping tiles.
Be alert to correctly identify composite tile products. Dents, bending, or curling are not seen in clay or cement tiles, and indicate a synthetic material.
There are loose tiles. This can allow water penetration. Repair or replace the tiles.
There are cracked or broken tiles. This permits water penetration. Replace the tiles.
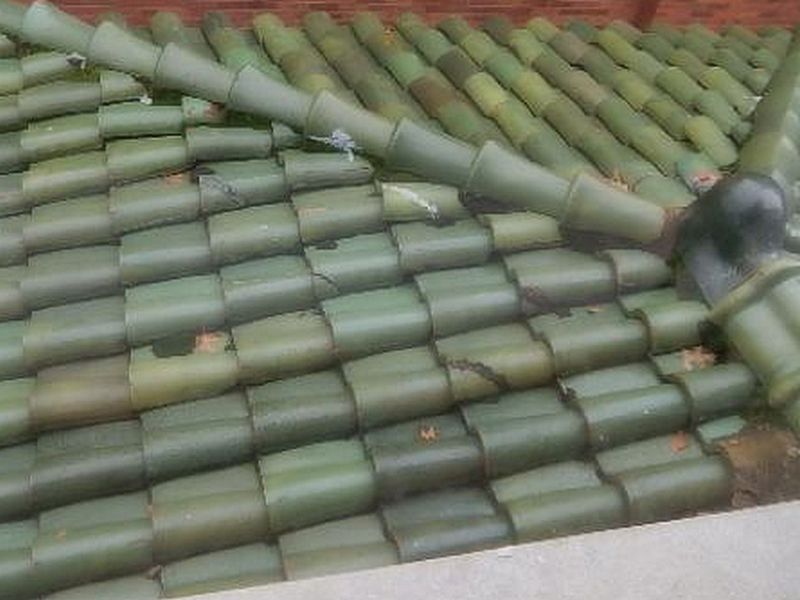
There are missing tiles. This allows water penetration. Replace the tiles.
There have been repairs to the tile roof covering with asphalt or caulking. This type of repair is subject to failure and should be considered temporary. Hire a roofing contractor to evaluate the condition and to make repairs as required.
The tiles are old, worn, and deteriorated. Repairs would not be practical or reliable. Replace the tiles as needed.
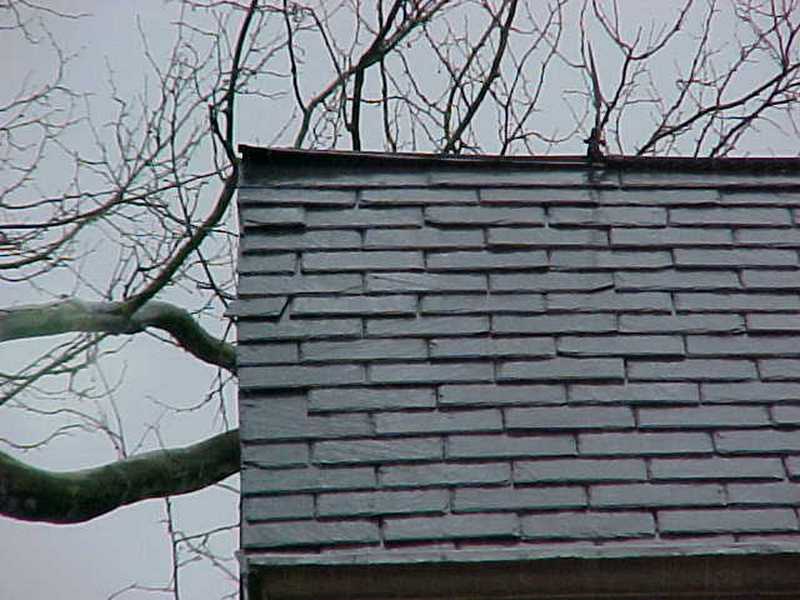
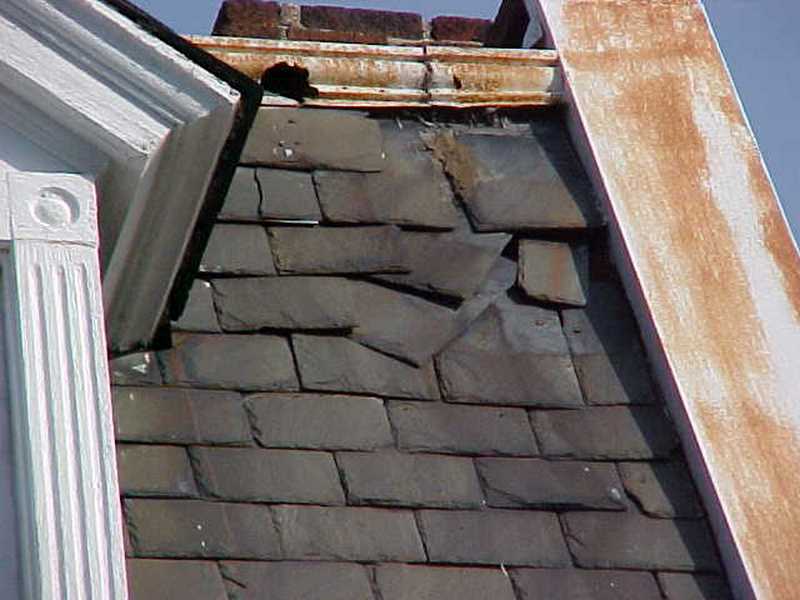
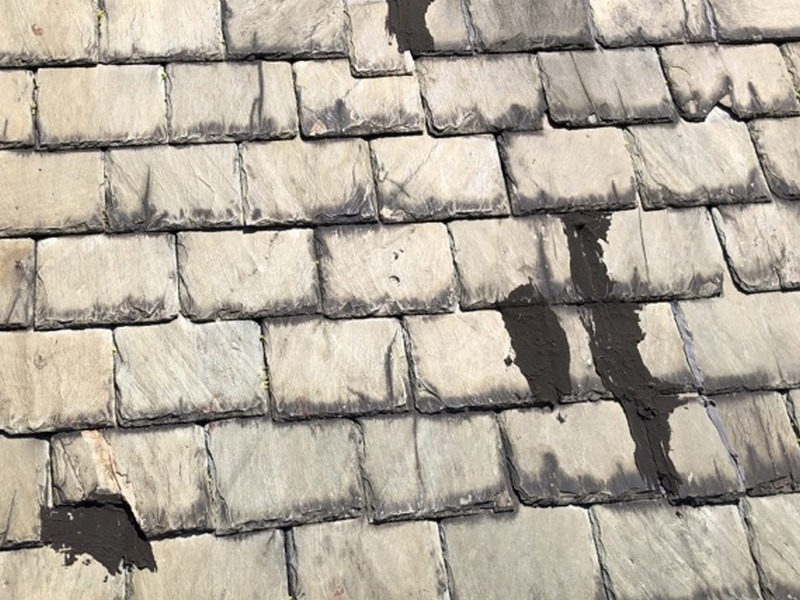
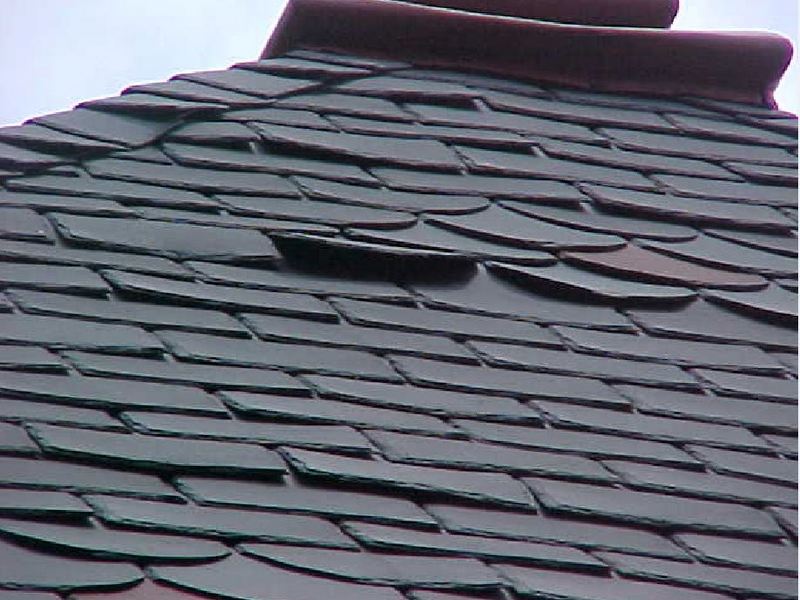
Slate roofs should not be walked on. They are not recommended for slopes less than 3/12 unless installed as purely decorative over a waterproof system. Be alert to synthetic or imitation slates. Natural slate does not bend or curl. Inspect for damaged, slipping, loose, or missing pieces. Cracks are not uncommon; tar and caulking is a temporary repair. The exception is the ridge, where it is common to use asphalt as a sealant. While most slates have a long EUL, some varieties do not, or have softer “ribbons” present. These ribbons can wear faster, creating holes. Be alert to delamination. Small areas of mild surface or edge delamination is not a problem. But if it is throughout the thickness of the slate or widespread it should be reported.
Inspect the eave edge for a proper starter course. Observe the gables edges for inadequate overhang. A common issue with any roofing material that lasts as long as slate is that it can outlast both the fasteners used to secure the pieces as well as the roof’s flashings. Pay close attention to the flashings and any signs of loose or slipping slates.
There are cracked or broken slate tiles. This can allow water penetration. Hire a roofer for repairs or replacements as needed.
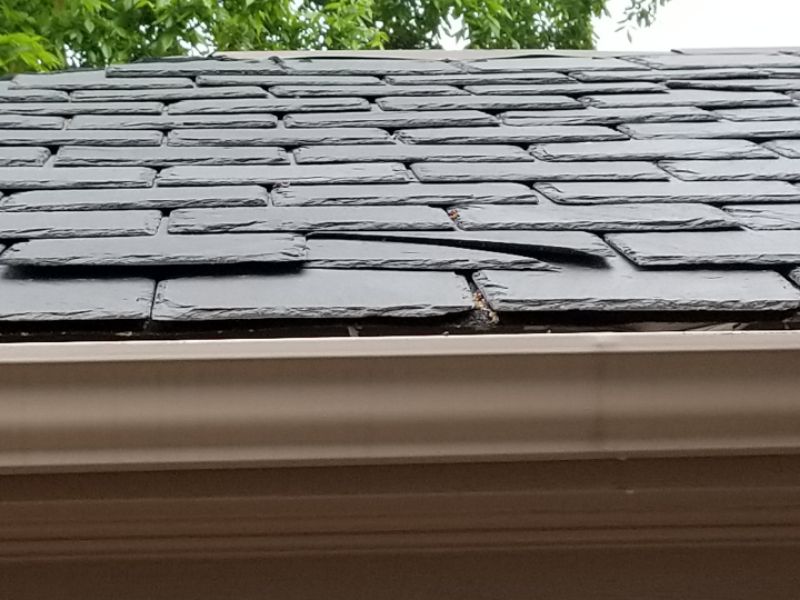
There are loose, slipping, or missing slate tiles. This allows water penetration. Hire a roofer for repairs or replacements as needed.

There have been repairs to the roof covering with asphalt or caulking. This type of repair is subject to failure and should be considered temporary, and is only acceptable at the ridge. Hire a roofing contractor to evaluate the condition and to make repairs as required.

The sealant at the slate roof’s ridge is failing. This allows water penetration. Hire a roofing contractor to evaluate the condition and to make repairs as required.
The slate tiles are deteriorated and delaminating. This indicates a slate that is at the end of its service life and can allow water penetration. Hire a roofing contractor to evaluate the condition and to make repairs as required.
There are synthetic slates that are curling and lifting. This allows water penetration. Hire a roofing contractor to evaluate the condition and to make repairs as required. Note that the working lifespan of manufactured slates is not known.
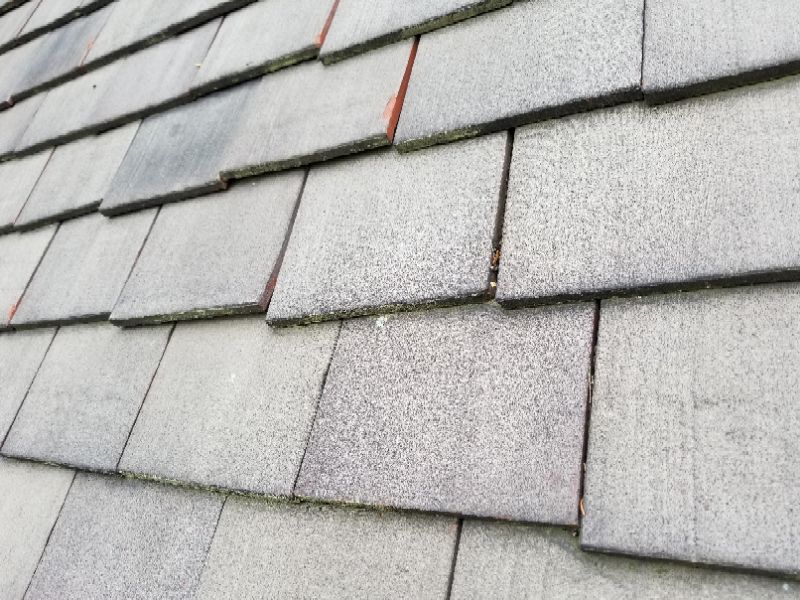
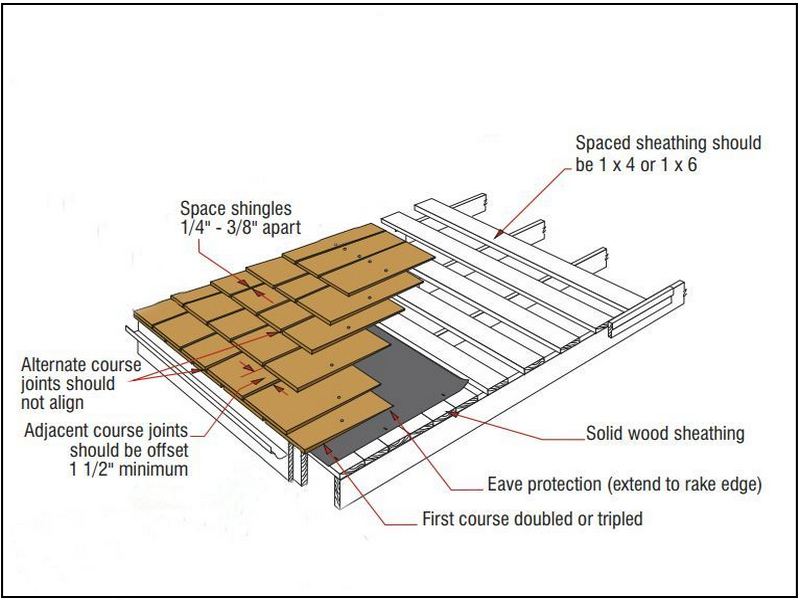
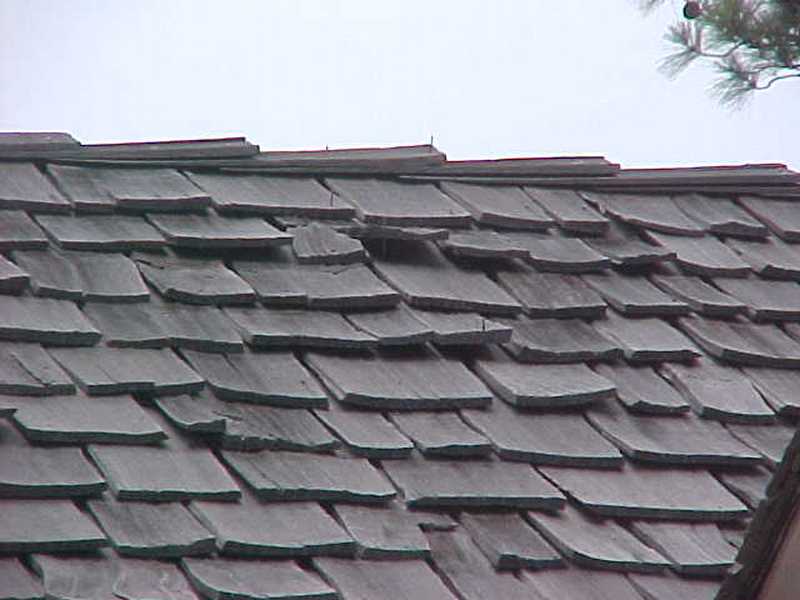
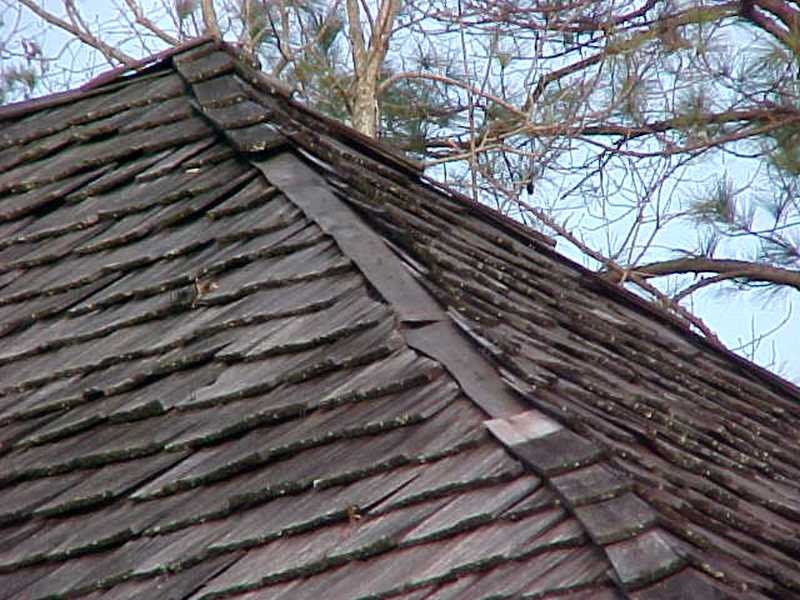
Wood roofs should not be walked on, or only with extreme caution. Damage to the roof, slippery surfaces, and loose tiles are potential fall hazards. Wood roofs are highly dependent of the quality of the product, installation, and maintenance for longevity. Very thick wood tiles, installed on skip sheathing and maintained every 5-8 years, can deliver an EUL of 30-40 years. Poorly-maintained, thinner shakes or shingles on solid sheathing may only last 16-20 years. Both shakes and shingles can be installed on solid roof sheathing or a spaced sheathing. Skip (spaced) sheathing allows for the drying-out of the wood. Any portions of the roof requiring an ice and water shield must have solid sheathing.
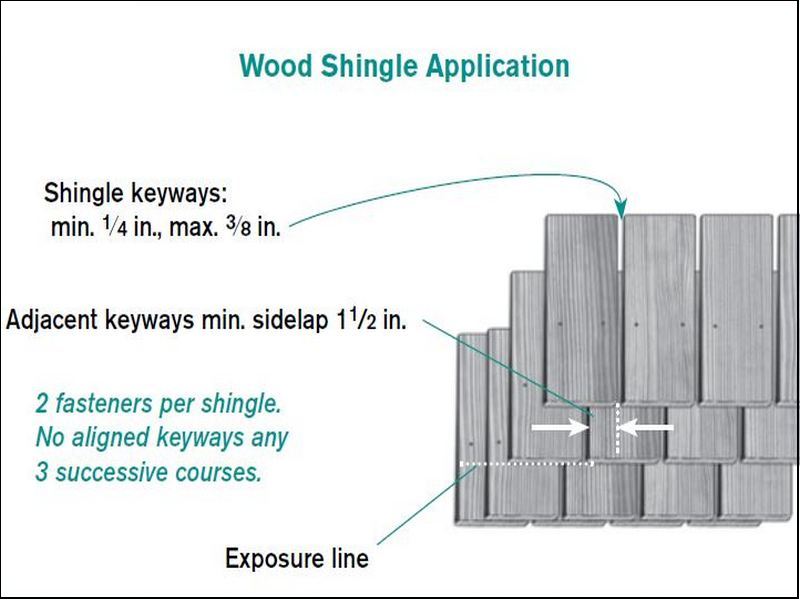
Inspect the wood roofing for damage, cracks and splits, deterioration, slipped or missing tiles, and biological build-up. An adequate side-edge overhang should be present, and well as an eave starter course and overhang. Side-spacing between tiles is required to allow for expansion and contraction. Gaps should be between ¼” to 3/8” for shingles, and slightly wider for shakes. They must be installed on a minimum slope of 3/12 for shingles, and 4/12 for shakes.
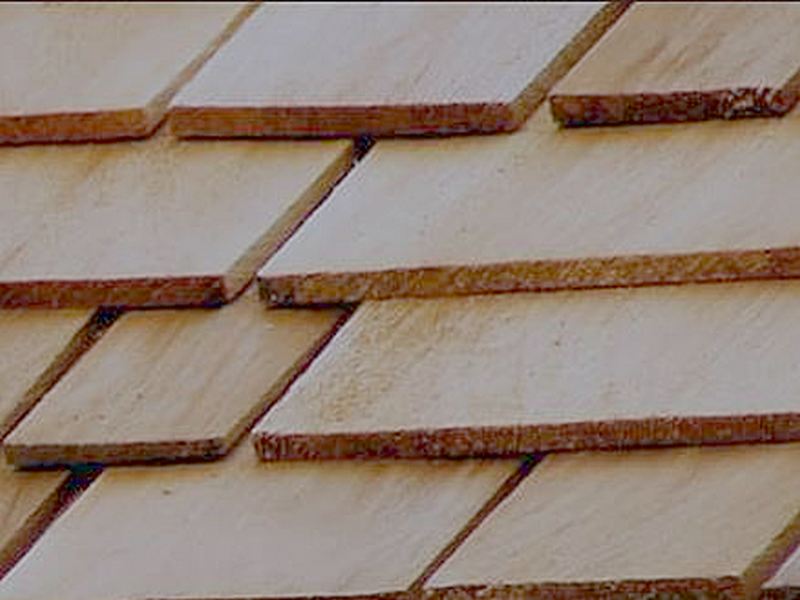
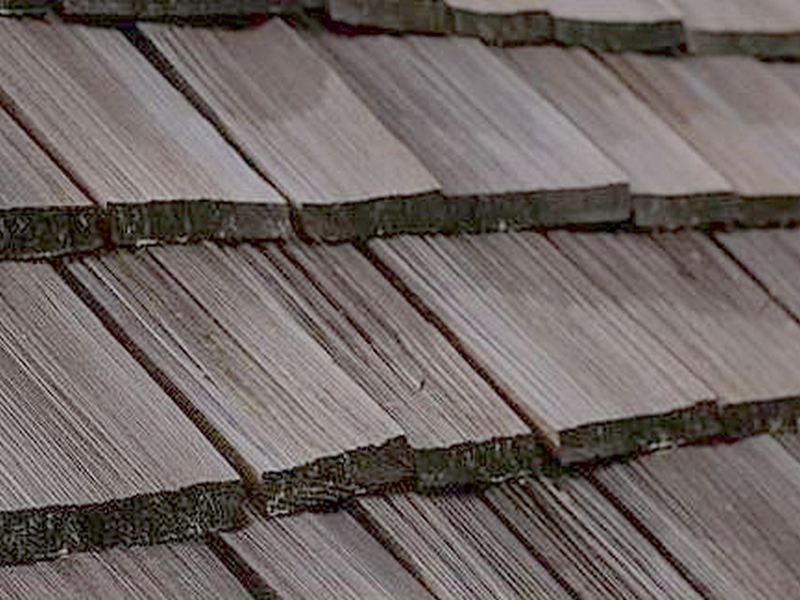
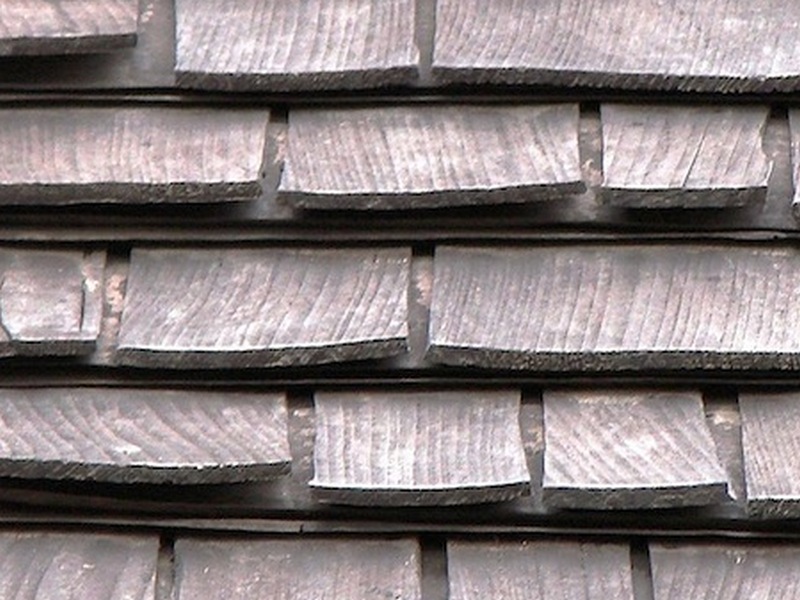
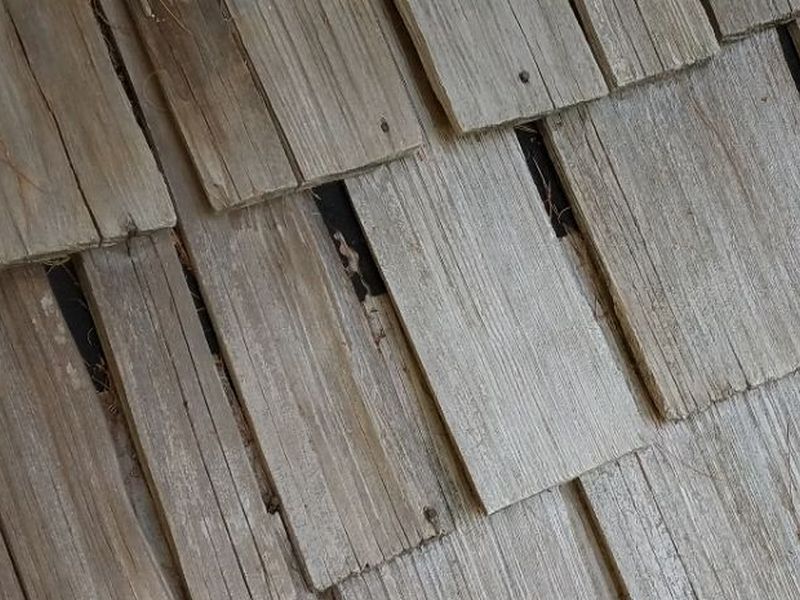
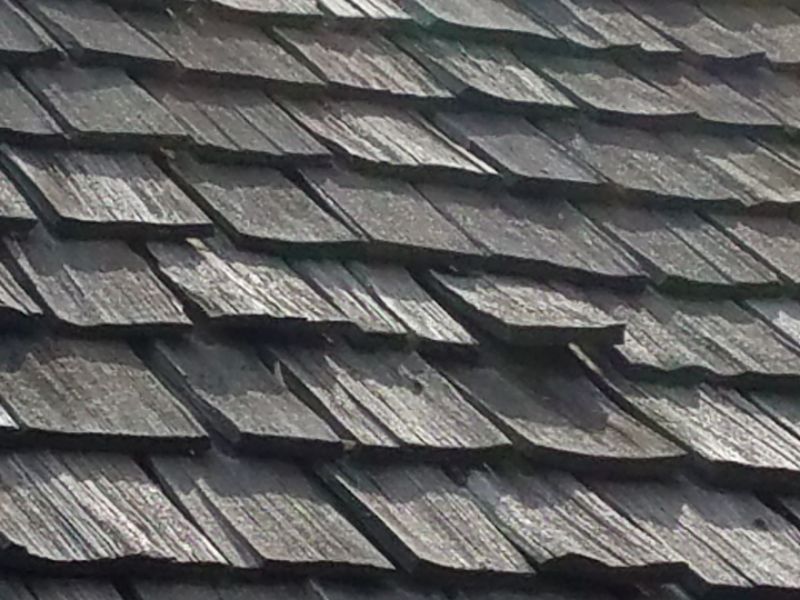
It is important to be able to distinguish between wood shakes and wood shingles. Shakes are generally split rather than sawn. They are thicker, heavier, and rougher in appearance, usually 5/8” or thicker at the butt end. Shingles are always sawn. They are thinner, lighter, and much more uniform, generally 3/8” to ½” at the butt end. They have different installation protocols.
Wood Shingles
Wood Shakes
UNDERLAYMENT vs. INTERLAYMENT: This is a critical difference between shakes and shingles. “Underlayment” refers to a weather-resistant barrier (WRB), e.g. tar paper, that is installed on the sheathing continuously under all wood tiles. “Interlayment” is a WRB that is installed between each course of tiles.
SHAKES: Wood shakes should never have an underlayment except (a) where an ice and water shield is installed on solid sheathing (b) when installed on a raised, horizontal batten system. Instead, an interlayment is required.
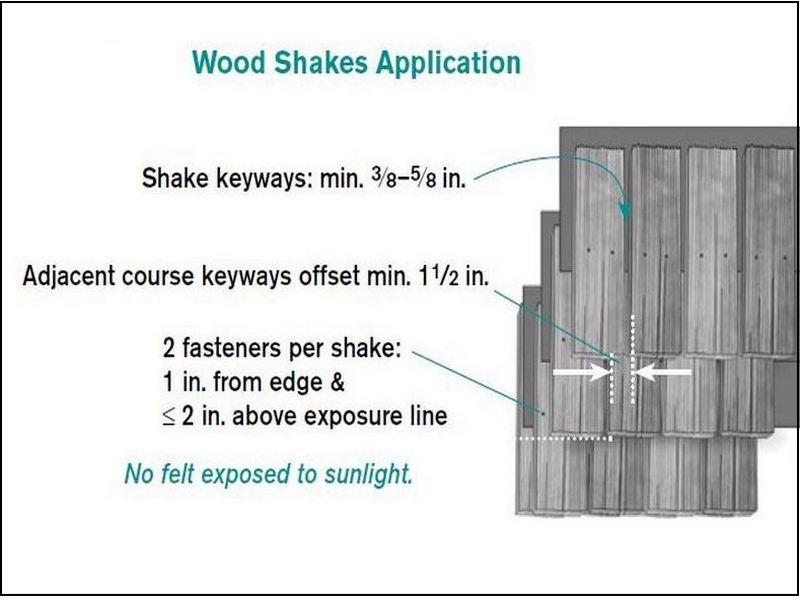
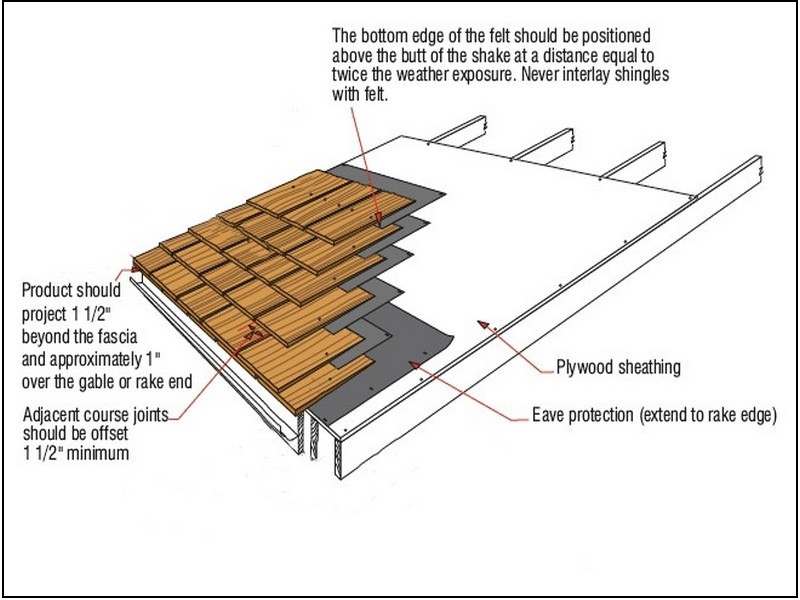
SHINGLES: Wood shingles should NEVER be installed with an interlayment. This inhibits proper drying out of the wood, and is a significant defect. They should be installed directly on the sheathing (except where an ice and water shield is) or on a specifically-designed “breather mat.” The best installation is a “3-ply” arrangement wherein there’s no vertical gap alignment within 3 courses.
The wood shingles are installed using an interlayment. This is contrary to industry standards, and will accelerate deterioration and leakage. Hire a roofer for an evaluation and repairs or replacements as needed.
There is moss, mold, or other biological build-up on the roof covering. The growth may damage the roof covering and cause premature deterioration or failure. Clean the roofing.
The felt interlayment on the wood shake roofing is exposed. This is contrary to accepted standards and will allow water penetration. Hire a roofer for repairs or replacements as needed.
Fasteners are backing out of the wood roof tiles. This will cause the shakes/shingles to become loose and allow water penetration. Hire a roofer for repairs as needed.
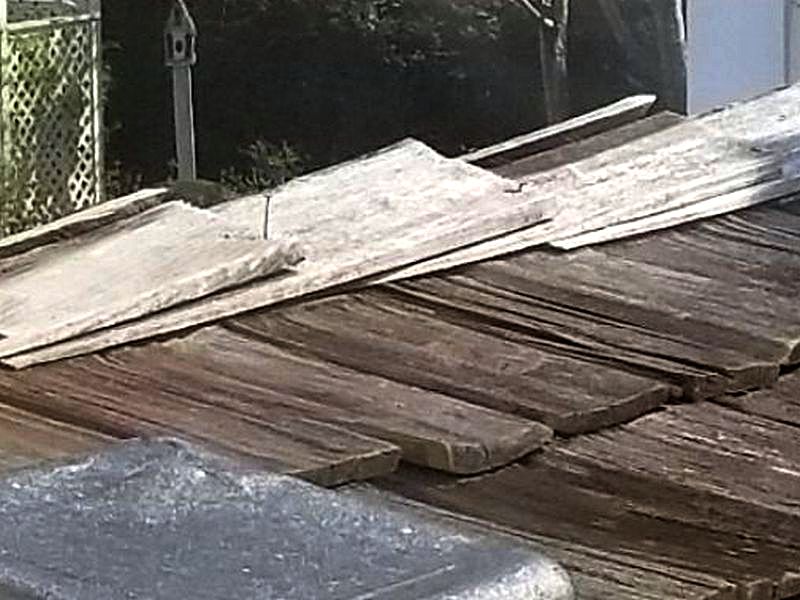
The wood roofing shows signs of deferred maintenance. Some tiles are split and/or curling. This can affect the working life and cause premature deterioration. Hire a roofer for repairs as needed.
There are damaged or deteriorated wood tiles. This allows water penetration. Hire a roofer for repairs or replacements as needed.
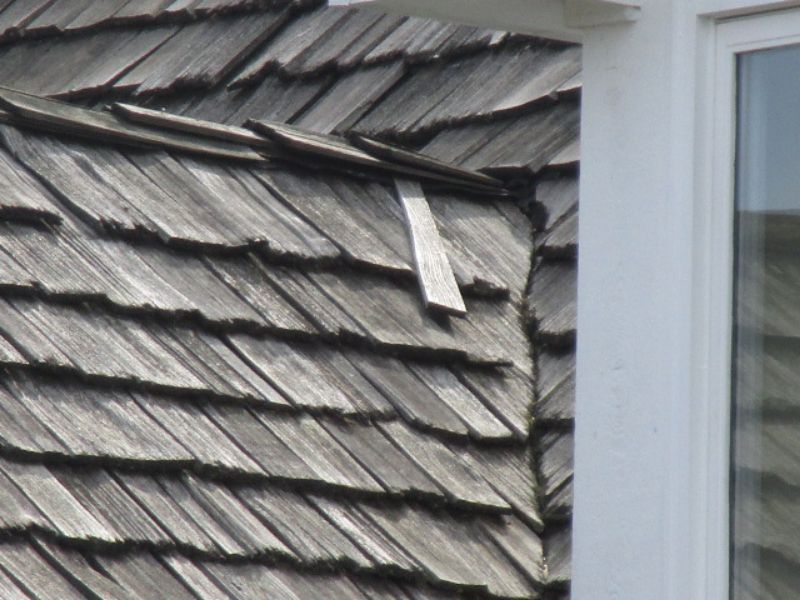
There are missing wood tiles. This allows water penetration. Hire a roofer for repairs or replacements as needed.
The wood roof covering is old, worn, and deteriorated. Repairs would not be practical or reliable. Replace the roofing.

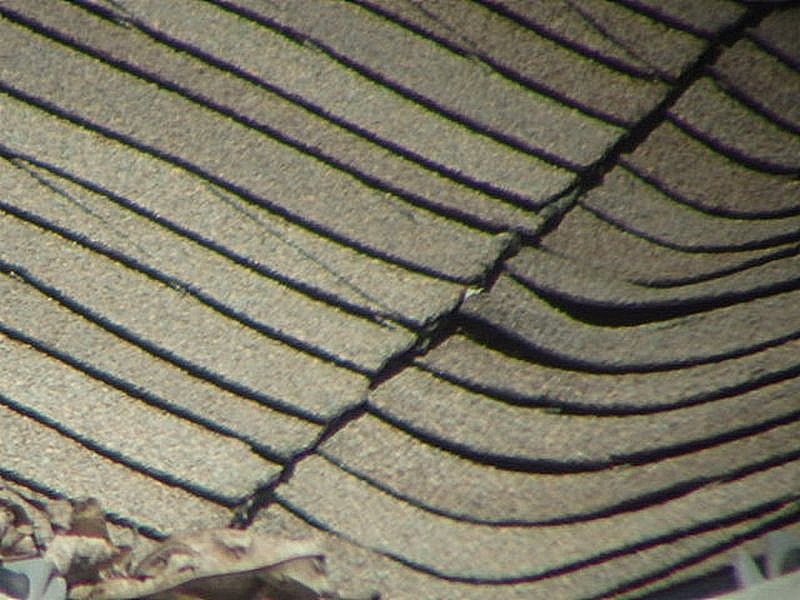
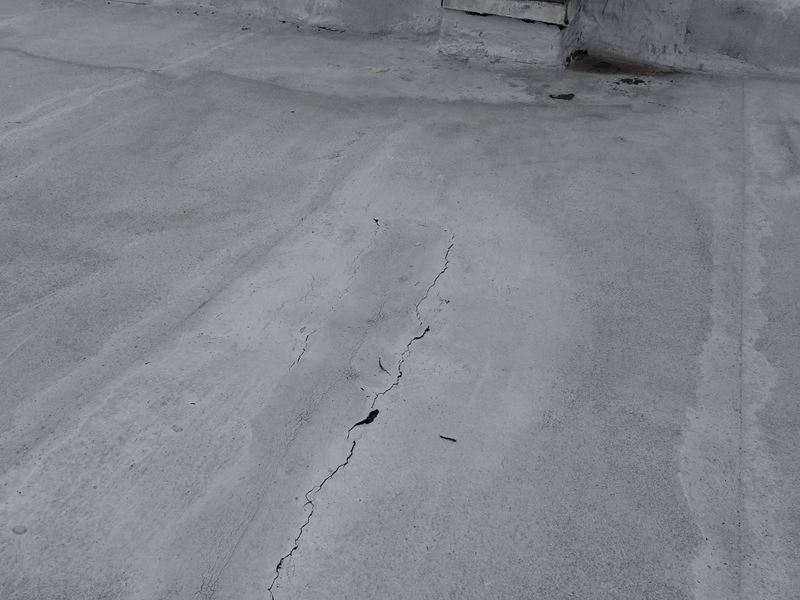
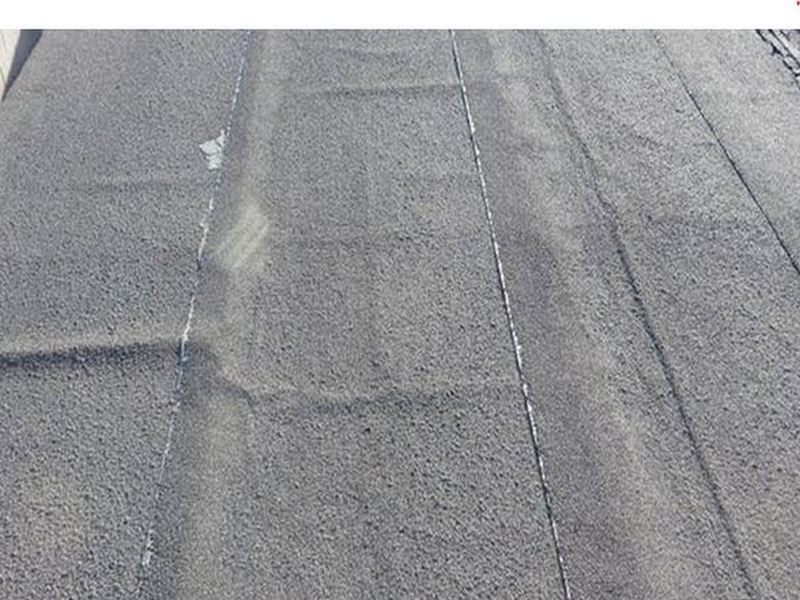
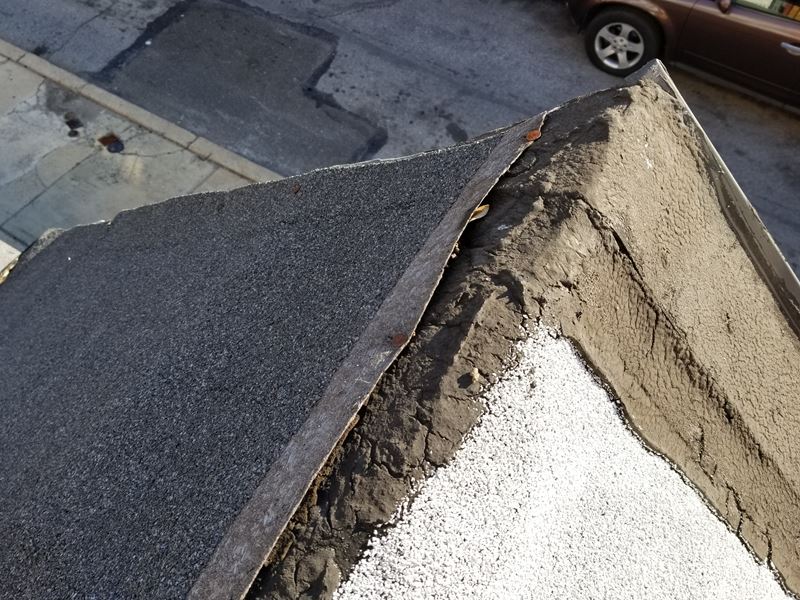
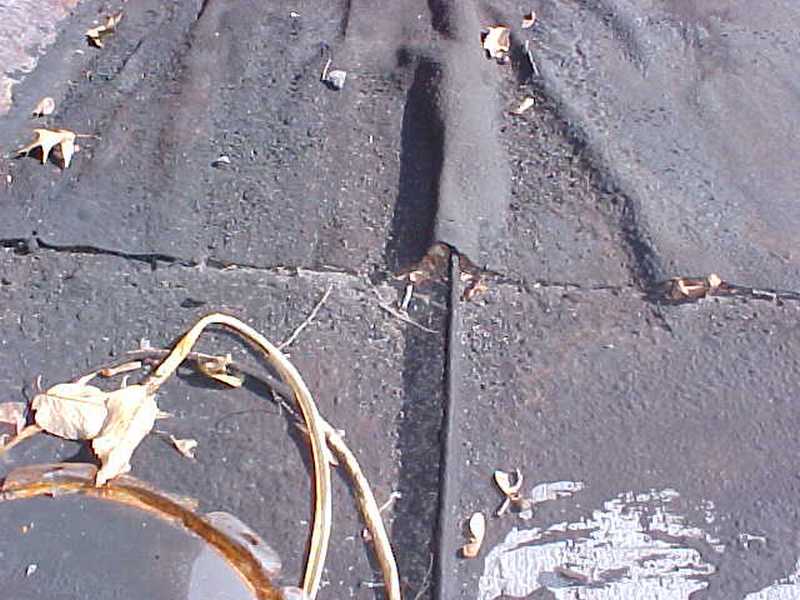
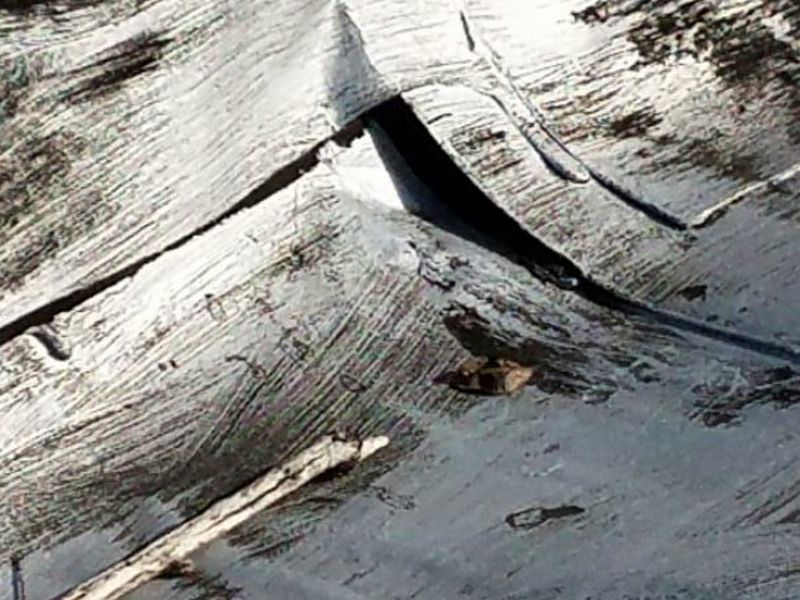
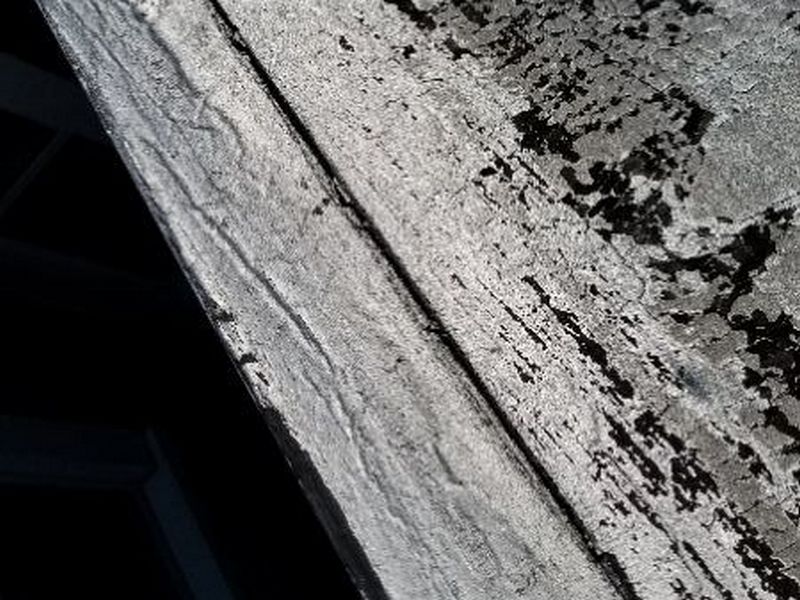
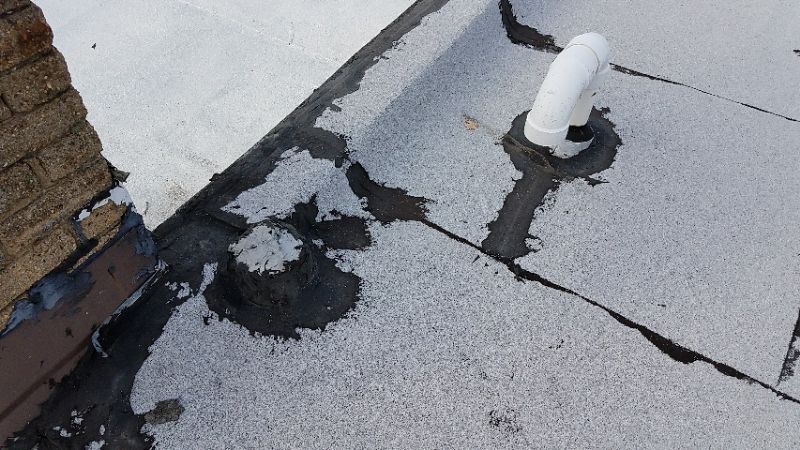
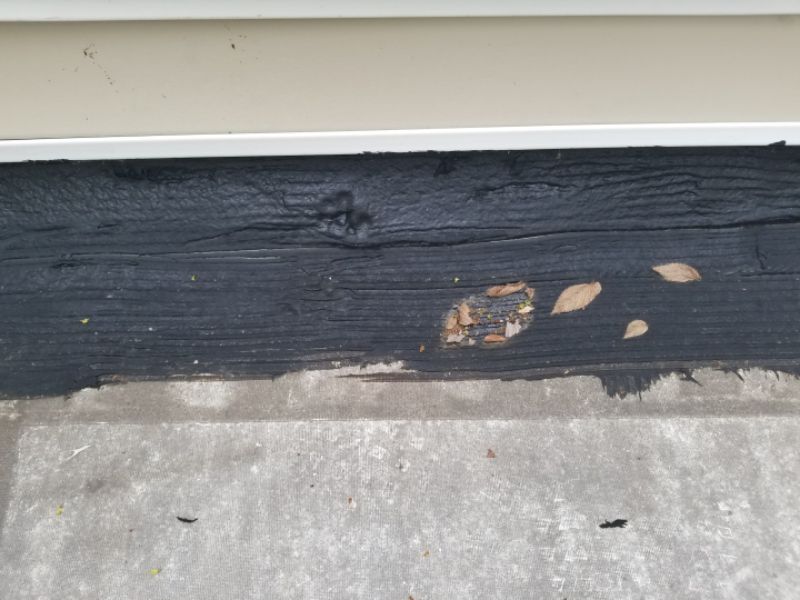
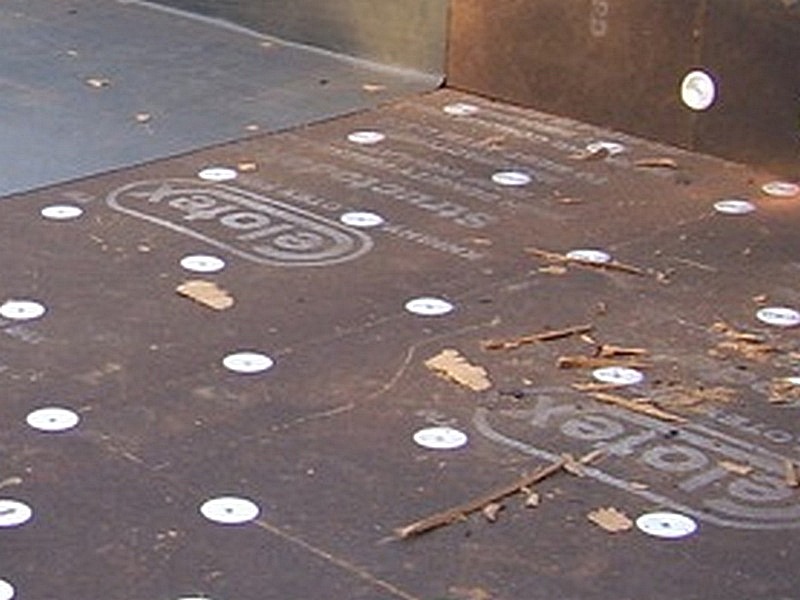
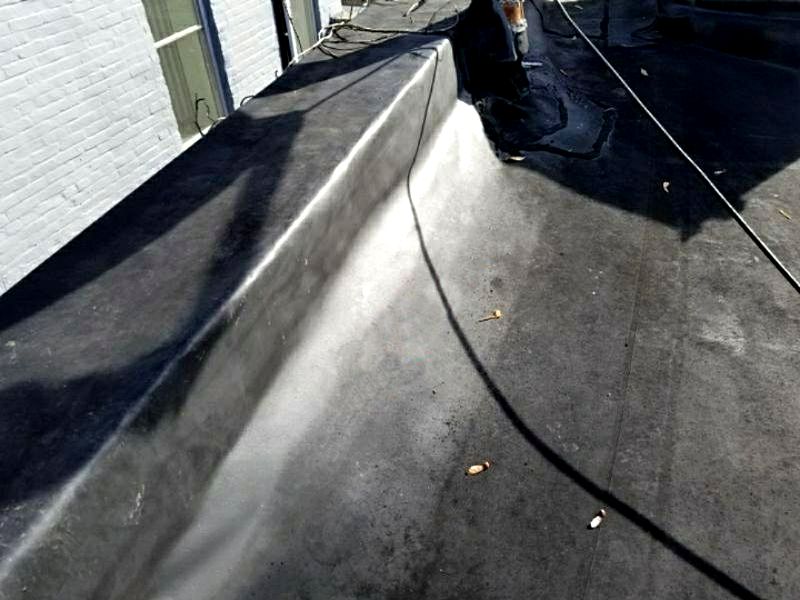
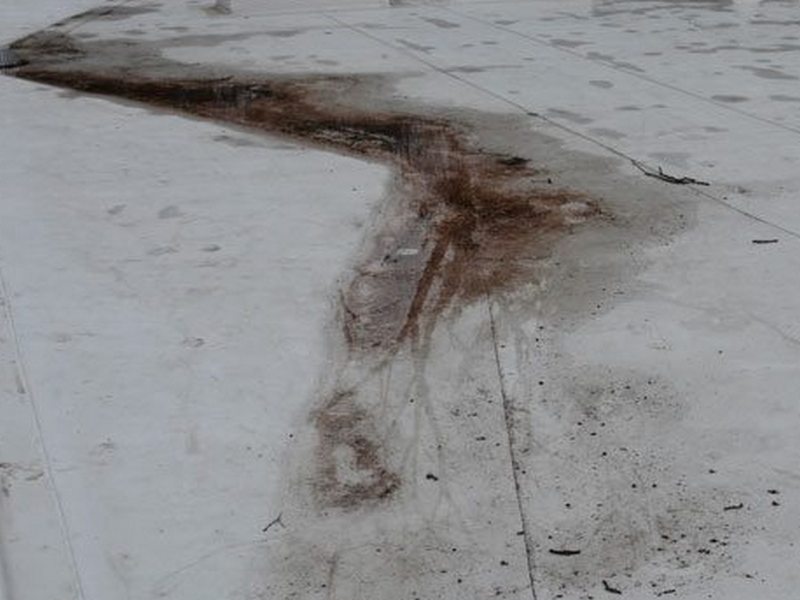
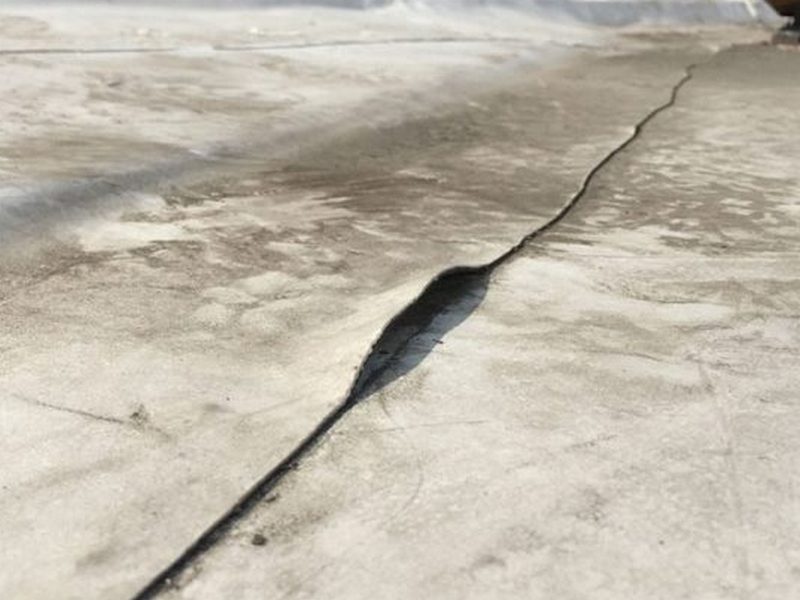
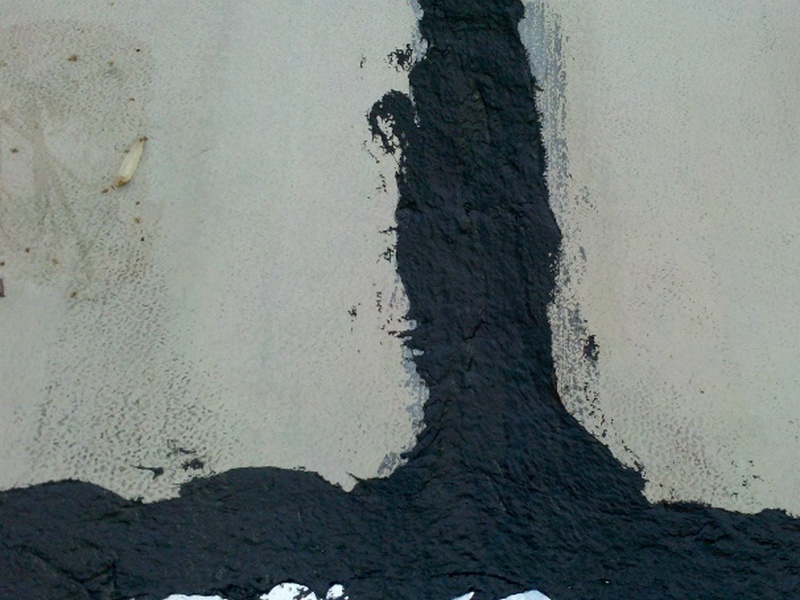
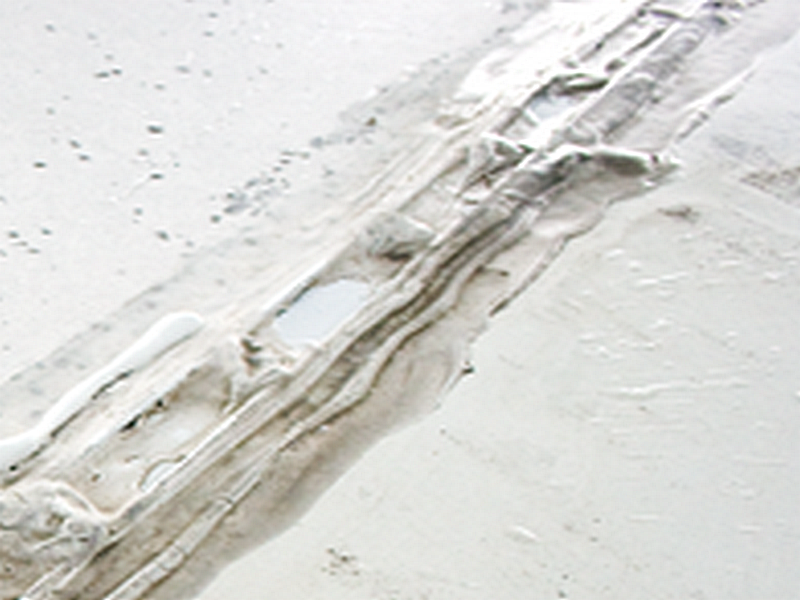
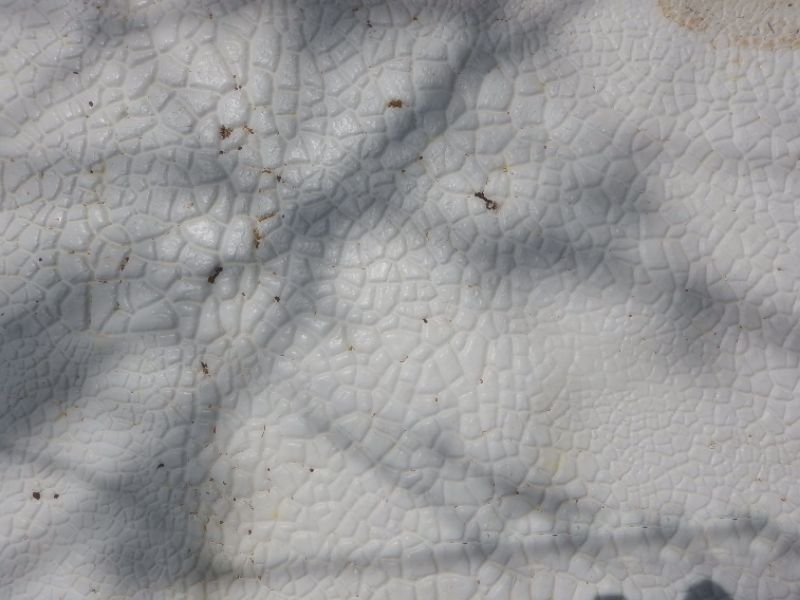
Modified Bitumen is a rolled-out membrane. It comes in a smooth and a granular finish, and is suitable for low-sloped and flat surfaces. MB should be installed on a smooth decking surface. Watch for regular raised seams under the membrane, or for a “crunchy” sound or feel when walking on the roof. This indicates an installation directly over an old metal roof. It is improper, and will void the material’s warranty and fail prematurely.
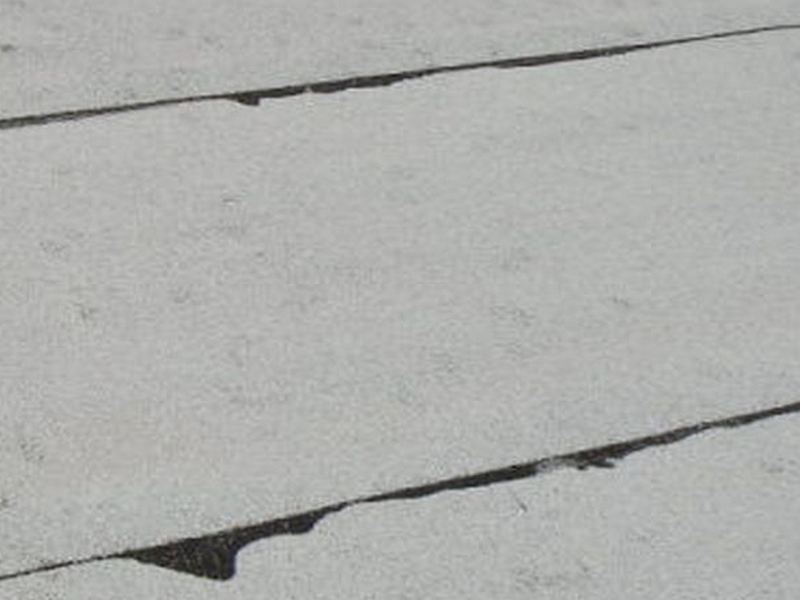
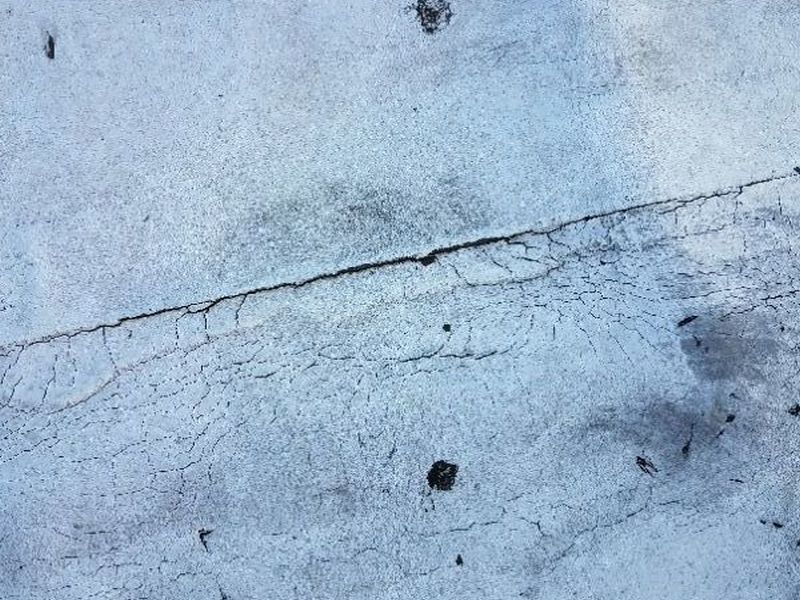
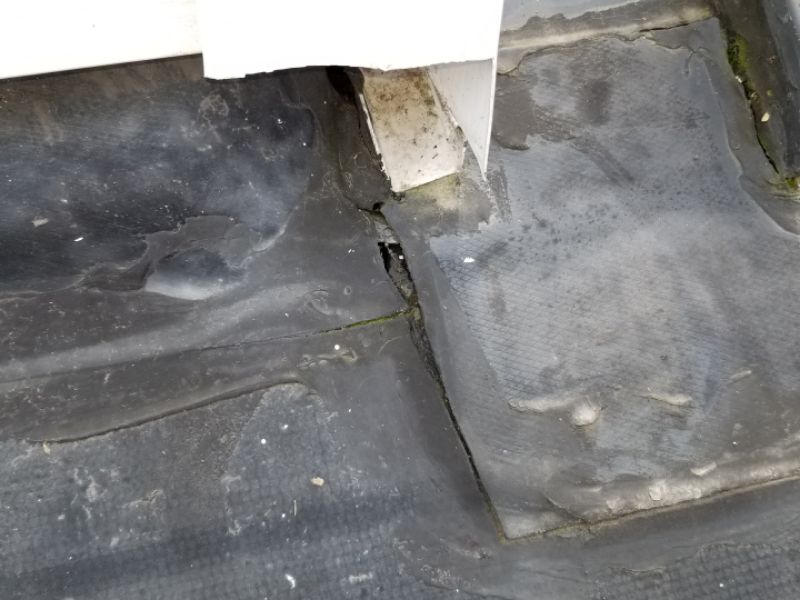
Always inspect the seams, edges, overlaps, and transitions. They should be tight with no signs of lifting or looseness. All overlaps in a torched-down system should show a “bleed-out” of asphalt approximately 3/8”. Smooth surfaces should have a consistent reflective coating in good condition. Peeling, flaking, cracking, and bare spots should be reported. Be alert to nail head bumps. These indicate past moisture penetration and decking deterioration that’s causing fasteners to back out. Soft spots underfoot should be reported. The membrane should not have blisters, wrinkles, splits, or loose areas. Be alert to evidence of ponding, which should be reported. Repairs with tar or caulk on the surface or at seams should be reported as temporary measures and not reliable.
Granular torched-down modified bitumen showing proper “bleed-out.”
The reflective coating on the roof membrane is failing or inadequate. This affects the roofing’s performance and will cause premature deterioration. Repaint the roofing.
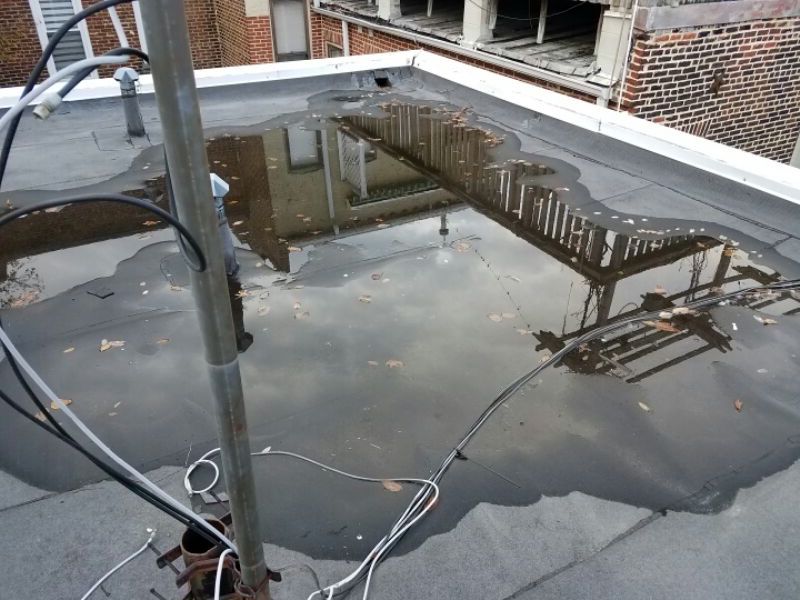
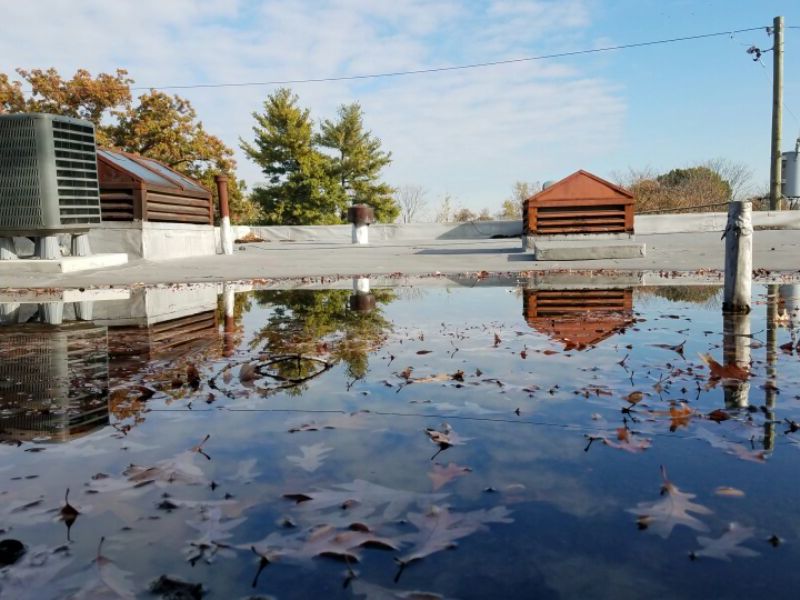
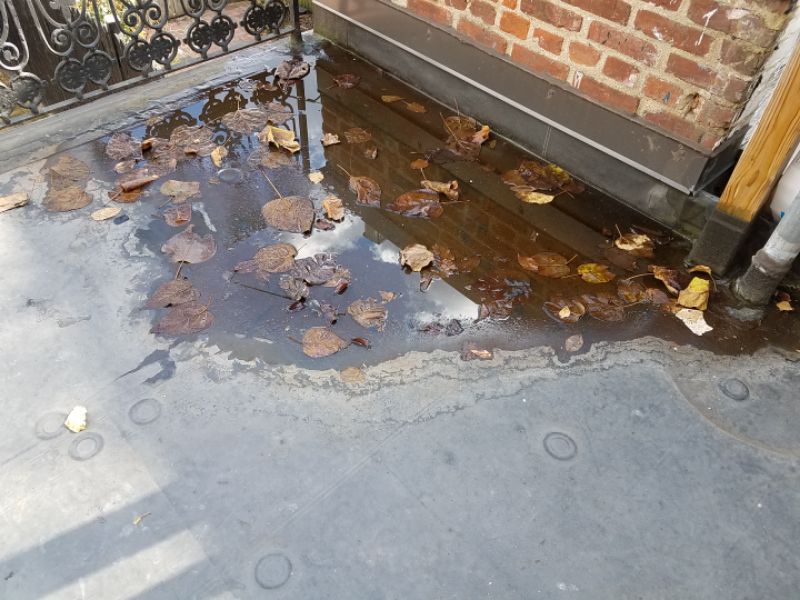
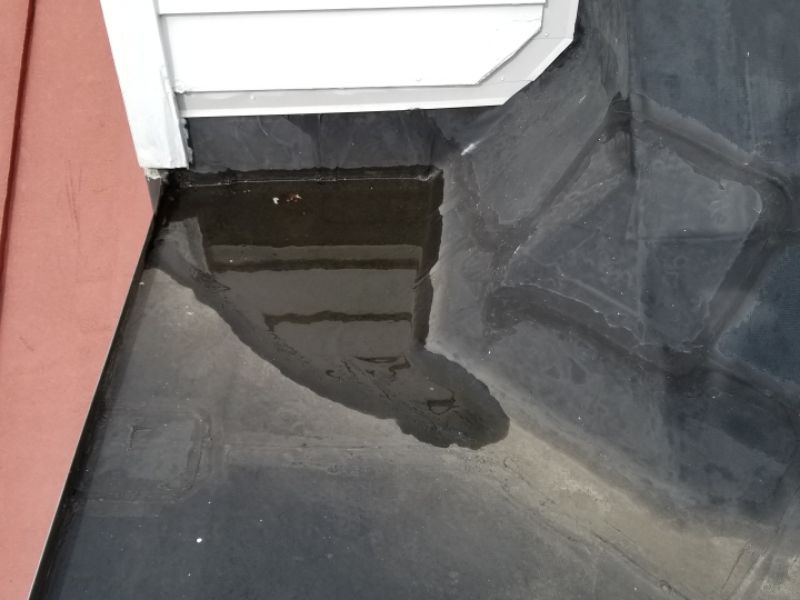
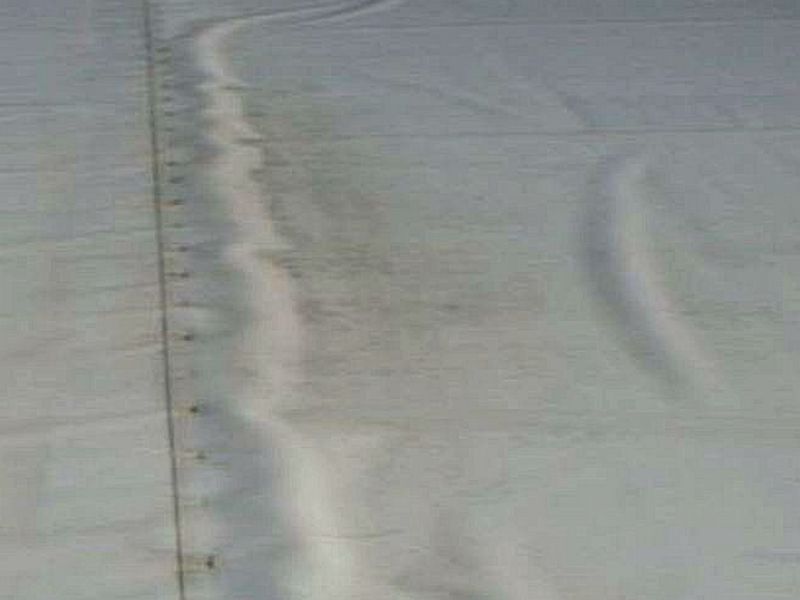
There is excessive ponding of water on the roof. Standards require that water evaporates within 48 hours after the rain stops. This can cause premature failure and leaks. Hire a roofing contractor for an evaluation and to provide repairs or replacement as needed.
There are seams on the roofing membrane which need resealing to prevent further damage and leaks. Hire a roofer for repairs or replacements as needed.
There have been repairs to the roof covering with asphalt or caulking. This type of repair is subject to failure and should be considered temporary. Hire a roofing contractor to evaluate the condition and to make repairs as required.

The membrane has moisture spots or blisters. This indicates trapped moisture and possible pinhole leaks. Hire a roofing contractor to evaluate the condition and to make repairs as required.
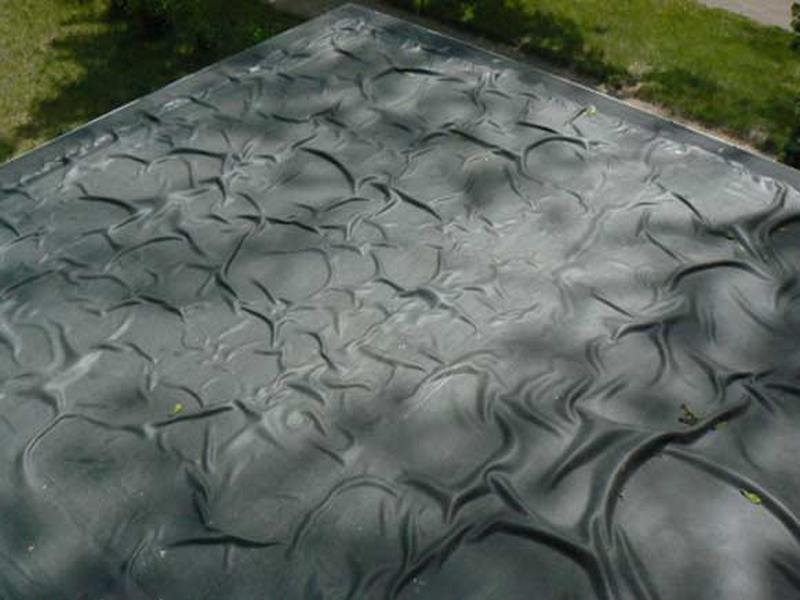
The membrane is improperly installed. There are loose and buckled sections. This can cause membrane damage and premature failure. Hire a roofer to remove and replace the membrane.
The roof covering is old, worn, and deteriorated. The membrane has significant cracking. Repairs would not be practical or reliable. Replace the roofing.
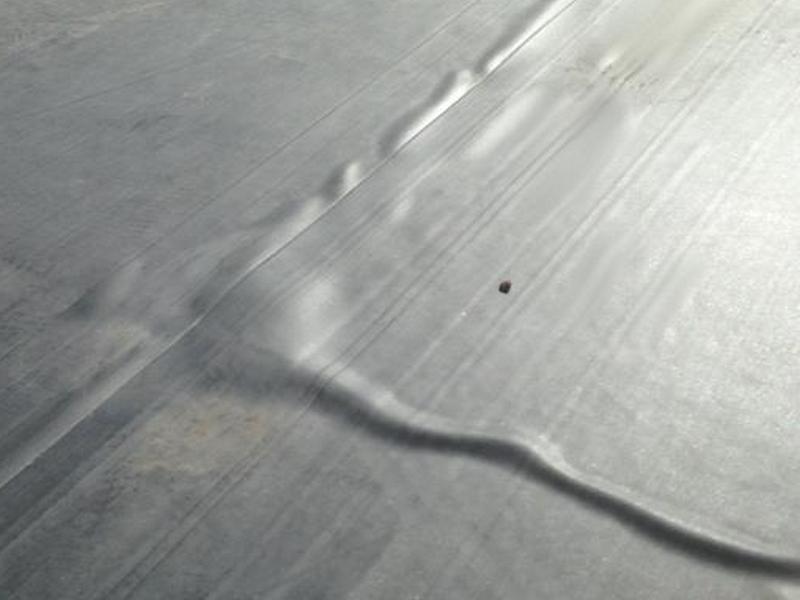
EPDM is a low-sloped/flat roof membrane often referred to as “rubber” roofing. It is similar in look and feel to inner tube material. Residential roofs are usually installed fully adhered to the decking with mechanical bars and buttons on the vertical sidewall terminations. The membrane is stretchy and resilient. EPDM is not affected by ponding. Nevertheless, manufacturers recommend positive drainage; water weight can exceed stress limits, and freeze-thaw cycles over seams can cause failures. EPDM is incompatible with asphalt-based roof cements or mastics. Only approved primers and adhesives can be used for installations or repairs.
Inspect the seams, edges, overlaps, and any transitions. They should be tight without lifting or looseness. The overall membrane should be tight to the decking without loose areas or wrinkles. Impressions of regularly-spaced circles are normal: the underlayment board is usually attached with large washers at the fasteners. Look for small beads of moisture on the surface which indicate possible pinhole leaks allowing trapped water to escape. EPDM is prone to shrinkage. Over a larger surface this can cause bridging off of the deck. This should be reported as it will encourage premature failure.
Installing EPDM underlayment with washers: Seeing an impression of the washers on the finished roof is OK as long as there aren’t beads of moisture showing (or any debris underneath!).
There is excessive ponding of water on the roof. Standards require that water evaporates within 48 hours after the rain stops. This can cause premature failure and leaks. Hire a roofing contractor for an evaluation and to provide repairs or replacement as needed.
There are seams on the roofing membrane which need resealing to prevent further damage and leaks. Hire a roofer for repairs or replacements as needed.
The membrane has been improperly repaired using asphalt or caulk. These are incompatible with this material and will fail, causing leaks. Hire a roofing contractor to evaluate the condition and to make repairs as required.
The membrane is improperly installed. There are loose and buckled sections. This can cause membrane damage and premature failure. Remove and replace the membrane.
The membrane is improperly installed. There are loose and buckled sections. Additionally, the wall termination is using asphalt, which is incompatible. This can cause membrane damage and premature failure. Remove and replace the membrane.

The roof membrane has separated from the decking and is “tenting.” This stresses the EPDM and will cause premature failure and leaks. Hire a roofer for repairs or replacements as needed.
The membrane has moisture spots or blisters. This indicates trapped moisture and possible pinhole leaks. Remove and replace the membrane.
The roof covering is old, worn, and deteriorated. Repairs would not be practical or reliable. Replace the roofing.

These low-slope/flat roof membranes are usually white, fully adhered to the roof deck in residential applications, and may use mechanical bars and buttons on vertical sidewall terminations. They are very similar in appearance. PVC is somewhat shinier and more slippery, and is not unlike a swimming pool liner. Both are “thermoplastic”, meaning that they are softened with heat to weld the seams together, which then re-harden for a permanent bond. Modern, higher-quality versions of these membranes have similar performance in the field. PVC has shown some instance of outgassing its plasticizers, leading to brittleness and less UV resistance.
Both PVC and TPO are incompatible with tar and asphalt mastics and caulks. Repairs should be made with fully-prepared and heat-welded patches. Inspect the seams, edges, overlaps, and any transitions. They should be tight with no signs of lifting or looseness. The overall membrane should be tight to the decking and free of loose areas or wrinkles. Be alert to evidence of ponding, which should be reported.
There is excessive ponding of water on the roof. Standards require that water evaporates within 48 hours after the rain stops. This can cause premature failure and leaks. Hire a roofing contractor for an evaluation and to provide repairs or replacement as needed.
There are seams on the roofing membrane which need resealing to prevent further damage and leaks. Hire a roofer for repairs or replacements as needed.
The membrane has been improperly repaired using asphalt or caulk. These are incompatible with this material and will fail, causing leaks. Hire a roofer for repairs or replacements as needed.
The membrane is improperly installed. There are loose and buckled sections. This can cause membrane damage and premature failure. Remove and replace the membrane.
The roof covering is old, worn, and deteriorated. Repairs would not be practical or reliable. Replace the roofing.
This low-slope/flat roofing system is sometimes referred to as “tar and gravel”. It has been falling out of favor due to modern membranes such as EPDM and TPO. Additionally, they are relatively high maintenance, labor-intensive systems. A BUR’s quality and longevity is very dependent on the installation’s workmanship, methods, and proper maintenance. BUR roofing consists of between 3 and 5 layers of asphalt roofing sheets or tar paper. Each successive layer is mopped down, usually with hot asphalt. A top layer of gravel ballast or a granular top sheet is installed. This serves as UV protection. A raised “gravel stop” flashing should be installed at the perimeter if ballast is used.
Inspect for a full and complete top coat. Voids should be reported. Make note of any areas that are soft or spongy underfoot. Inspect for blisters, which indicate trapped moisture or air under the plies. They can stretch and stress the membrane, and leave exposed UV-vulnerable areas. Cracking, open seams, and gaps or separations from the flashings are notable. Ridges, which unlike blisters are usually hard to the touch, form at joints and seams. They can allow ponding. Be alert to signs of temporary and ongoing repairs such as heavily-applied mastic or flood coats. Poor drainage and ponding should be reported.
The built-Up roofing has bare spots not covered by gravel. These are vulnerable to UV damage and will fail, allow leaks. Hire a roofing contractor for repairs as needed.
There are blisters on the built-up roofing. This indicates trapped moisture between the roofing layers, and will cause premature deterioration and leakage. Hire a roofing contractor for repairs or replacements as needed.
The roof covering is old, worn, and deteriorated. Repairs would not be practical or reliable. Replace the roofing.

Atlas Roofing Corporation is a manufacturer of building materials based in Atlanta, Georgia. During the 2000’s, Atlas produced a 3-tab asphalt shingle sold under the name “Chalet”. The shingles were sold primarily in the Southeastern United States and were marketed as an affordable alternative to more expensive architectural shingles.
USEFUL LINK: Atlas Chalet Shingles
ALLEGED PROBLEMS
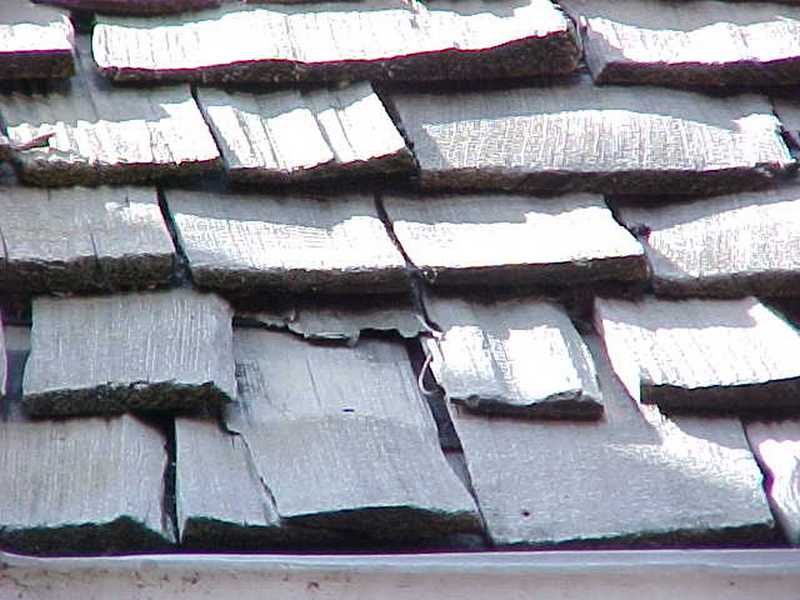
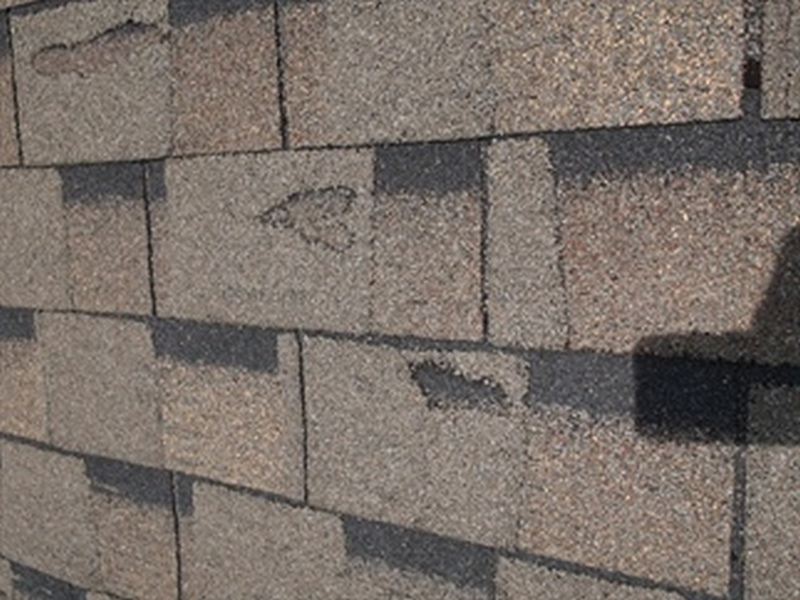
Atlas Chalet shingles were purposely manufactured with varying levels of granule thickness on the face of the shingle. This manufacturing process created a low-cost product similar in appearance to an architectural shingle. Within a few years of installation, homeowners began complaining the shingles were failing due to a manufacturer defect.
Claims have been made that the manufacturing process made the shingles susceptible to premature failure. Signs of failure are alleged to include blistering, cracking, and moisture penetration, all of which could lead to reduced life expectancy. Atlas marketed the shingles with a 30-year warranty, but the company has not honored the warranty up to this point as it relates to these specific claims.
LAWSUIT
Atlas discontinued Chalet shingles in 2010. In at least a handful of situations, homeowners have turned to the legal system for help. Initially, lawsuits were filed in Alabama, Georgia, North Carolina, South Carolina, Virginia, Ohio and Tennessee. In 2014, these suits were compiled into multi-district class-action litigation under the jurisdiction of the U.S. District Court for the Northern District of Georgia. Currently, plaintiffs’ attorneys are seeking additional homeowners with Chalet shingles installed to join the suit and strengthen their case.
REPLACEMENT
Defective and/or failed shingles cannot be repaired. Replacement is the only option, and usually requires that the entire roof be replaced. Care should be taken to document the currently installed roofing materials in the event a class-action settlement is reached in the future on behalf of all effected homeowners.
IDENTIFICATION
Atlas shingles are most readily identified as they are a “mock” dimensional shingle. They are a 3-tab product with thickened areas of granule. This gives them the appearance of an architectural product.
Common modes of failure are blistering, pitting, granule loss, delamination, and cracking. The damage tends to occur in the built-up areas that imitate the extra layers found in architectural shingles. Due to the problems during failure, the shingles tend to absorb moisture, and are prone to wind damage, lateral cracks, and tear-off.
These pictures show both the built-up granule feature, as well as the common blistering that occurs.
If you’re lucky, you can access a portion of the underside where the shingles are labeled.
Blistering can cause significant delamination. Cracking is also a common failure mode.
Roof Covering Limitation and Information Statements
Areas inaccessible/not visible due to height, design, materials: There are areas of the roof which are inaccessible and/or not visible due to height, design, and materials. Therefore, the inspection is significantly limited. We recommend further evaluation by a roofing specialist.
Areas inaccessible/not visible due to deck: There are areas of the roof which are inaccessible because of an installed deck. Therefore, the inspection is significantly limited. Repairs or replacement of the roofing would be difficult, i.e., dismantling or removal of the deck would be required.
Areas inaccessible/not visible due to solar panels: There are areas of the roof which are inaccessible because of installed solar panels. Therefore, the inspection is significantly limited. Repairs or replacement of the roofing would be difficult, i.e., dismantling or removal of the solar panels would be required.
Painted with coating/sealant, future maintenance/replacement: The roof is painted with coating/sealant. Therefore, the inspection is significantly limited. Paint can seal cracks and/or obscure evidence of moisture intrusion. Sealant typically is used after water control issues occur and is often applied to delay replacement of the roof. This method does not address any previous leaks or associated damage and the long-term integrity of this type of application is questionable. Anticipate future maintenance and/or replacement.
Prior repairs, difficult to evaluate cause/extent: There have been repairs to the roof covering. It is difficult to evaluate the cause and extent of repairs. You should ask the owner about the problems they had, when the repairs were done, who did them, if they have a receipt for the work, if there is a warranty in effect , and if the warranty conveys with the property.
Near/at end useful life, budget for replacement: The roof covering is near or at the end of its estimated useful life. We recommend establishing a budget to replace the roof covering.
Past end useful life, budget for replacement: The roof covering is past the end of its estimated useful life. We recommend establishing a budget to replace the roof covering.
Two shingle layers: There are two layers of shingles on the roof. Roof structures generally are designed to support a maximum of two layers. When the roofing system requires replacement, both layers will need to be removed prior to installation of new roofing materials.
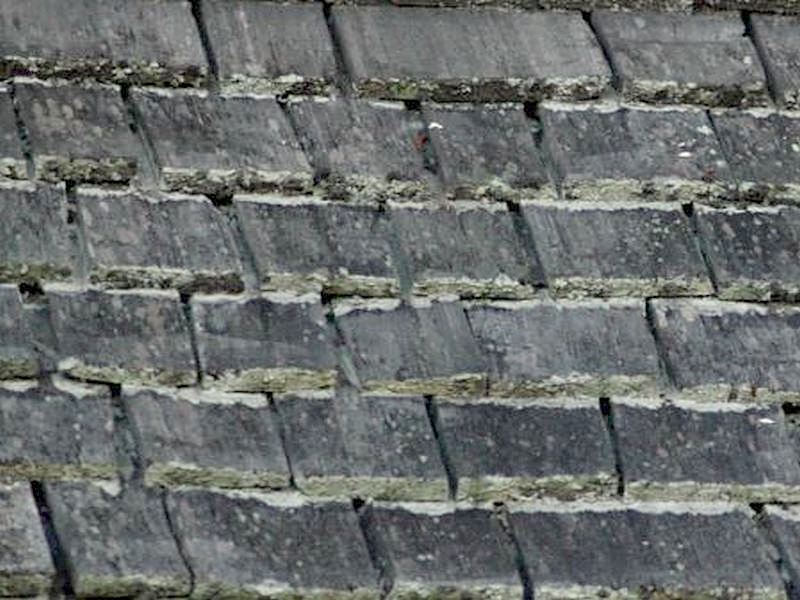
Asbestos shingles: The roof covering appears to be cement asbestos shingles. Asbestos content can be confirmed only by laboratory analysis. Asbestos cement shingle roofing is brittle and should not be walked on except by qualified, insured roofers. If the roof requires replacement or repair, there are special handling and disposal requirements because of health and safety issues. Check local solid waste authority regarding disposal of the asbestos cement shingles.
Built-up membrane/multi-ply system: A built-up membrane roof covering is a multi-ply system, the longevity of which is dependent on the quality of installation and regular maintenance. The top of the roof covering usually is covered with gravel or rock to reflect ultra-violet light and to protect the roof from mechanical damage. The roof becomes vulnerable as aggregate loosens or exposes the membrane to the sun. Seams may begin to open, followed by leaks. Blisters and bubbles can form where moisture is trapped between the felt plies. Leaks are very difficult to isolate on this type of roof, as water can travel a great distance through the plies before becoming apparent. Flashings, if present, are often covered with roofing materials and cannot be evaluated.
Metal skin appears intact with minimal damage or oil-based covering remaining: The roof’s metal skin appears intact with little apparent damage or oil-based covering remaining. We recommend that you consider an “acrylic-based” approach to metal roof servicing as recommended by many metal roof product manufacturers. Water-based coatings have the advantage of remaining flexible. Oil products become brittle, which shortens their adhesion and effective working life. The purpose of a coating on metal roofing is to protect the metal with a “sacrificial” layer. Brittle cracked oil coatings permit moisture intrusion and will corrode the actual metal.
Metal roofing requires regular coating and maintenance: Metal roofing requires regular coating and maintenance to inhibit rust and corrosion. Avoid asphalt and tar compounds, which trap moisture against the metal and encourage corrosion.
Apply maintenance coating to non-granular single-ply modified bitumen every three to five years: Apply a maintenance coating to non-granular single-ply modified bitumen every three to five years.
Estimated age based on visual clues and condition, exact age not determined:The estimated age of the roofing materials is based on visual clues and condition. Without documentation, the exact age of the roofing cannot be determined. Check with the owner to determine if there is any documentation available, or if there are any warranties in effect regarding the roofing materials and workmanship.
Full scope of roofing system condition not included: The full scope of the roofing system’s condition is not included in this report due to an independent specialist’s evaluation. Refer to the specialist’s report(s) for more information and required actions. Any observations are provided as a courtesy.
Wood shakes and shingles: Wood shakes and shingles are fragile compared to other roofing materials. Therefore, anticipate regular maintenance to prolong the roof’s serviceability. Proper maintenance of this type of roof should include the removal of debris and the periodic coating of the surface with a wood preservative product with a fungicide and some form of ultraviolet protection. Products listed as sealants, water proofers, or plasticizers should not be used. Individually rotted or defective pieces should be replaced as required.
Flashing
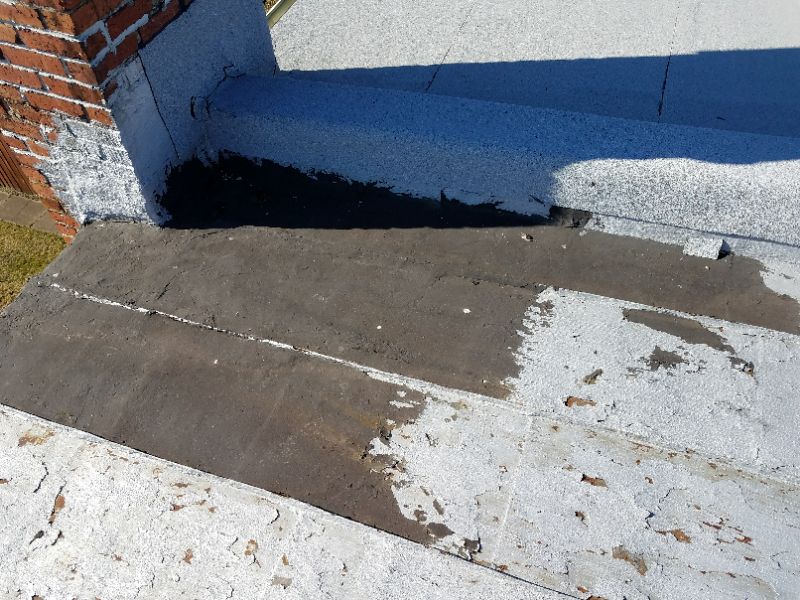
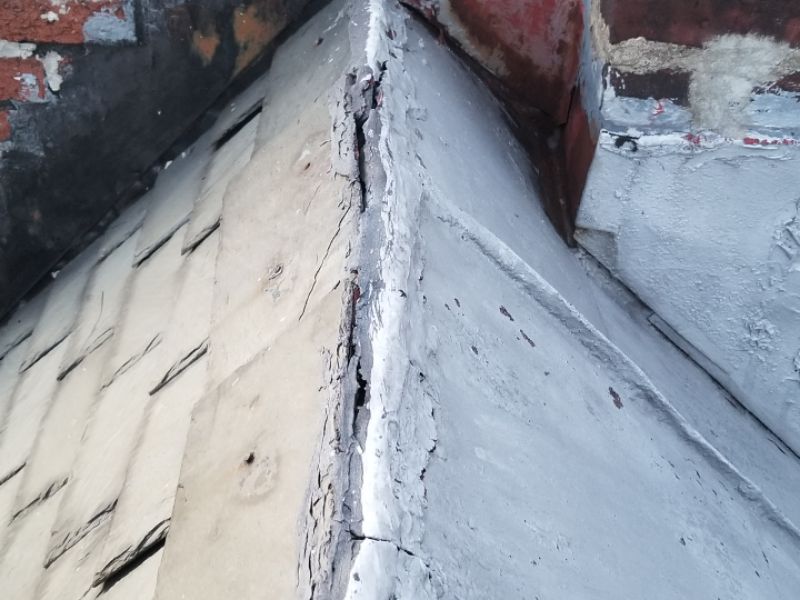
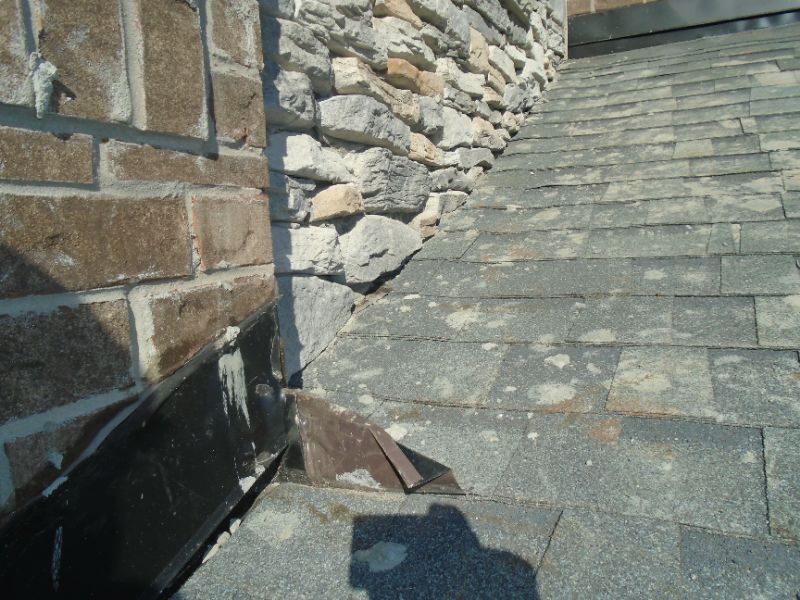
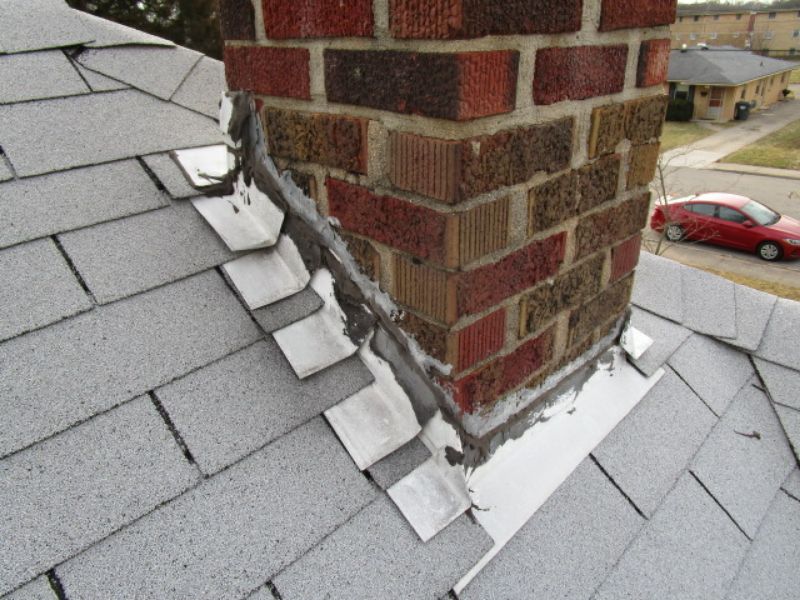
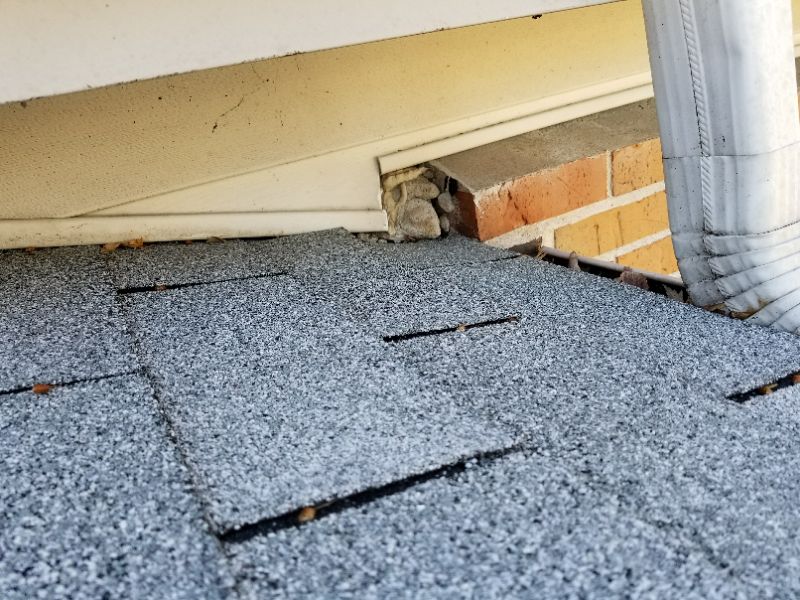
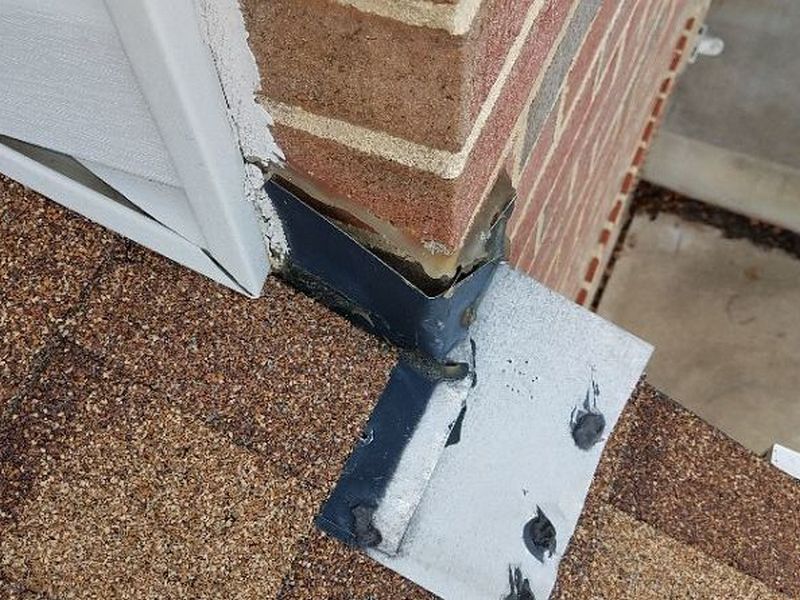
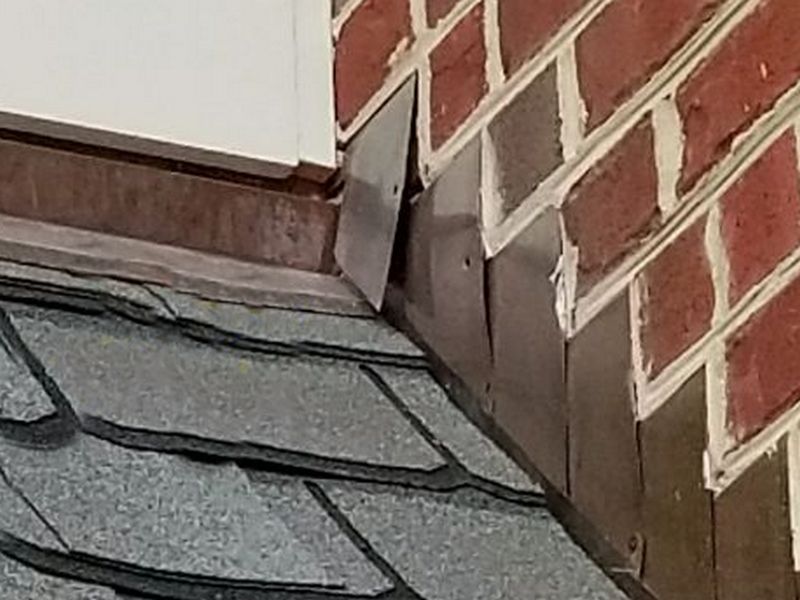
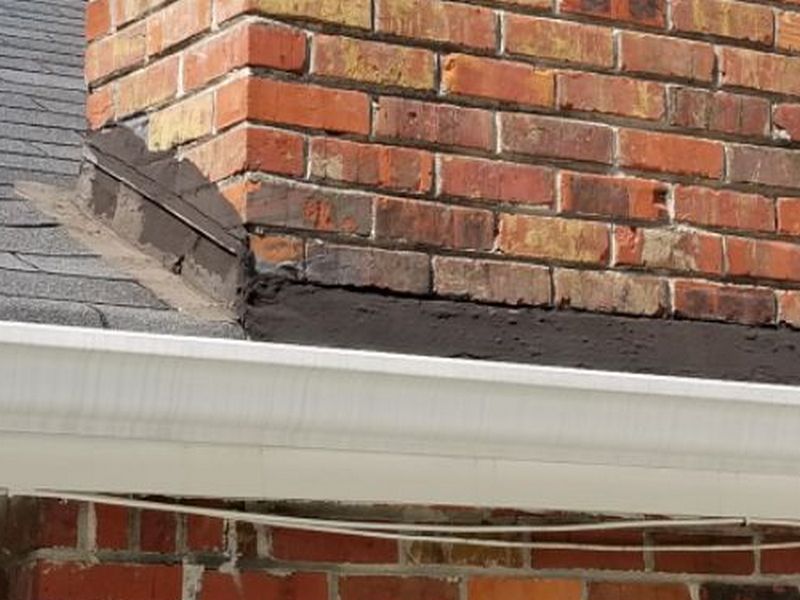
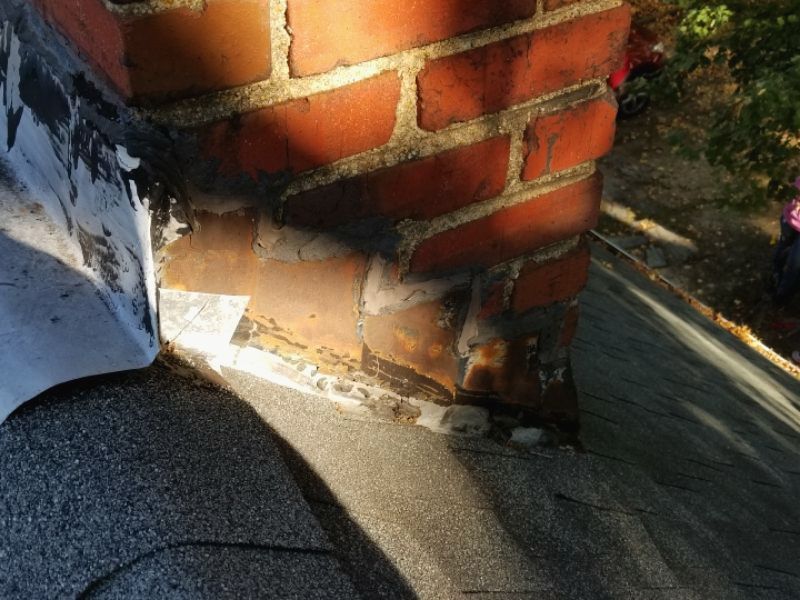
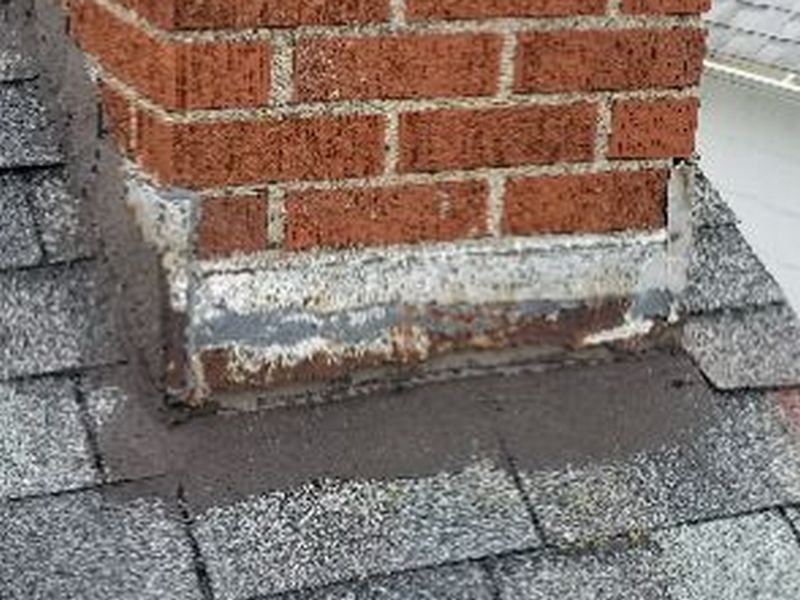
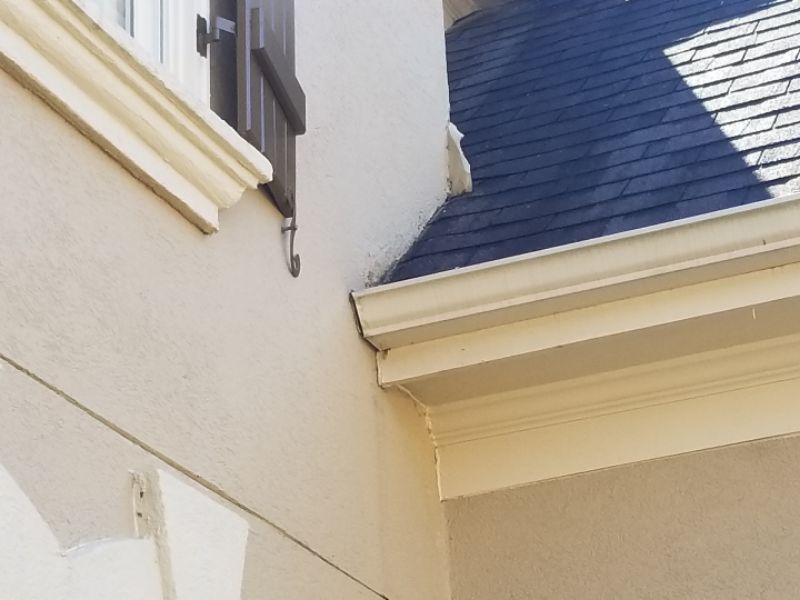
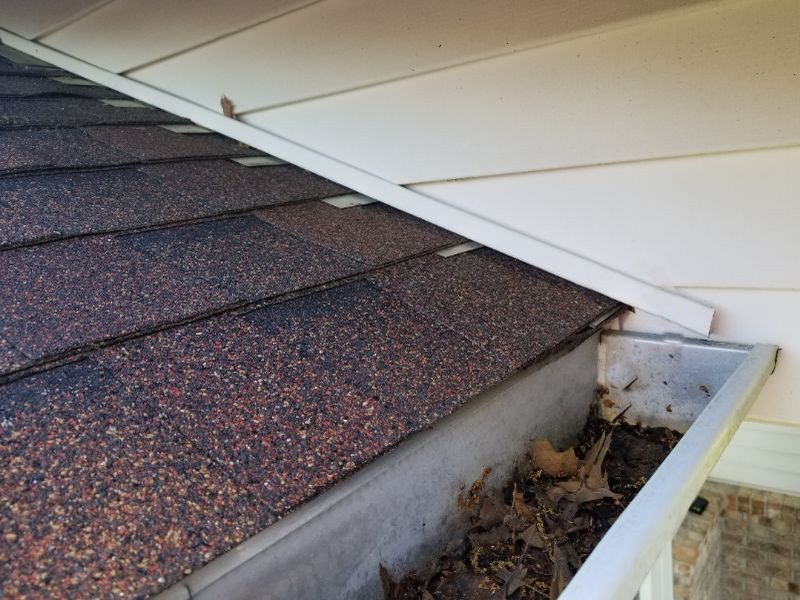
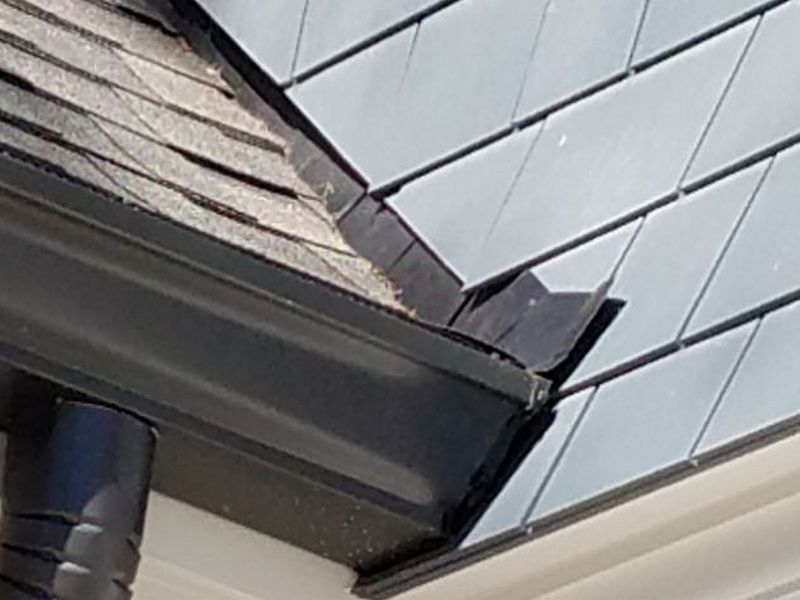
Flashings prevent water intrusion where the roof changes direction or meets another part of the home, e.g. a wall, chimney, or roof penetration. They are also installed at the eaves and sidewalls, where they can prevent water from wrapping under the roofing (drip edge flashings) or driving into the home (kick-out flashings). Roof valleys are also flashed. The majority of roof leaks occur at the flashings. Properly-installed systems rely primarily on a mechanical exclusion of water. Overall repairs using caulks or roofing cement should be considered temporary. The flashing on roofing materials that have a very long EUL should be inspected closely. Slate, and clay or concrete tiles can easily outlast the flashings, especially older installations that used galvanized steel flashing.
Inspect all visible flashings for deterioration, damage, missing or loose sections, gaps, lifted areas, and unsealed exposed nail heads. Nails driven through the exposed flashing is permitted only in certain applications. Inspect all caulked edges for gaps, or deterioration. Modern practices allow counter flashings to be nailed in place and the upper edges caulked.
Step flashing is required where the sloping side of a roof meets a wall, chimney, or skylight. Individual L-shaped pieces are placed on top of each course of the roofing before the next course above is installed. A single piece of flashing should not be used instead of step flashing. It is unreliable and should be reported.
For walls, the step flashings should be installed before the siding. The vertical portions are covered by the siding, leaving only about 2” exposed. On a chimney, or a stucco or masonry home, a counter flashing is used. After all step flashings are in place, the counter flashing is installed. In older or high-quality installations, the top of the counter flashing is bent inwards into a cut groove, or reglet, and caulked. Modern practices nail the counter flashing to the surface and caulk the upper edge. Flashings should also be present at the top of the shingles parallel to a wall or a chimney’s downhill side. The lower portion of the flashing lays on top of the roofing. The vertical portion goes underneath the siding. On a home with solid siding (stucco or masonry) or a masonry chimney, a counter flashing should be installed. The top edge of the counter flashing should be let into a reglet or nailed and caulked.
The step flashing is missing. The lack of this flashing, or the use of a single-piece flashing, will allow leakage. Hire a roofer for repairs or replacements as needed.
The counter flashing is missing above the step flashing. This will allow leakage. Hire a roofer for repairs or replacements as needed.

The flashing is missing. This will allow leakage. Hire a roofer for repairs or replacements as needed.
There is a gap in the flashing. This can allow water to enter, causing deterioration of the materials behind and under the flashing. The condition of the materials behind and under the flashing could not be determined and hidden damage may exist. Replace the flashing and repair any damage which may be revealed.

The flashing is loose. This permits water penetration. Secure or replace the flashing.
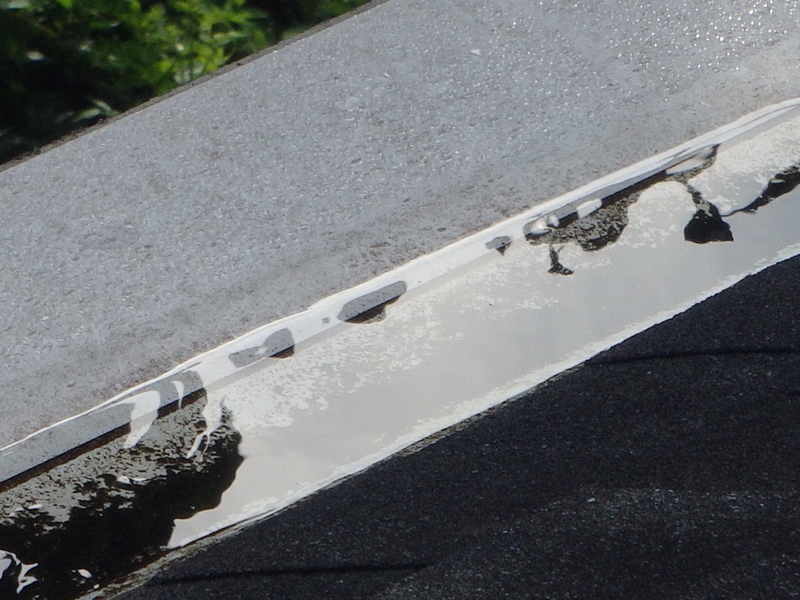
There is excessive tar or caulk applied at the flashing. This is considered a temporary repair that will fail. Replace the flashing.
The flashing is corroded. It is at the end of its service life and is unreliable. Replace the flashing.
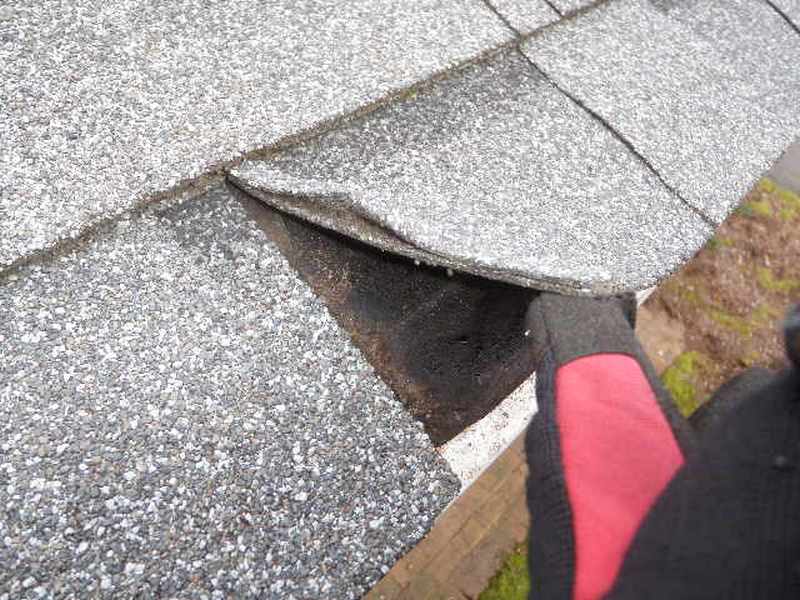
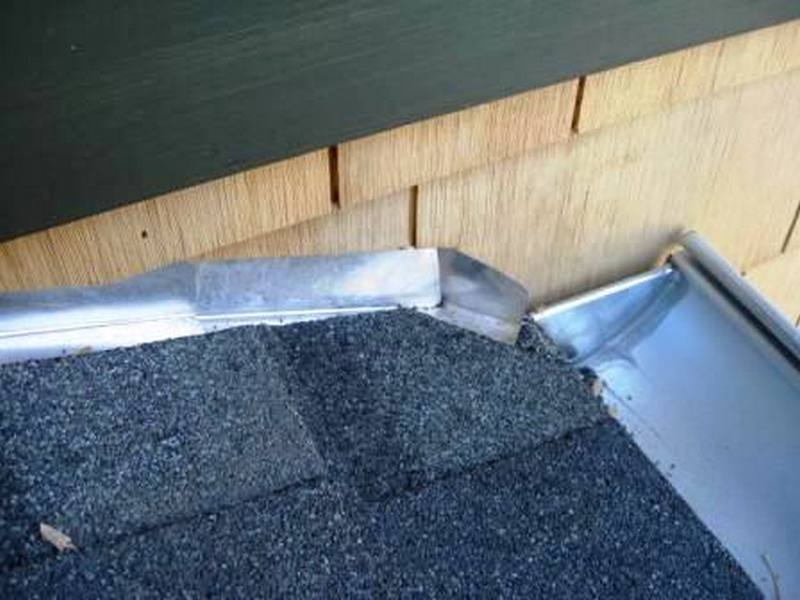
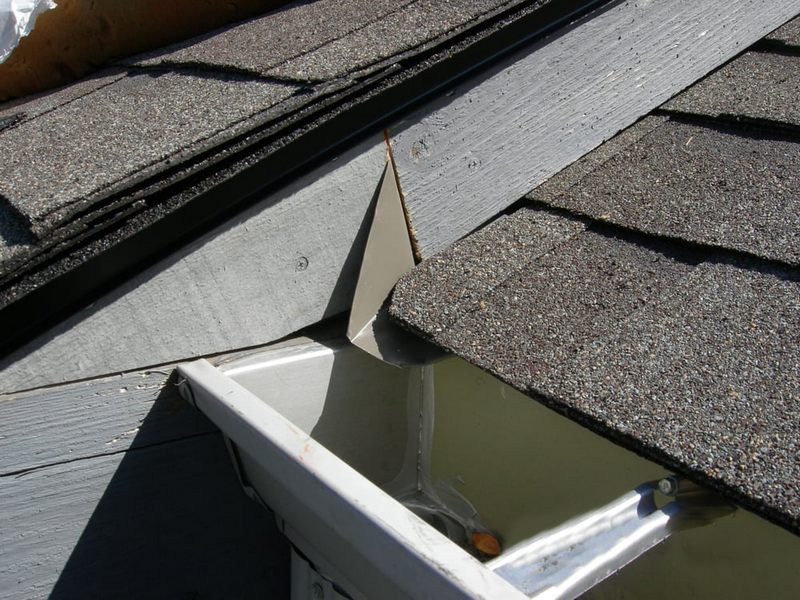
Kickout flashings should be installed at the bottom of any roof slope where the wall or chimney continues past the eave or gutter. They serve to divert water away from the sidewall or chimney and help prevent it from driving into or behind the cladding. Kickout flashings should be an integral part of the roofing/siding installation. They must be behind the siding and step flashing, and under the roofing. They should not be applied on top of shingles or siding. They should have sealed seams, and extend at least 4” to 6” above the eave and away from the sidewall.
The kickout flashing is missing at the juncture of an exterior wall and roof. This can allow water penetration. Replace the flashing and repair any damage which may be revealed.
The kickout flashing is damaged at the juncture of an exterior wall and roof. This can allow water penetration. Replace the flashing and repair any damage which may be revealed.
The kickout flashing is inadequate. It should be installed behind the step flashing and siding, and under the roofing, and project 4″-6″. This can allow water penetration. Replace the flashing and repair any damage which may be revealed.

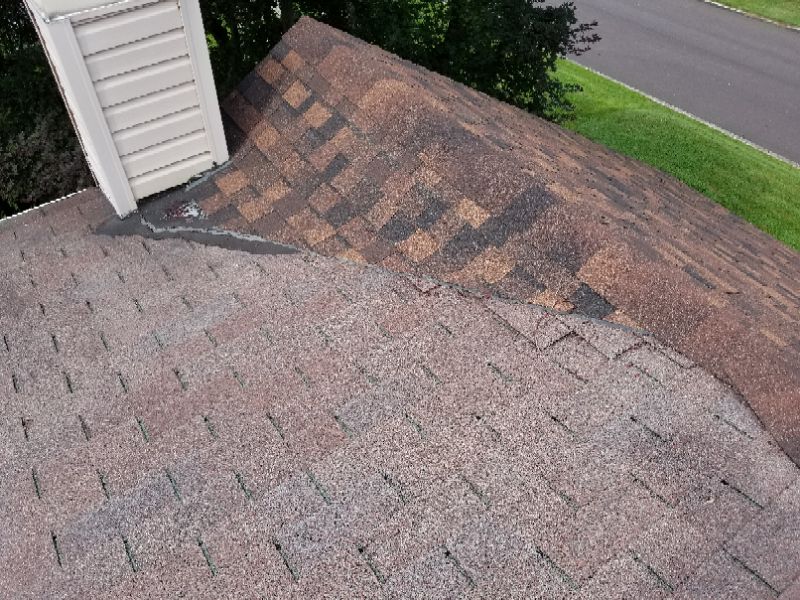
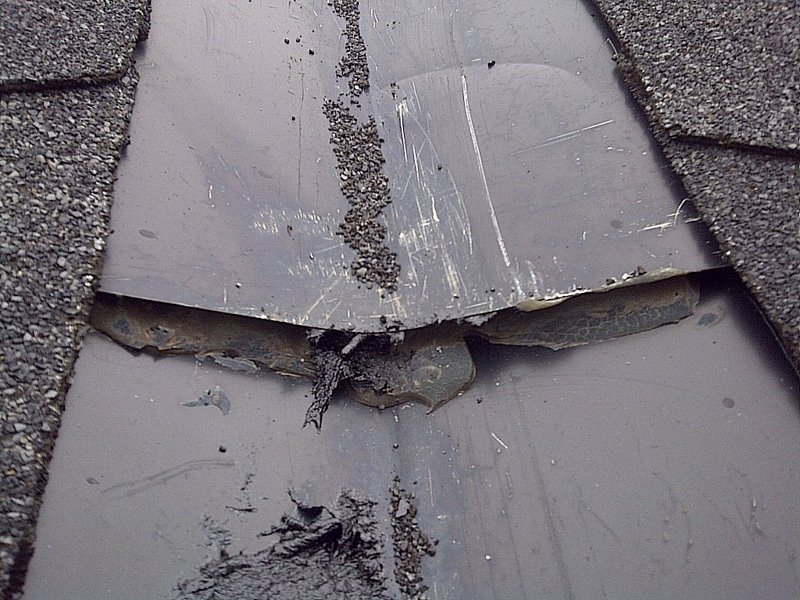
Closed valleys can either be “closed cut” or “woven.” Waterproof membranes should be installed in the center of the valley, but this is usually not visible. A woven valley has the shingles from each roof plane extending across the valley in alternating courses. This type of installation can only be done with 3-tab shingles. Each course must extend at least 12” across the valley on to the intersecting roof. No nails can be within 6” of the valley’s center, and the roofing must be pressed into the valley decking so no bridging is present.
Closed cut valleys can be installed with dimensional shingles. Only the bottom course is woven. After that, shingles on the smaller or lower sloped side of the valley are installed. After the one side is shingled, the larger or steeper slope is installed. Those shingles must also extend past the center line of the valley. Then the larger/steeper side shingles are cut back in a straight line at the valley’s center. The upper corner of each shingle is trimmed at a 45° angle to help direct water out of the valley. A line of sealant should be applied under the edge of the top shingles. The steeper roof, or the larger of equal-slope roofs, must always be “on top”.
The closed, woven valley is improperly installed. The overlap is not correct, and will allow leakage. Hire a roofer for repairs or replacements as needed.
The closed, cut valley is improperly installed. The overlap has been cut back too far, and will allow leakage. Hire a roofer for repairs or replacements as needed.
The closed valley has been repaired with tar or caulk. This is considered a temporary repair that will fail. Hire a roofer for repairs or replacements as needed.
Open valleys have metal flashing down the length of the valley. Any upper section must be on top of the lower one. Be alert to any signs of buckling. The bottom edge of the valley flashing should extend at least ¾” beyond the eave, and should extend at least 12” up under each side of shingles. The gap of exposed flashing should be 6” wide at the top of the valley, and widen by 1/8” per foot moving towards the bottom. The upper corner of each shingle is trimmed at a 45° angle to help direct water out of the valley. A line of sealant should be applied under the edge of the shingles.
There is excessive tar or caulk applied at the flashing. This is considered a temporary repair that will fail. Repair or replace the flashing as needed.
The open valley flashing is rusted. This makes it unreliable and prone to leakage. Hire a roofer for repairs or replacements as needed.
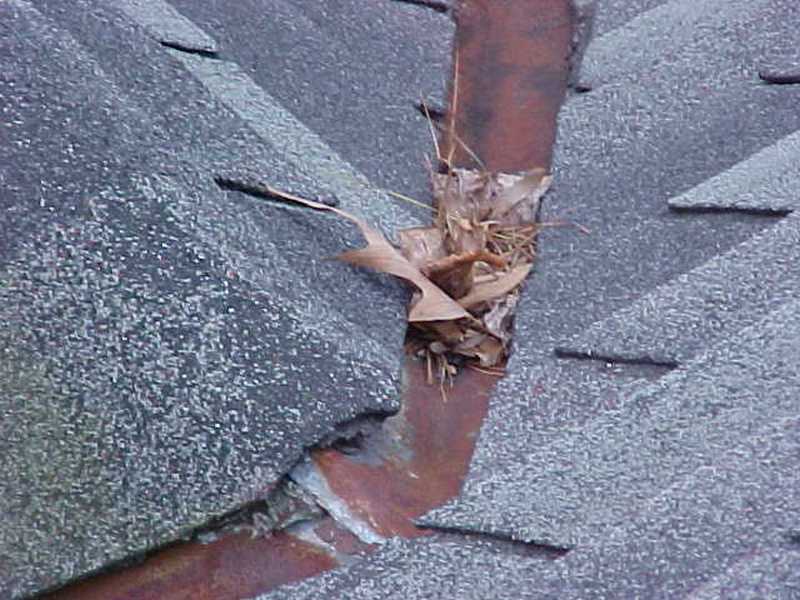
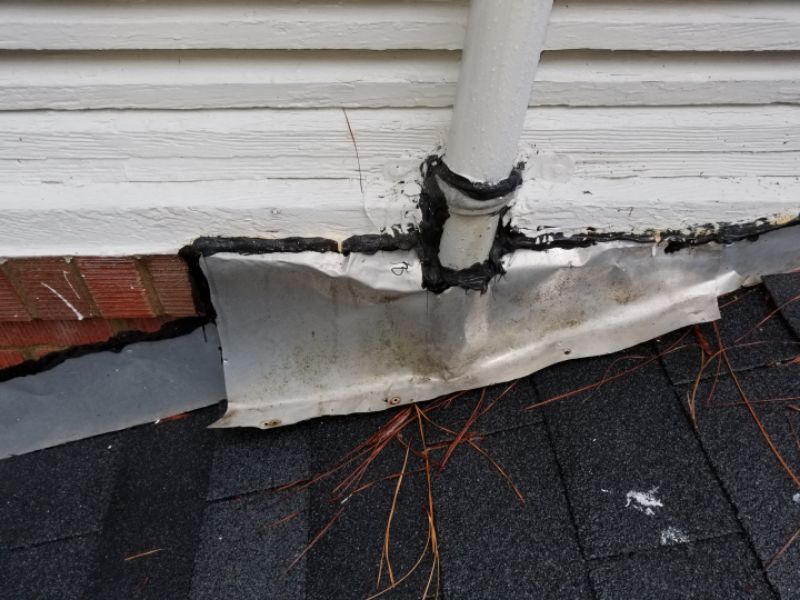
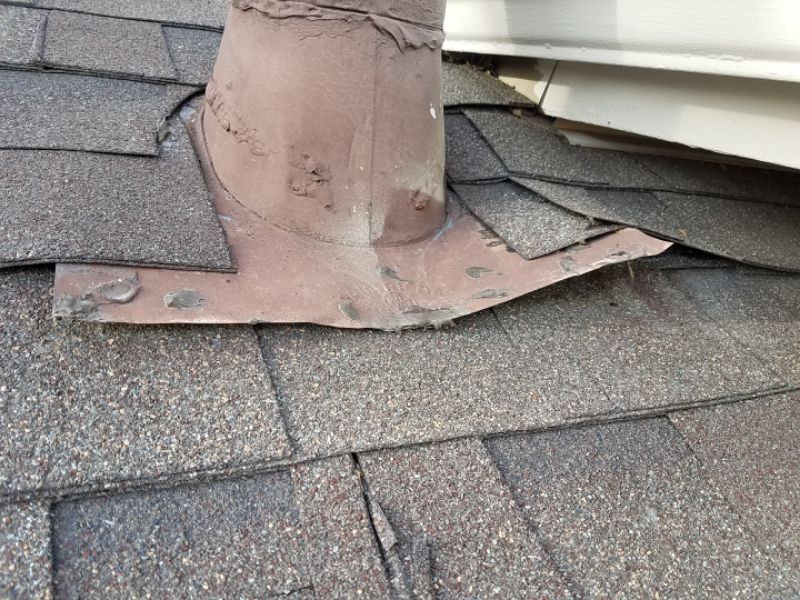
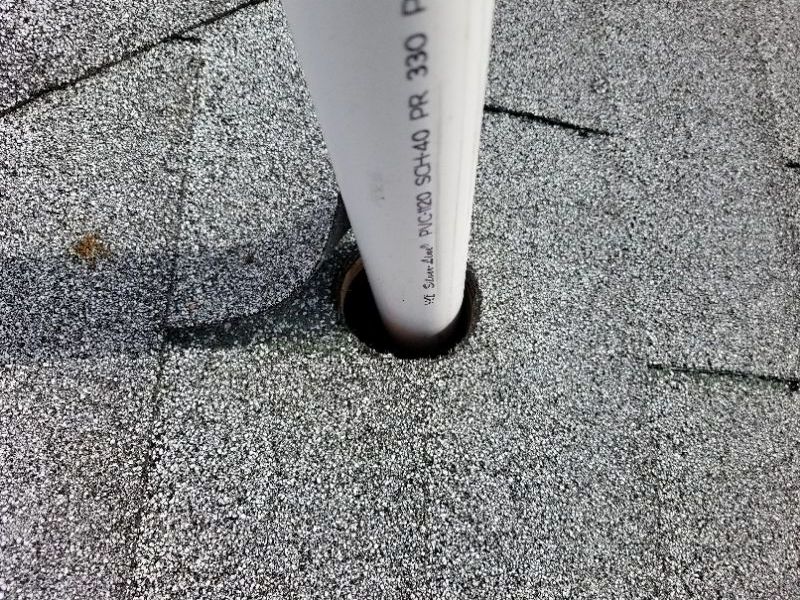
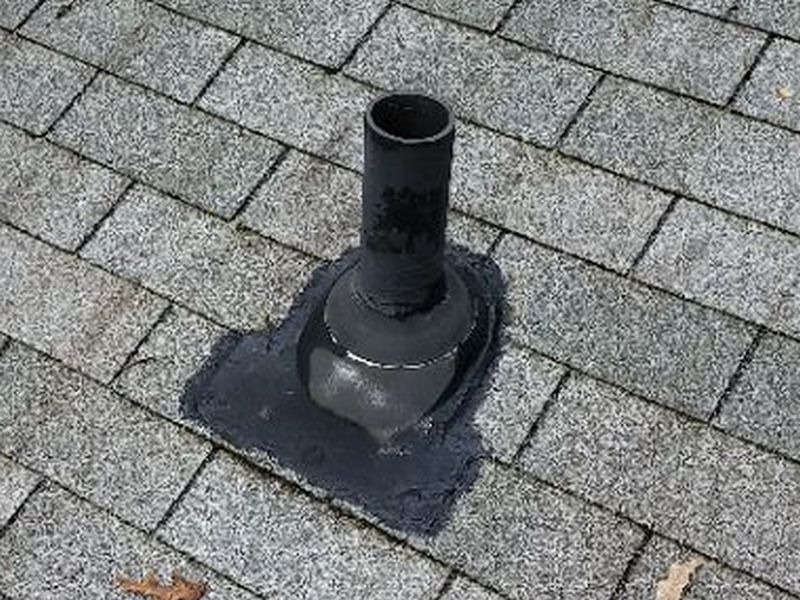
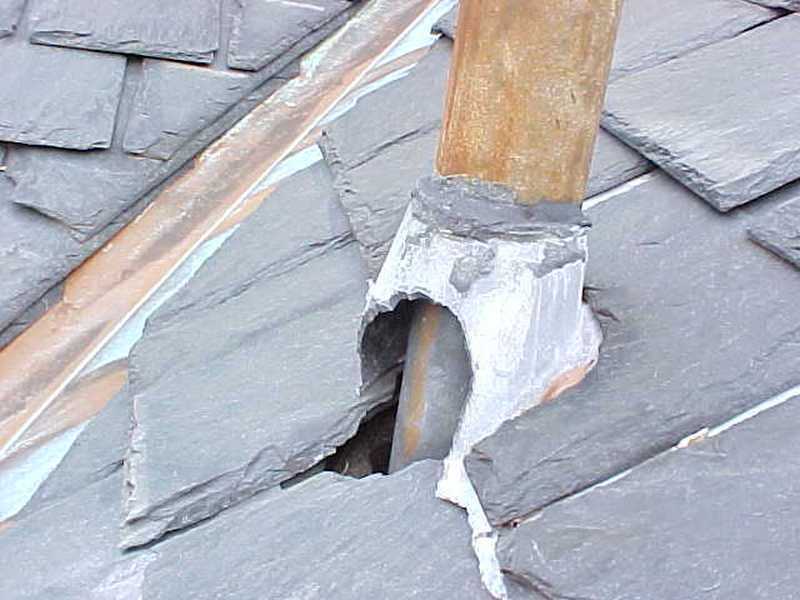
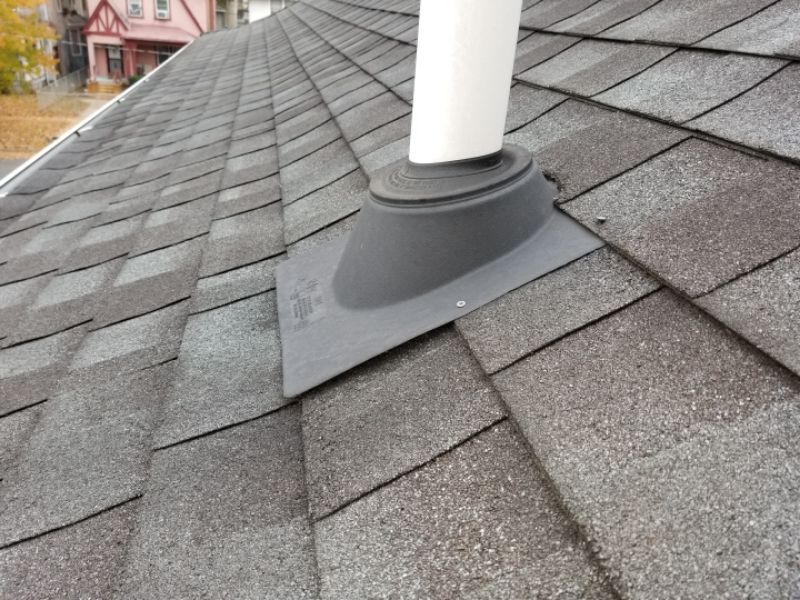
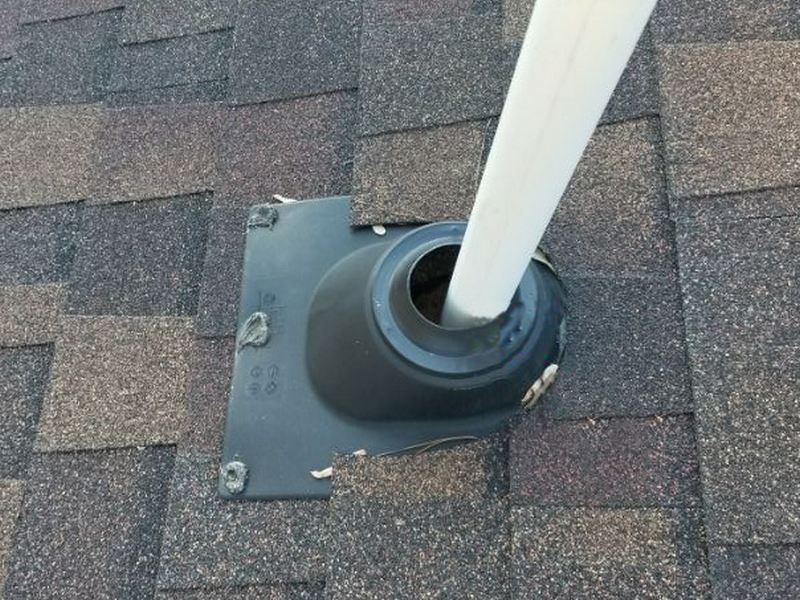
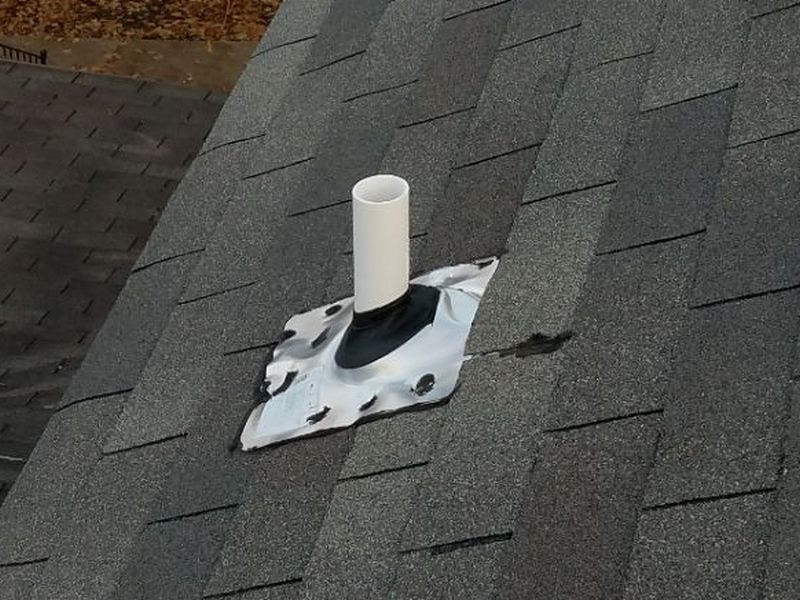
These are used where a DWV vent pipe or a flue penetrates the roof. Entry points for electrical service wires at the mast and HVAC linesets will also use them. They should rely on mechanical exclusion of water as it flows down the roof’s slope. The top forms a saddle flashing. It should be under the roofing, along with the side flashing that’s at and above the roof penetration. Below the penetration the lower portion, or skirt, must be on top of the roofing. Any rubber or flexible sections must be intact and free of openings, tears, or deterioration. Excess tar should be reported as a temporary repair. The flashing should lay tightly on the roofing.
The flashing is lifted. This permits water penetration. Secure or replace the flashing.
The flashing is missing. This allow water penetration. Install flashing and repair any damage which may be revealed.
There is excessive tar or caulk applied at the flashing. This is considered a temporary repair that will fail. Replace the flashing.

The flashing is damaged or deteriorated. This permits water penetration. Replace the flashing and repair any damage which may be revealed.

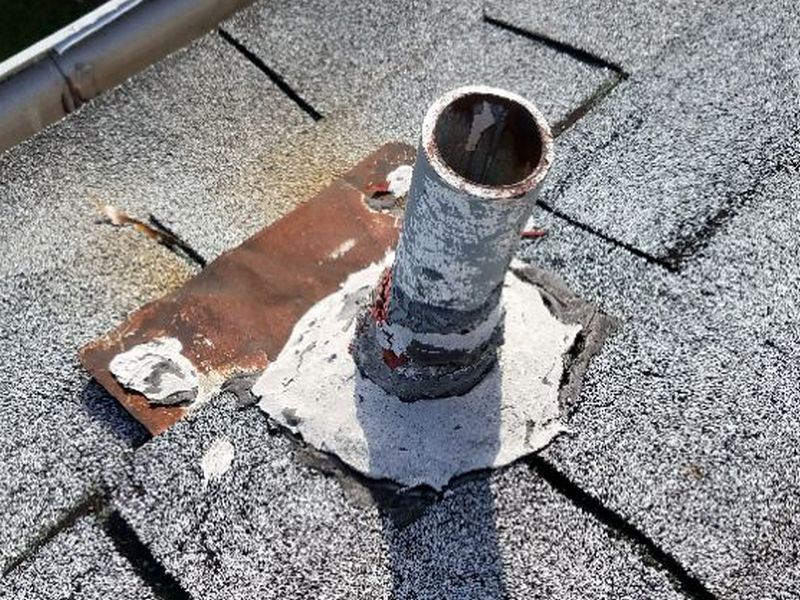
The flashing is damaged or deteriorated. The repairs are unworkmanlike and are not considered reliable. This permits water penetration. Replace the flashing and repair any damage which may be revealed.

The flashing is improperly installed. This permits water penetration. Replace the flashing and repair any damage which may be revealed.
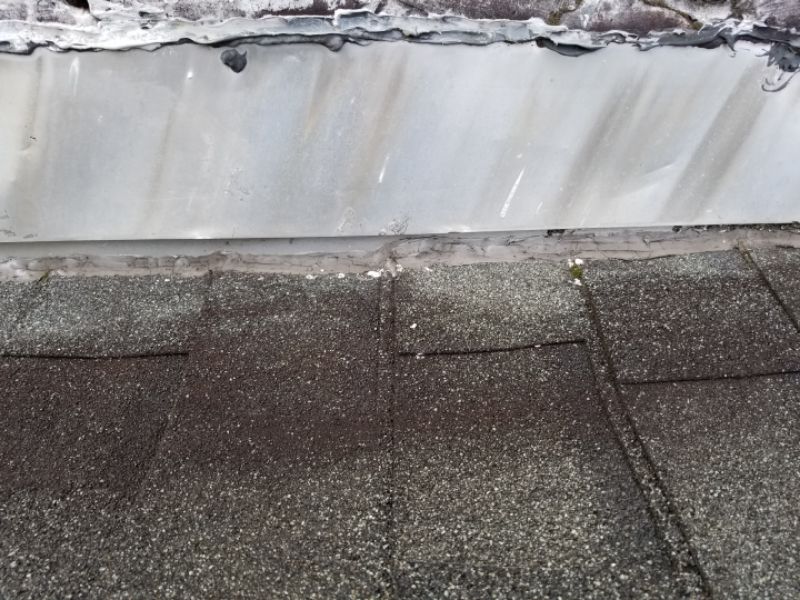
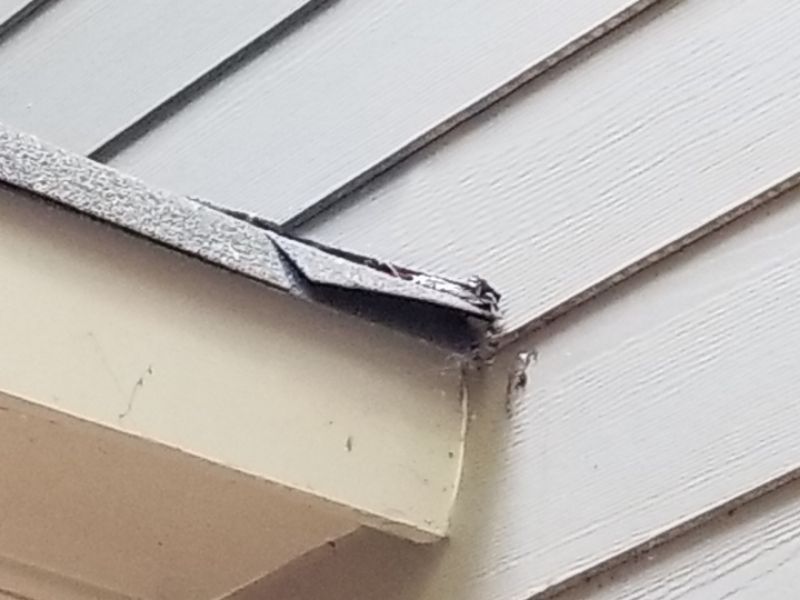
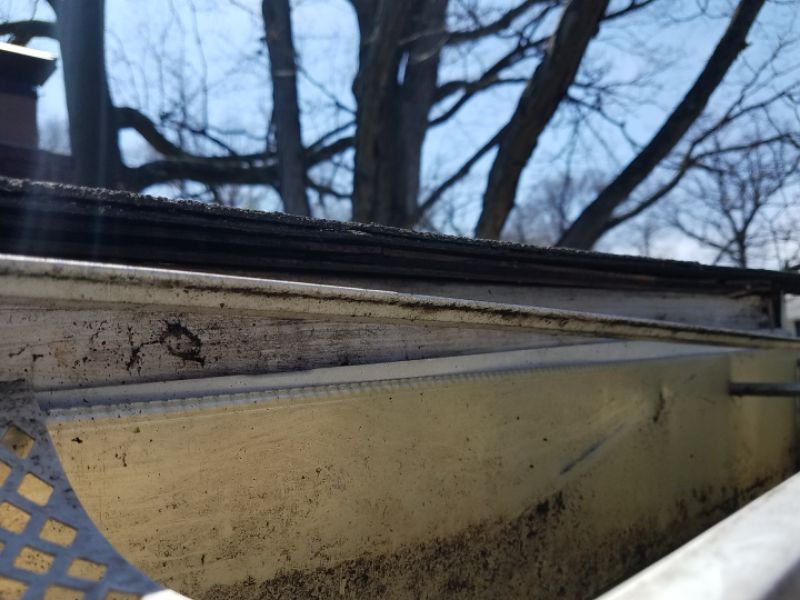
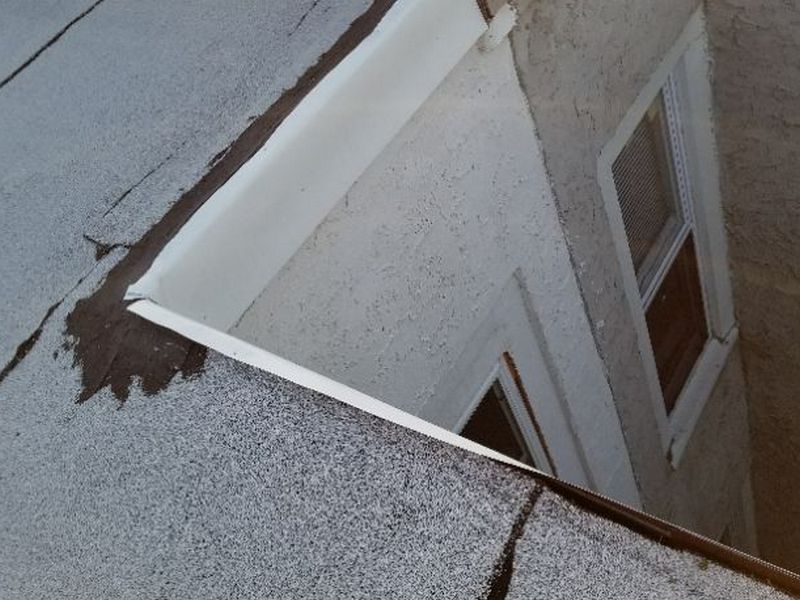
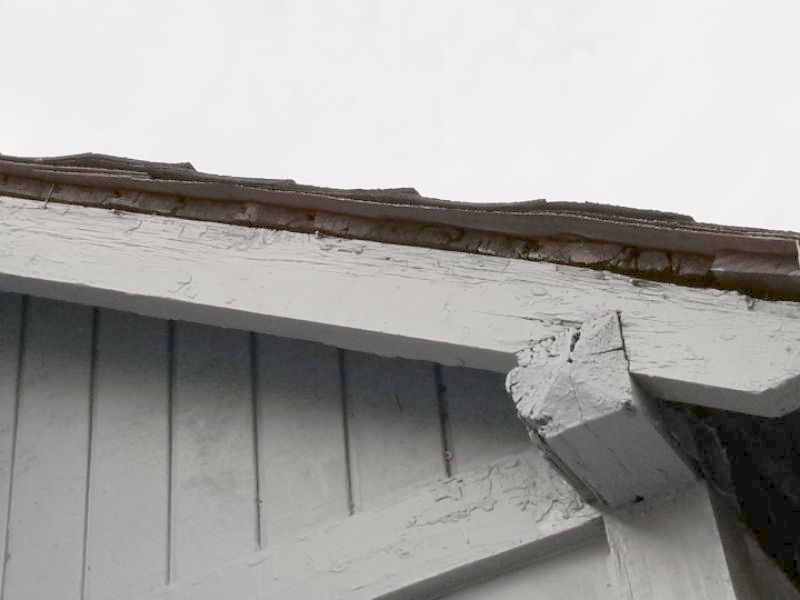
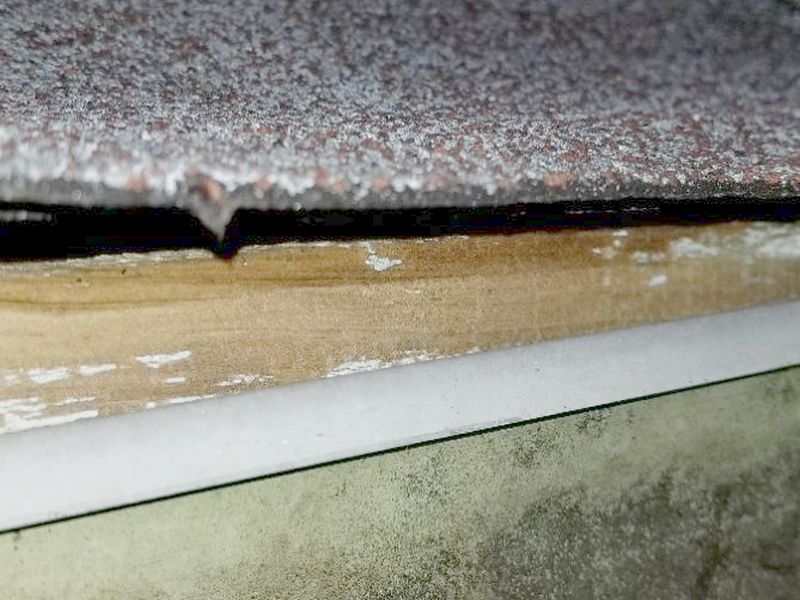
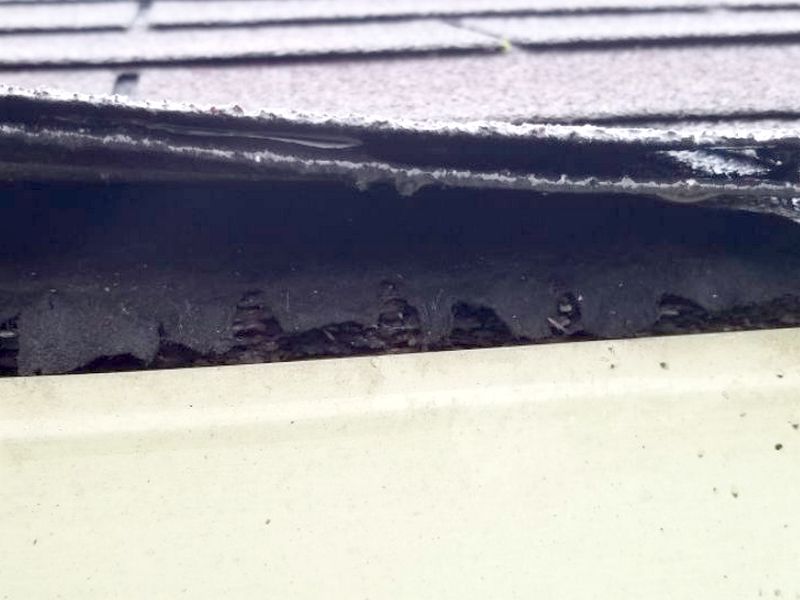
Installing drip edge flashing is a roofing best practice, but may not have been required at the time and location of a given installation. Drip edges are installed at the edges of a roof, i.e. the eave and the rake. They serve to move water away from the roof. Water has a tendency to stick to a surface and will wrap around an edge, driving back into the fascia or rake board. Drip edges are shaped to carry the water outward where it will release into the gutter or fall free past the side of the home.
Inspect the flashings to ensure that they are installed on top of the tar paper and below the roofing. It should be well-secured, but fasteners should not be over-driven or backing out. Each section of drip edge should overlap the next. The trim directly below any edge without a flashing should be inspected carefully for deterioration.
The drip edge flashing is loose. This allows water penetration. Repair or replace the flashing.
The drip edge flashing is improperly installed. The roofing should be on top of the flashing. This will allow leaks and damage. Replace the flashing and repair any damage which may be revealed.
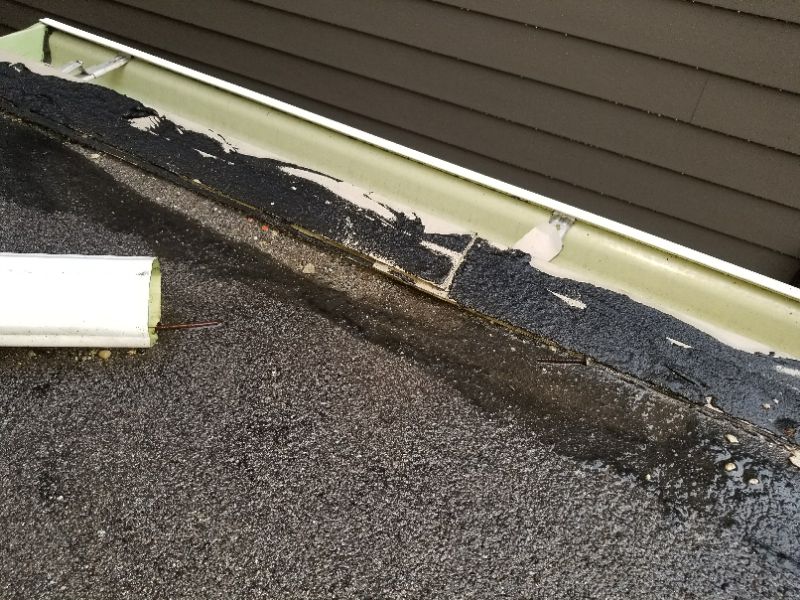
The drip edge flashing is missing. This will allow leaks and damage. Install flashing and repair any damage which may be revealed.
Flashing Limitation and Information Statements
Flashing repairs with sealants/adhesives are temporary: Most flashing repairs with sealants or adhesives should be considered temporary. Permanent flashings are typically mechanical and do not depend on adhesives or sealants for dependability.
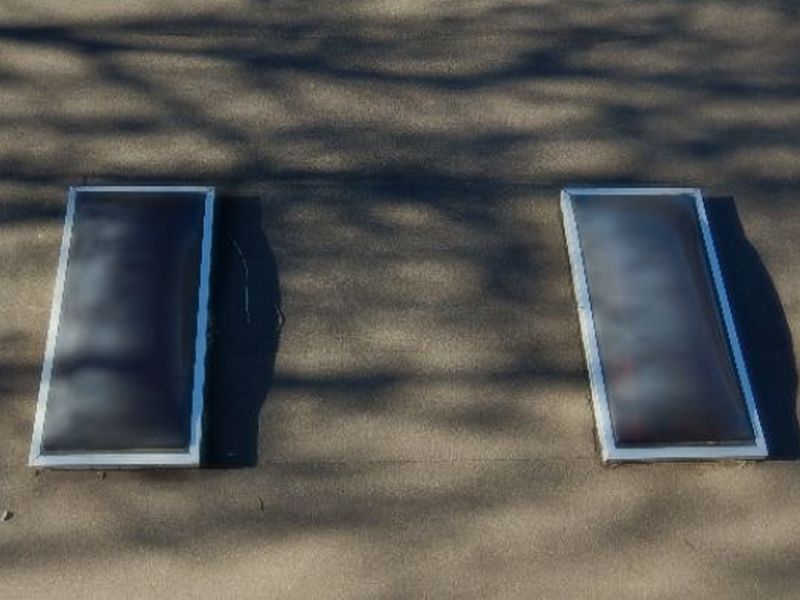
Skylight
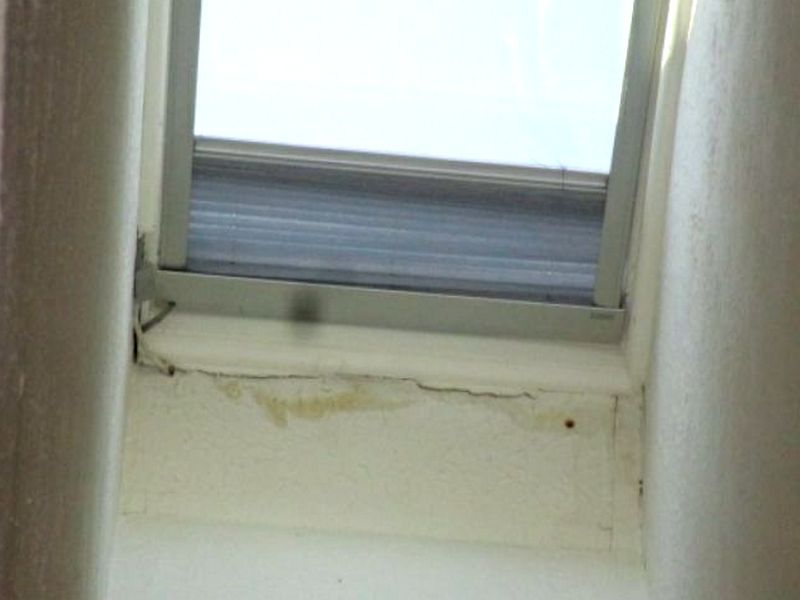
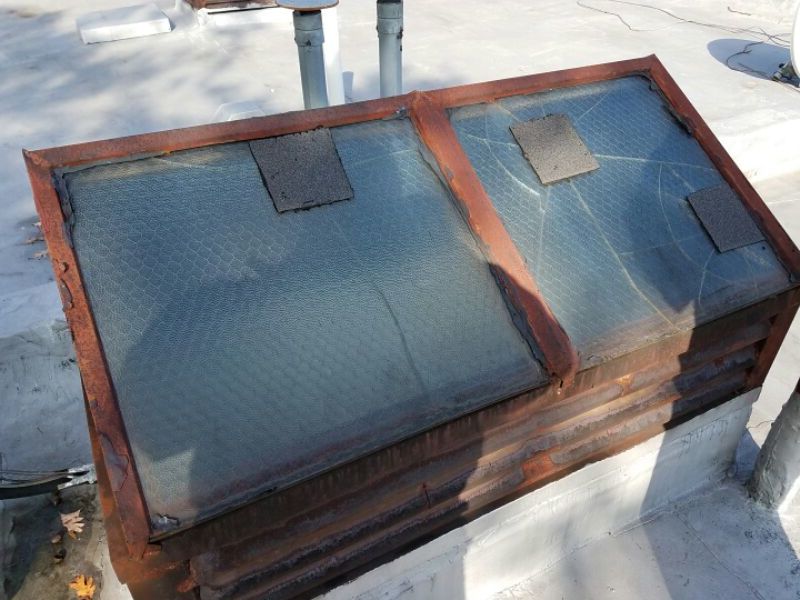
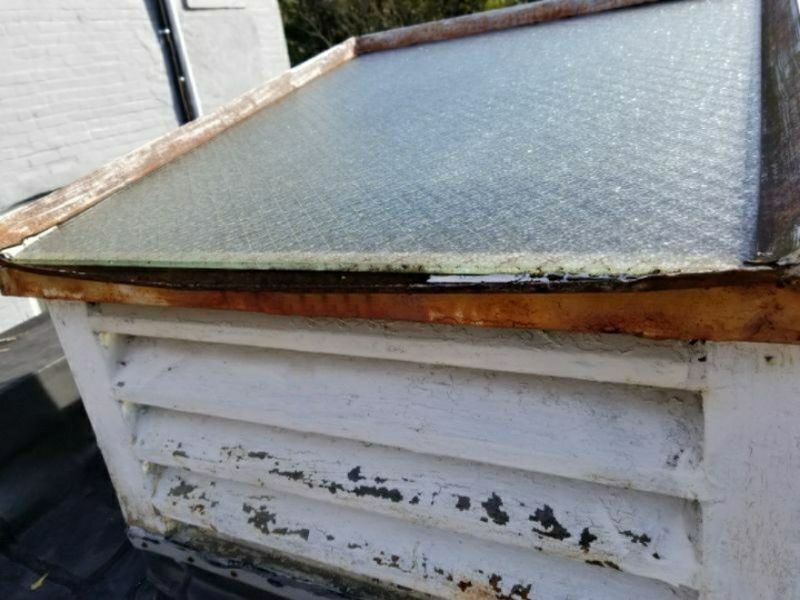
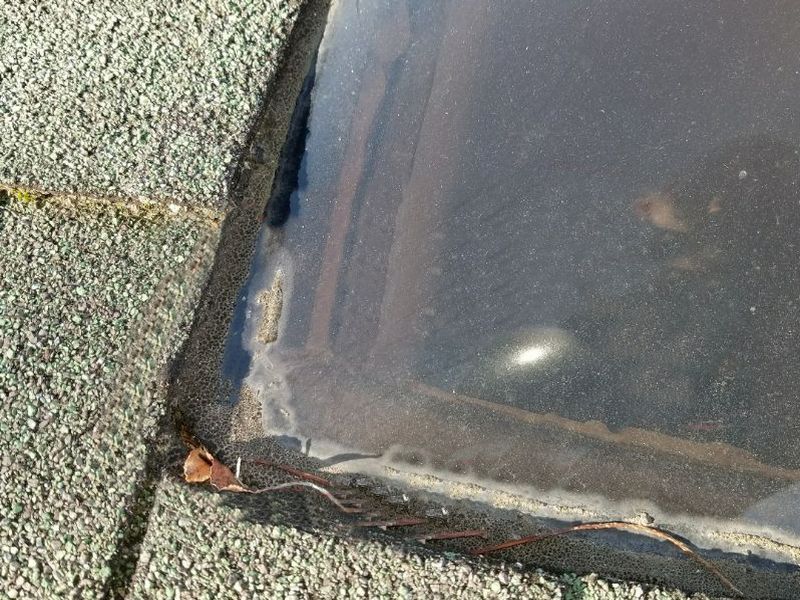
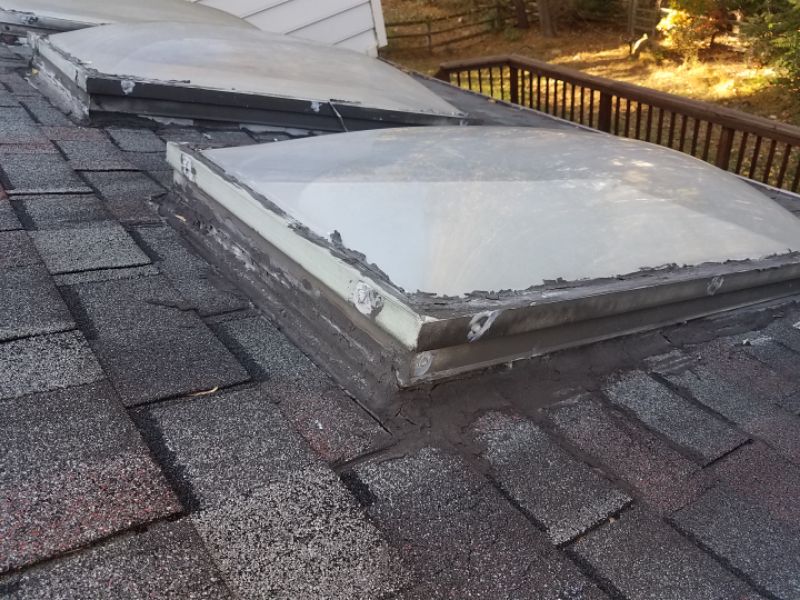
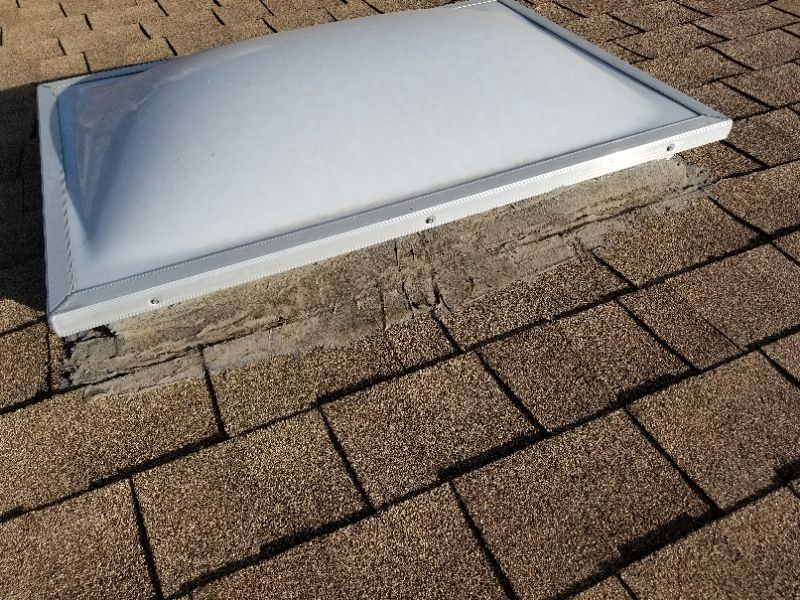
Skylights combine the features and challenges of both windows and roof penetrations. Additionally, as windows, they have extra vulnerabilities because they are more horizontal than vertical. They must be installed on a raised “curb”, basically short sidewalls several inches high above the roof’s surface. Installing an acrylic dome directly to the roof decking and under the shingles is unworkmanlike and guaranteed to leak.
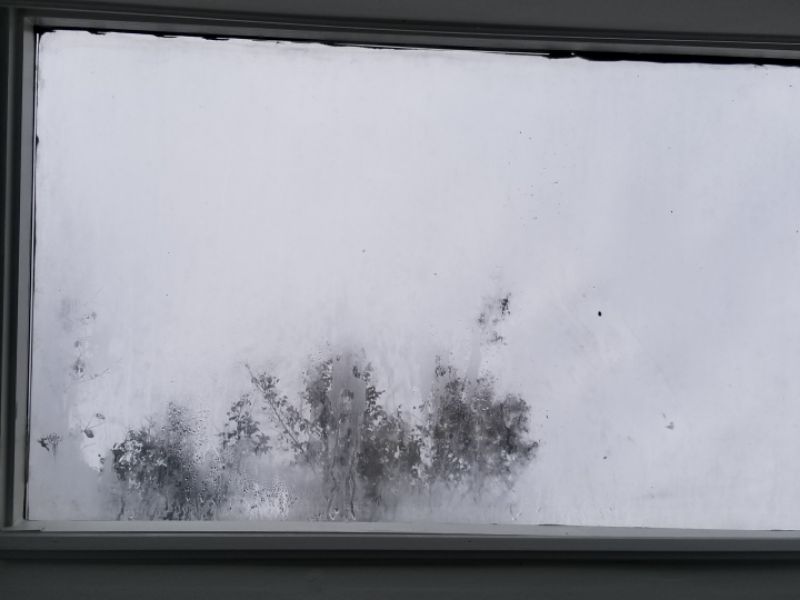
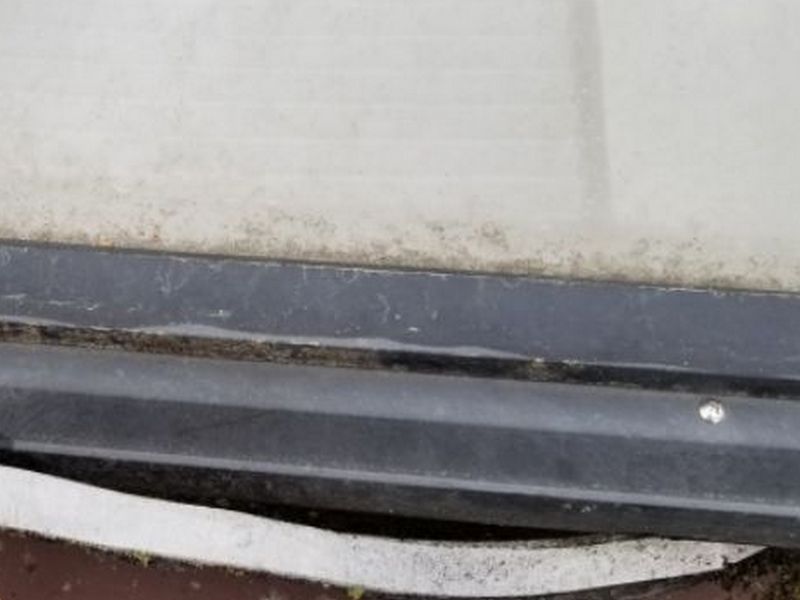
Skylights must have any and all flashings appropriate to their installation. This will include step flashings on the sides, saddle flashing at the top under the roofing, and the lower skirt on top of the roofing. Skylights must be acrylic or safety glass. Old-house units may have wired glass. All glass or acrylic must be free of cracks, and have all fasteners installed and intact. Any insulated glass units should be inspected for signs of seal failure. Inspect for any signs of leakage, including at the interior using infrared. Inspect all operable skylights for proper function. Note limitations to testing as appropriate.
The skylight glass or dome is damaged. This permits water penetration and is a safety risk. Replace the glass or dome.
The skylight has a failed insulated glass seal. This causes condensation and fogging between the panes. Replace the insulated glass unit or the skylight as needed.
The skylight window frame is damaged. This permits water penetration. Repair or replace the frame.

The skylight is installed without a raised curb and flashing. This is unreliable and will leak. Hire a contractor to replace the skylight.
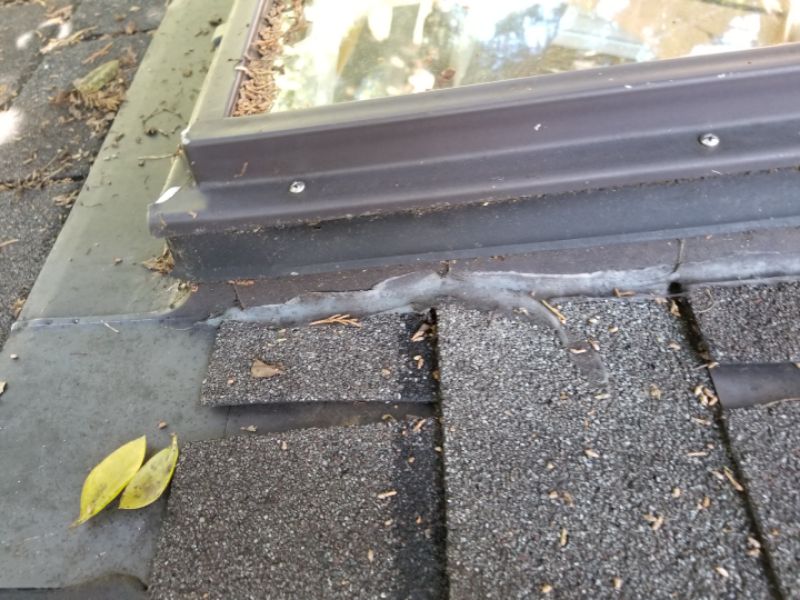
There is excessive tar or caulk applied at the flashing. This is considered a temporary repair that will fail. Replace the flashing.
The skylight is leaking. This will allow water damage. Repair or replace the skylight.