- Inspect
- Structural components, including foundation and framing
- Structural components in which deterioration is suspected, or where clear indications of possible deterioration exists; probing not required if would damage any finished surface
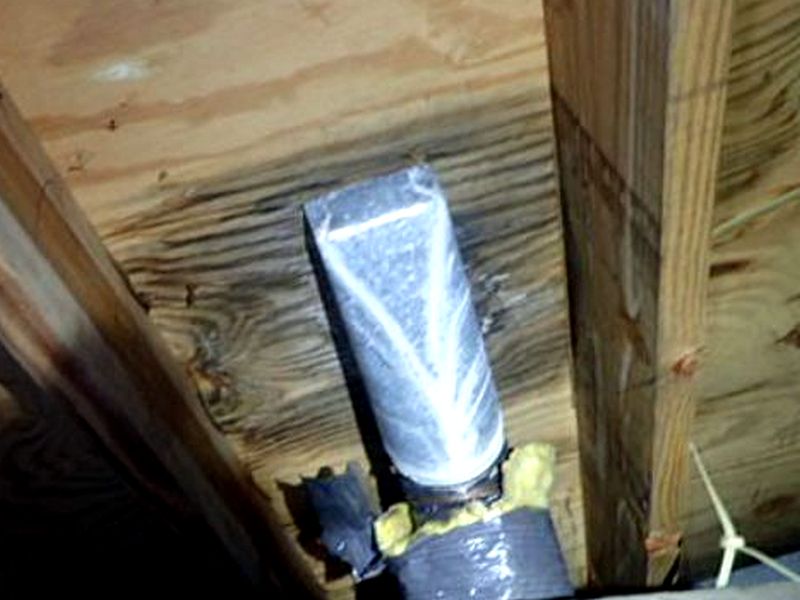
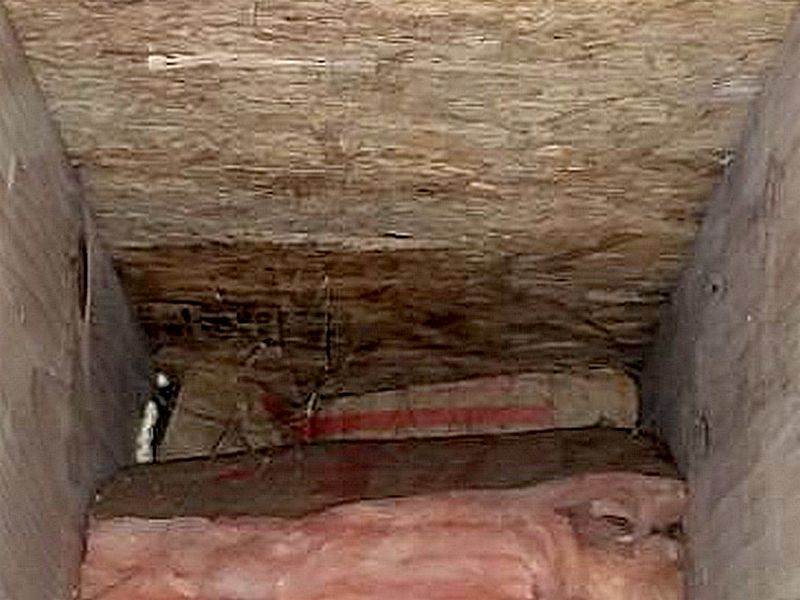
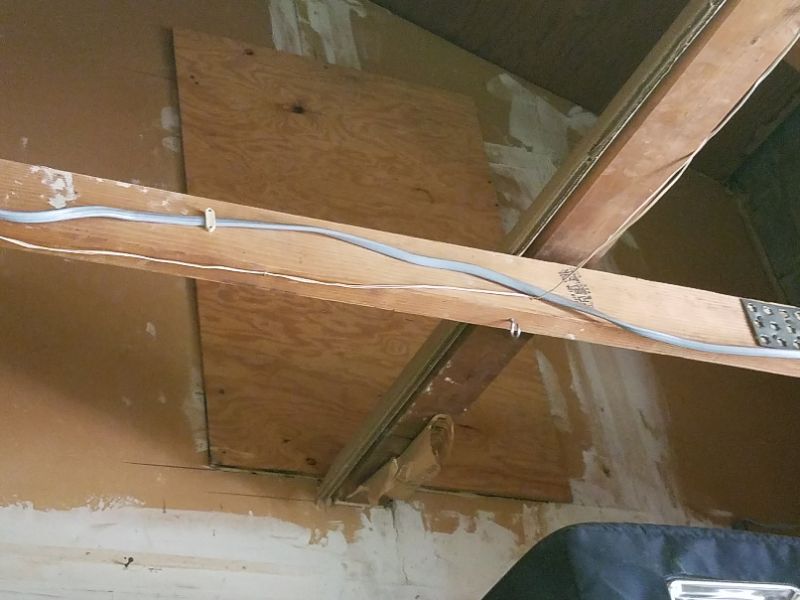
- Crawl space and attic areas to the extent possible as determined by the inspector to be readily accessible and safe
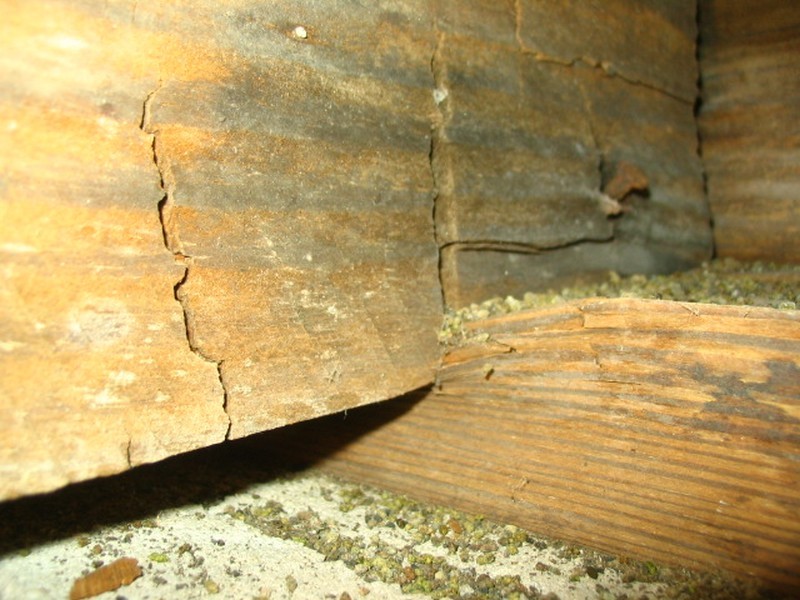
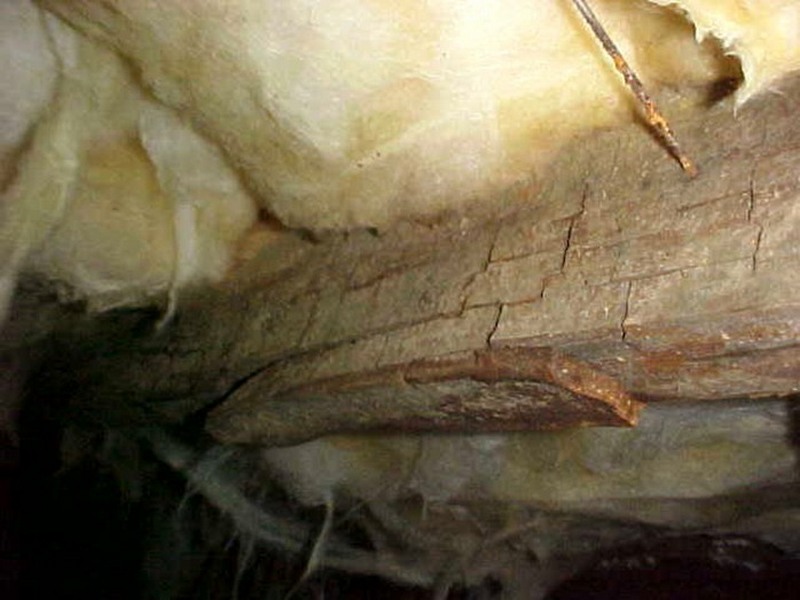
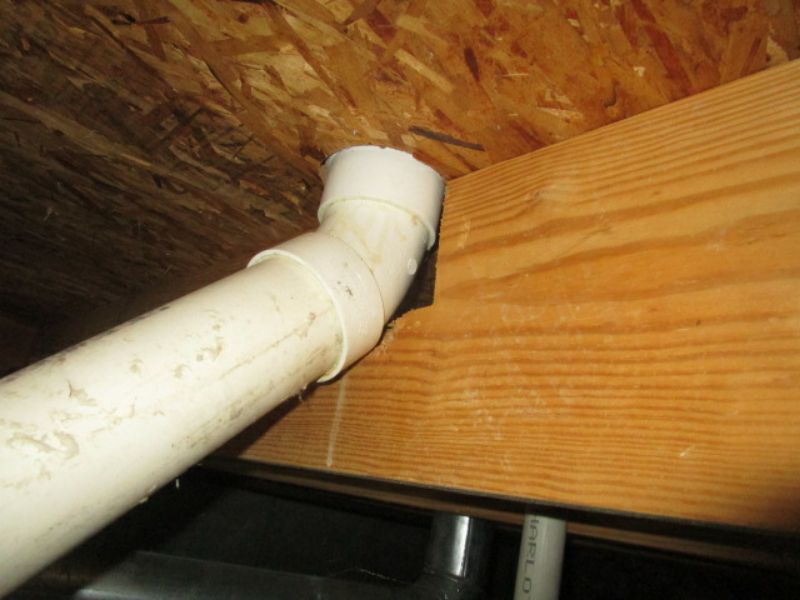
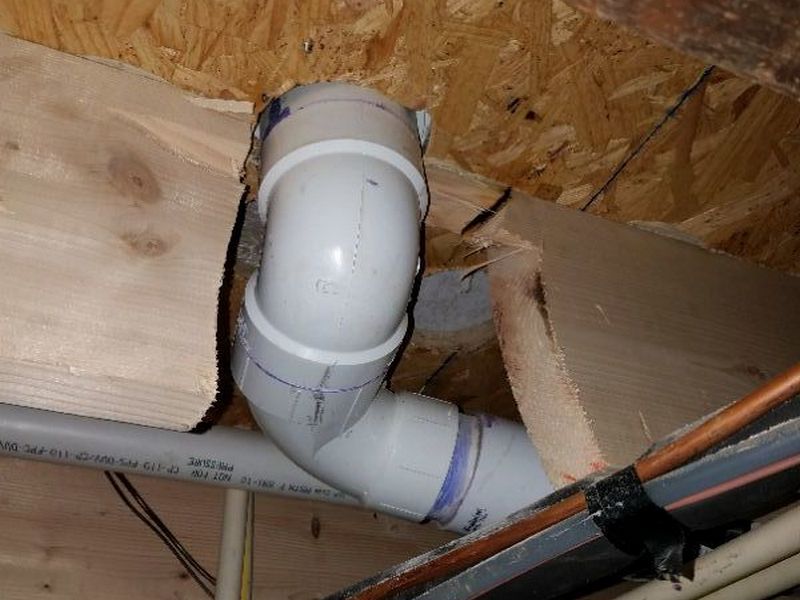
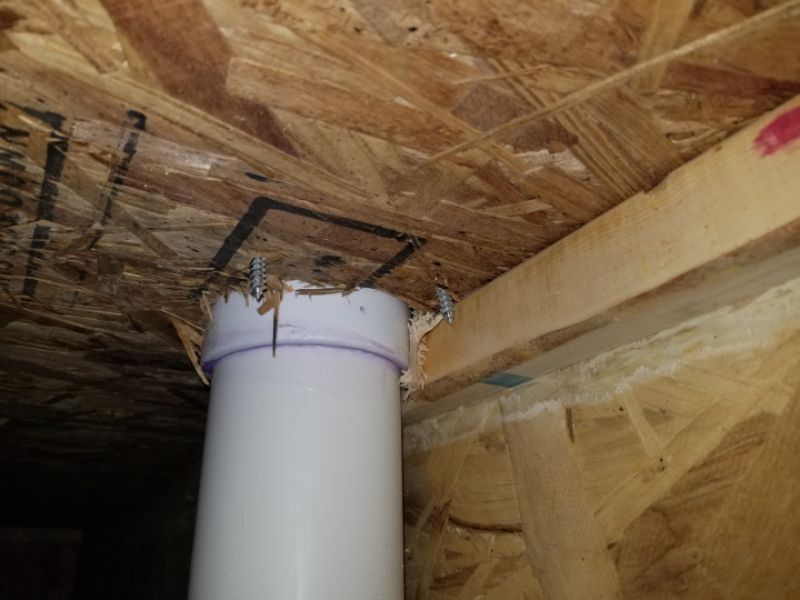
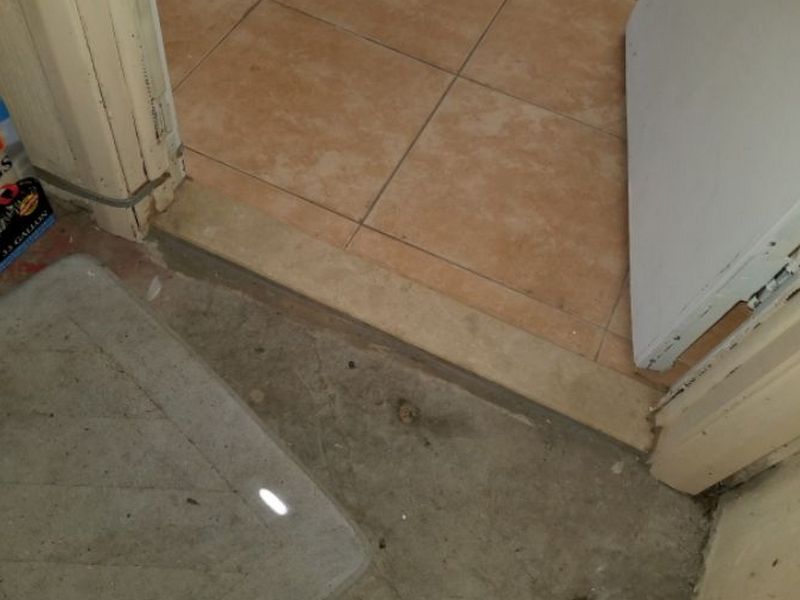
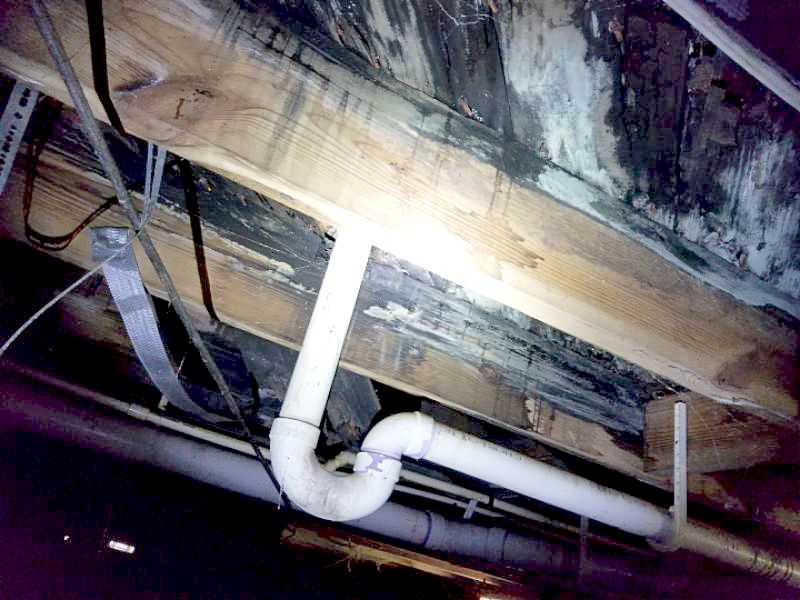
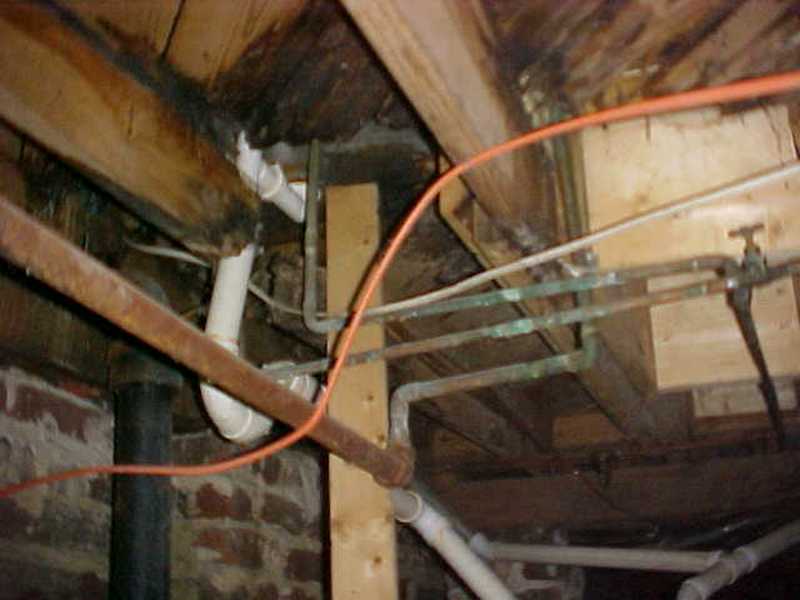
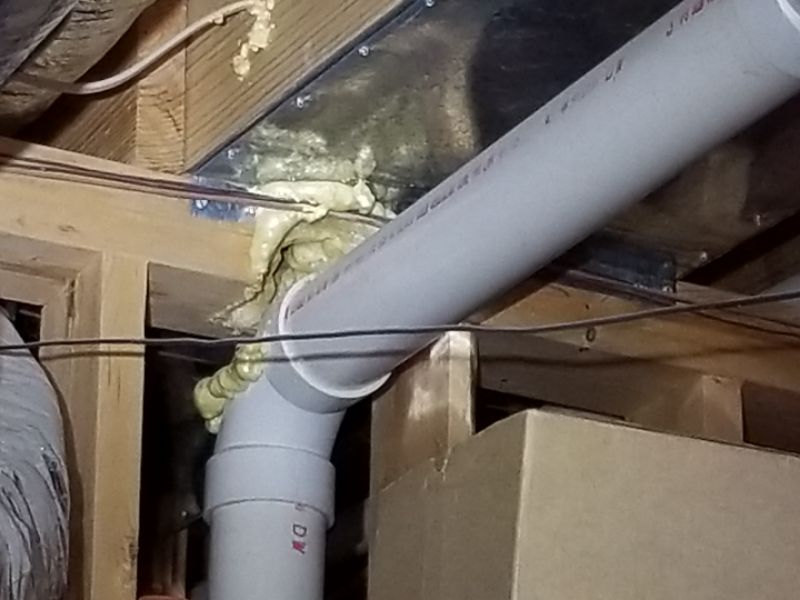
- High vulnerability locations normally covered by insulation or humidity control measures, e.g. crawl space toilet and plumbing penetrations, under exterior doors, deck ledger areas
- Describe
- Foundation
- Floor, wall, ceiling, and roof structures
- Methods used to inspect under-floor crawl spaces and attics, e.g. “Entered,” “Viewed from access,” “No access”
- Conditions which limit visibility or accessibility of property’s features or condition (snow/leaf cover, ongoing construction, dangerous animals, suspected hazardous materials, etc.)
- All buildings or structures present
- Which buildings or structures are inspected or not inspected
- Age of inspected buildings (if known)
- Type (description) of each inspected building
- Method(s) used to describe the location of features or defects
- Not required
- Engineering, architectural services, or analysis
- Opinion as to adequacy of any structural system or component
- Inspection of any location if it would damage installed insulation or humidity control system
Foundation
The structural integrity of a home depends on its foundation. Whether the house has perimeter walls or piers, this is what the entire construction rests on and relies upon to carry all the weight down to the footings. A defect here can affect everything above it. Additionally, foundation issues can easily be the most expensive problems to correct.
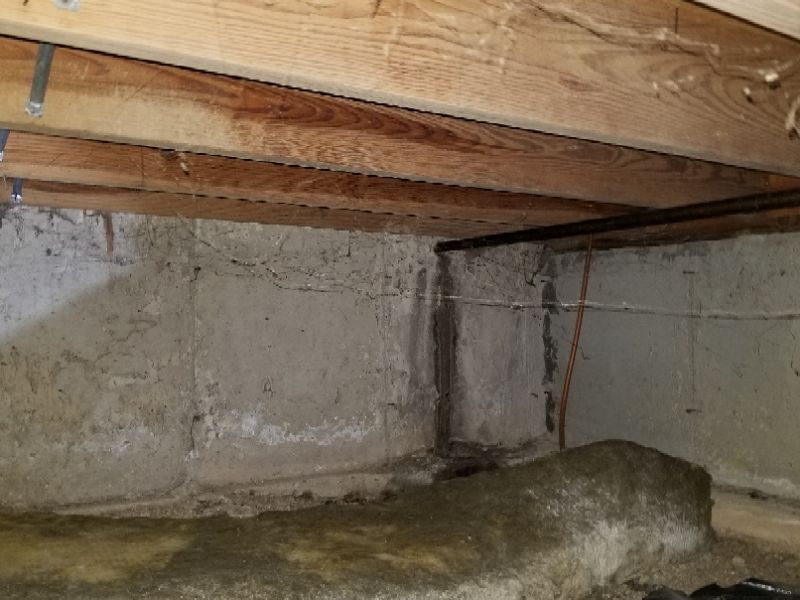
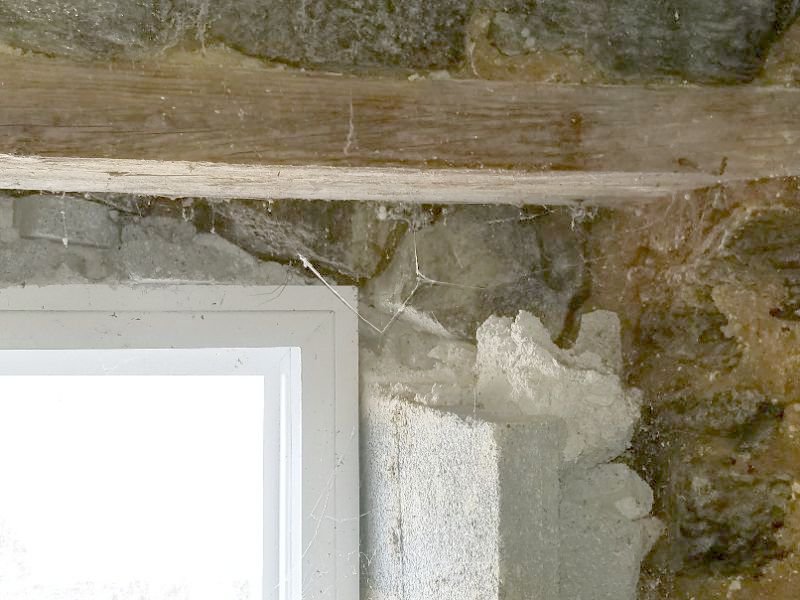
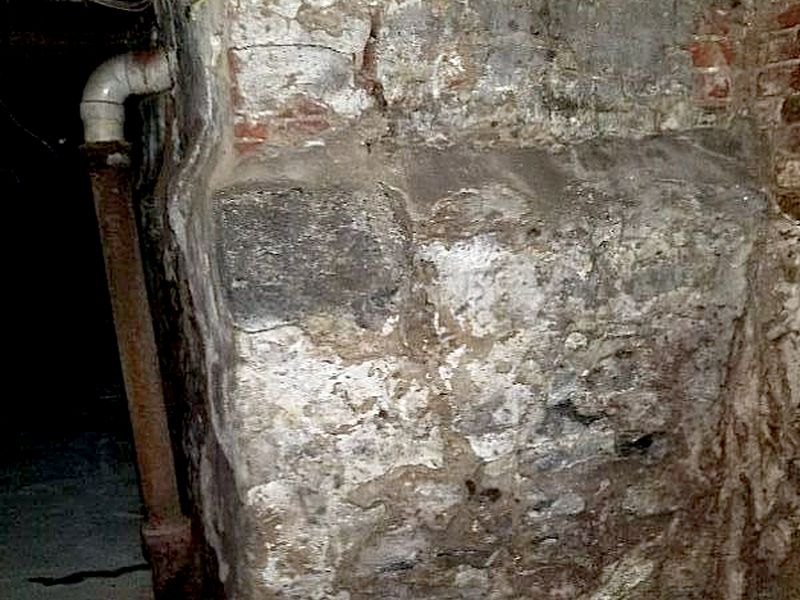
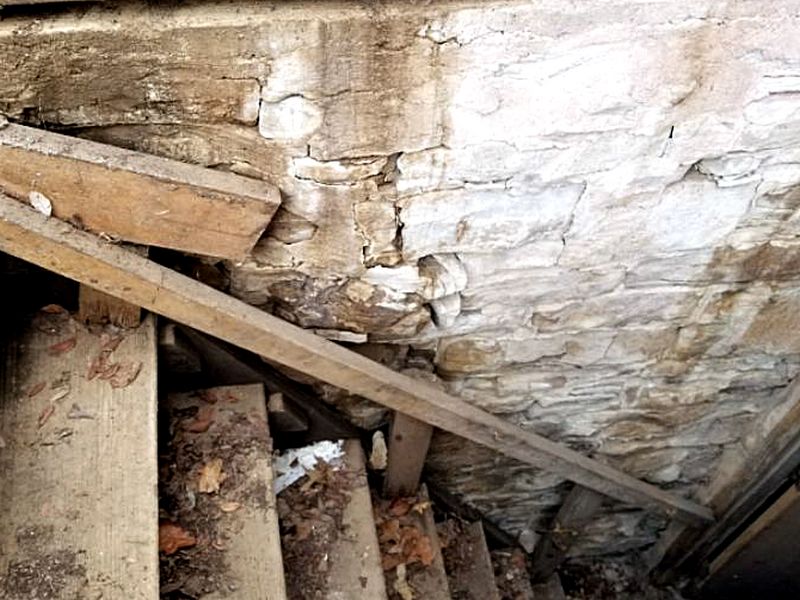
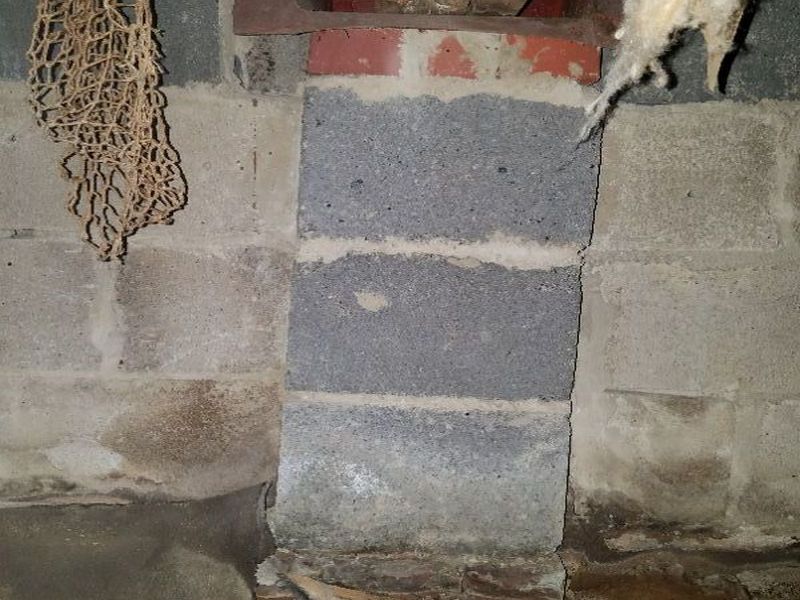
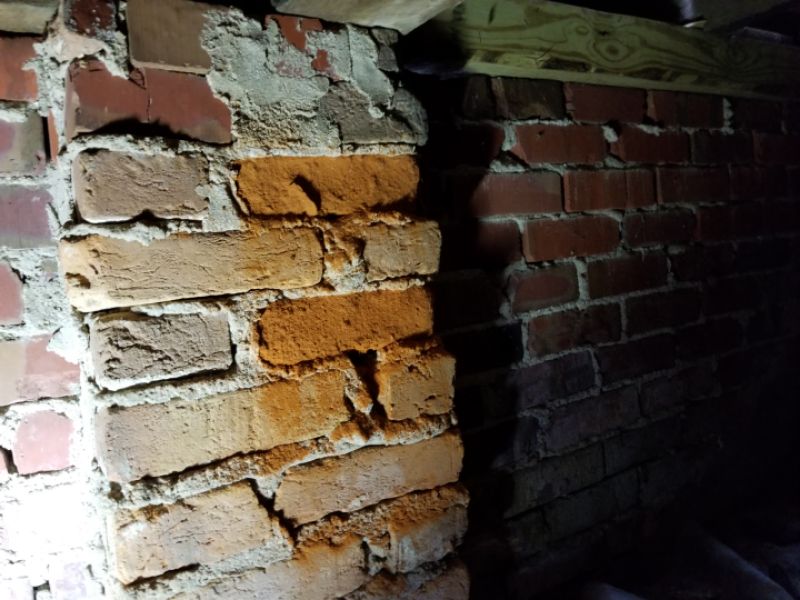
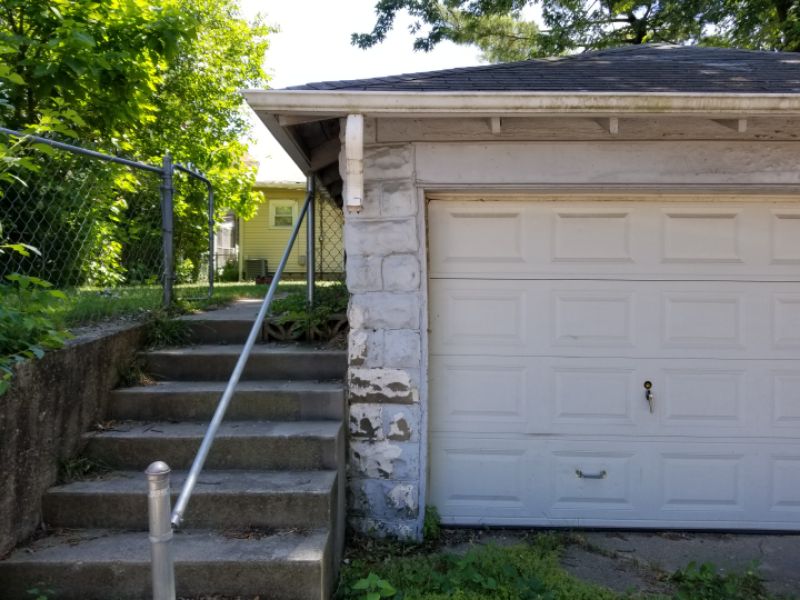
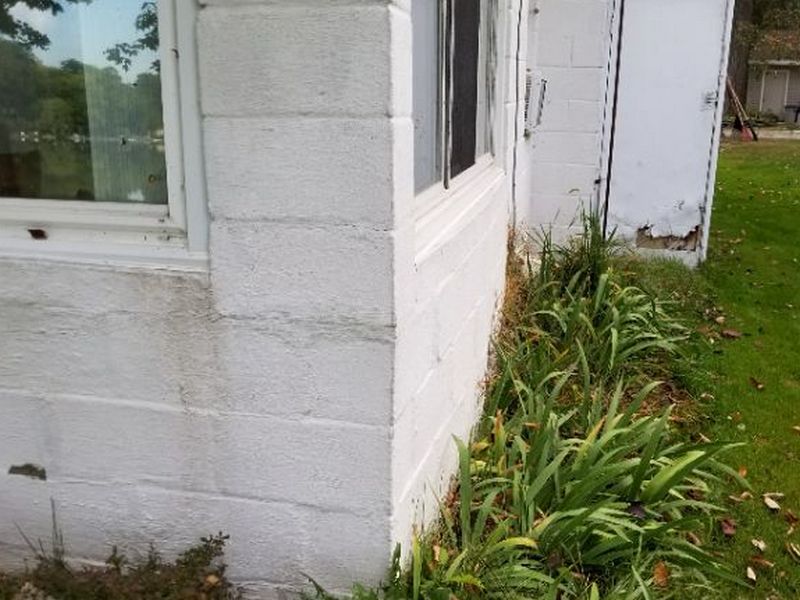
It doesn’t matter if the foundation is stone, bricks, CMUs, concrete, or wood; everything must be plumb and stacked up properly to prevent uneven forces that can cause stress and failure. Observe at a distance to detect leaning, bowing, or displacement. Look for cracks, damage, and deterioration. Pay attention to water management issues; moisture is the great destroyer. It degrades all but the strongest of building materials, and can undermine the rest, taking away its proper support.
Water management around a foundation is critical to its long-term stability. The overwhelming majority of foundation water penetration issues can be attributed to failing to move water away from the structure. It’s the basics: roof runoff control and surface grading. While high water tables can come into play, the problem is rarely “the weather.” Pay attention outside, and carry those observations inside when you inspect.
There are water stains in the basement. This implies conditions conducive to mold formation and damage. The source of water penetration must be identified. Hire a contractor for an evaluation and to make repairs or upgrades as needed.
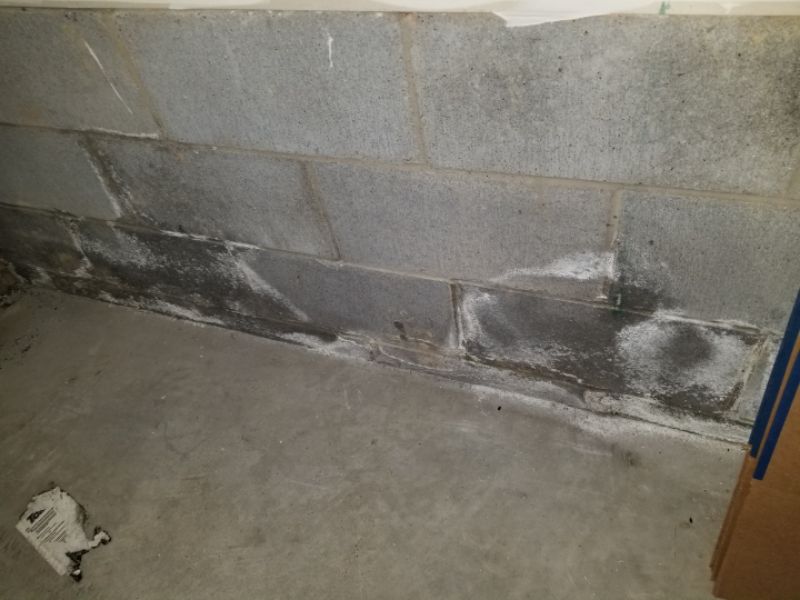
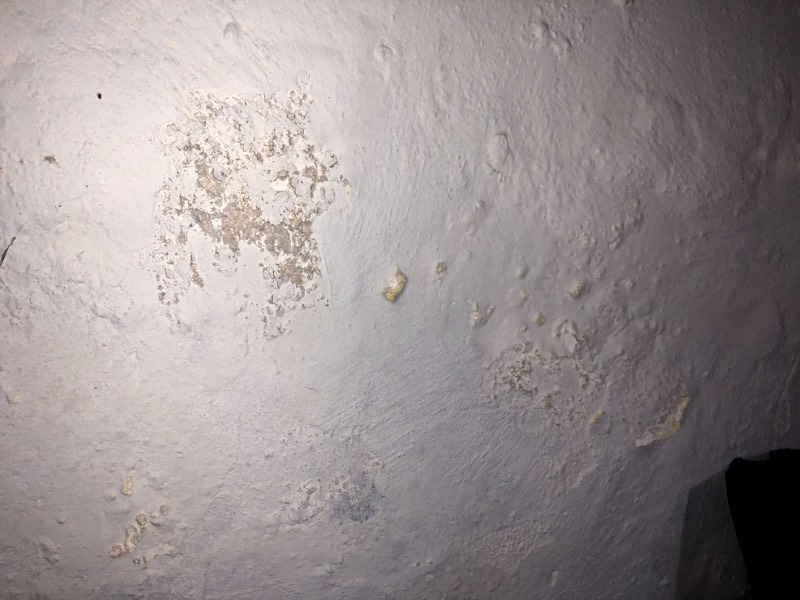
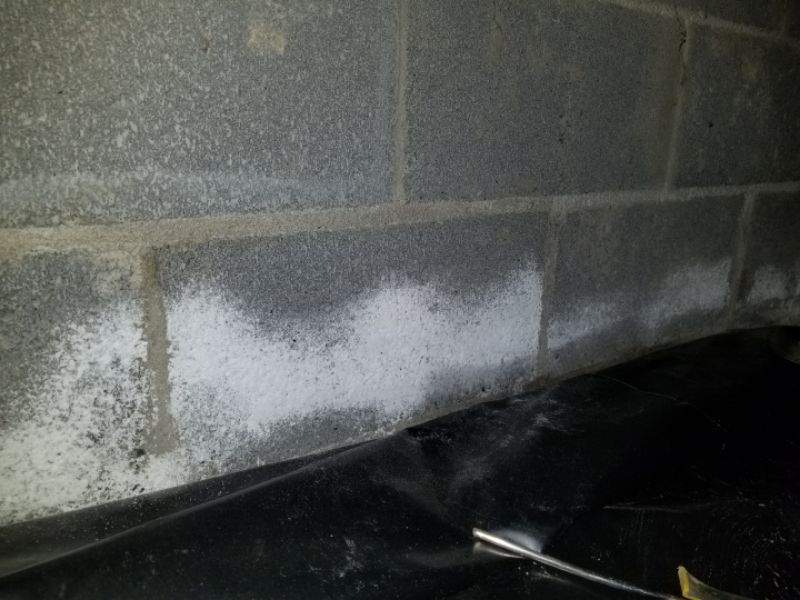
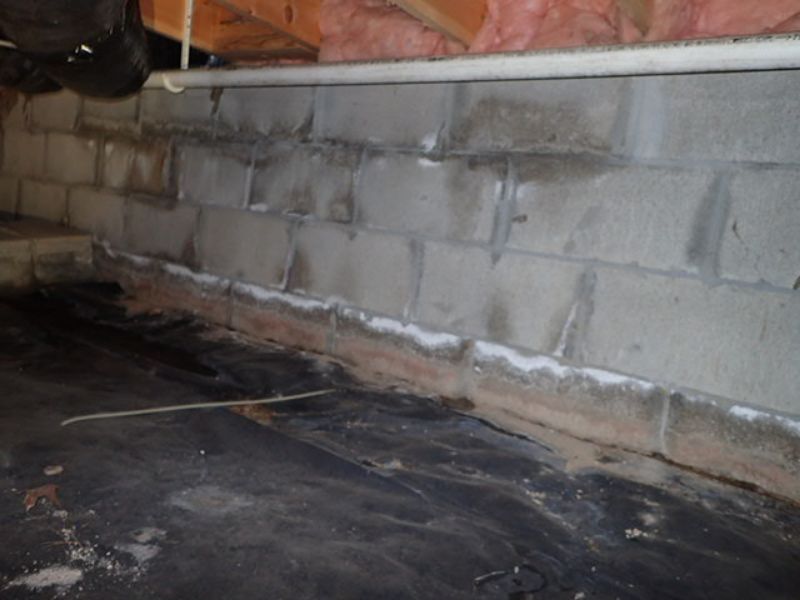
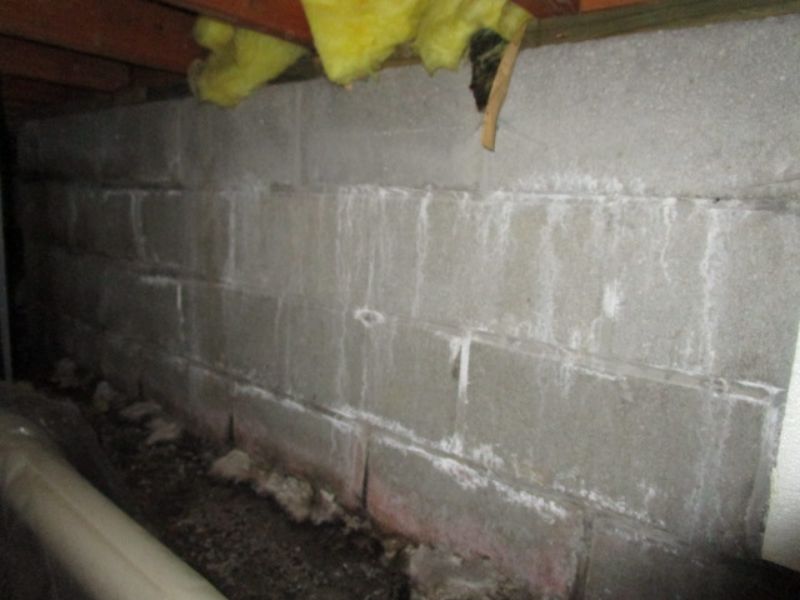
There is efflorescence in the basement. These white crystalline deposits indicate moisture penetration. This is conducive to mold formation and damage. The source of the penetration must be identified. Hire a contractor for an evaluation and to make repairs or upgrades as needed.
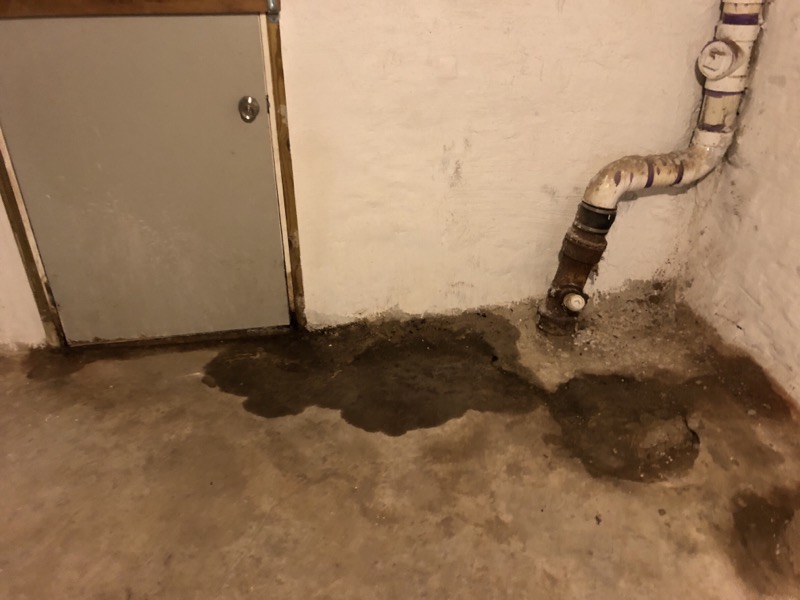
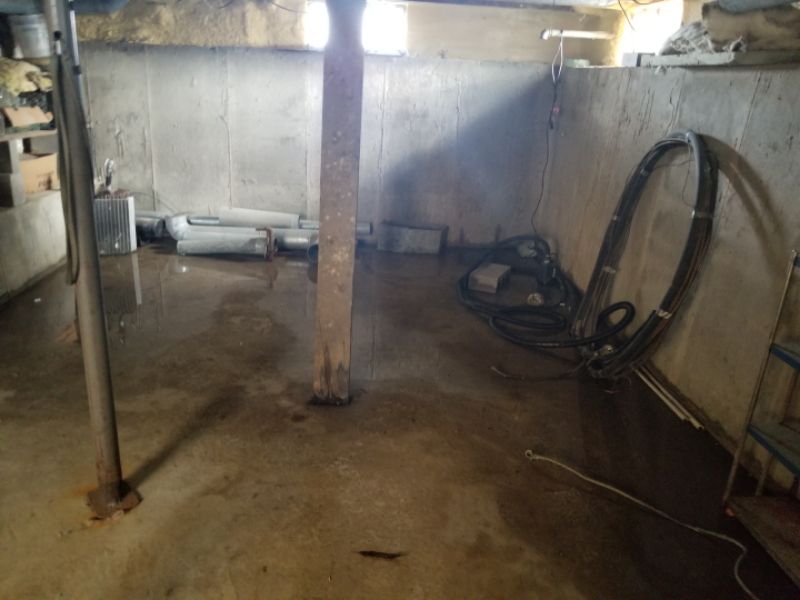
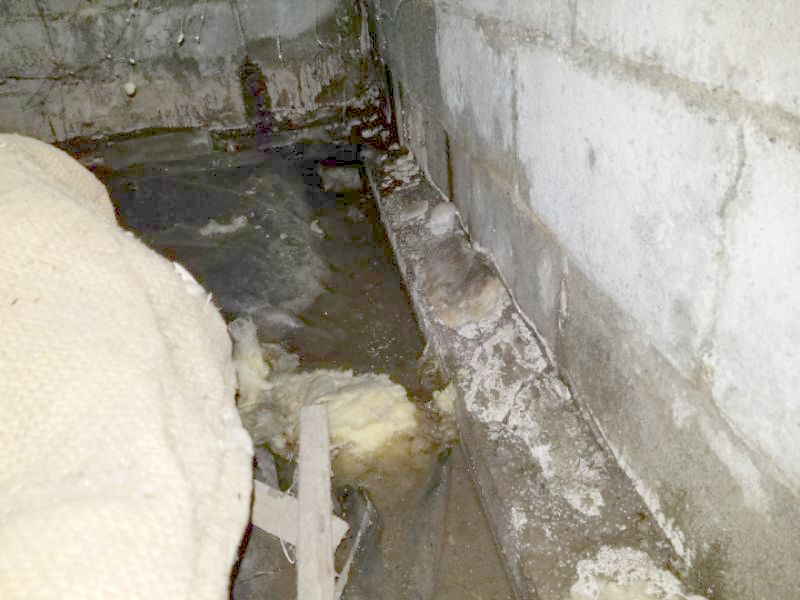
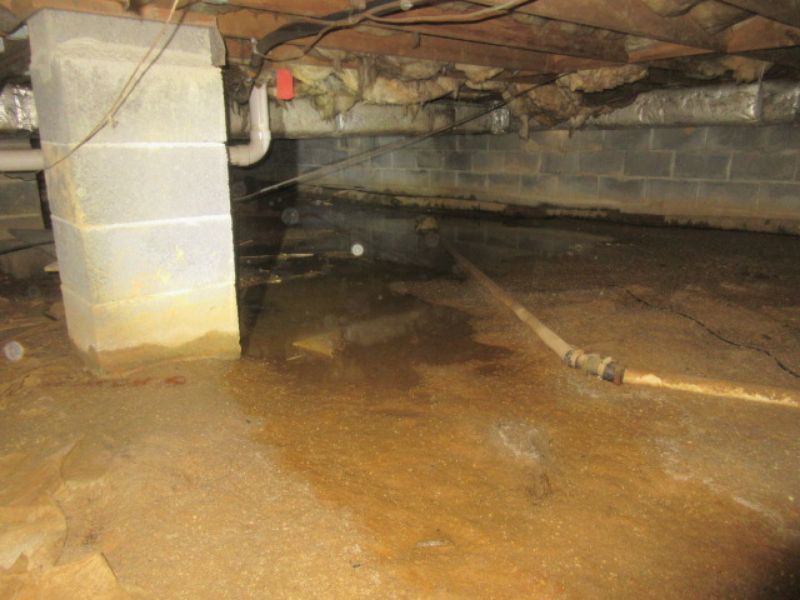
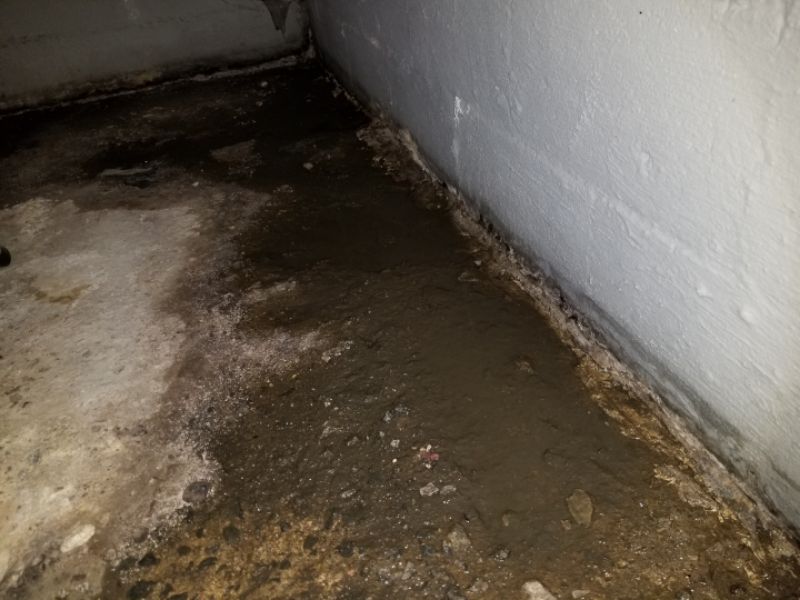
There is water in the basement. This is conducive to mold formation and damage. The source of water penetration must be identified. Hire a contractor for an evaluation and to make repairs or upgrades as needed.

There is efflorescence in the crawl space. These white crystalline deposits indicate moisture penetration. This is conducive to mold formation and damage. The source of the penetration must be identified. Hire a contractor for an evaluation and to make repairs or upgrades as needed.
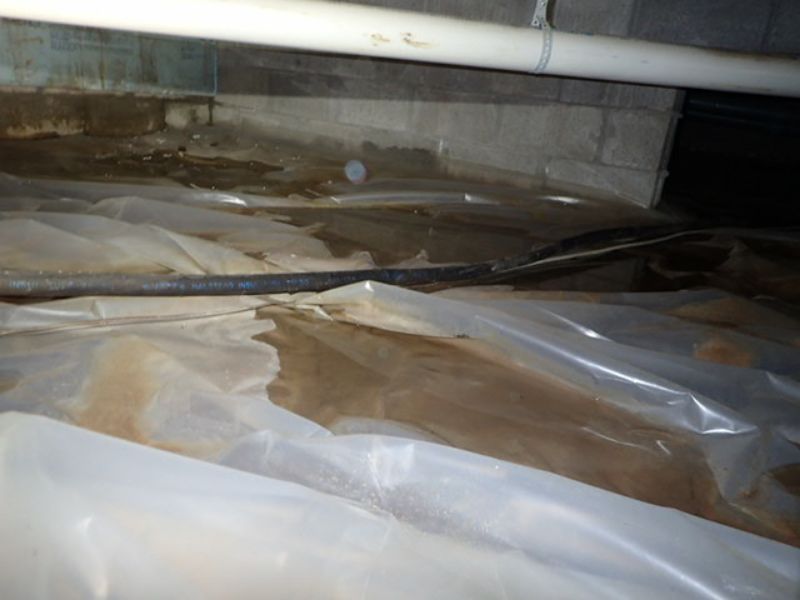
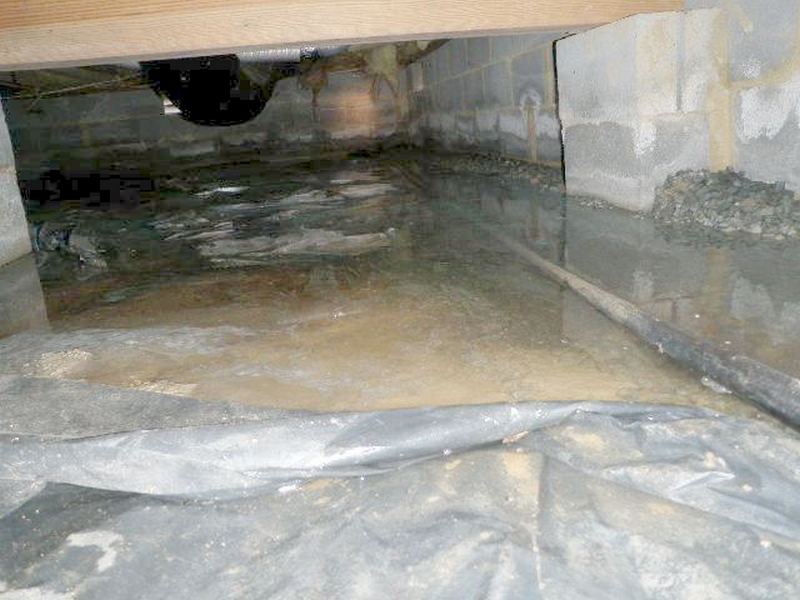
There is standing water in the crawl space. This is conducive to mold formation and damage. The source of water penetration must be identified. Hire a contractor for an evaluation and to make repairs or upgrades as needed.
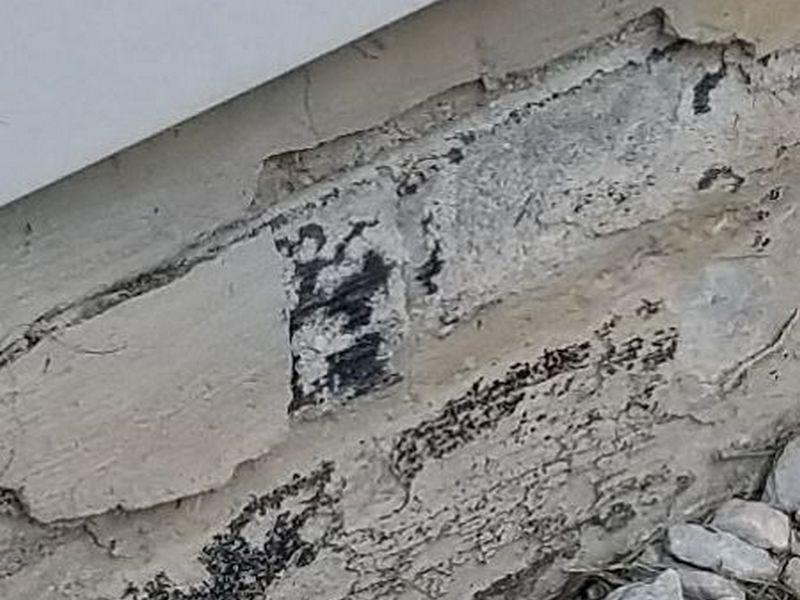
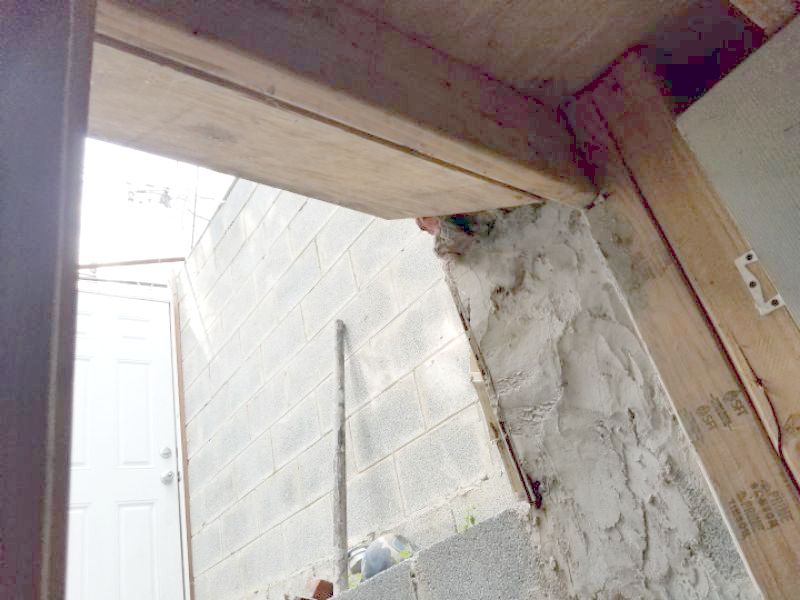
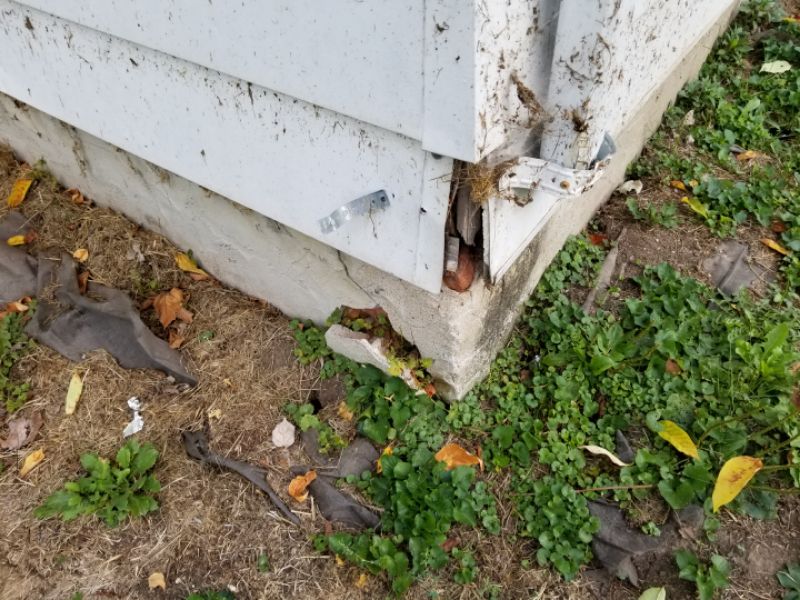
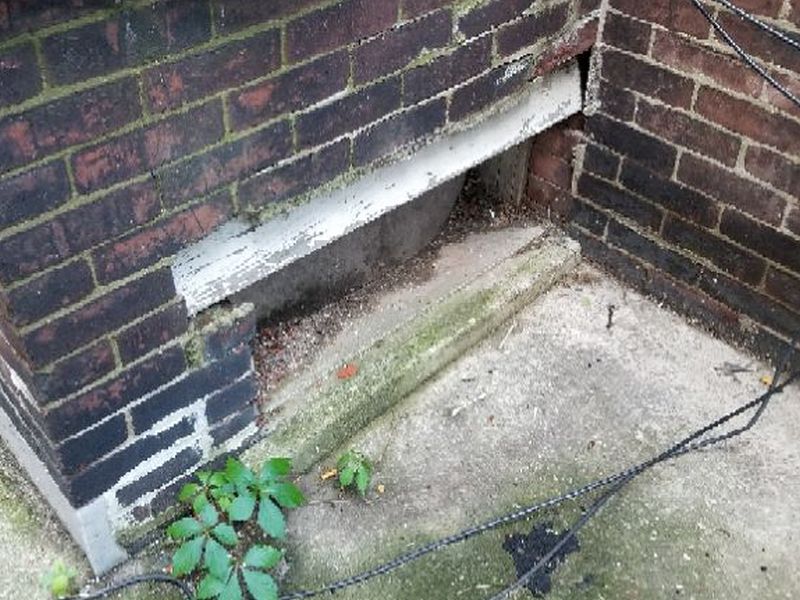
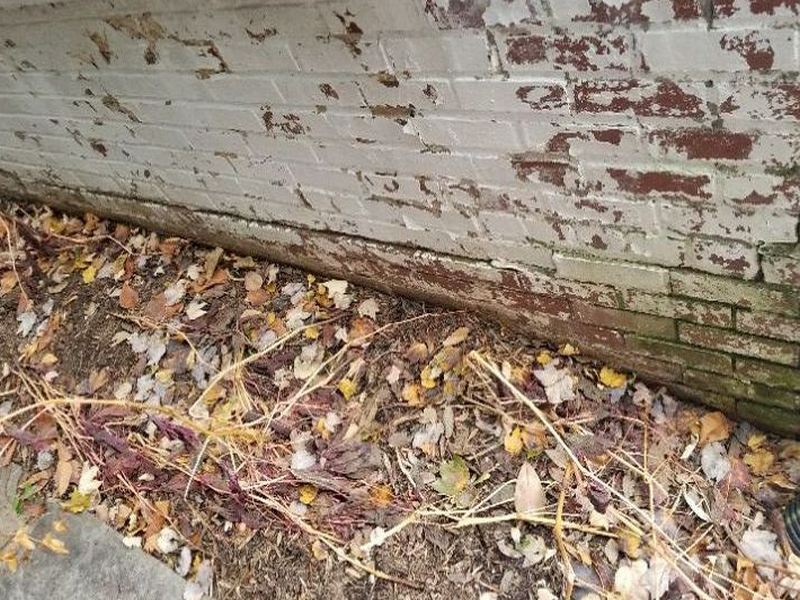
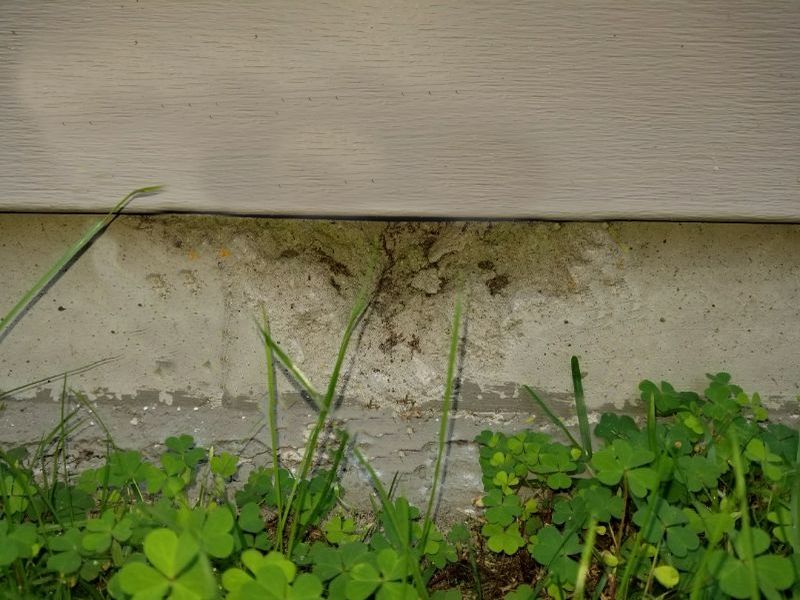
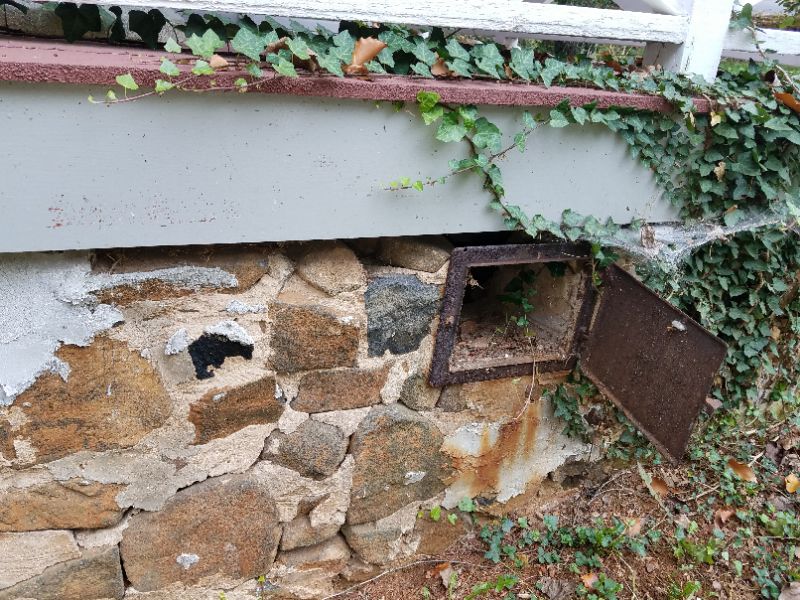
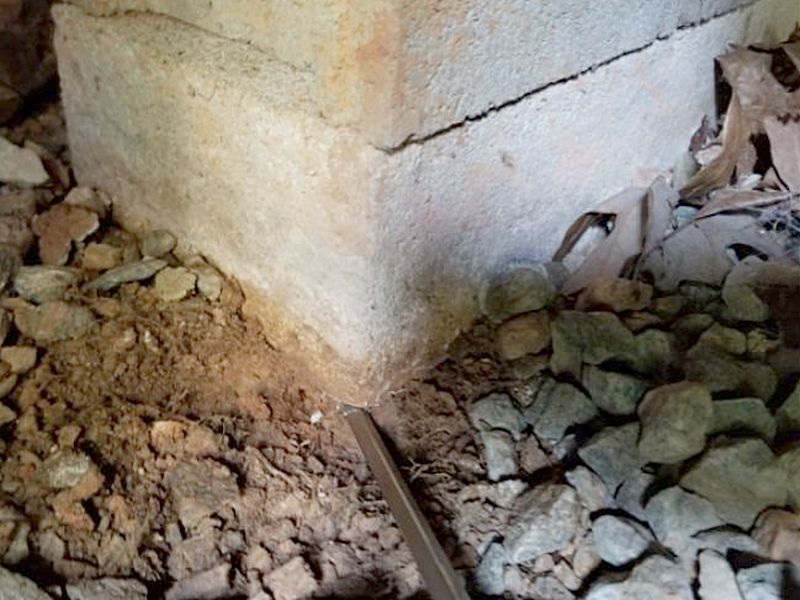
The foundation’s concrete parge coat is damaged. The parging helps to provide protection against moisture intrusion. Repair the parging; hire a contractor as needed.
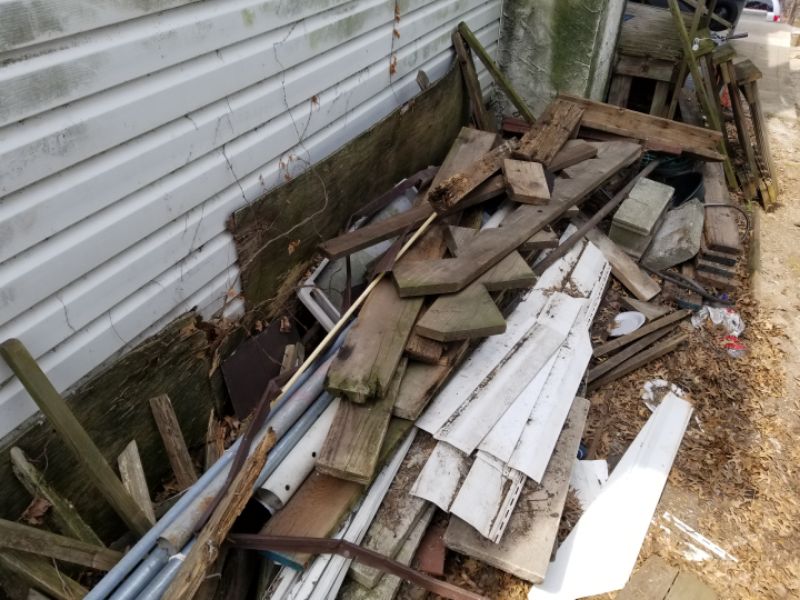
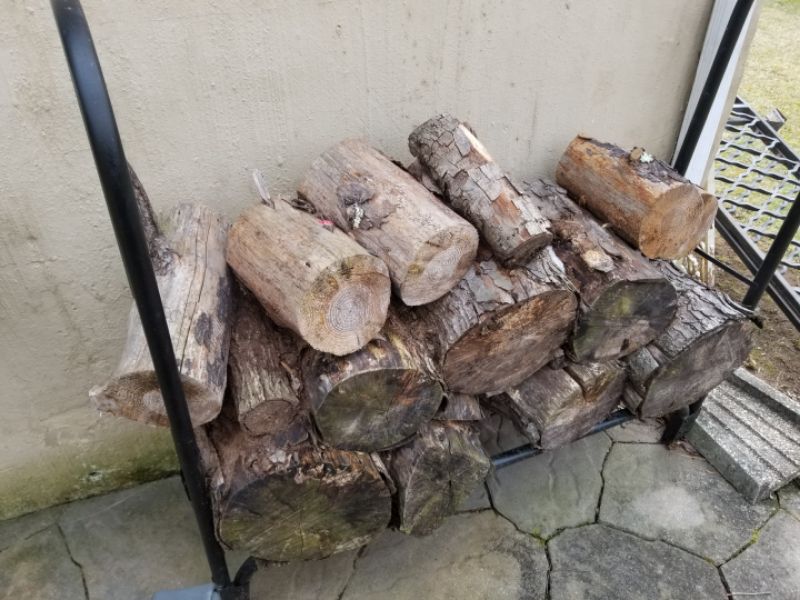
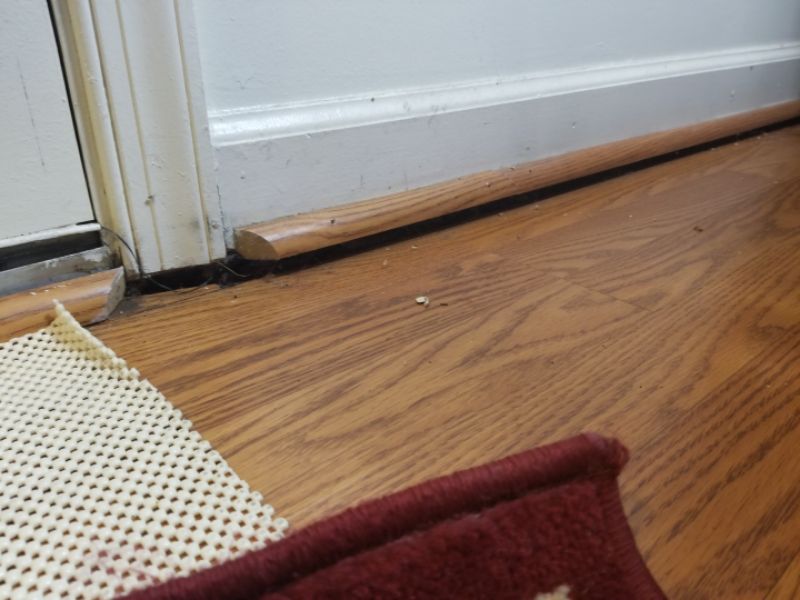
Firewood or wood debris is piled against the siding. This is conducive to wood destroying insect activity. Remove the firewood or debris.
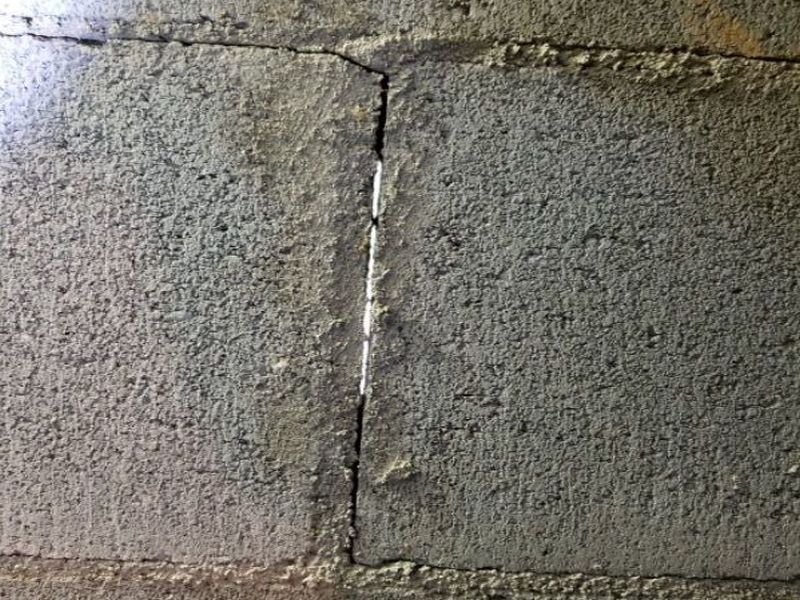
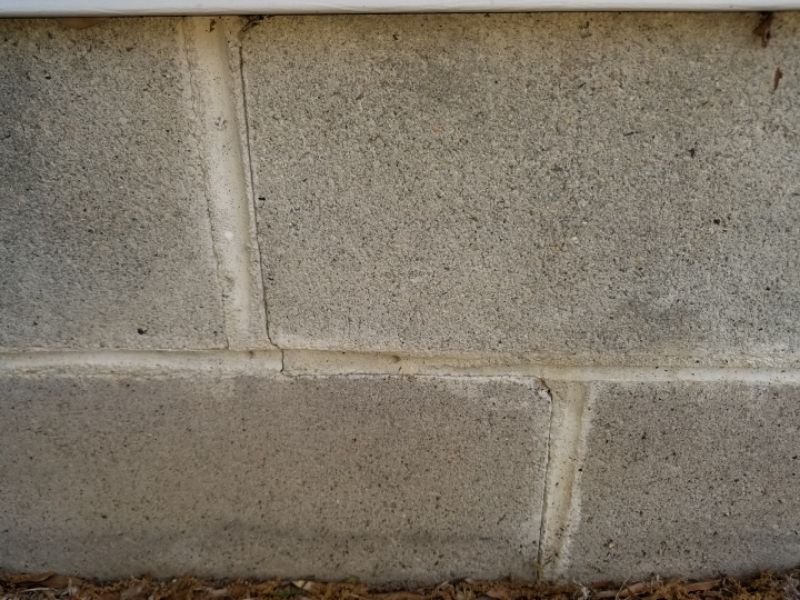
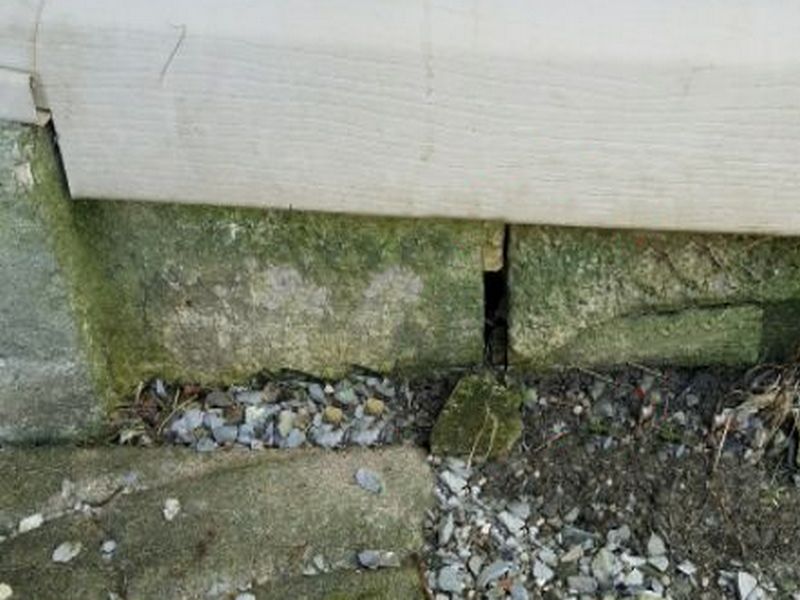
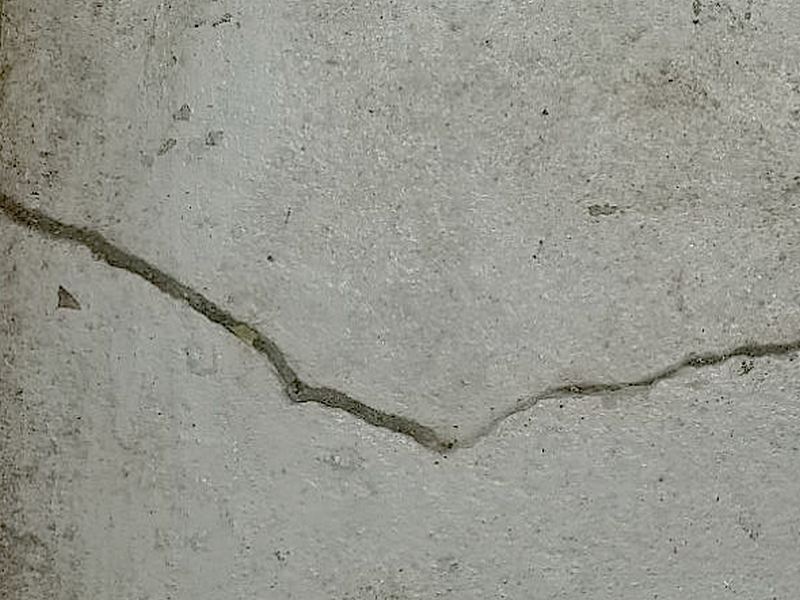
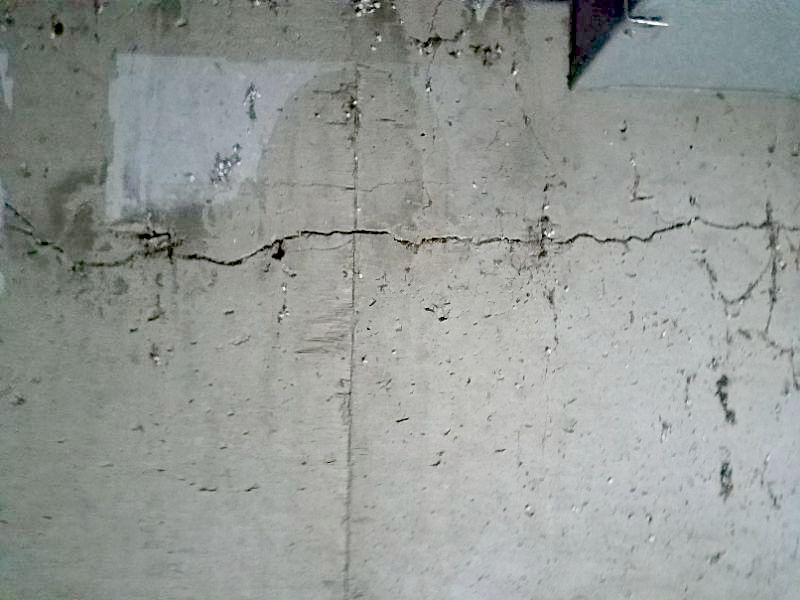
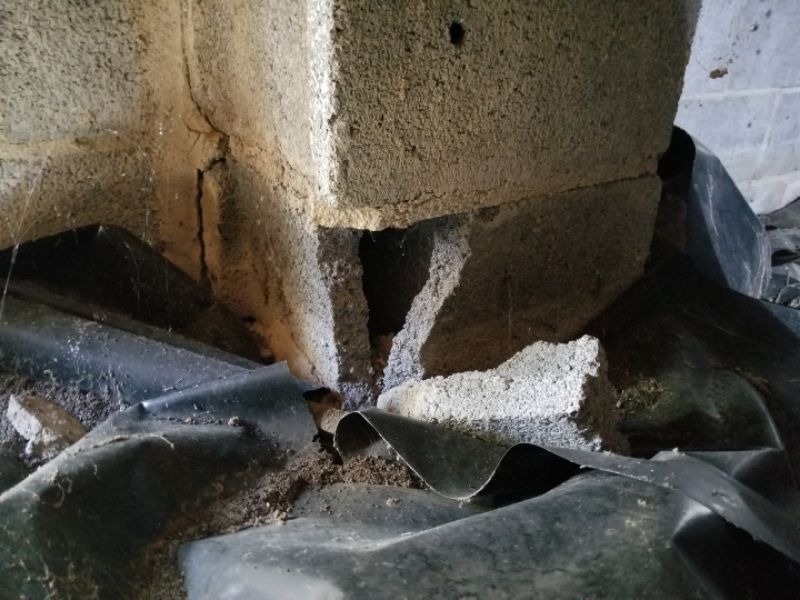
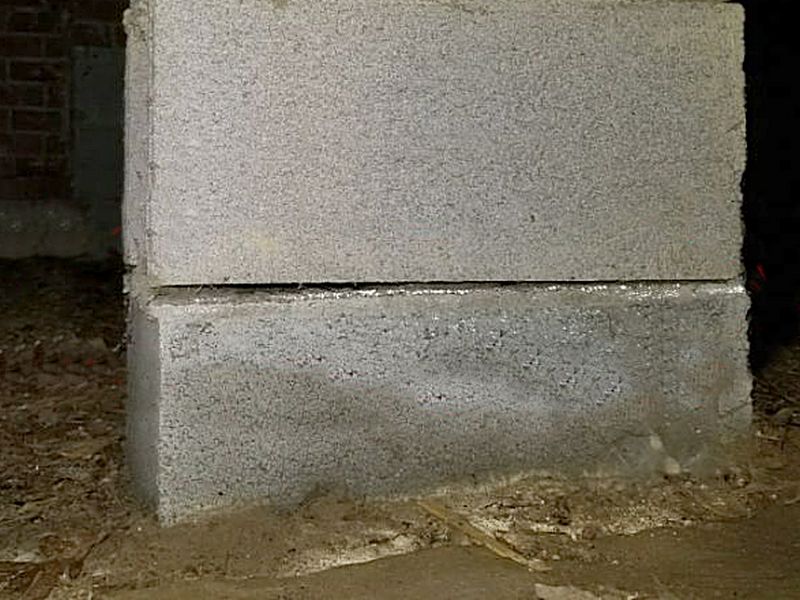
There is minor cracking in the foundation wall. No settlement or displacement is visible. Repair and seal the cracks.
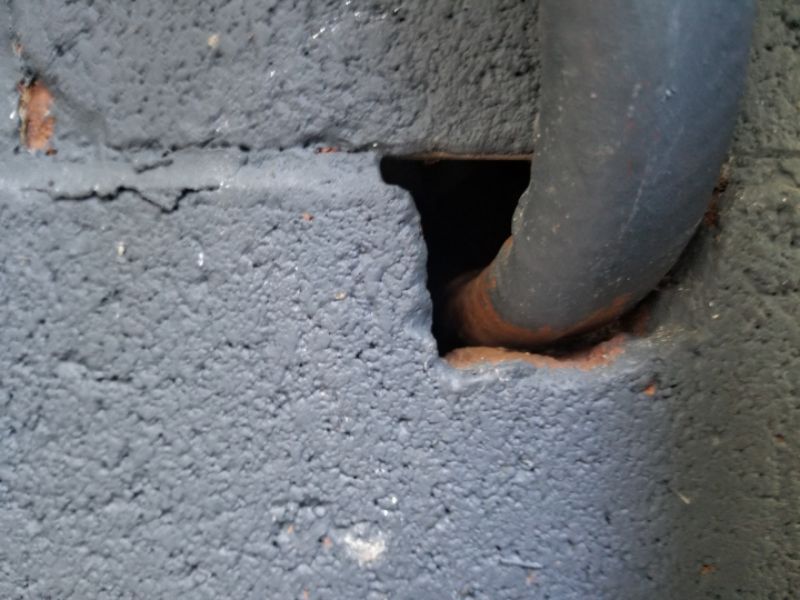
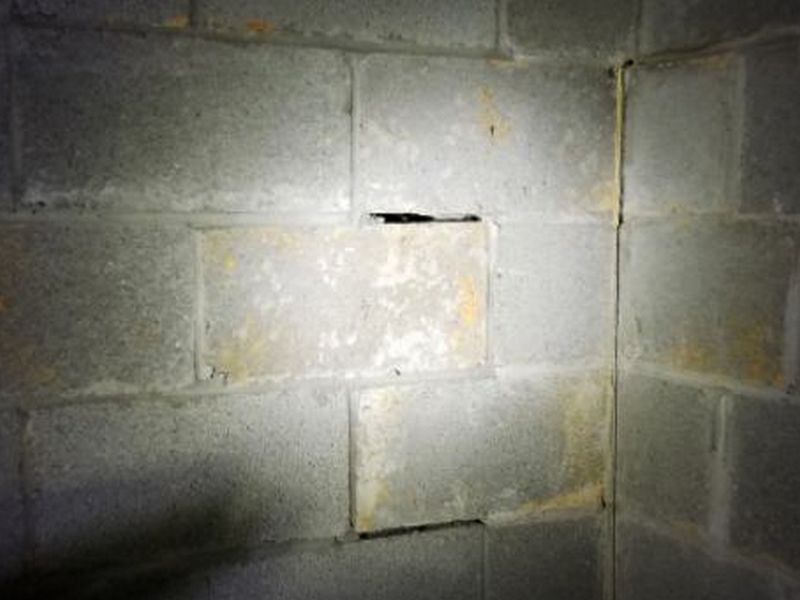
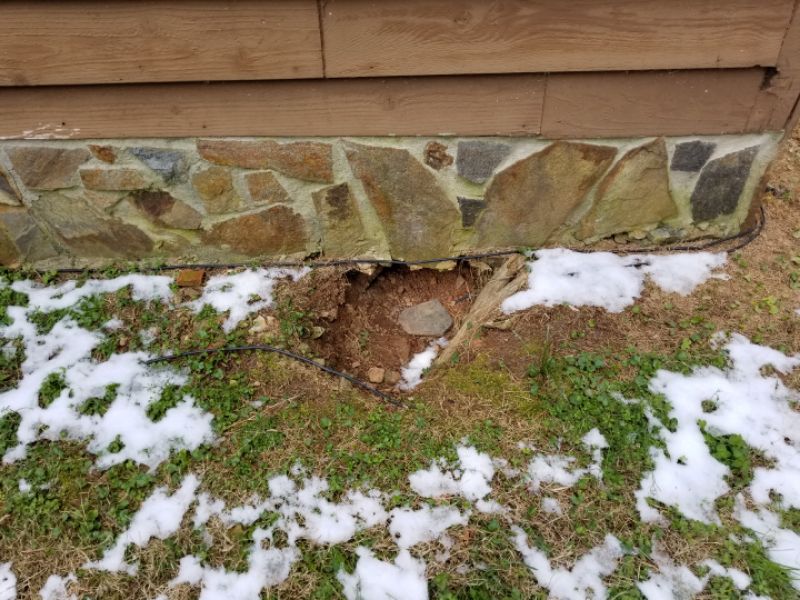
There are holes present in the foundation wall. Unsealed holes left in the foundation may allow water infiltration. Fill and seal the holes.

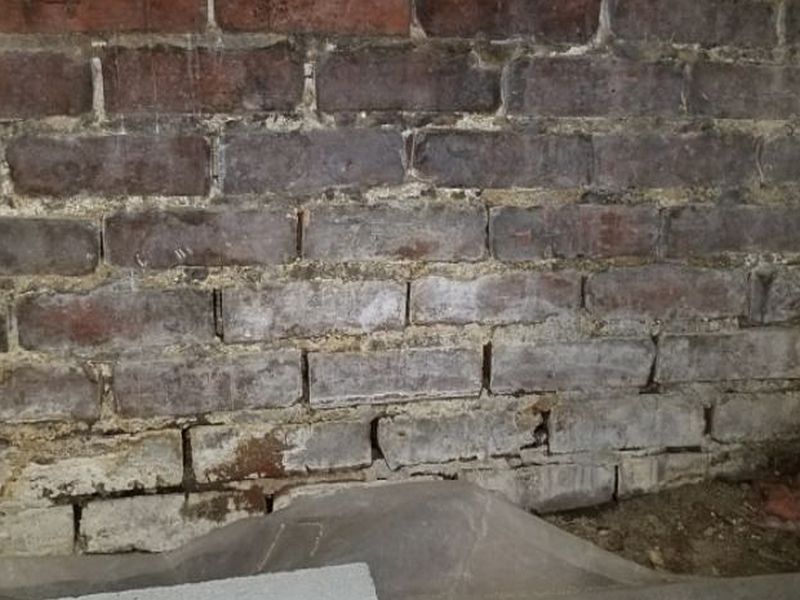
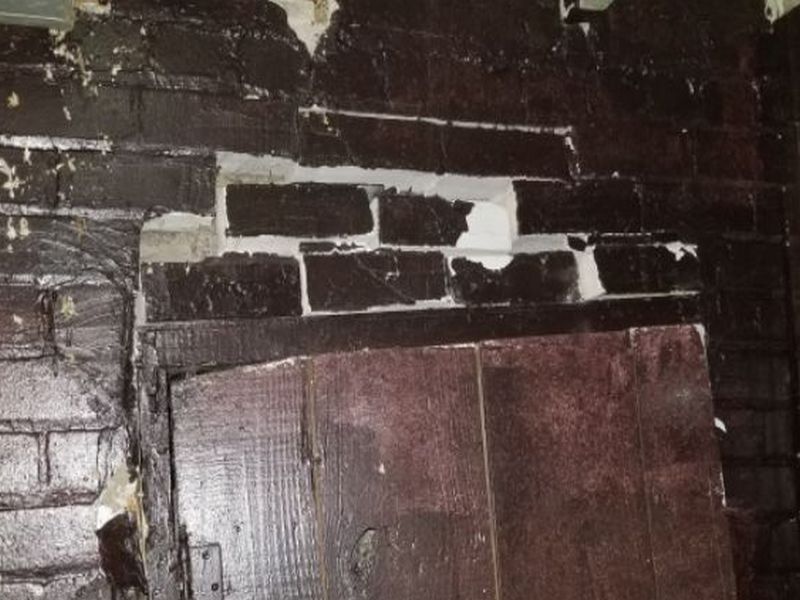
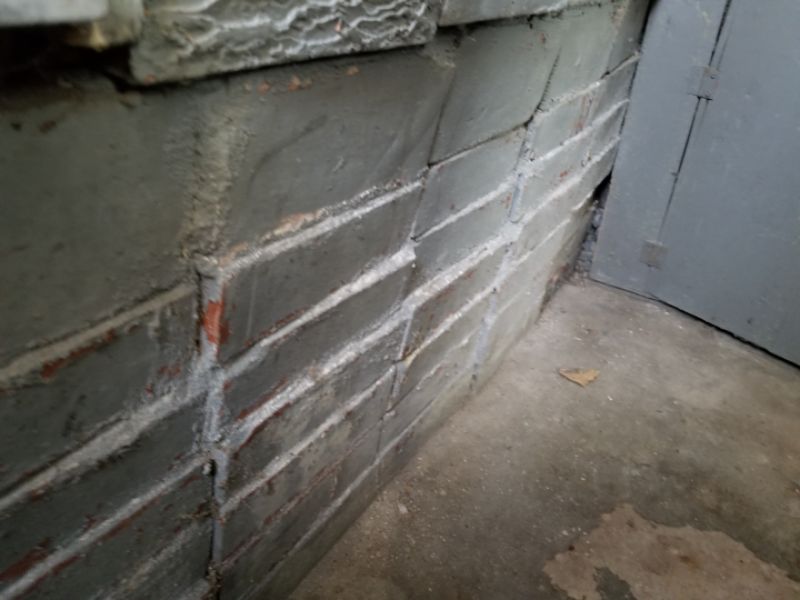
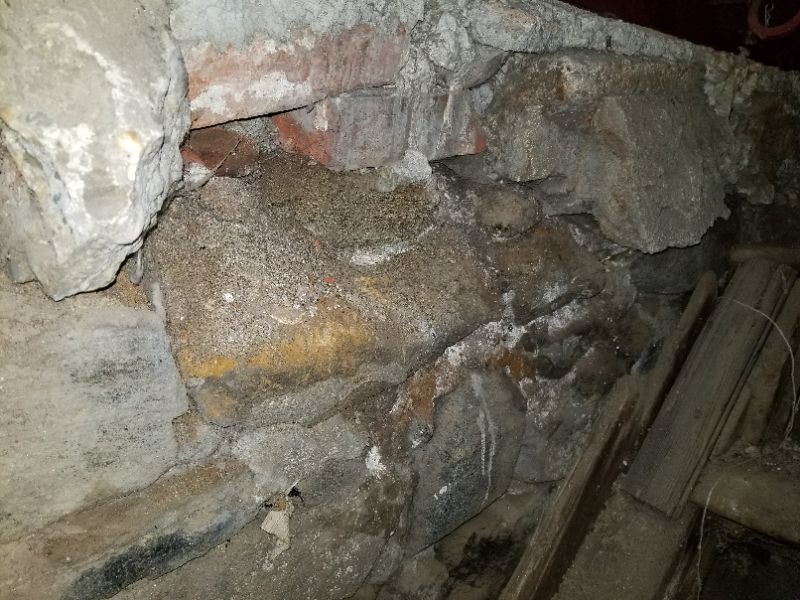
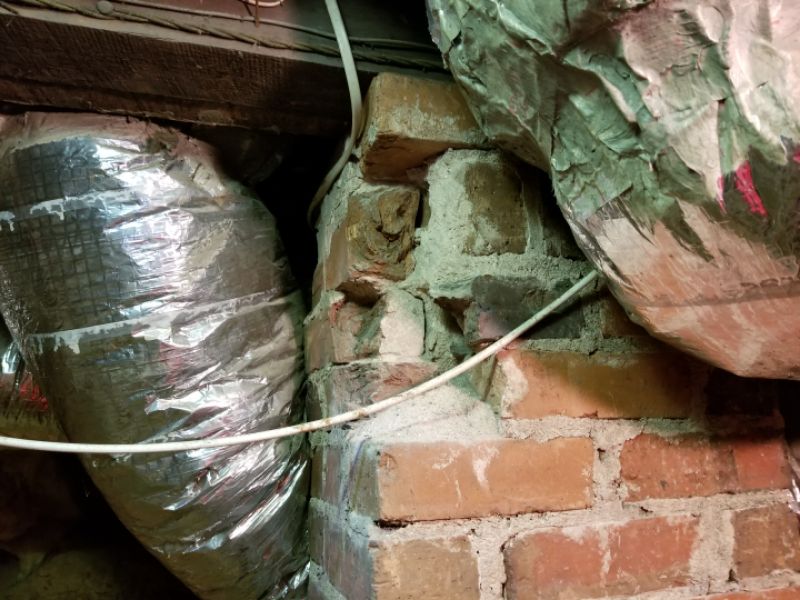
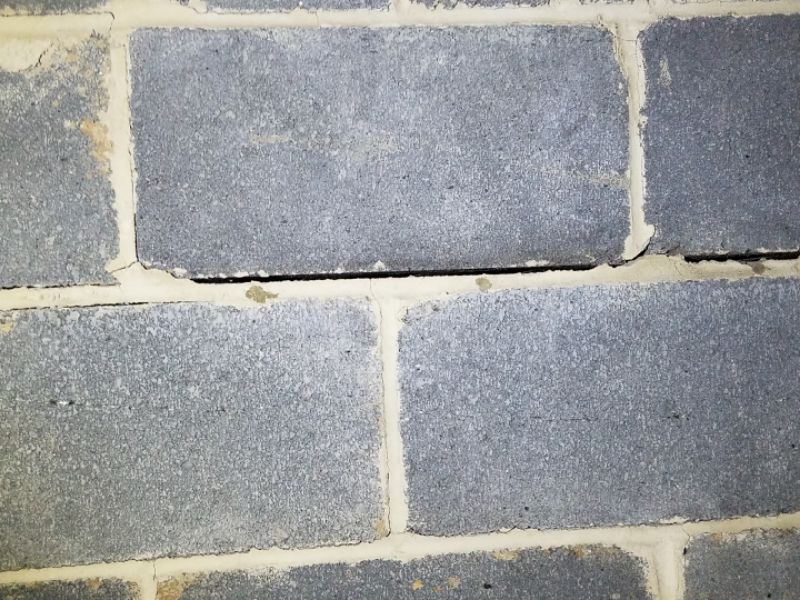
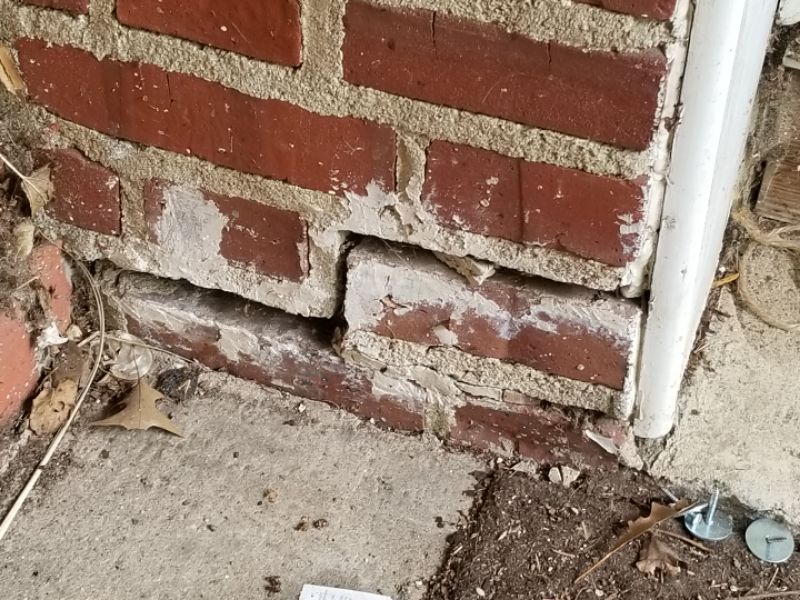
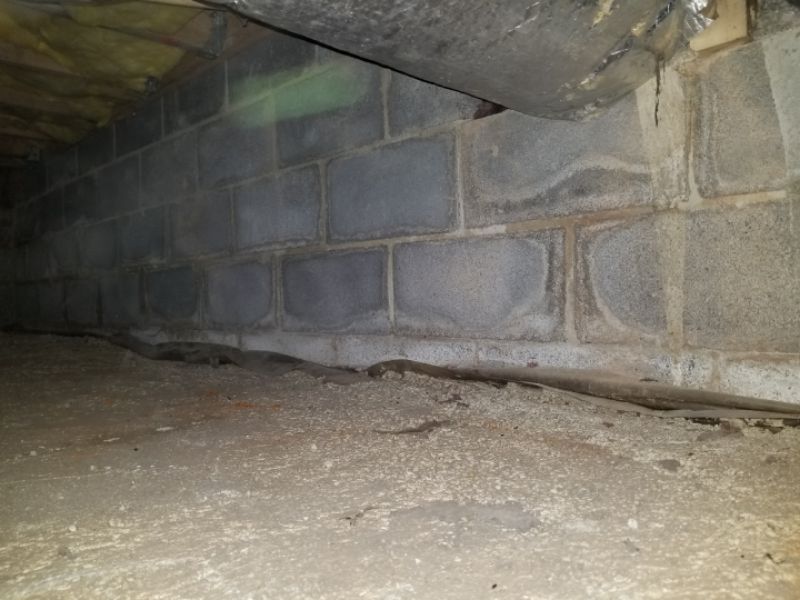
The mortar for the foundation walls is missing or deteriorated. This will allow moisture penetration and further damage. Repair the mortar joints.
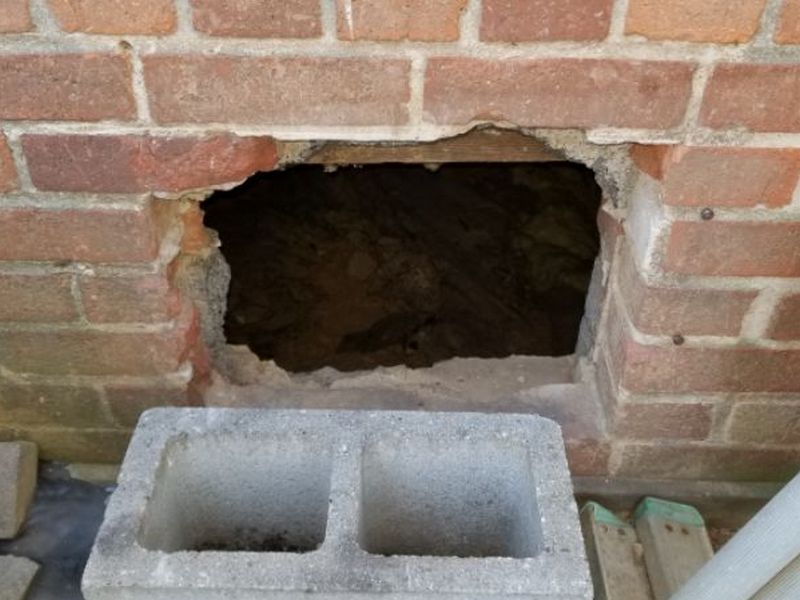
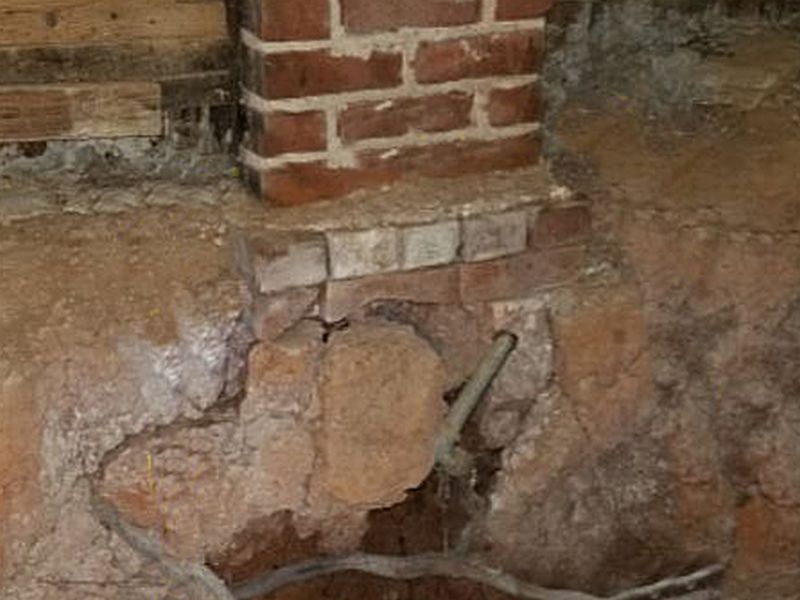
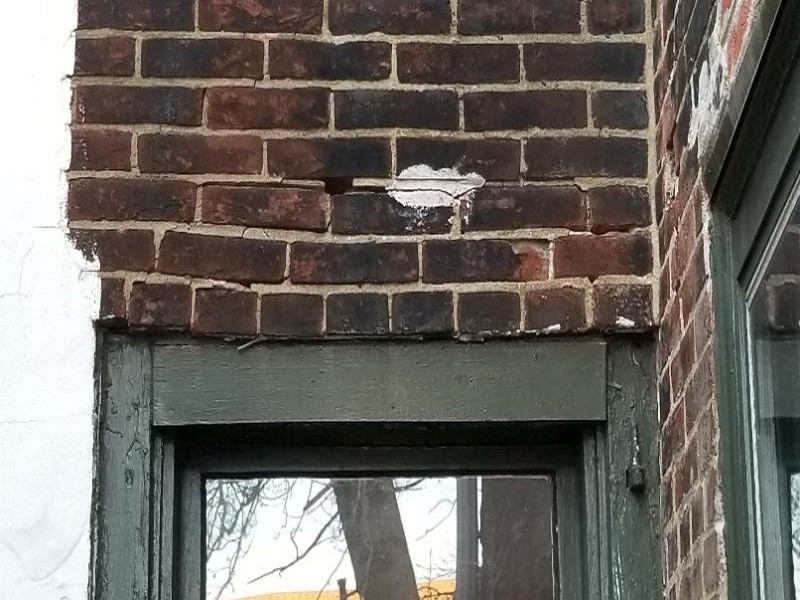
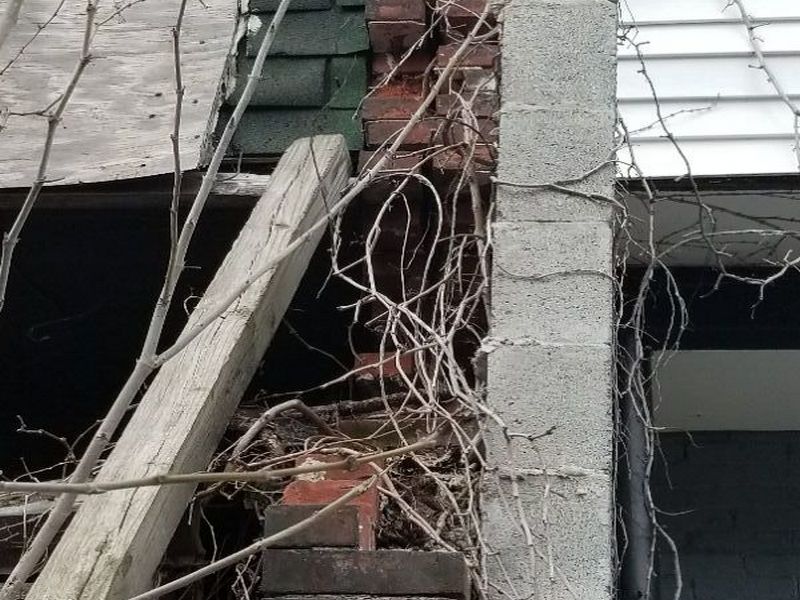
There is a lintel missing where an opening has been made in the foundation. Lintels are required to carry the structural loads around the opening once the wall components are removed. Hire a contractor to provide repairs as needed.
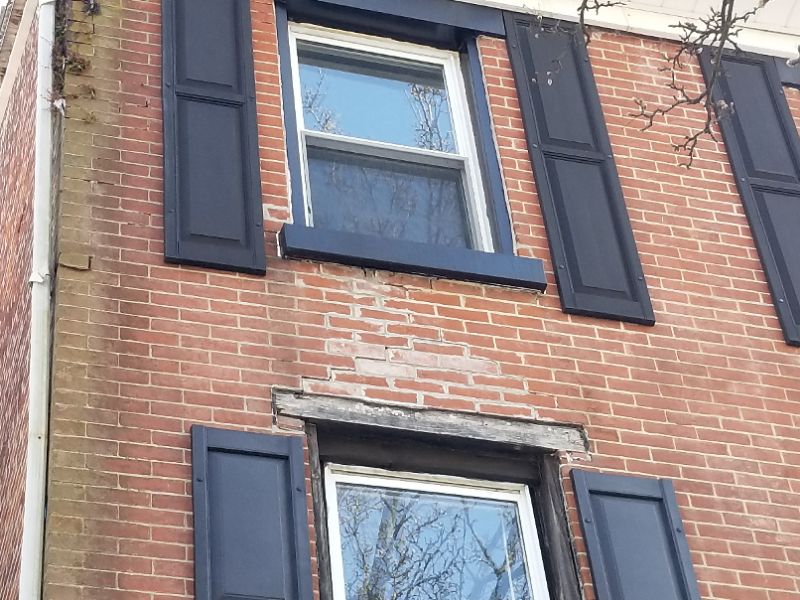
There is a damaged or deteriorated lintel in the foundation wall. This can affect the lintel’s support for the masonry above an opening in the foundation wall. Repair or replace the lintel.

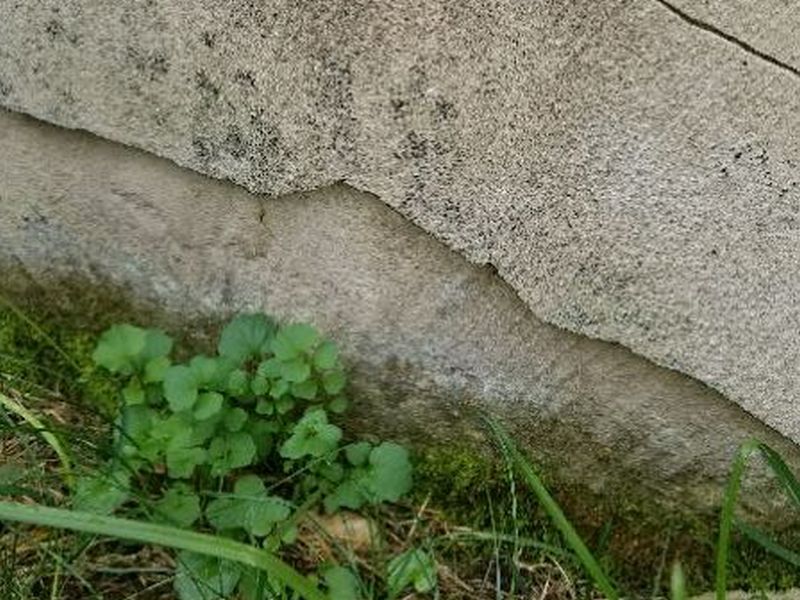
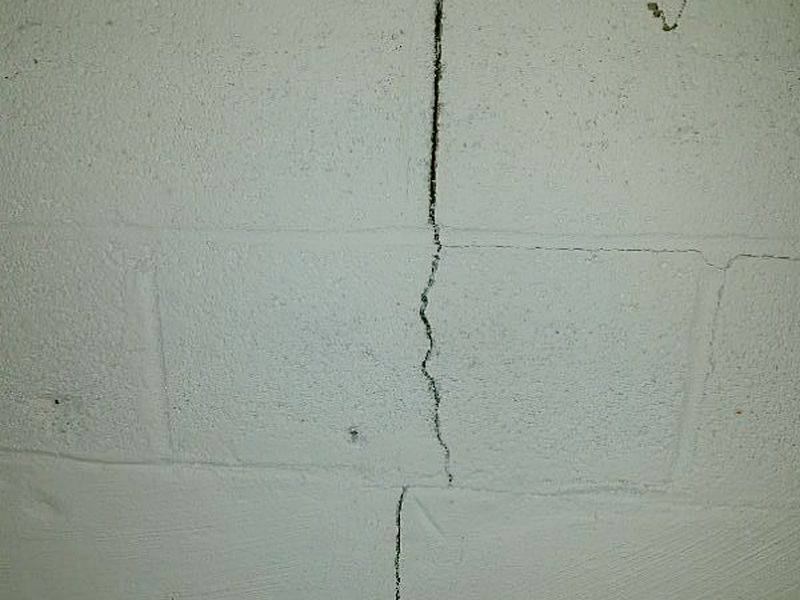
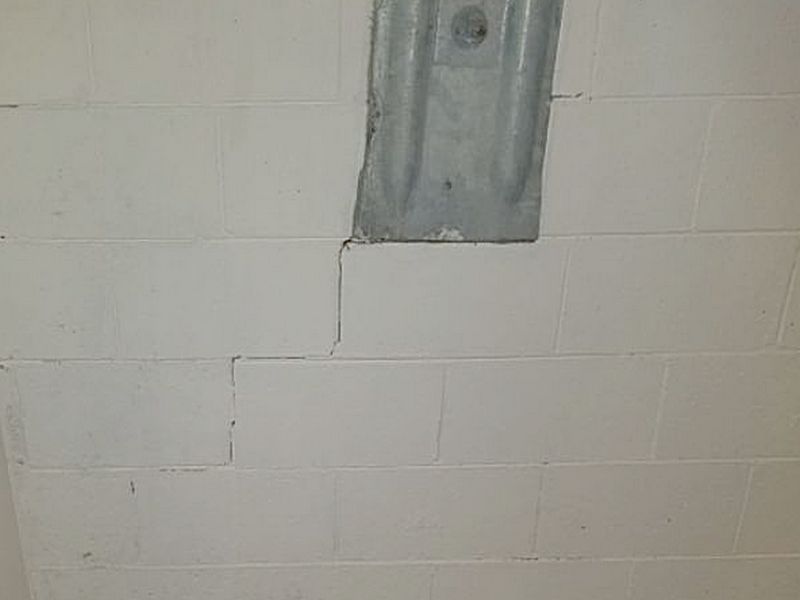
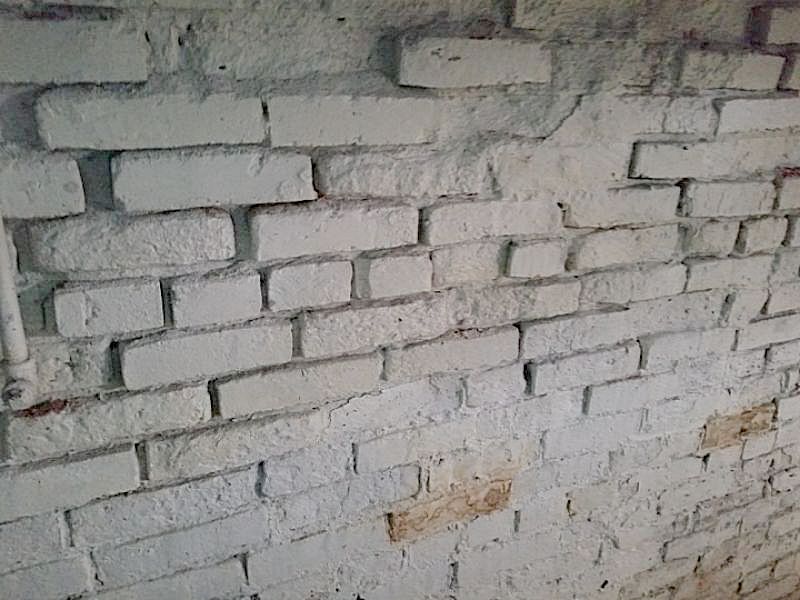
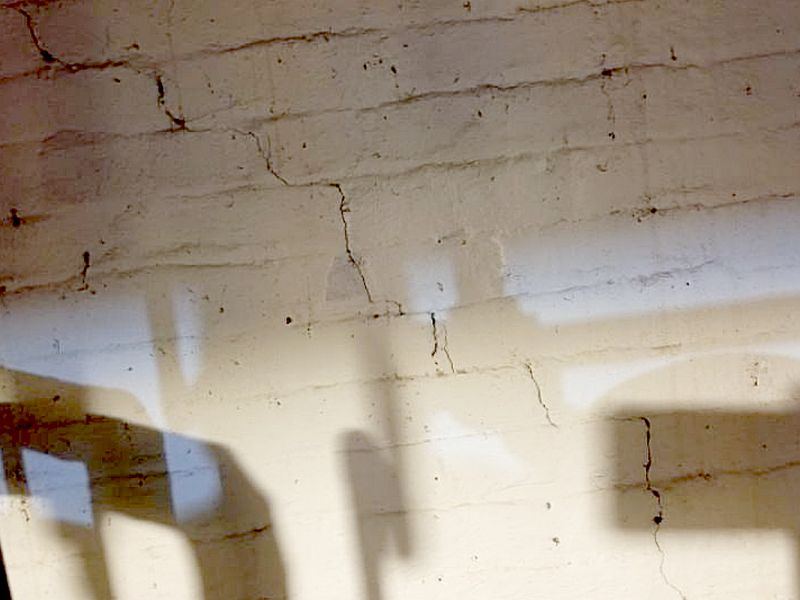
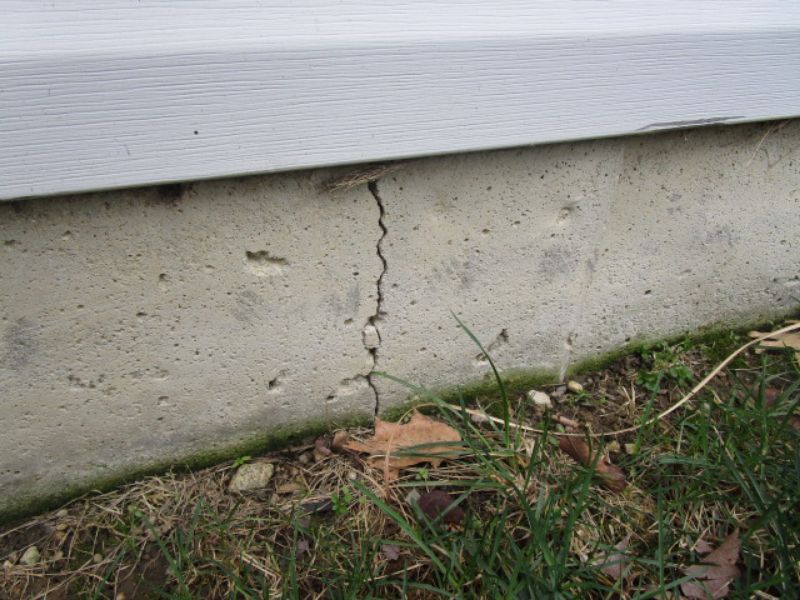
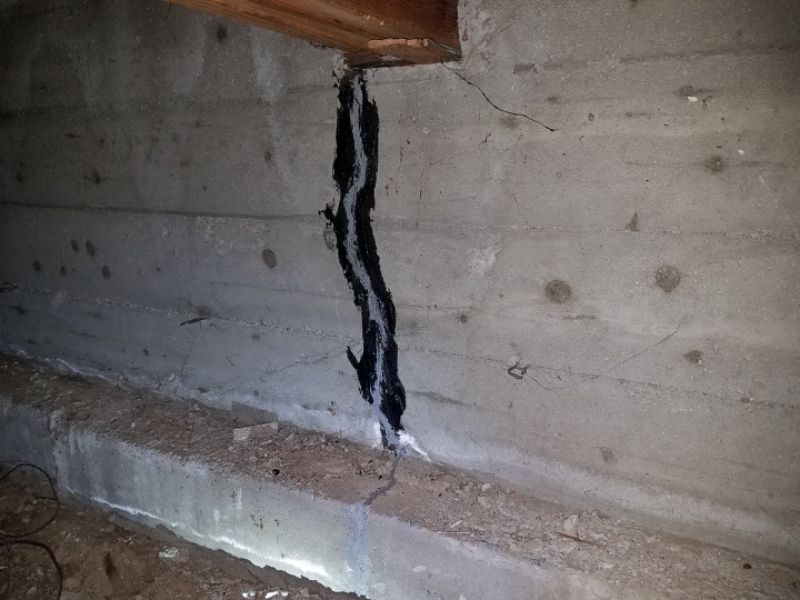
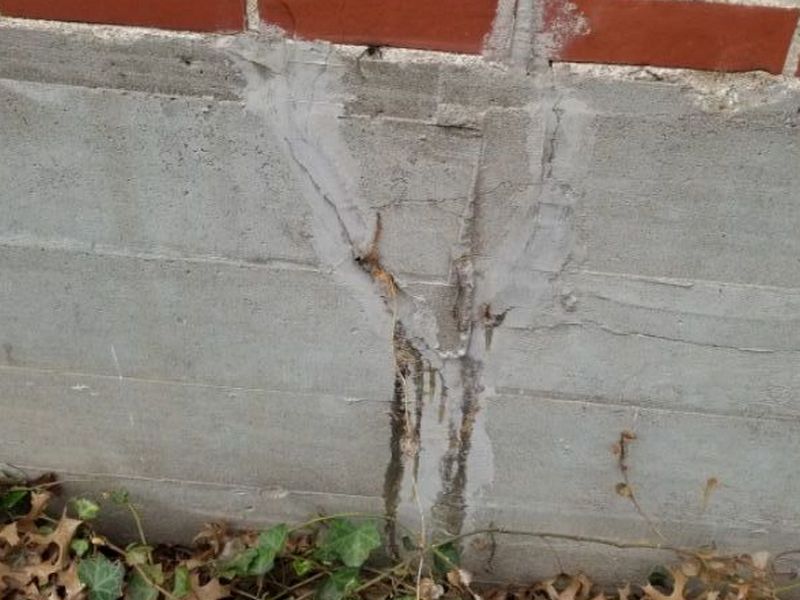
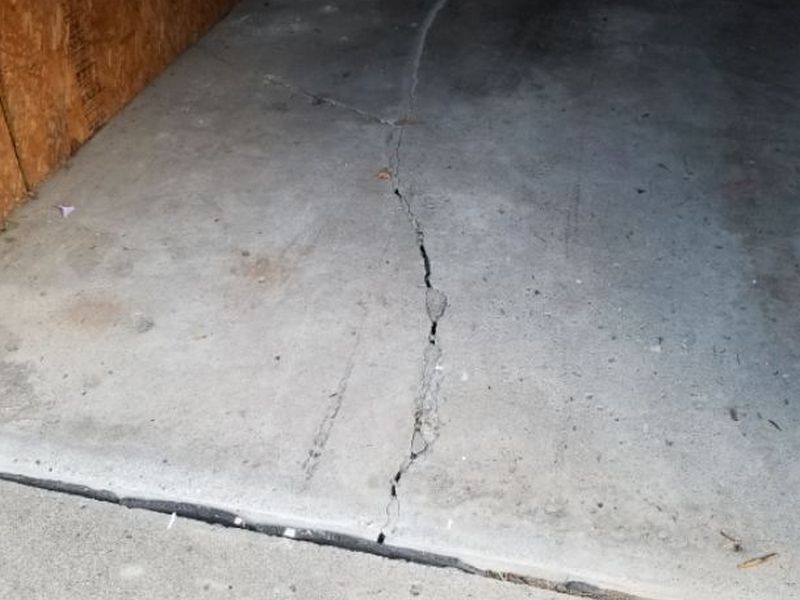
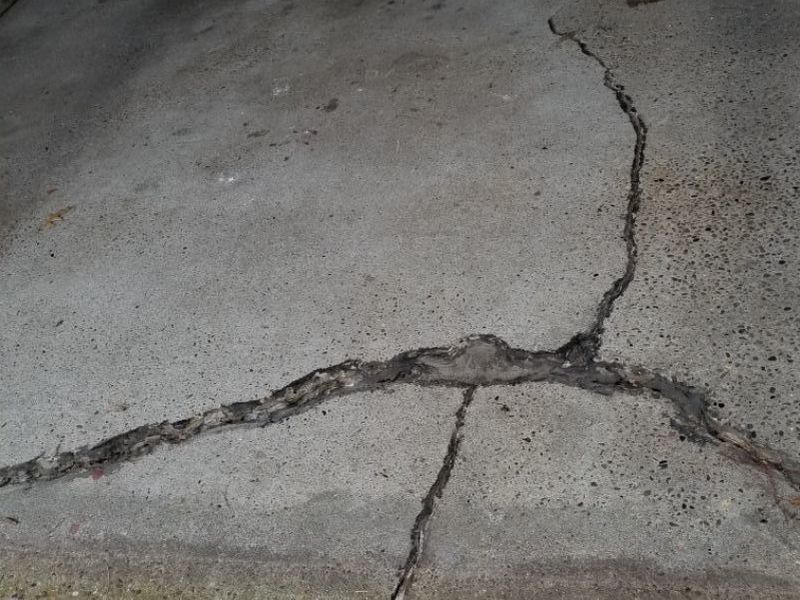
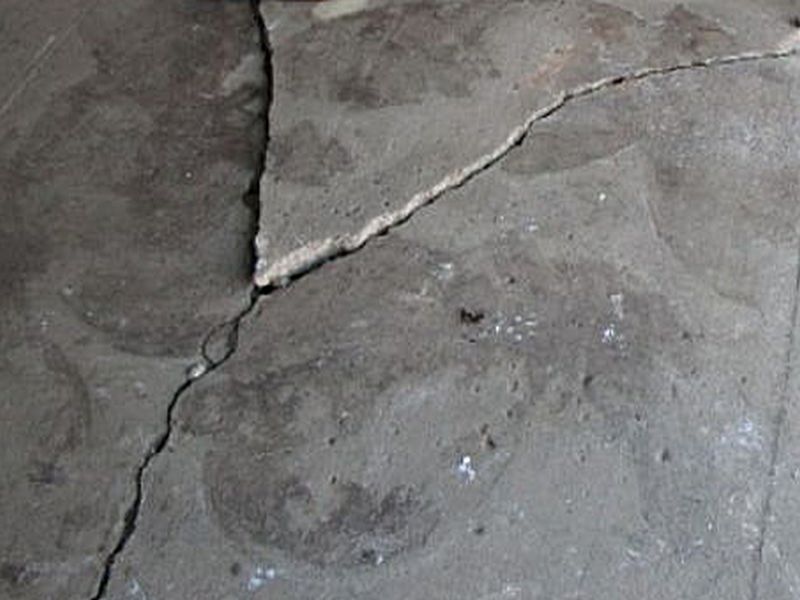
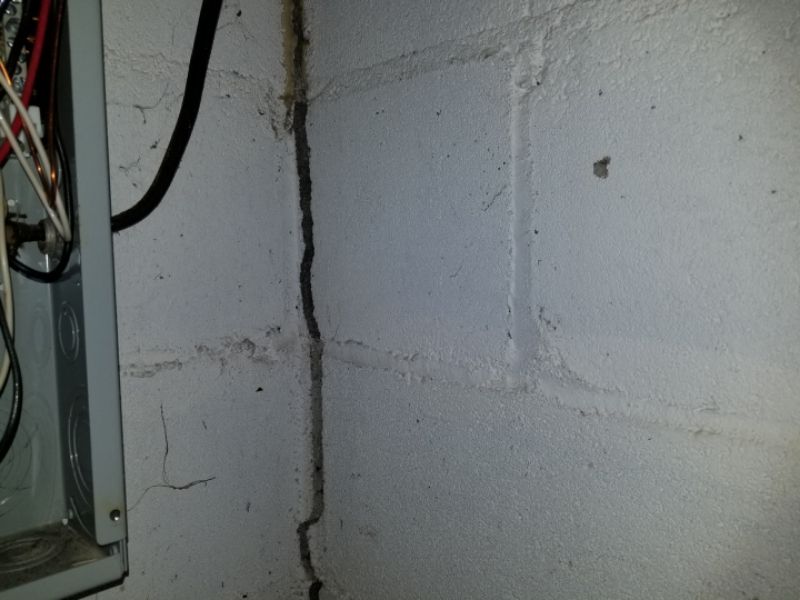
There are vertical cracks in the foundation. Vertical cracks indicate that the foundation has settled or is settling. Hire a contractor to evaluate the cracks and provide repairs as needed.

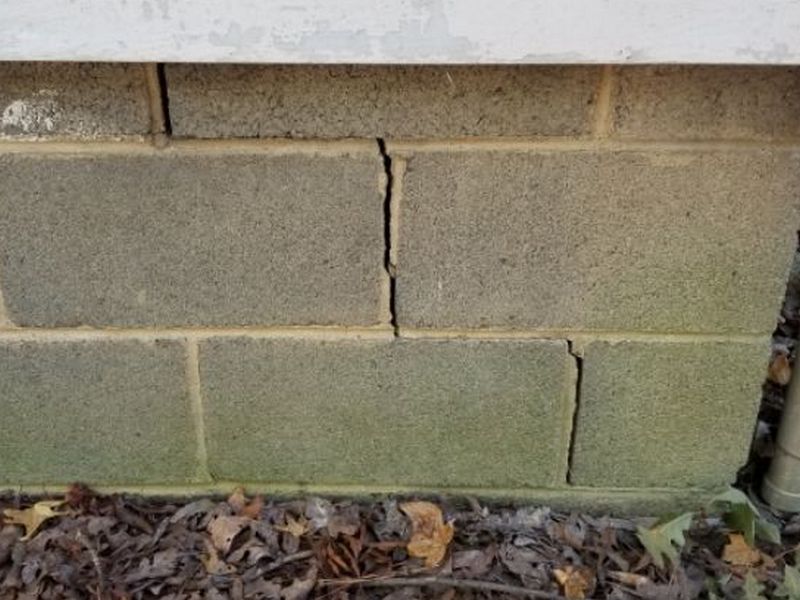
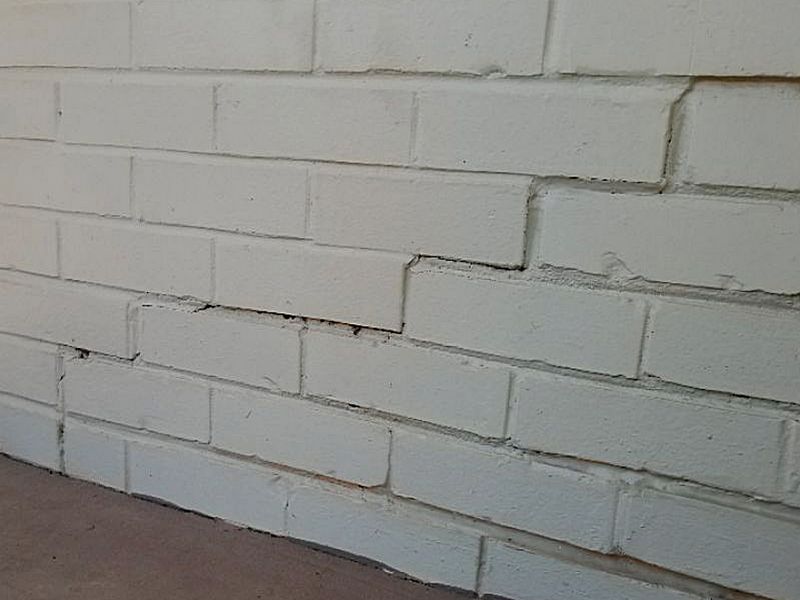
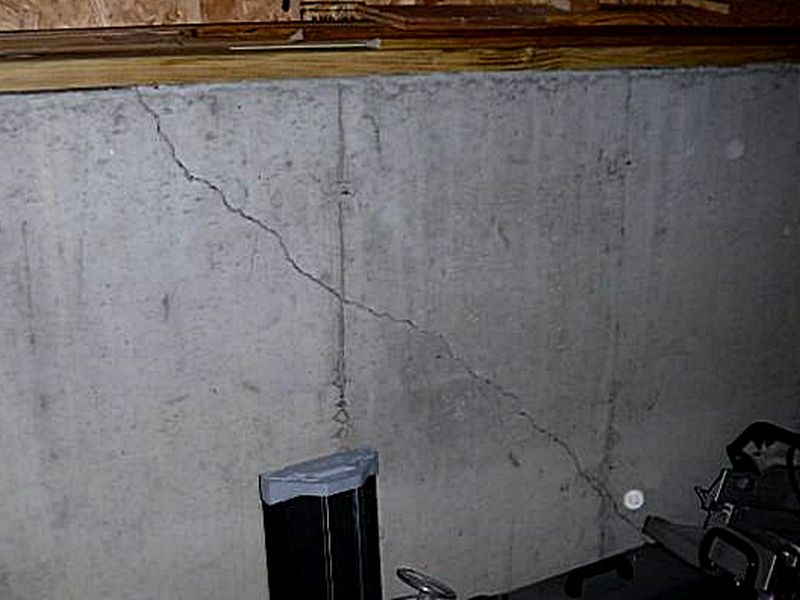
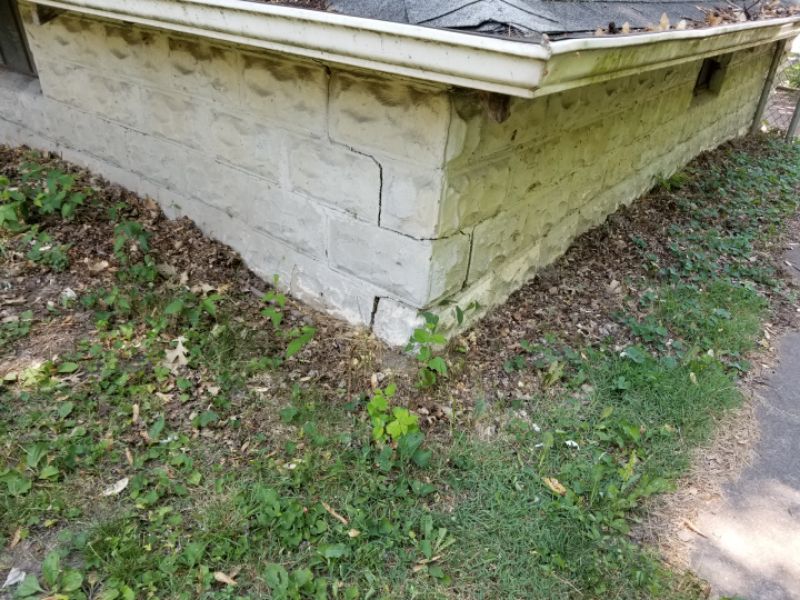
There are step cracks in the foundation wall. Step cracks indicate that the foundation has settled or is settling. Hire a contractor to evaluate the cracks and provide repairs as needed.
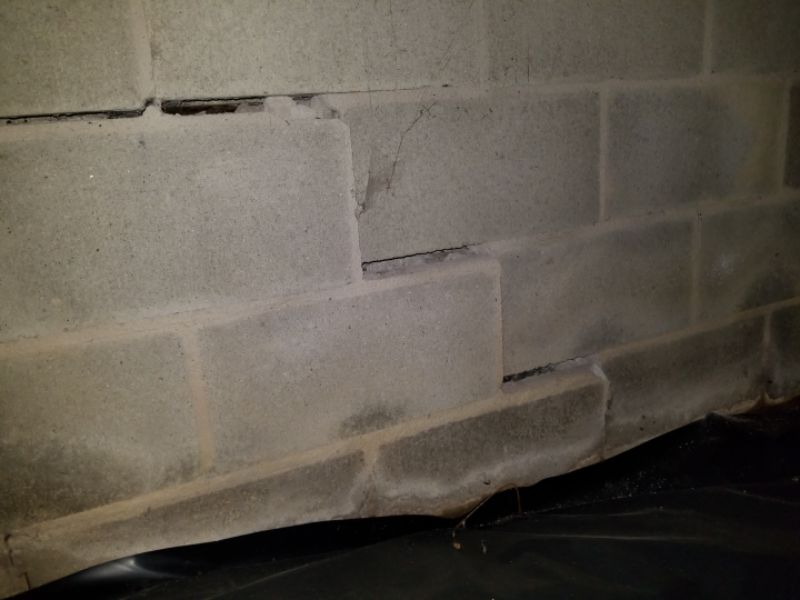
There are step cracks in the foundation wall. Step cracks indicate that the foundation has settled or is settling. Repairs are present. You should obtain any warranty information available. Hire a contractor to evaluate the cracks and repairs as needed.
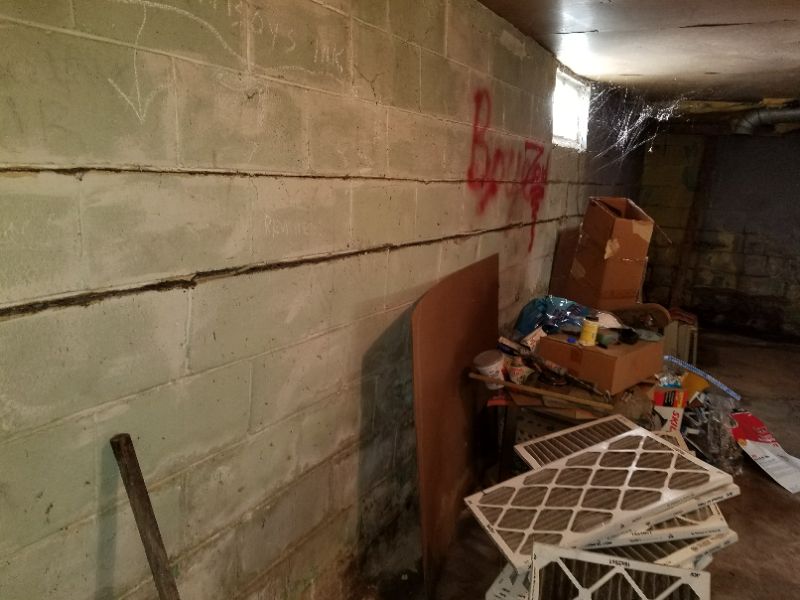
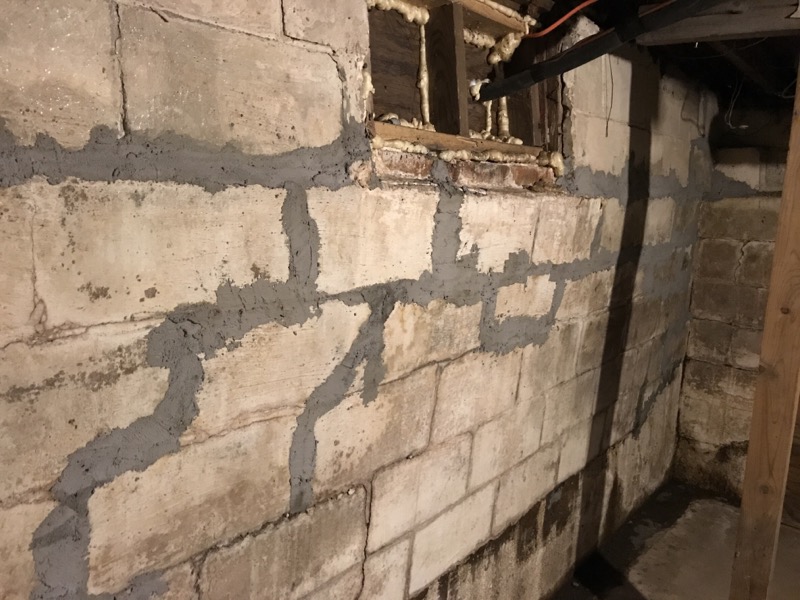
There are horizontal cracks in the foundation wall. This indicates excessive lateral pressures and wall failure. Hire a contractor to evaluate the cracks and provide repairs as needed.
There are horizontal cracks and bowing in the foundation wall. This indicates excessive lateral pressures and wall failure. Repairs have been performed. You should obtain any warranty information available. Hire a contractor to evaluate the cracks and repairs as needed.
The foundation’s concrete parge coat is damaged. The parging helps to provide protection against moisture intrusion. Repair the parging; hire a contractor as needed.
The mortar for the foundation walls is missing or deteriorated. This will allow moisture penetration and further damage. Repair the mortar joints.
There is a lintel missing where an opening has been made in the foundation. Lintels are required to carry the structural loads around the opening once the wall components are removed. Hire a contractor to provide repairs as needed.
There is a damaged or deteriorated lintel in the foundation wall. This can affect the lintel’s support for the masonry above an opening in the foundation wall. Repair or replace the lintel.
There are step cracks in the foundation wall. Step cracks indicate that the foundation has settled or is settling. Hire a contractor to evaluate the cracks and provide repairs as needed.
There are horizontal cracks and bowing in the foundation wall. This indicates excessive lateral pressures and wall failure. Hire a contractor to evaluate the cracks and provide repairs as needed.
The foundation wall is out of plumb or leaning. This will compromise the load bearing capacity of the wall. Hire a contractor for an evaluation and to provide repairs as needed.
Firewood or wood debris is piled against the siding. This is conducive to wood destroying insect activity. Move the firewood and debris.
The slab is damaged. This can allow water penetration and further deterioration. Hire a contractor for repairs as needed.

The slab is being undermined. This can allow settlement and damage. Hire a contractor to correct the conducive conditions and make repairs as needed.

The slab has settled; the reason for this is not known. Action is needed to prevent possible ongoing damage. Hire a contractor for an evaluation and repairs as needed.
There is minor cracking in the foundation wall. No settlement or displacement is visible. Repair and seal the cracks.

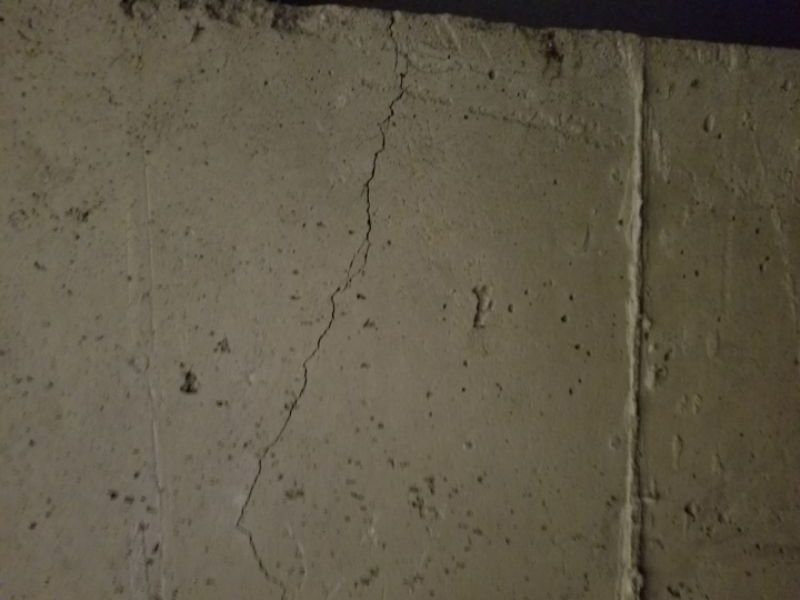
There are vertical cracks in the foundation. Vertical cracks indicate that the foundation has settled or is settling. Hire a contractor to evaluate the cracks and provide repairs as needed.
There are vertical cracks in the foundation wall. Vertical cracks indicate that the foundation has settled or is settling. Repairs have been performed. You should obtain any warranty information available. Hire a contractor to evaluate the cracks and repairs as needed.
There are horizontal cracks and bowing in the foundation wall. This indicates excessive lateral pressures and wall failure. Hire a contractor to evaluate the cracks and provide repairs as needed.
There are horizontal cracks and bowing in the foundation wall. This indicates excessive lateral pressures and wall failure. Repairs have been performed. You should obtain any warranty information available. Hire a contractor to evaluate the cracks and repairs as needed.
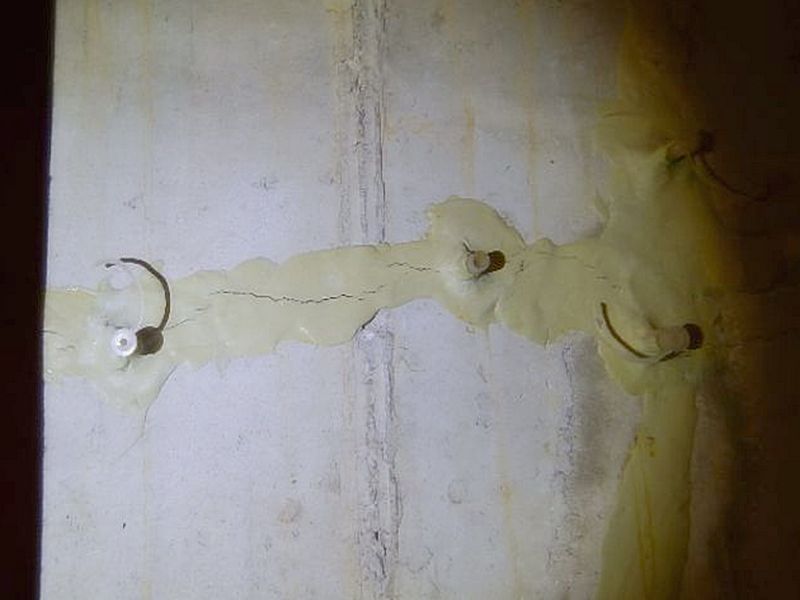
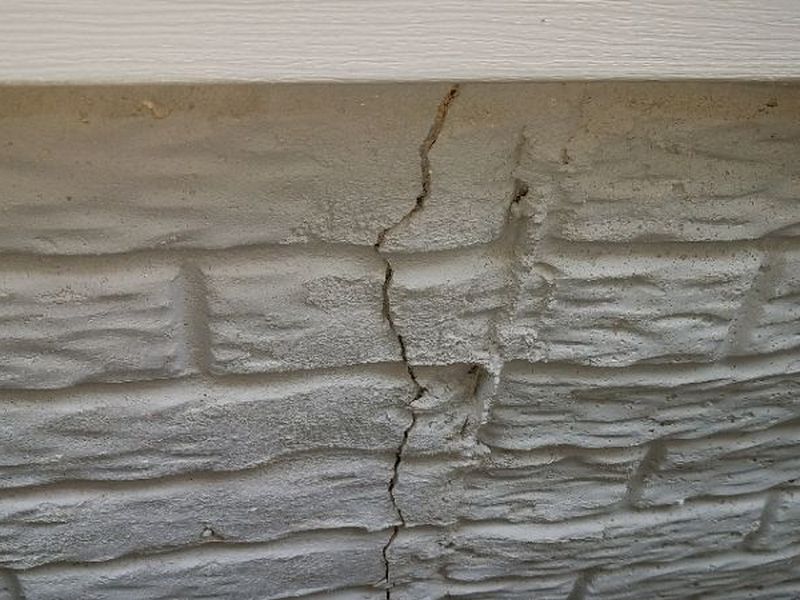
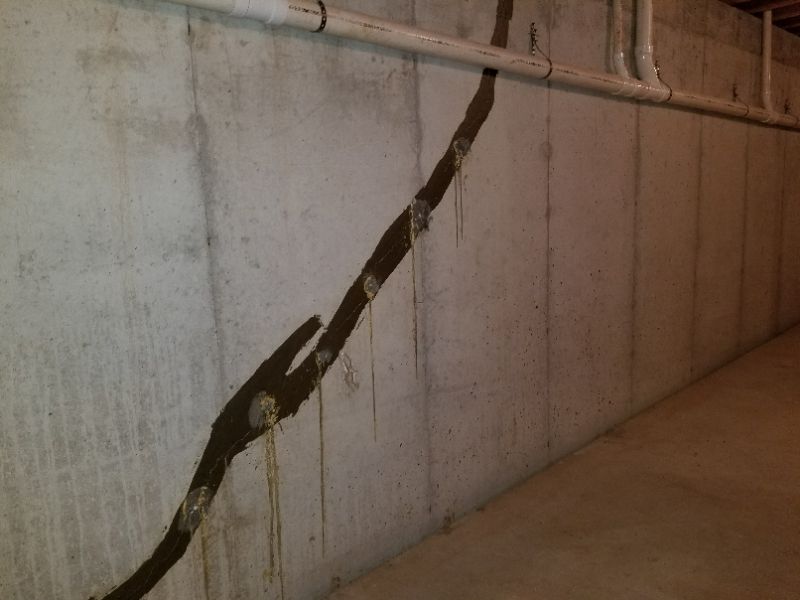
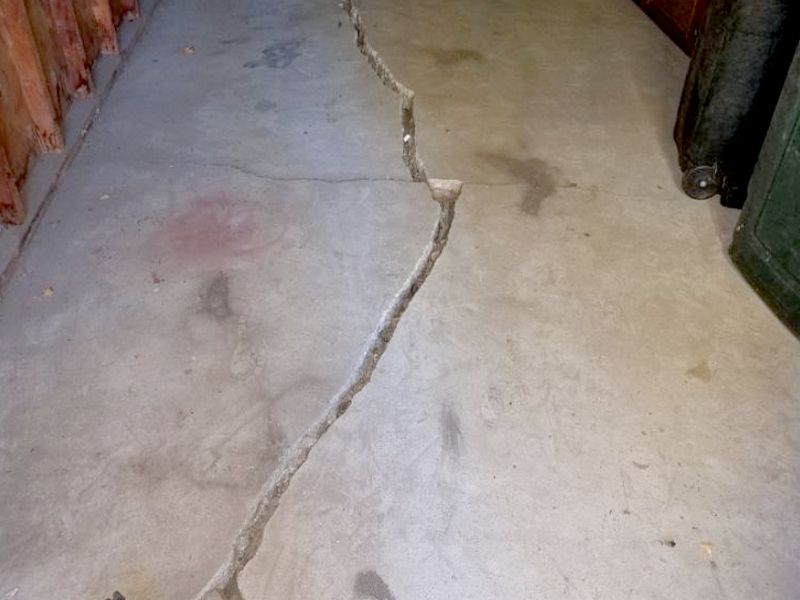
There is a diagonal crack in the foundation wall and differential movement on either side of the crack. Diagonal cracks often indicate a lack of support under the foundation at that area. Hire a contractor to evaluate the cracks and provide repairs as needed.
There is a diagonal crack in the foundation wall and differential movement on either side of the crack. Diagonal cracks often indicate a lack of support under the foundation at that area. Repairs have been performed. You should obtain any warranty information available. Hire a contractor to evaluate the cracks and repairs as needed.
The mortar for the foundation walls is missing or deteriorated. This will allow moisture penetration and further damage. Repair the mortar joints.
There is a lintel missing where an opening has been made in the foundation. Lintels are required to carry the structural loads around the opening once the wall components are removed. Hire a contractor to provide repairs as needed.
There are vertical cracks in the foundation. Vertical cracks indicate that the foundation has settled or is settling. Hire a contractor to evaluate the cracks and provide repairs as needed.
There is differential settlement in the foundation. This implies a structural failure. Hire a contractor for an evaluation and to provide repairs as needed.
Foundation Limitation and Information Statements
Areas inaccessible/not visible due to height, design, materials: Some areas are inaccessible and/or not visible due to height, design and materials. Therefore, the inspection is limited.
Painted/sealed cracks hide evidence of moisture intrusion: The foundation has been painted. Paint can seal cracks and/or obscure evidence of moisture intrusion. Therefore, the inspection is limited.
Covered with insulation: The foundation is covered with insulation. Therefore, the inspection is limited.
Finished areas, no view behind walls, above ceilings, or other obstructions: Finished areas limit the inspection. The inspector does not inspect behind walls, above ceilings, or other obstructions which obstruct the inspector’s view.
Maintained by local association, not inspected: The foundation appears to be maintained by local association and, therefore, is not inspected.
Expansive soils prevalent: Expansive soils are prevalent in this geographic area. Expansive soils, often referred to as marine clay or shrink/swell soils, can affect a home’s structure because changes in moisture content in the soil cause expansion and contraction with enough force to move and damage foundation walls, slabs, and driveways. We inspect visible areas of the structure. We do not determine if movement occurs because of expansive soils nor do we conduct soil testing. To determine the presence of expansive soils, hire a geo-technical engineer to conduct a soil test.
Wood foundation, estimating service life is difficult: There is a wood foundation. Estimating the service life of a wood foundation is difficult. Pressure treated lumber is expected to have about a 30-year ground contact rating, but this is dependent on the grade and treatment of the construction materials. Drainage issues are critically important for homes with wood foundations. Periodic maintenance of surface and roof water drainage components, such as proper surface grading and gutter systems, is required.
Beams
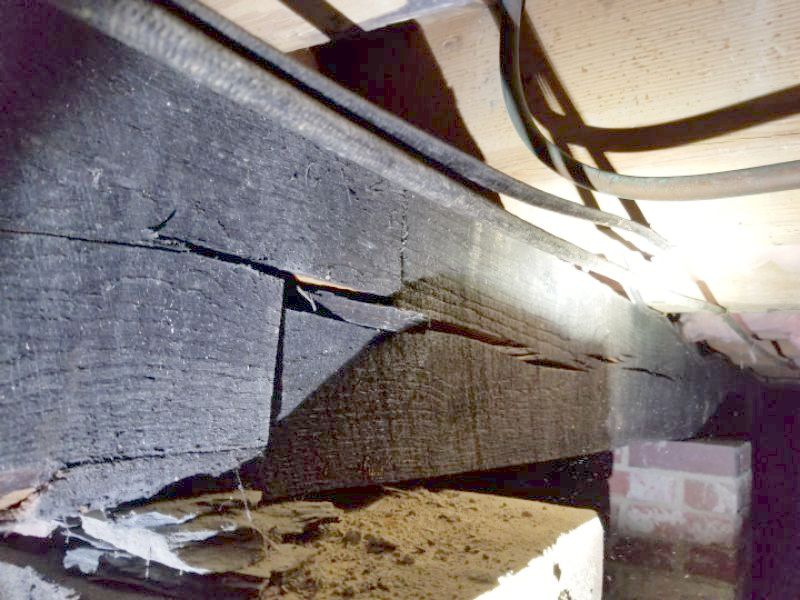
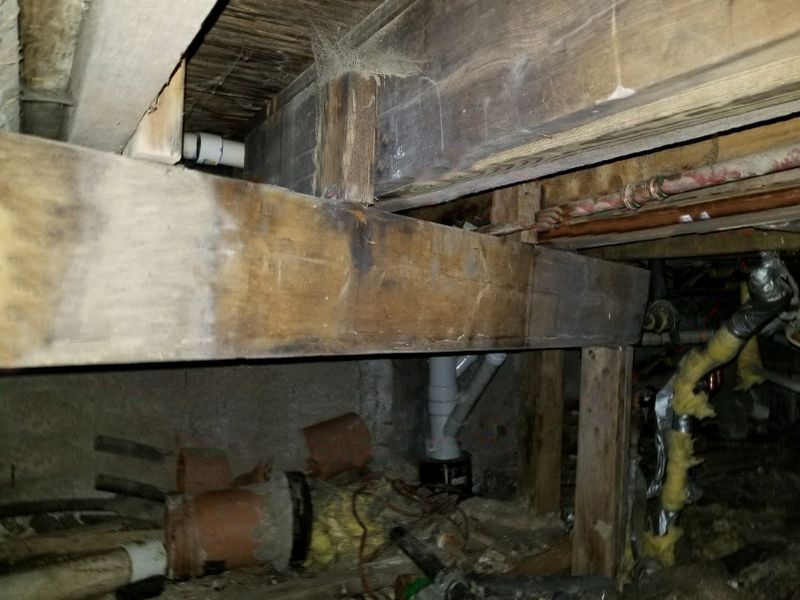
Beams are primary horizontal structural members, supporting entire sides of the floor system. Without beams, floor joists would have to be able to span from one foundation wall to the opposite wall. A beam supported by piers allows joists to be half the length, and prevents the need for a foundation wall in the middle. As they are basically standing in for a foundation wall, any problems can have widespread and even catastrophic implications.
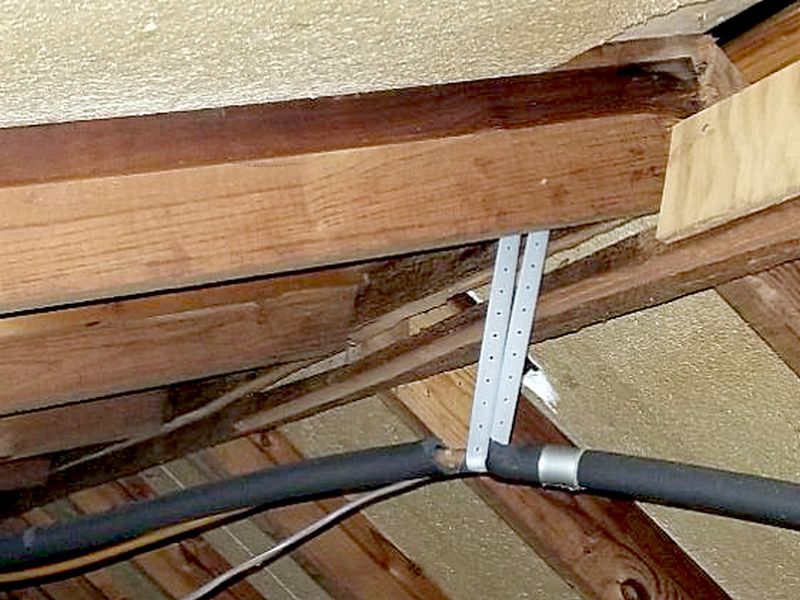
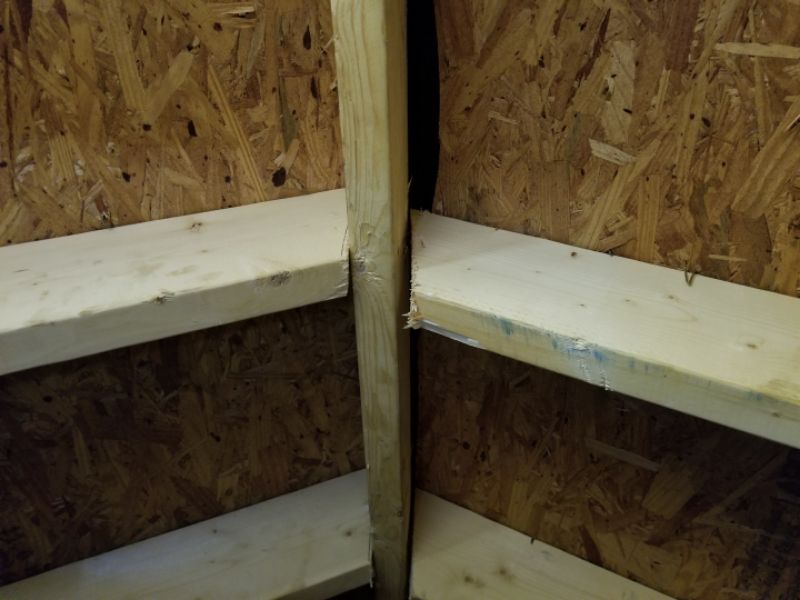
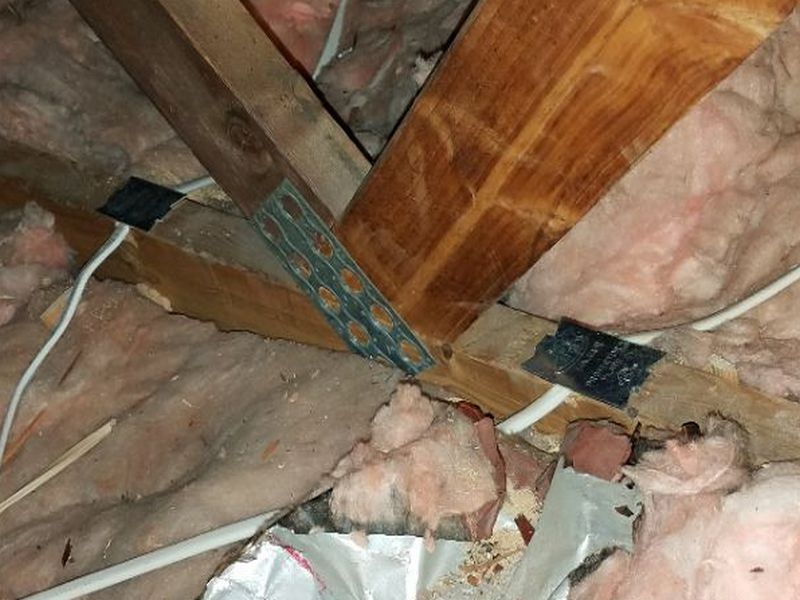
Beams inside a finished house are often not visible; problems must be inferred. Remember where the loads line up from the roof downward. Are there are openings rather than walls or columns below those load paths? A post and beam should be there. Look for cracks or sagging in the finished surfaces around the beams, or in the visible beams themselves. Inspect for proper bearing support when possible: 3″ on masonry and 1.5″ on wood or metal. Beams must be have positive connections to their support posts. Look for stains, damage, twisting, deterioration, and excess or improper notching or boring. Beams built up from dimensional lumber must be tightly-constructed.
The beam is cracked or damaged. This can affect its load-bearing capacity. Hire a contractor to repair or replace the beam.

The beam is notched or has holes drilled that are beyond acceptable limits. This reduces the beam’s load-bearing capacity. Hire a contractor to repair or replace the beam.
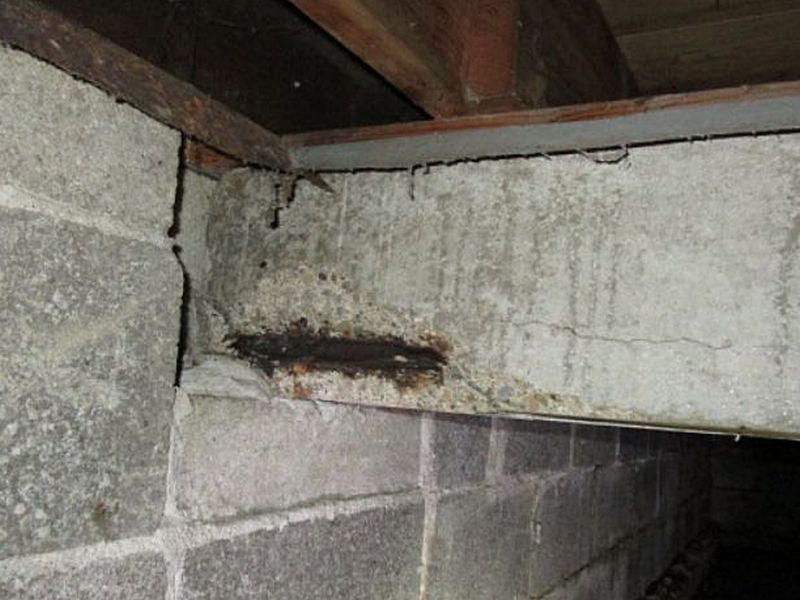
The beam has inadequate bearing. This affects its overall ability to carry structural loads. Hire a contractor to provide repairs as needed.
A splice in the beam is not over a pier. This can affect its load bearing capacity. Hire a contractor for repairs or replacement as needed.
The beam is twisted or rotated. This can affect its load-bearing capacity. Hire a contractor to repair or replace the beam.
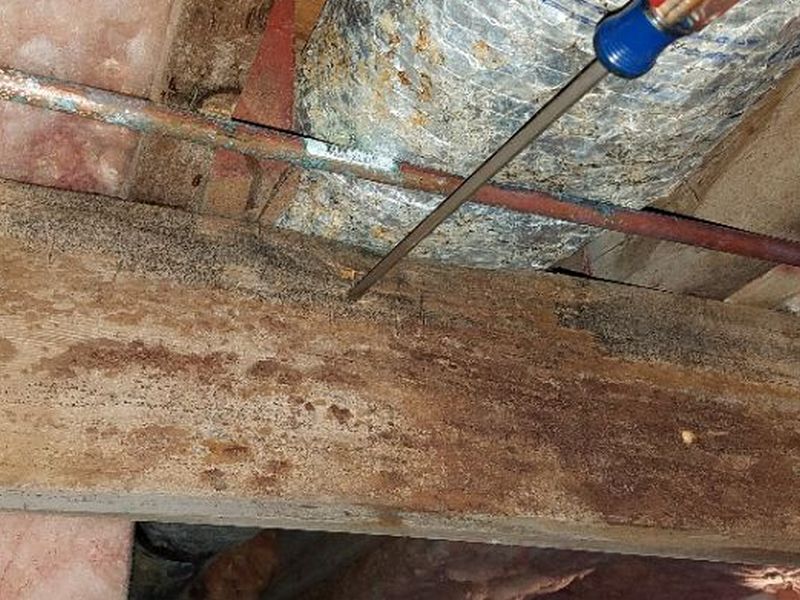
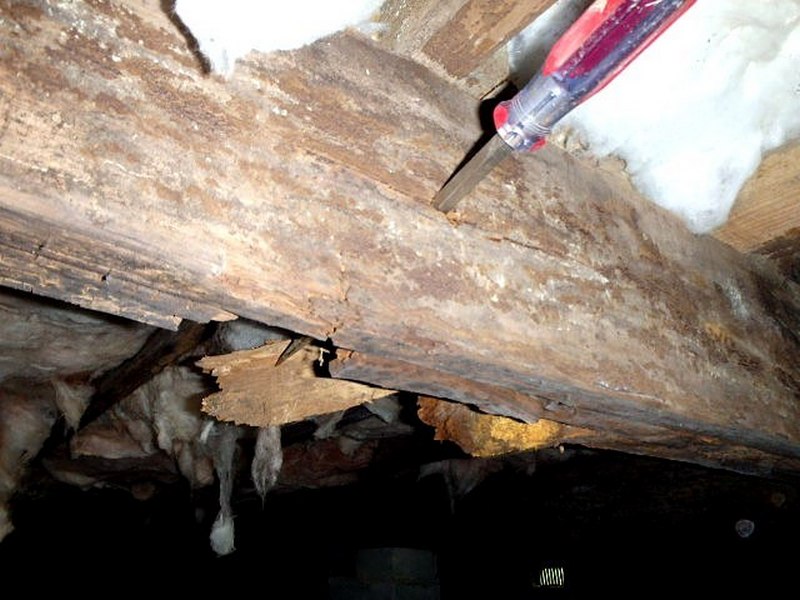
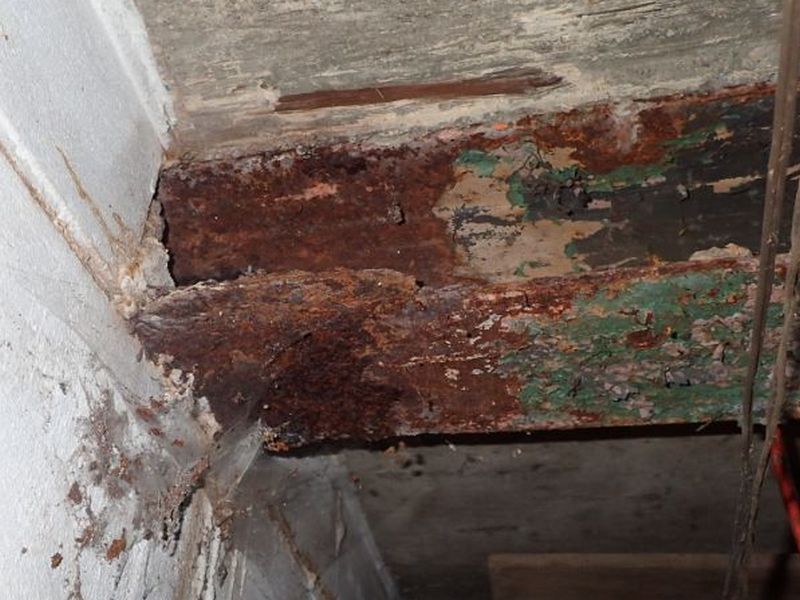
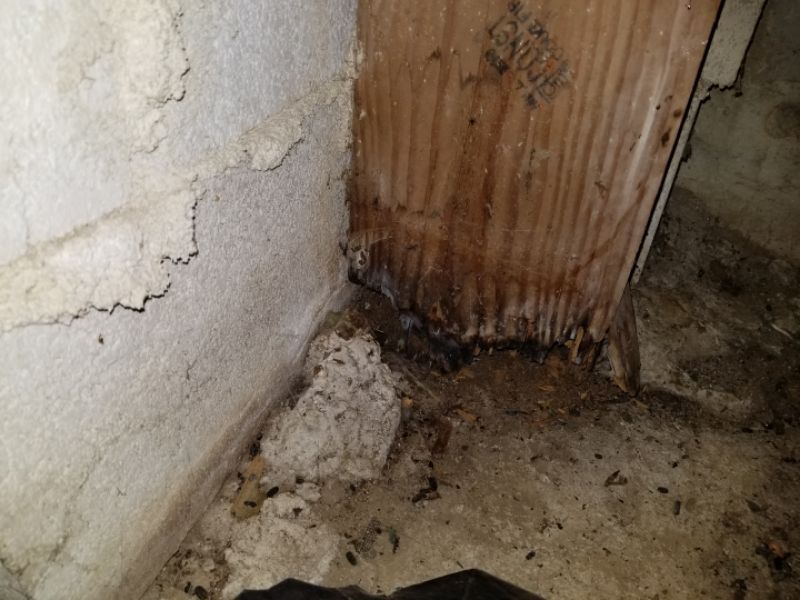
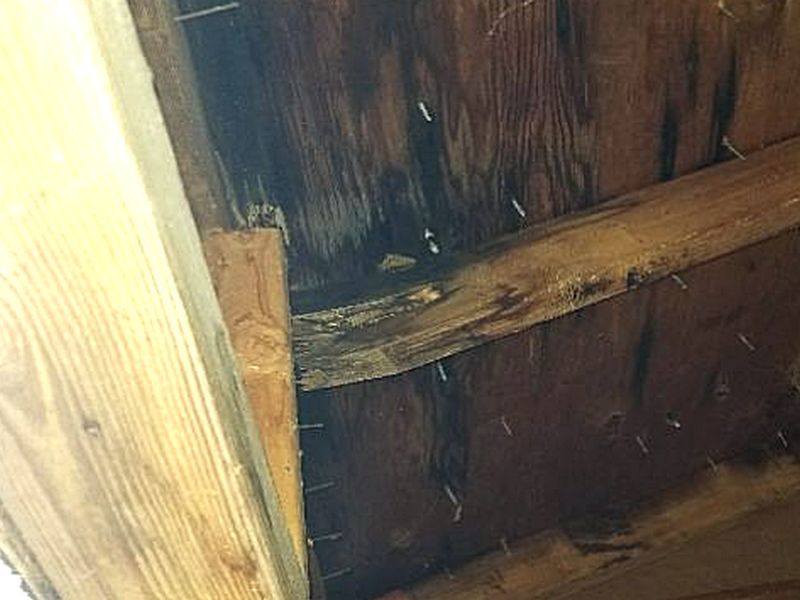
The beam is deteriorated. This can affect its load-bearing capacity. The cause of the deterioration should be identified. Hire a contractor for an evaluation and to repair or replace the beam.
The beam is sagging. This indicates that excessive loads are being applied. Hire a contractor for an evaluation and to repair or replace the beam.
The beam is crushed. This indicates that deterioration is present and/or excessive loads are being applied. Hire a contractor for an evaluation and to repair or replace the beam.
The boards in the built-up beam are not tightly connected together, and the splices are not offset. This prevents them from acting as a single unit and affects the beam’s load-bearing capacity. Hire a contractor for repairs or replacements as needed.
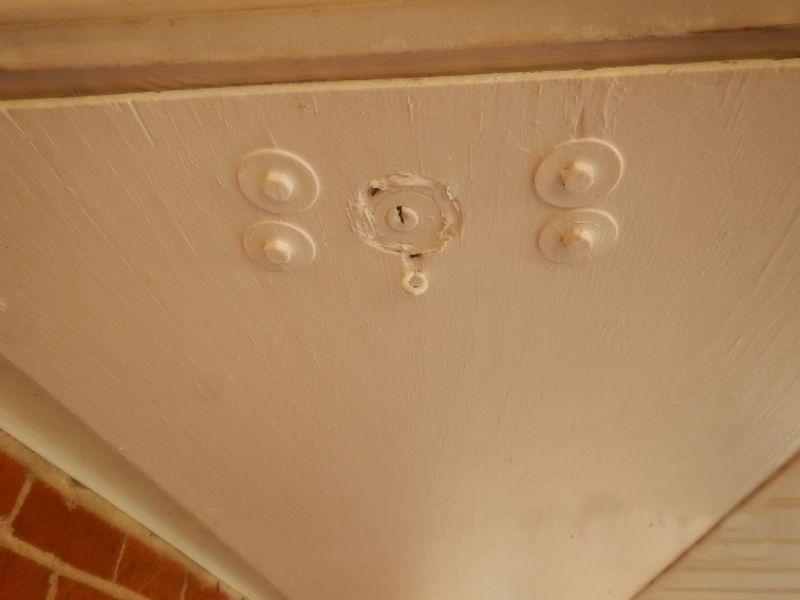
There is an excessive number of shims installed at the beam. Excessive use of shims is poor building practice and can affect its load-bearing capacity. Hire a contractor to make required repairs.
![]()
![]()
The shims are loose at the beam. This reduces the bearing capacity of the beam. Hire a contractor to make required repairs.
![]()
![]()
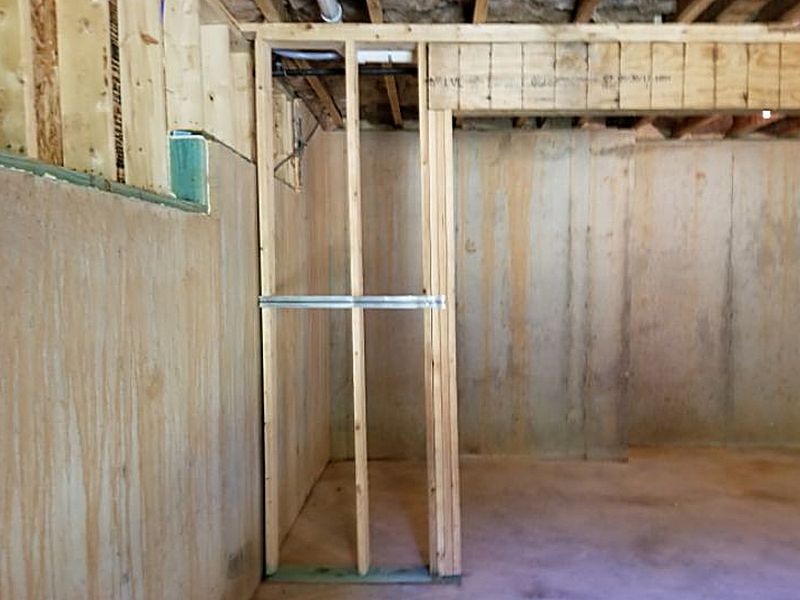
There are additional, non-original structural supports and alterations. The reason for the installation of the additional structural supports is not apparent. Discuss this with the homeowner. Hire a contractor for an evaluation and repairs as needed.

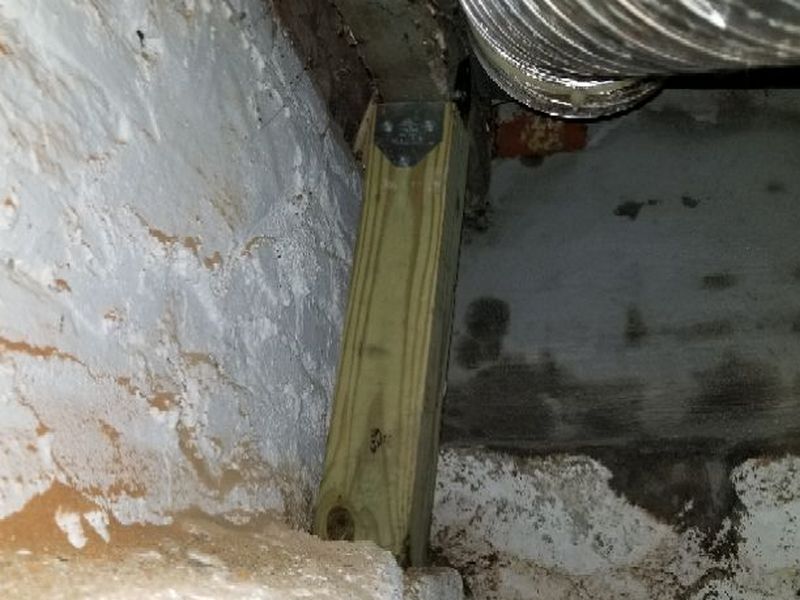
Wood shims have been installed under the steel beam. Dimensional lumber, composite, or steel plates are needed for stability. Hire a contractor for repairs as needed.
![]()
The beam has inadequate bearing. This affects its overall ability to carry structural loads. Hire a contractor to provide repairs as needed.
The support column is not properly connected to the steel beam. This can allow the support to shift and affect the structural stability. Hire a contractor for repairs as needed.
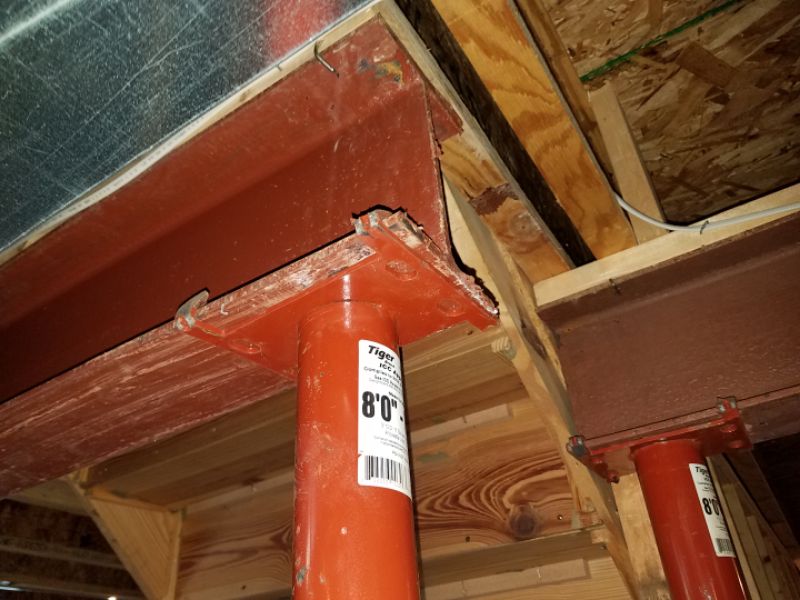
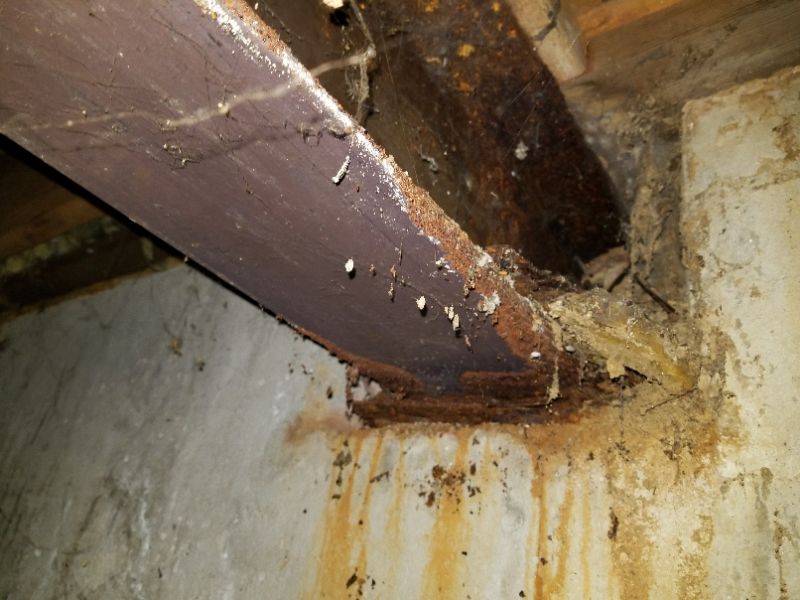
The steel beam is rusted. The underlying conditions causing this should be corrected to prevent further deterioration that will affect its load-bearing capacity. Hire a contractor for an evaluation and repairs as needed.
The steel beam has shifted and is pressing on the foundation wall. This affects its load-bearing capacity and the floor system’s overall structural stability. Hire a contractor for an evaluation and repairs or replacement as needed.
The beam is deteriorated. This can affect its load-bearing capacity. The cause of the deterioration should be identified. Hire a contractor for an evaluation and to repair or replace the beam.
Beams Limitation and Information Statements
Areas inaccessible and/or not visible due to design, finished surfaces, materials: Some areas are inaccessible and/or not visible due to design, finished surfaces, and materials. Therefore, the inspection is limited.
Minor horizontal cracks referred to as “checking,” generally not serious: Beams have minor horizontal cracks referred to as “checking,” which generally are not of serious concern. Solid wood beams typically form horizontal check cracks because they are installed when the wood is green and the outer surfaces dry out at a faster rate than the interior of the beam. Many such cracks occur without compromising the load-carrying capacity of the beam.
Grade beams employed in construction, water can travel along steel lintels: There are grade beams employed in the construction of the home. Water can travel along steel lintels used within the grade beams and it is common for water to seep under a grade beam and pool along the basement/crawl space intersecting wall. Pay particular attention to external surface drainage that is near the grade beams.
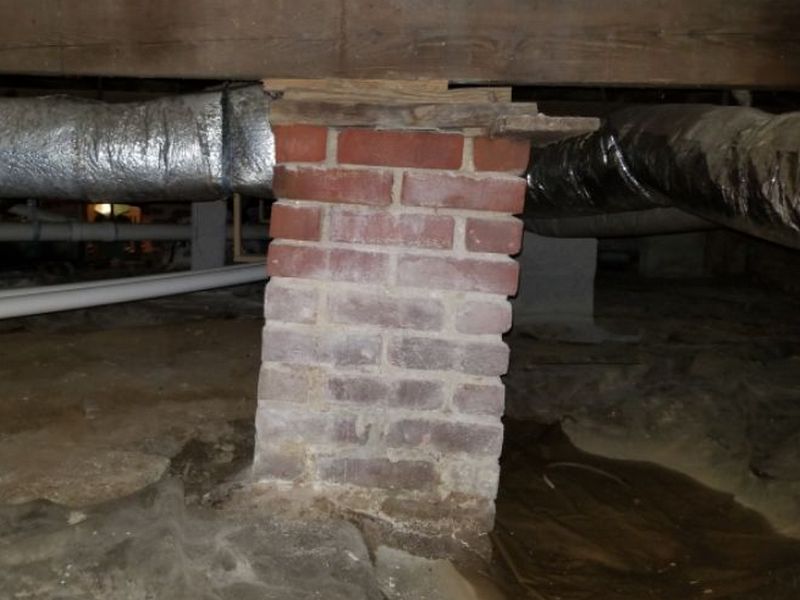
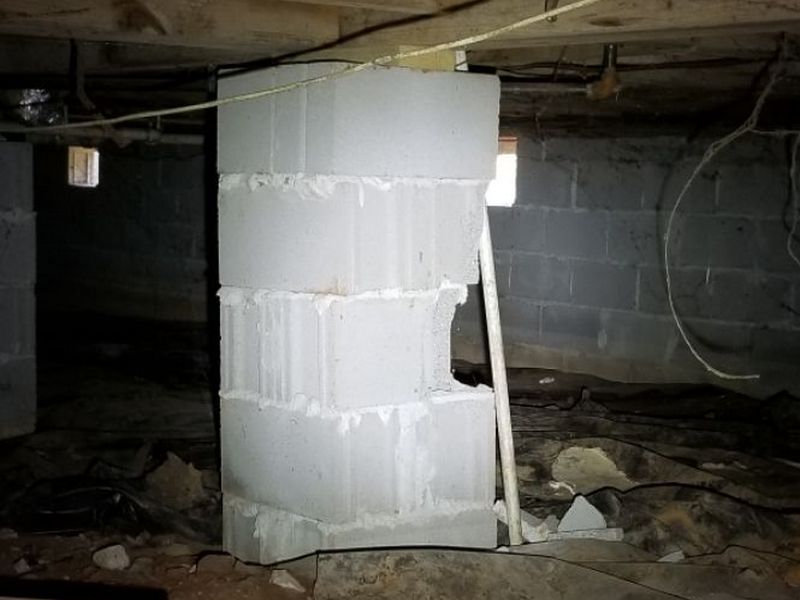
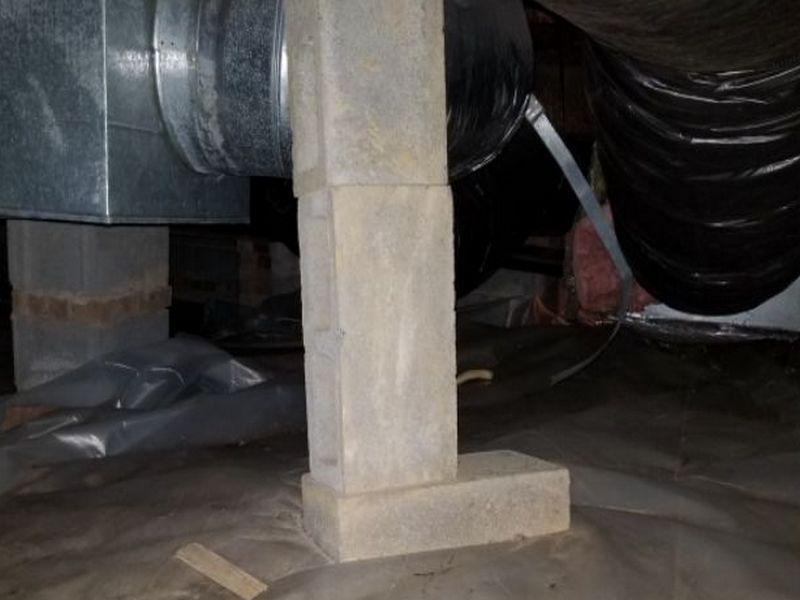
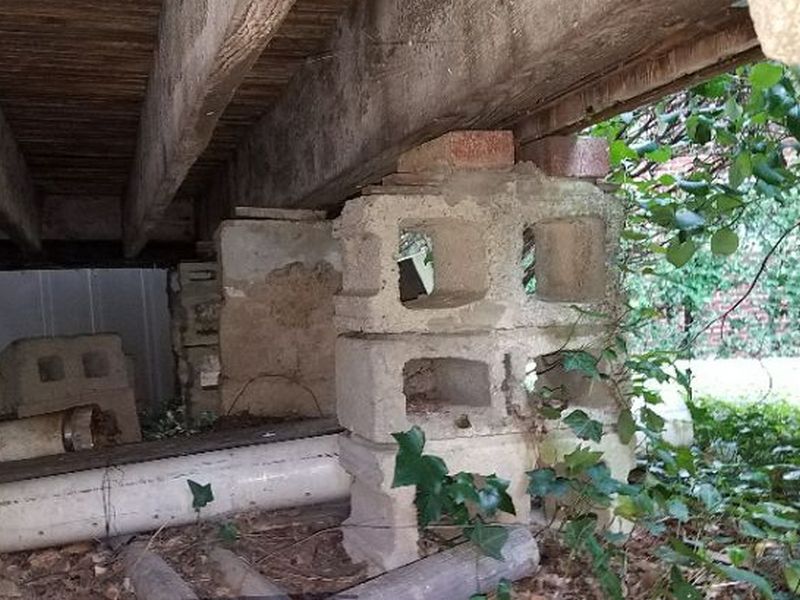
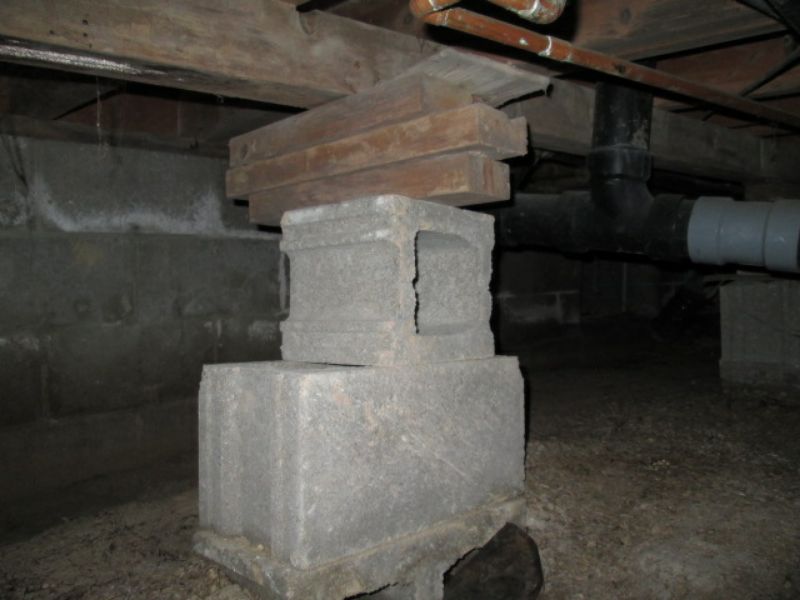
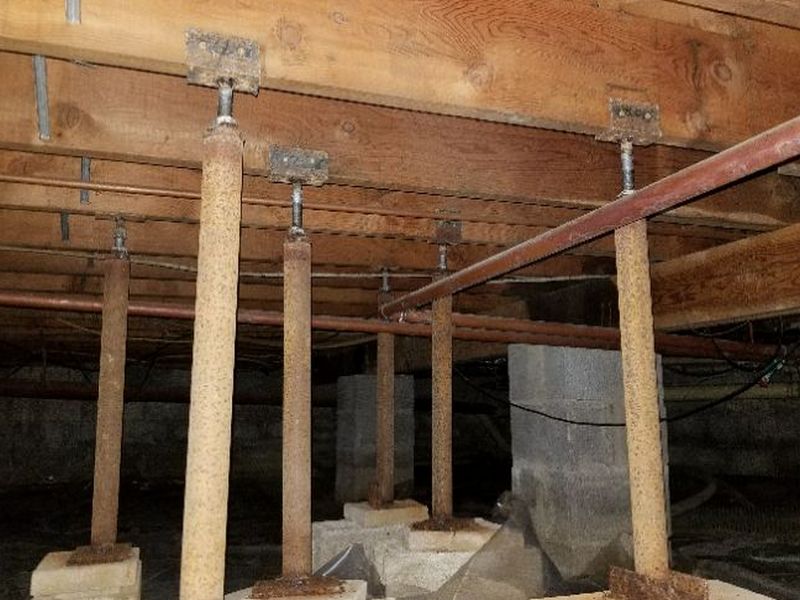
Piers/Posts
Piers and posts are upright columns that carry the weight of the home’s structure down into the ground and to the footings. In most houses, they are inside the foundation walls, where they support the beams and point-loads. Some buildings use piers spaced at regular intervals instead of a perimeter foundation wall, so-called “pier and beam” construction.
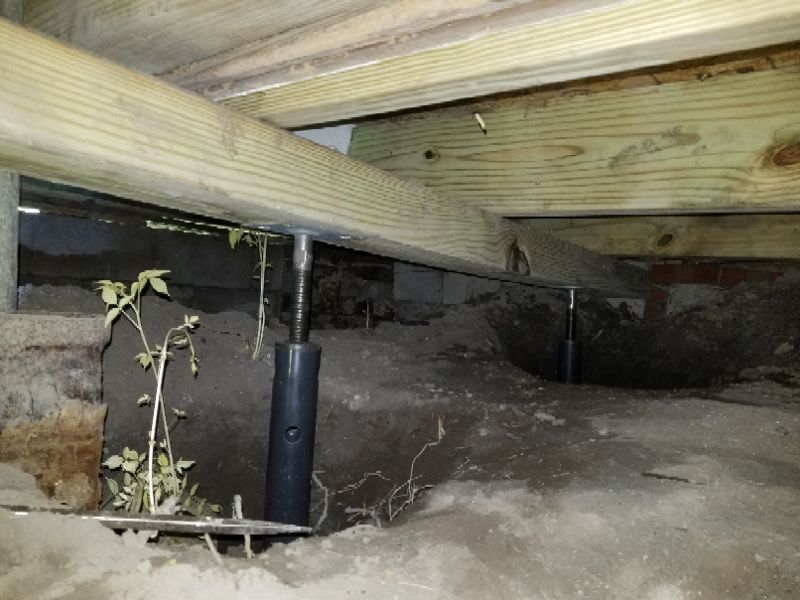
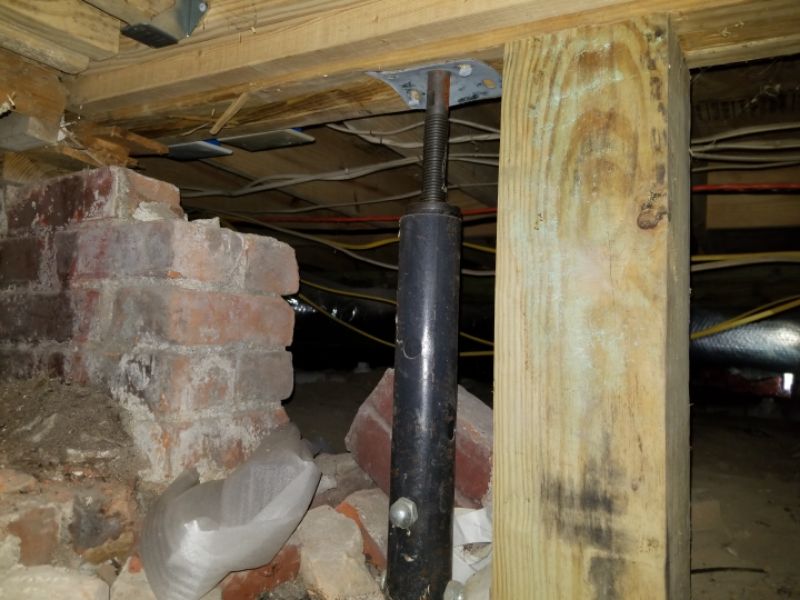
Most pier and post inspection is straightforward. Are they plumb, well-centered under their loads, and in good repair? Do they go into the ground, beyond where you can probe, presumably to a footer below the local frost line? The trickier part is determining if they are in the correct location. You should inspect the basement or crawl space last. When in the floors above and the attic, pay attention to where the structure is; are the loads following a line down to the pier or post? Is there unusual sagging near a pier that indicates the load path is missing the support? Remember: adjustable screw jacks (“lally posts”) are generally only approved for temporary use.
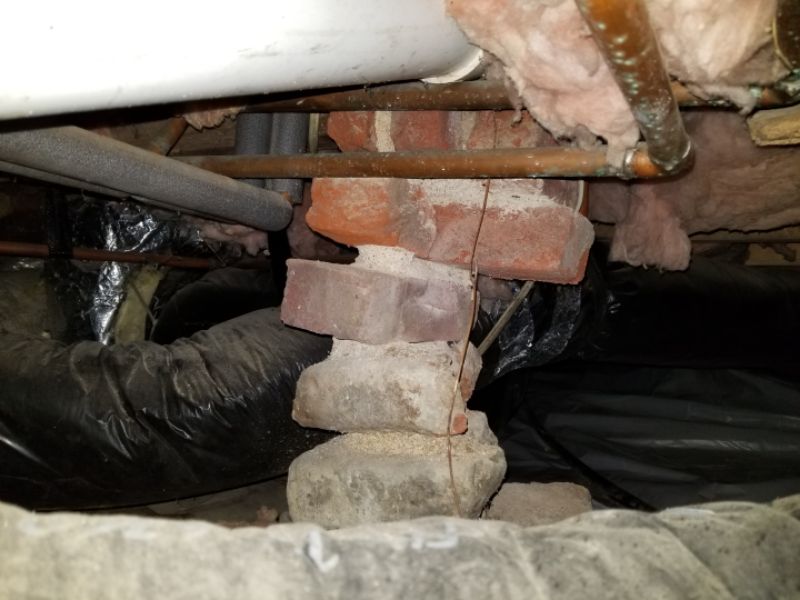
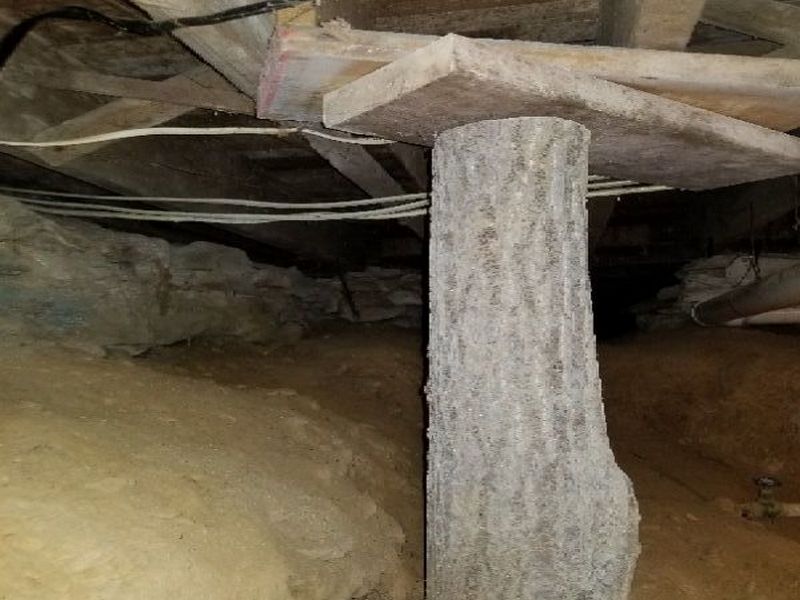
The pier is not plumb. This can affect its load-carrying ability. Hire a contractor to replace the pier.

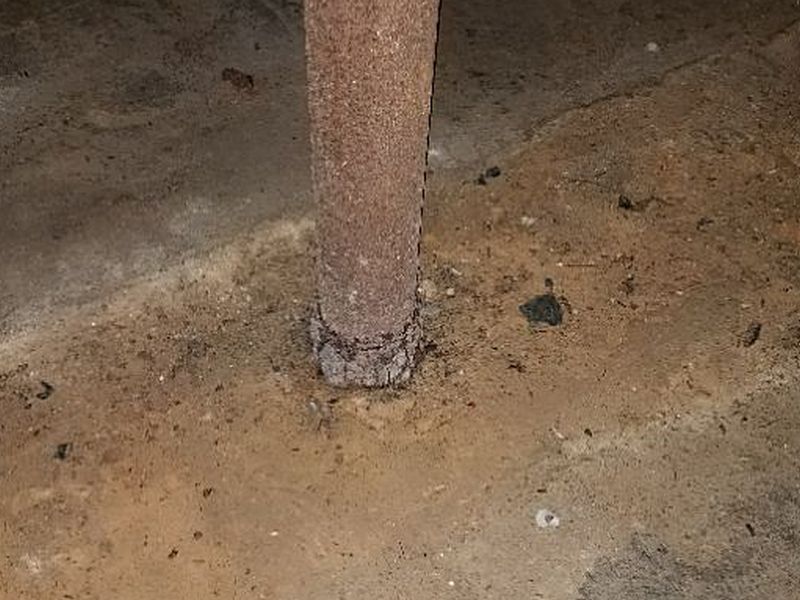
The pier is damaged. This can affect its load-carrying ability. Hire a contractor to replace the pier.
The pier is deteriorated. This can affect its load-carrying ability. Hire a contractor to replace the pier.
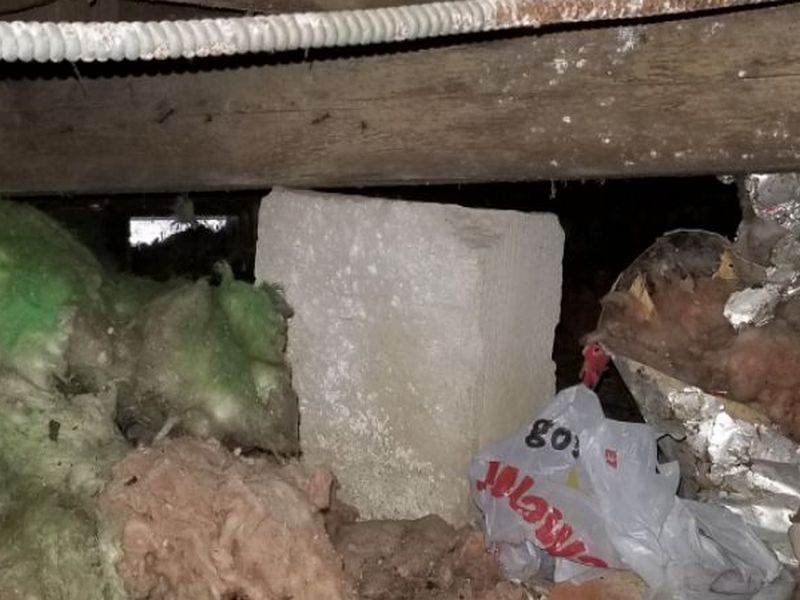
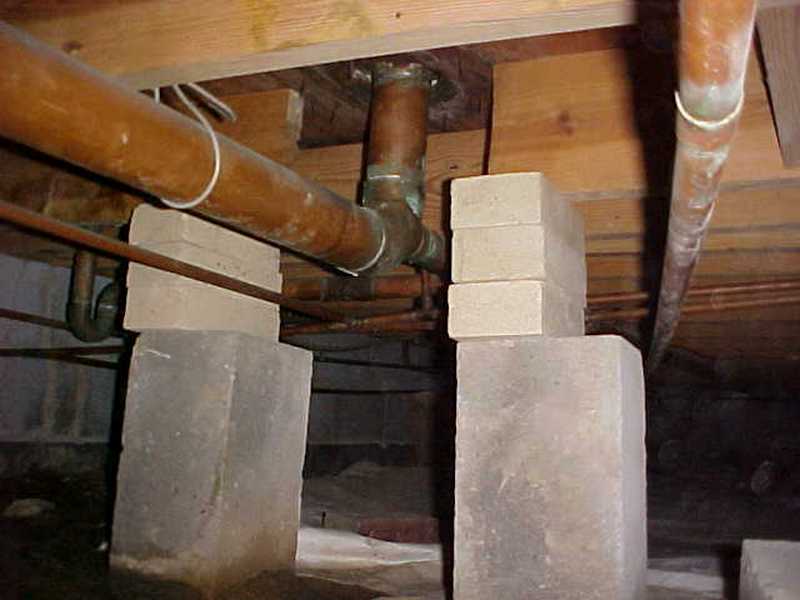
The pier does not have a footing that extends below the frost line. This can affect its load carrying ability. Surface blocks are not adequate. Hire a contractor to replace the pier.

The pier is settled. This can affect its load carrying ability. The cause for this should be identified. Hire a contractor to replace the pier.
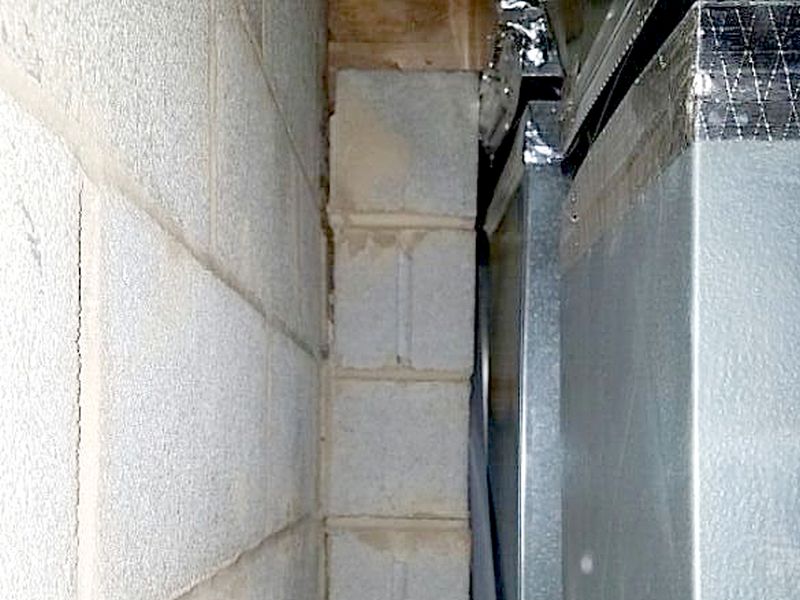
The CMU (cinder blocks) are improperly installed at the pier. They are on their sides. CMUs should be installed vertically with the cells perpendicular to the floor and the beam. Hire a contractor to replace the pier.
The CMU (cinder blocks) are improperly installed at the pier. The open cells have not been filled with grout as required by accepted practice. This affects its structural strength. Hire a contractor for repairs or replacement as needed.

The pier installation is unworkmanlike. Its reliability is questionable. Installations should adhere to accepted building practices. Hire a contractor to replace the pier.
The post is not plumb. This can affect its load-carrying ability. Hire a contractor to replace the post.
The post is damaged. This can affect its load-carrying ability. Hire a contractor to replace the post.
The post is deteriorated. This can affect its load-carrying ability. Hire a contractor to replace the post.

The post does not have a footing that extends below the frost line. This can affect its load carrying ability. Surface blocks or sections of a floor slab without a pier are not adequate. Hire a contractor to replace the post.

The post is settled. This can affect its load carrying ability. The cause for this should be identified. Hire a contractor to replace the post.
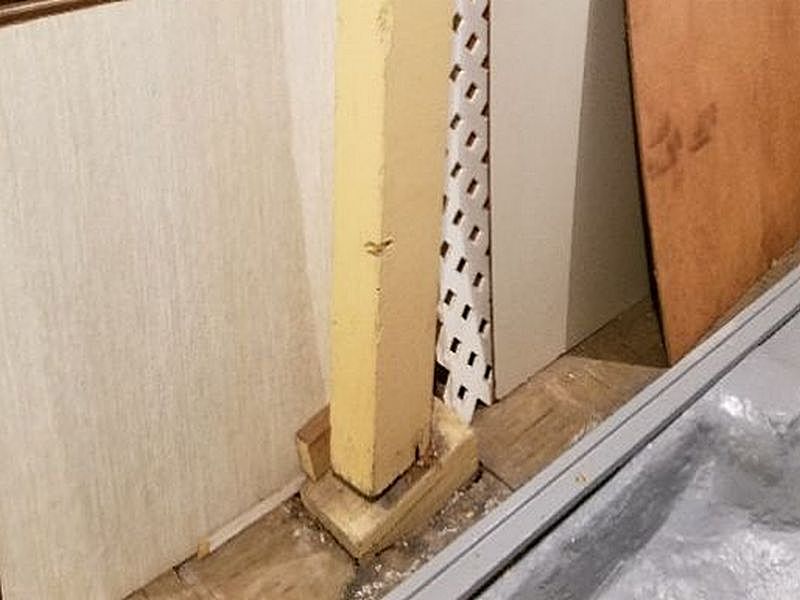
The post installation is unworkmanlike. Its reliability is questionable. Installations should adhere to accepted building practices. Hire a contractor to replace the post.
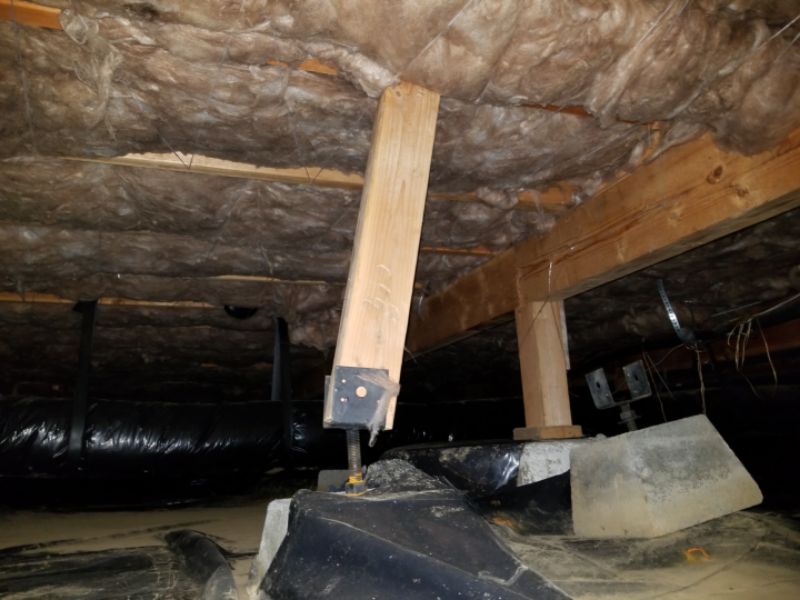
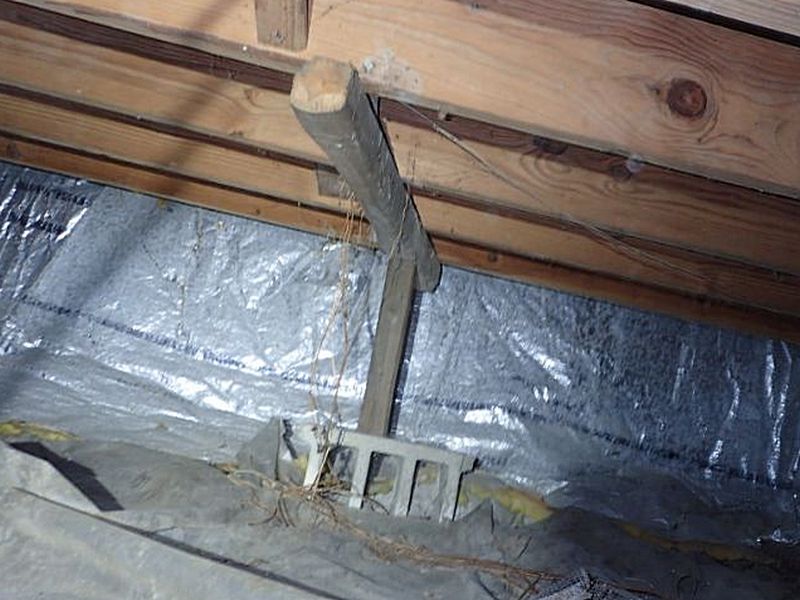
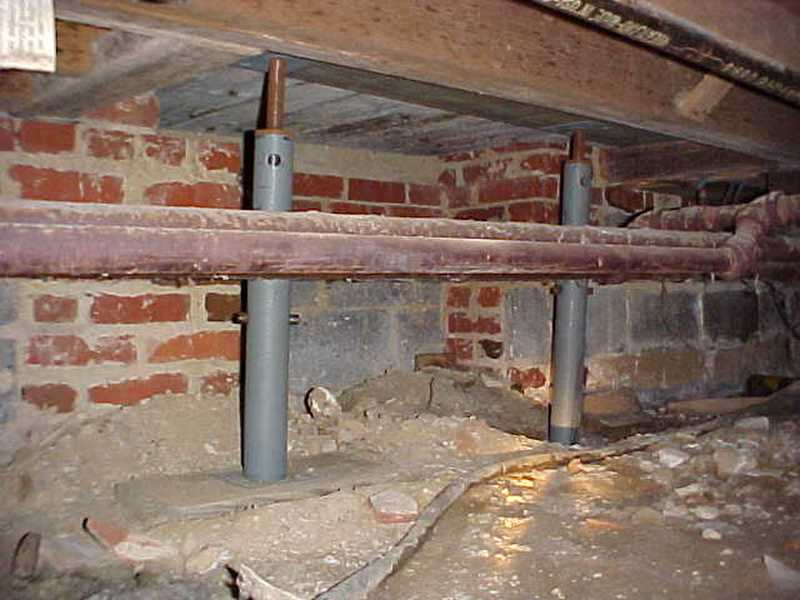
An adjustable screw jack is installed as a support post. These are considered temporary supports. Hire a contractor to replace the post.
Piers/Posts Limitation and Information Statements
Areas inaccessible and/or not visible due to design, finished surfaces, materials: Some areas are inaccessible and/or not visible due to design, finished surfaces, and materials. Therefore, the inspection is limited.
Floor
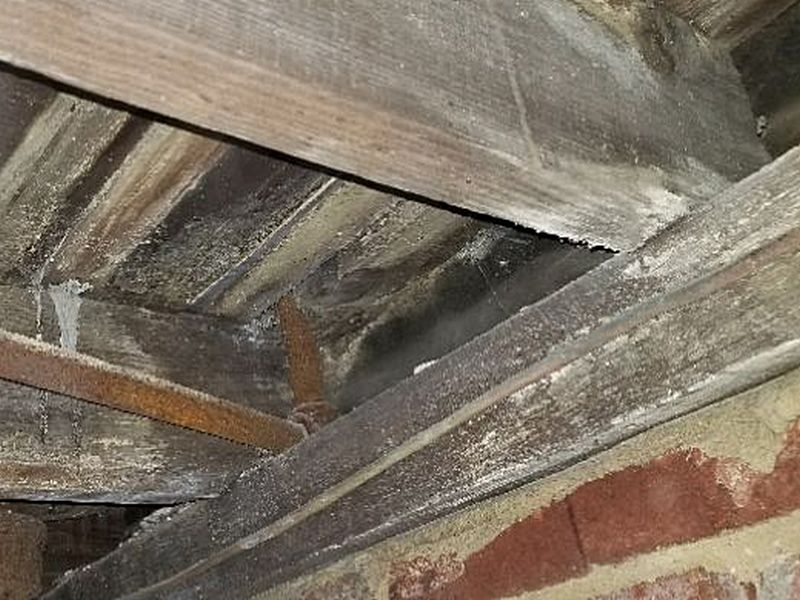
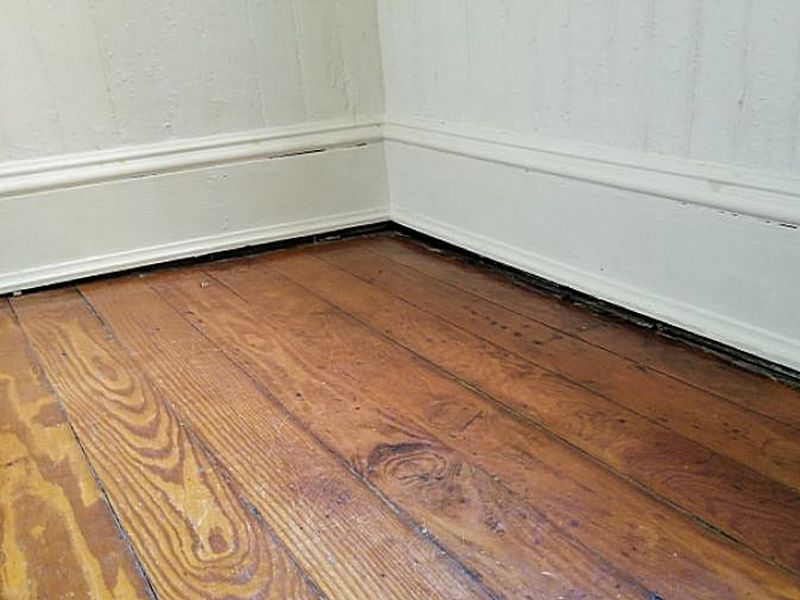
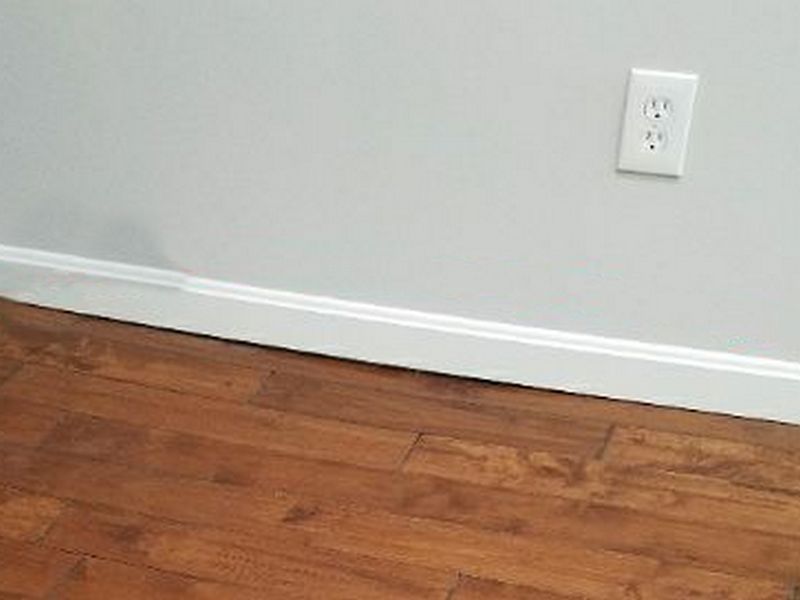
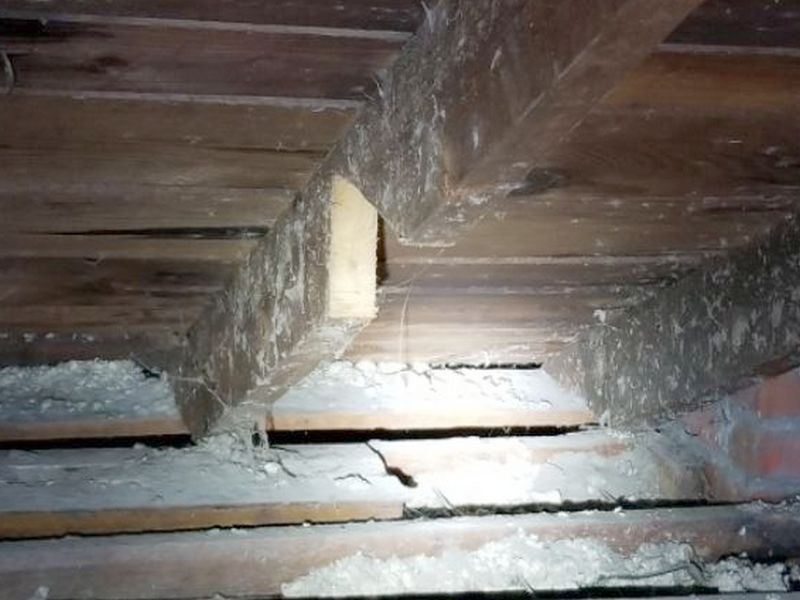
The structural importance of floors is obvious; the floor keeps us from falling into the crawl space, and it’s where we place our furniture. Sagging, soft spots, bounciness, and tilting are noticeable. What’s not as obvious are the flaws present that aren’t apparent until they’re at or near the failure point. The most common structural floor problems are water damage and improper repairs. Your eyes and feet are the best floor inspection tools. Inside a room, view as much of the floor as possible to see tilting or dips. Inspect the floor at the molding to reveal where the surface has dropped. Press your foot down at water-vulnerable areas, e.g. exterior entries and toilets. A large marble or level can help confirm issues.
Always connect the dots: why do I see this sag? When under the floor, you should move aside insulation in critical areas, e.g. exterior entries, toilets, tubs, refrigerators. Repairs must be workmanlike. “Sistered” joists must be full size, long enough, and tightly adhered. A surface block and post are not OK in place of a foundation support. Probe for rot!
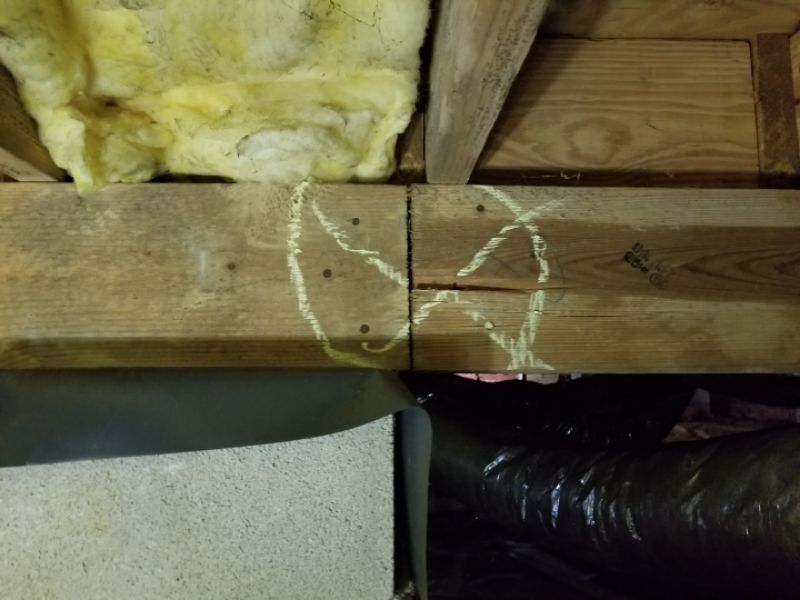
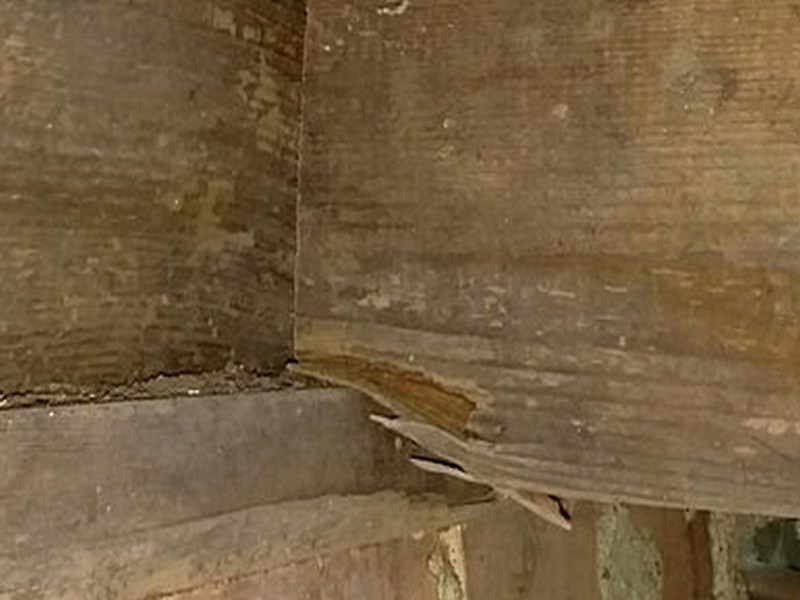
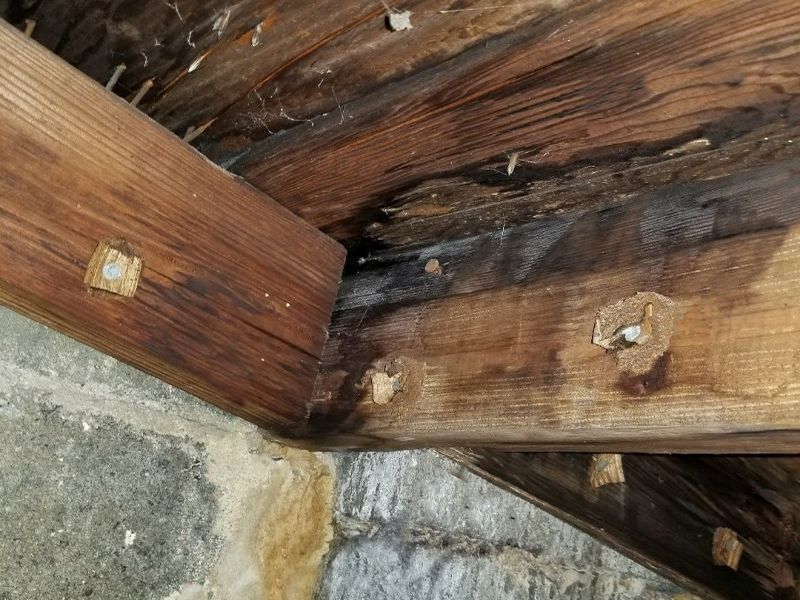
The joist is cracked or damaged. This can affect its load-bearing capacity. Hire a contractor to repair or replace the joist.

The joist has inadequate bearing. This affects its overall ability to carry structural loads. Hire a contractor to repair or replace the joist.

The joist has inadequate bearing. End nailing is not sufficient; properly-installed hanger hardware is needed. This affects its overall ability to carry structural loads. Hire a contractor to repair or replace the joist.

There is missing bridging between the floor joists. Bridging helps to prevent the joists from twisting. Hire a contractor to add bridging between the joists.

The joist is twisted or rotated. This can affect its load-bearing capacity. Hire a contractor to repair or replace the joist.
The joist is notched or has holes drilled that are beyond acceptable limits. This reduces the joist’s load-bearing capacity. Hire a contractor to repair or replace the joist.
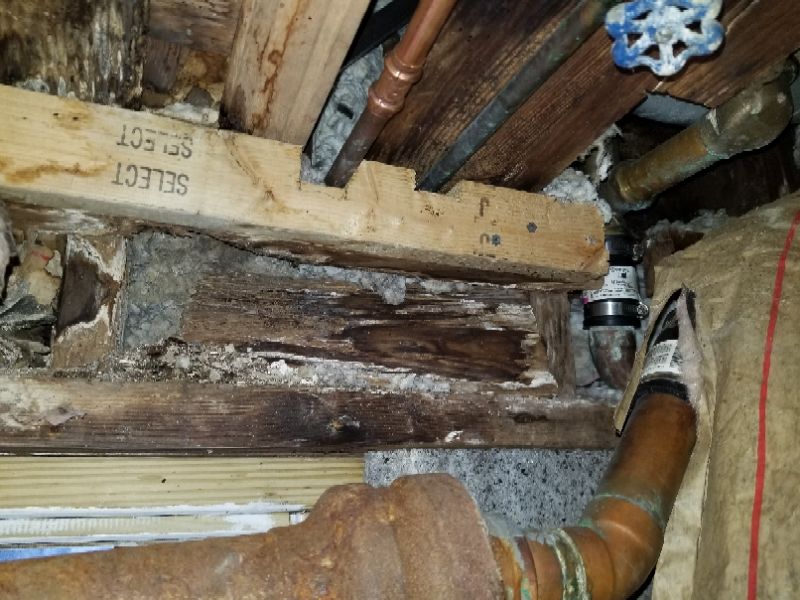
The joist is deteriorated. This can affect its load-bearing capacity. The cause of the deterioration should be identified. Hire a contractor to repair or replace the joist.
The joist is crushed. This indicates that deterioration is present and/or excessive loads are being applied. Hire a contractor for an evaluation and to provide repairs as needed.
The repairs to the floor frame are unworkmanlike. Repairs should adhere to accepted building practices. Surface blocks and posts cannot be used instead of foundation supports. Screw jacks are temporary devices. Hire a contractor to properly repair the floor frame.
The repairs to the floor frame are unworkmanlike. Repairs should adhere to accepted building practices. “Sister” repairs must use full-sized lumber, tightly adhered, and extending at least 1/3 the joist’s length past the damage. A sister must have one end on a bearing surface. Hire a contractor to properly repair the floor frame.
The floor framing sags excessively. This implies failure of the floor frame or other structural elements. Hire a contractor for an evaluation and to provide repairs as needed.
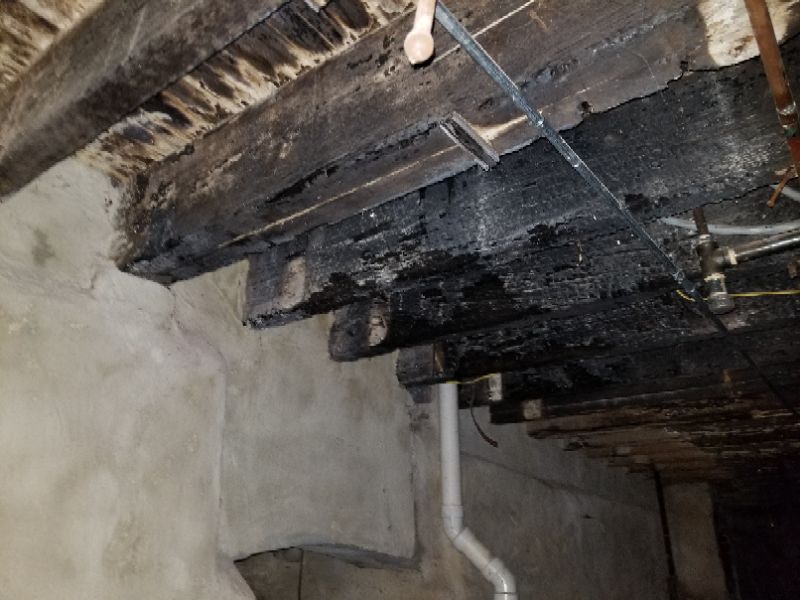
 There is evidence of fire damage. The inspector cannot determine the extent of the damage or the repairs. Ask the homeowner about the fire damage; records of the damage can usually be obtained through the local fire department, and a record of repairs, along with any applicable municipal permits and approvals, can usually be obtained through the municipal building department.
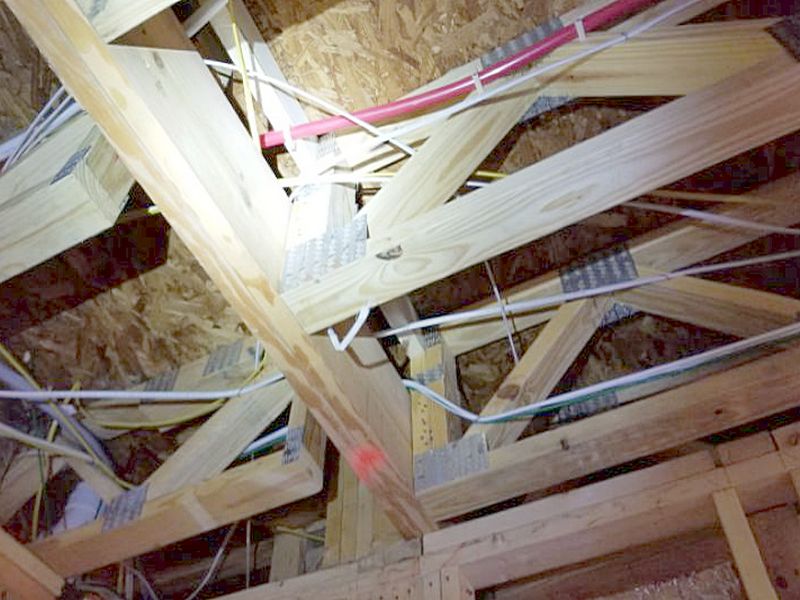
There is a cut truss. A truss is part of an engineered system and should be altered or repaired only with the approval of the manufacturer or a structural engineer. Hire a contractor to repair or replace the truss under the guidance of a truss or structural engineer.
The flange of an I-Joist has been notched. Notches are not allowed in the top or bottom flange. Hire a contractor to repair or replace the I-joist under the guidance of a truss or structural engineer.
The truss has inadequate bearing. End nailing is not sufficient; properly-installed hanger hardware is needed. This affects its overall ability to carry structural loads. Hire a contractor to repair or replace the truss under the guidance of a truss or structural engineer.
There are missing “squash blocks.” These are load-transferring uprights that strengthen engineered joist installations where point loads are being transferred to the foundation. Hire a contractor to install squash blocks under the guidance of a truss or structural engineer.
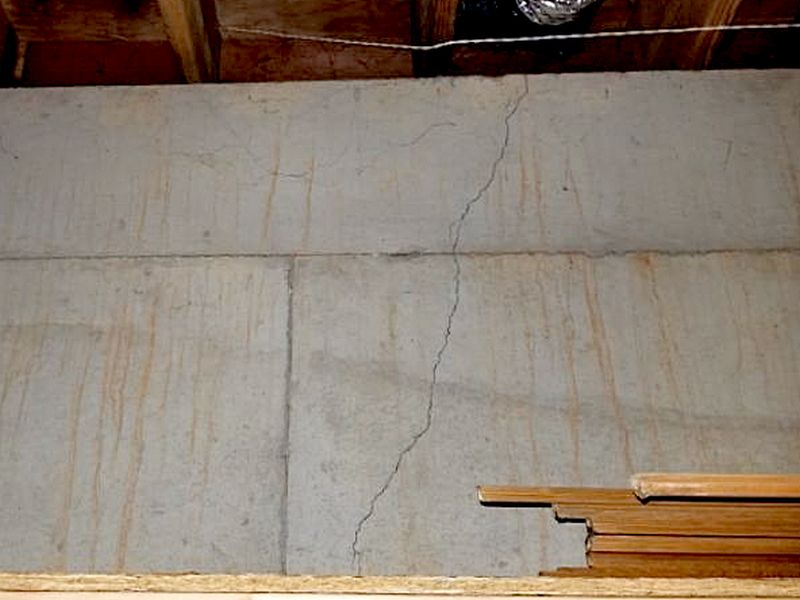
There are minor cracks in the floor slab. Repair and seal the cracks.
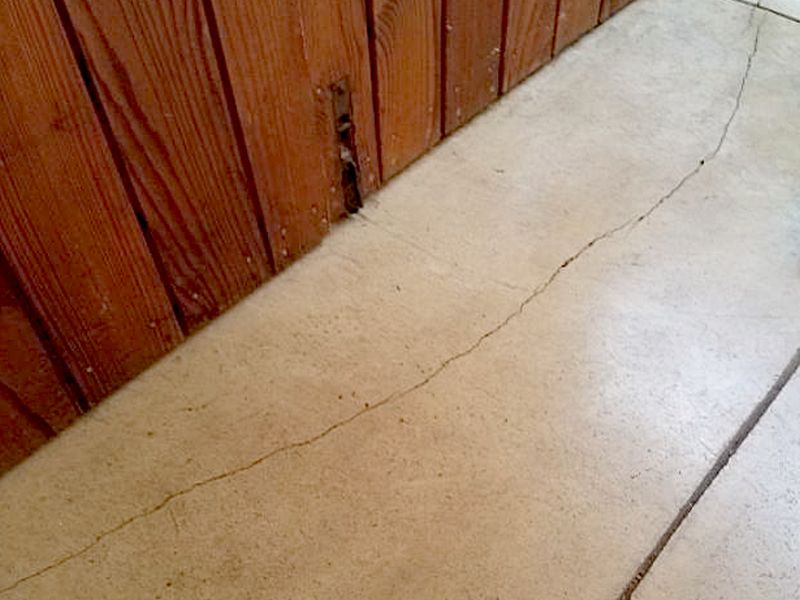

There are cracks in the floor slab that are wider than 1/4″. The cause for this should be identified. Hire a contractor for an evaluation and to provide repairs as needed.
There are cracks and differential settlement greater than 1″ in the floor slab. The cause of the settlement should be identified. Hire a contractor for an evaluation and to provide repairs as needed.

The garage floor and the living space floor are at the same height. Current standards require the living space to be installed no less than one step up from the garage to protect the living space from fumes. Hire a contractor for an evaluation and to provide repairs as needed.
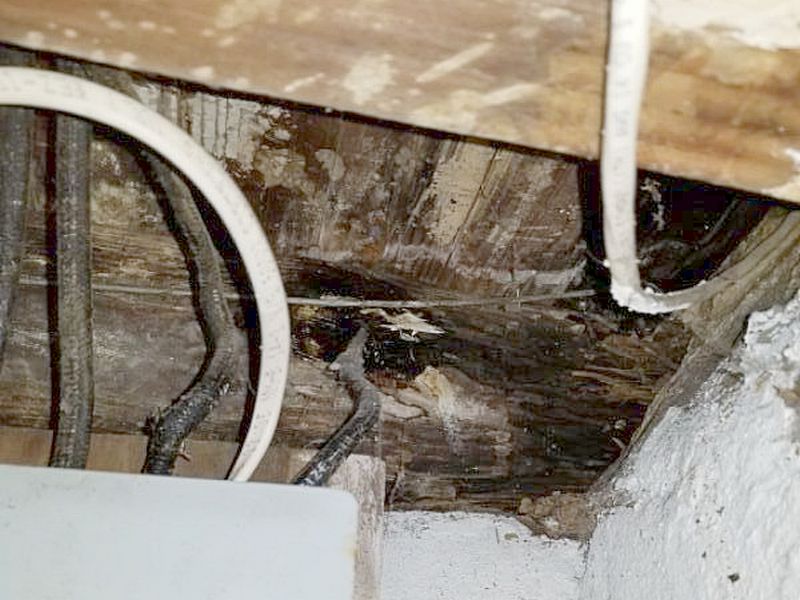
The sub-floor is stained, indicating a leak. The cause for the stains should be identified. Hire a contractor for an evaluation and to provide repairs as needed.
The sub-floor is deteriorated. This weakens the floor structure. Hire a contractor to provide repairs as needed.

The repairs to the sub-floor are unworkmanlike. Repairs should adhere to accepted building practices. Hire a contractor to properly repair the sub-floor.
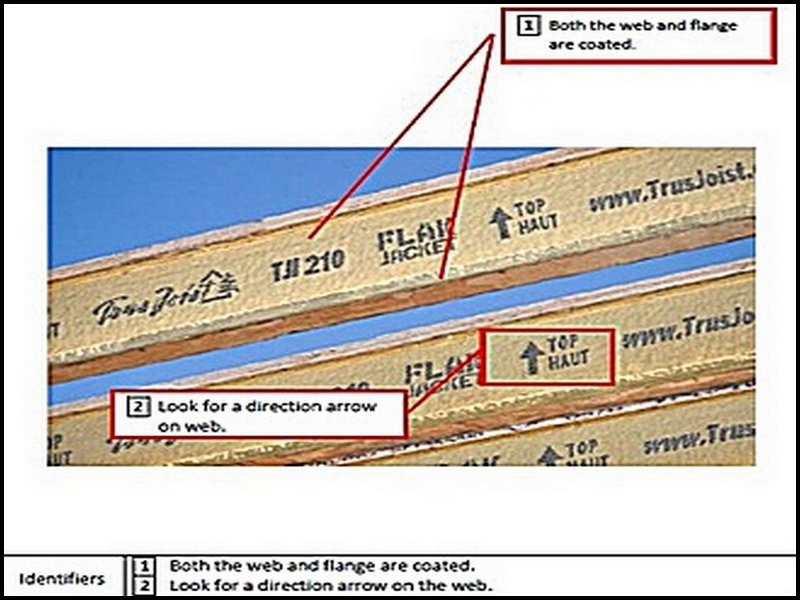
Weyerhaeuser “Flak Jacket” TJI Truss Joists are engineered I-joists manufactured with a fire-resistant coating. In products manufactured after 12.1.2016 the coating included formaldehyde-based resin. Weyerhaeuser acknowledged this after customer feedback noting odors in the homes. In higher concentrations formaldehyde can cause eye, nose, and throat irritation. In very high concentrations it can cause headaches, dizziness, and nausea. Not surprisingly, Class Action lawsuits are being filed.
Scope of the Issue:
As noted above, this only affects product manufactured after 12.1.2016. The company said it has halted all production, sales, and shipments of the product, and is collecting unused product from customers. Weyerhaeuser considers it highly unlikely that the floor structure above crawlspaces are involved. They estimate that <2,500 basement structures are affected. The locations include New Jersey, Colorado, Delaware, Minnesota, New York, and Pennsylvania.
Inspecting:
This will be a rare discovery, and can be reported with a custom Defect Statement. Clients should be advised to research at the website: https://www.weyerhaeuser.com/builderfj/ and further educate themselves.
Identifying TJI joists that ARE affected:

Identifying TJI joists that are NOT affected:
Floor joist deterioration is probably the most common structural defect. Improper joist repairs are at the top of the list for for unacceptable remediations. The correct term for a substandard job is “unworkmanlike.” This is a legally-recognized designation that has court precedence, and is preferred over “amateur” or similar words. A strict reading of current model Code calls for repairs that “shall conform to the requirements for a new structure”, i.e. complete joist replacement. That said, most models as adopted and administered allow for “sister” and post and beam repairs. Doing them right is where many contractors fall short.
The most important quality of a joist repair is re-establishing support onto a foundation-level base. Regardless of the method used, it must have a proper footing that extends below the local frost line. Surface block supports are unacceptable. Let’s look at this and at the other qualities needed. Note that, while often not enforced, most code departments require a permit for even a single joist repair. You must be familiar with what is and is not allowed in your jurisdiction.
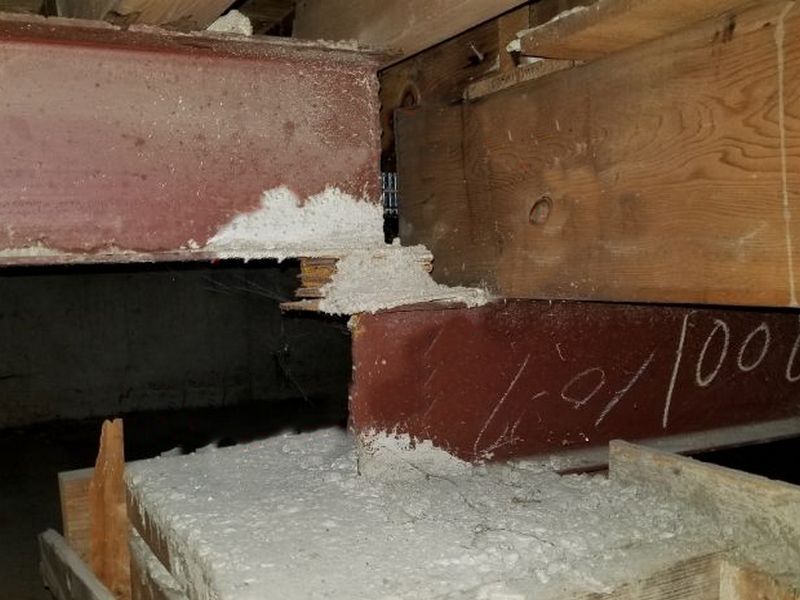
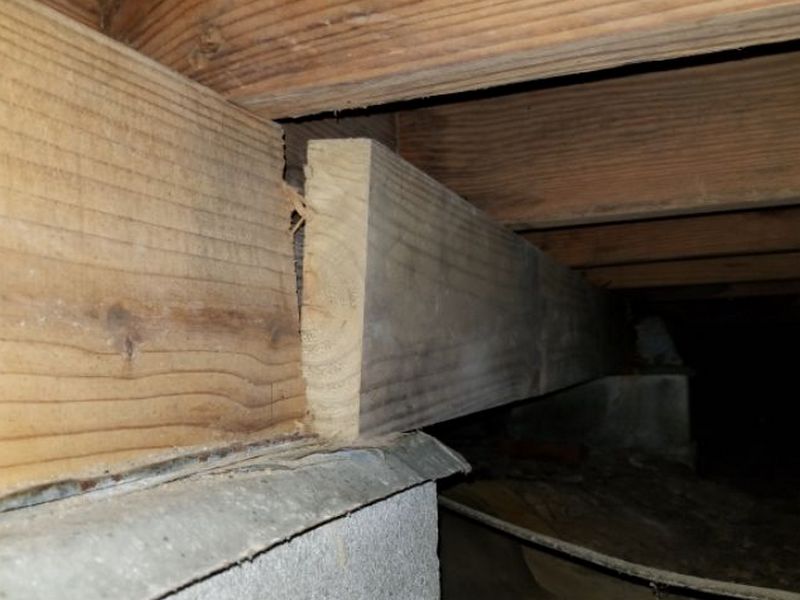
Total Joist Replacement
This is a premium method. The replacement joist must be the same size as the original, have proper bearing on the foundation or beam at both ends (1.5″ on wood and 3″ on masonry), and be in full supporting contact with all load surfaces above.
A “pocketed” joist may require a full replacement
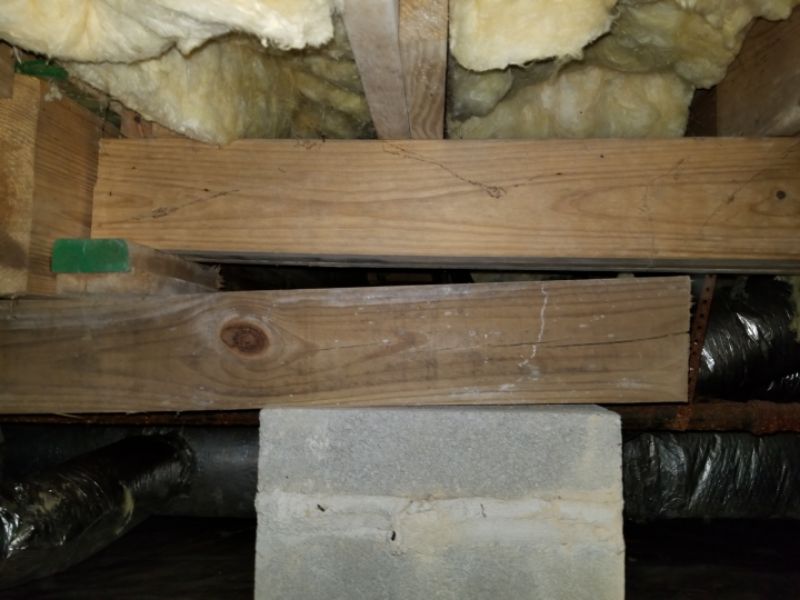
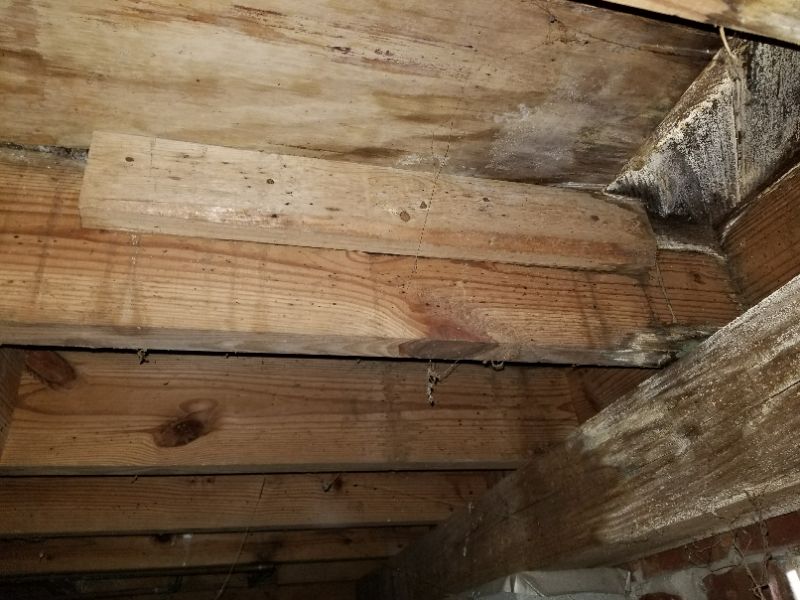
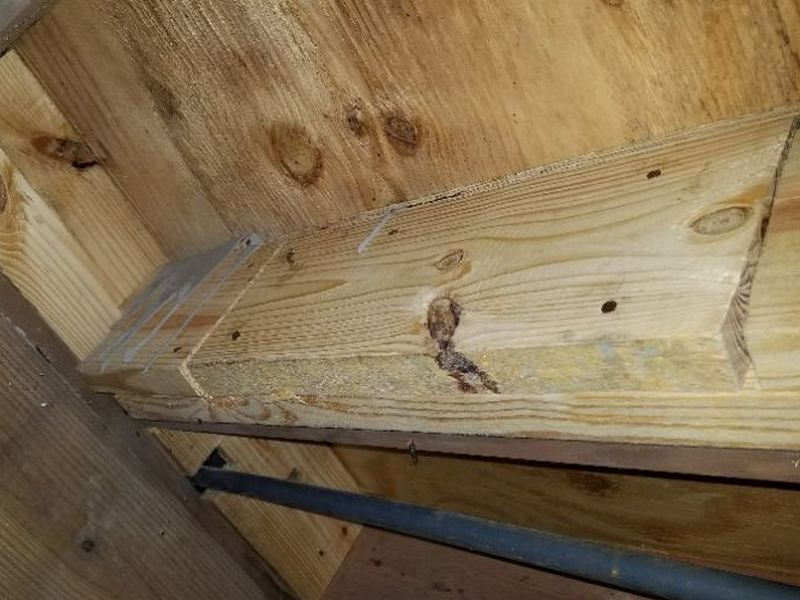
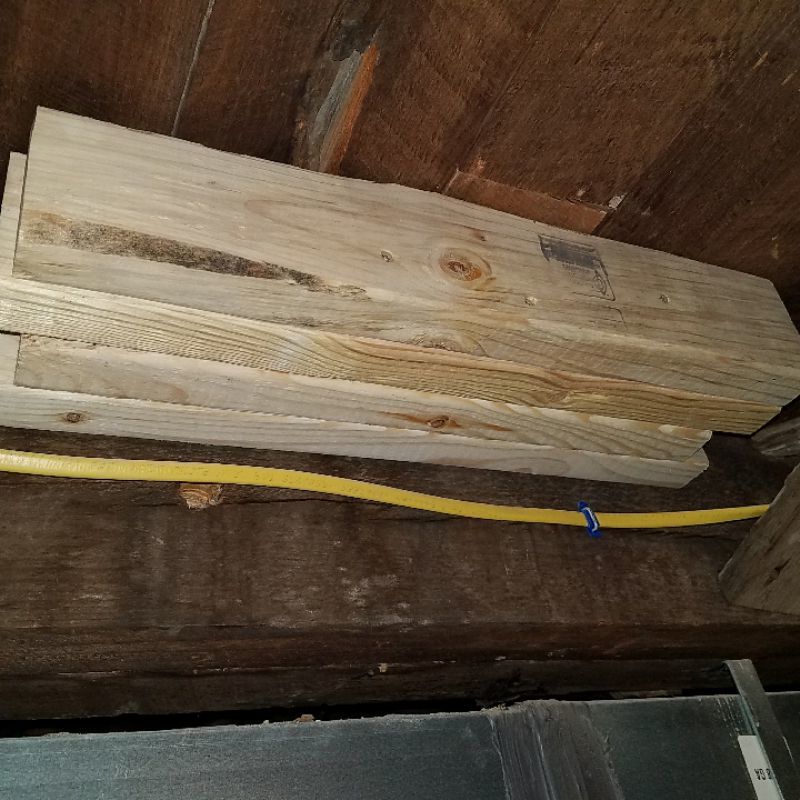
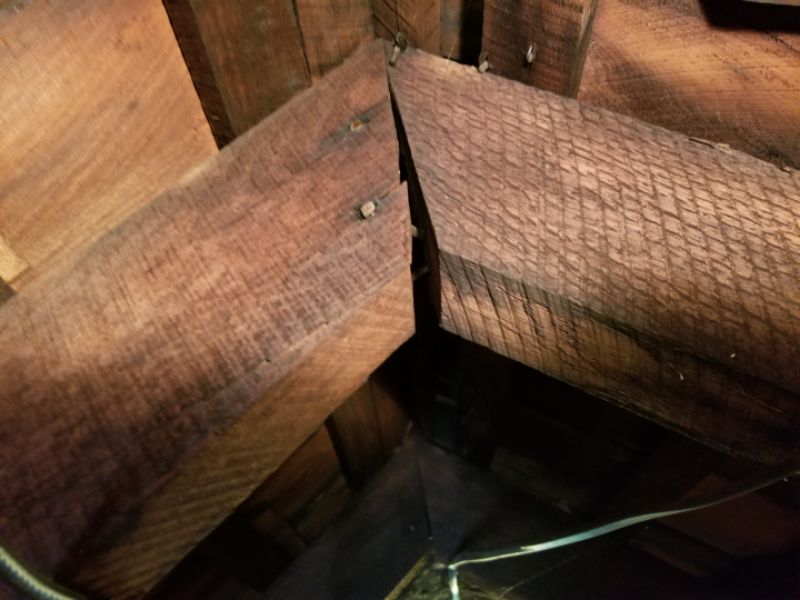
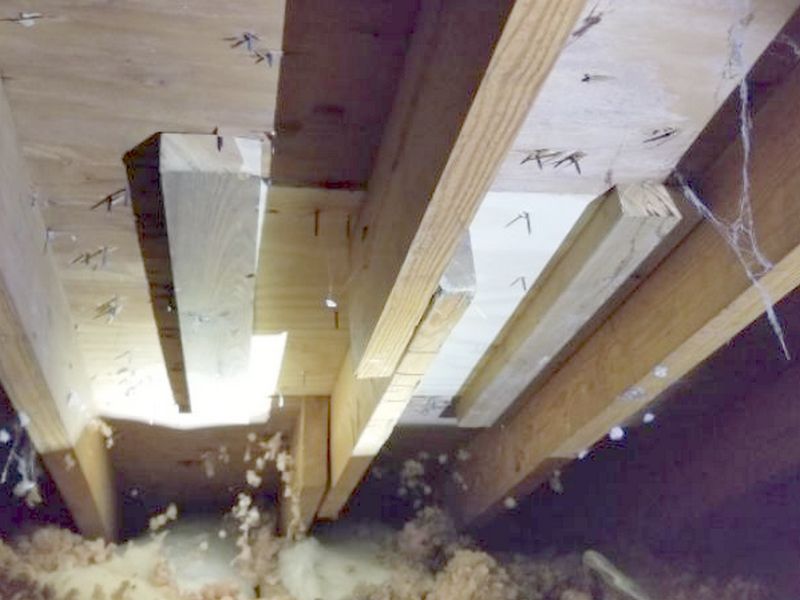
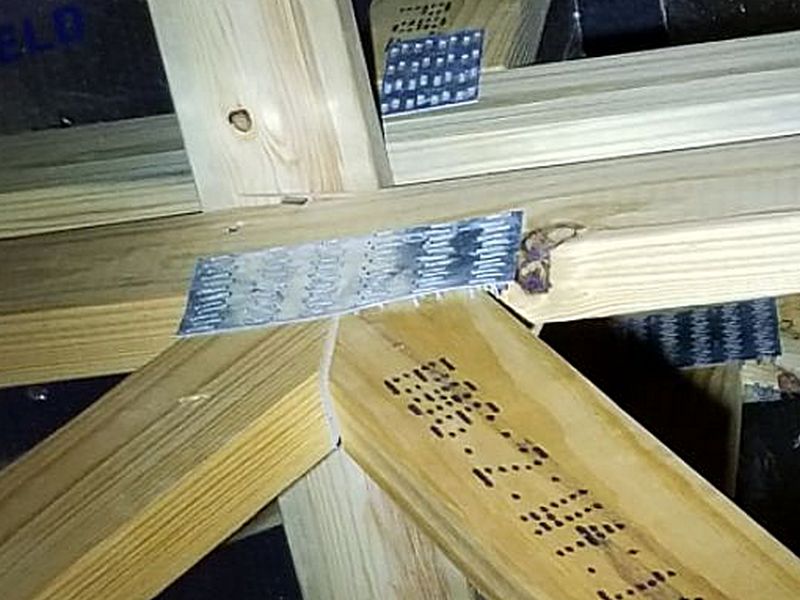
Sister Repairs
A “sister” repair attaches a new board to the old one in order to provide solid structure where the original joist is damaged. There are several requirements to doing this properly.
- The sister must be the same size as the original, e.g. a damaged 2×10 uses a 2×10 sister.
- The sister must be tightly attached to the original with multiple, spaced and staggered fasteners. Bolts or structural screws are preferred over nails. Inadequate connections or a loose bond will not transfer the load from the sister to the original.
- The sister must have one end on a foundation-level bearing surface. It can’t be entirely in the middle of the original.
- The sister must extend at least 1/3 of the overall joist’s length past the damaged area.
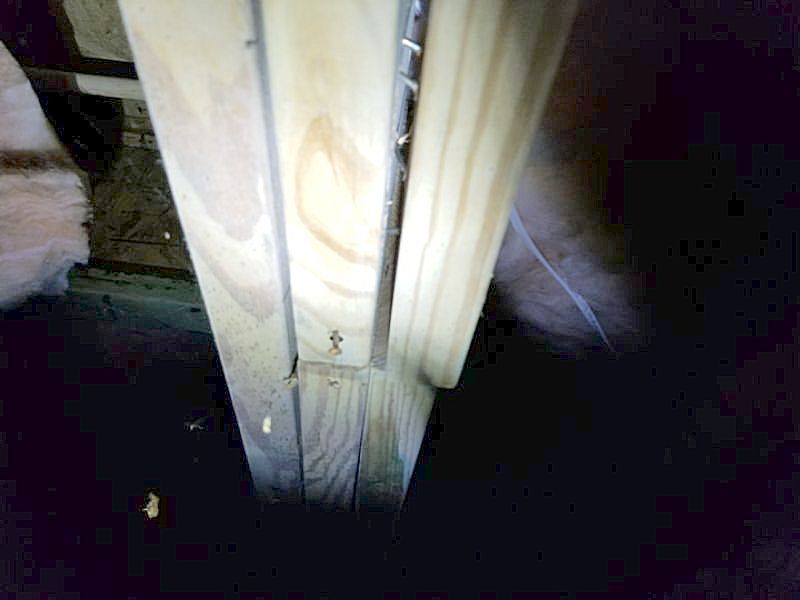
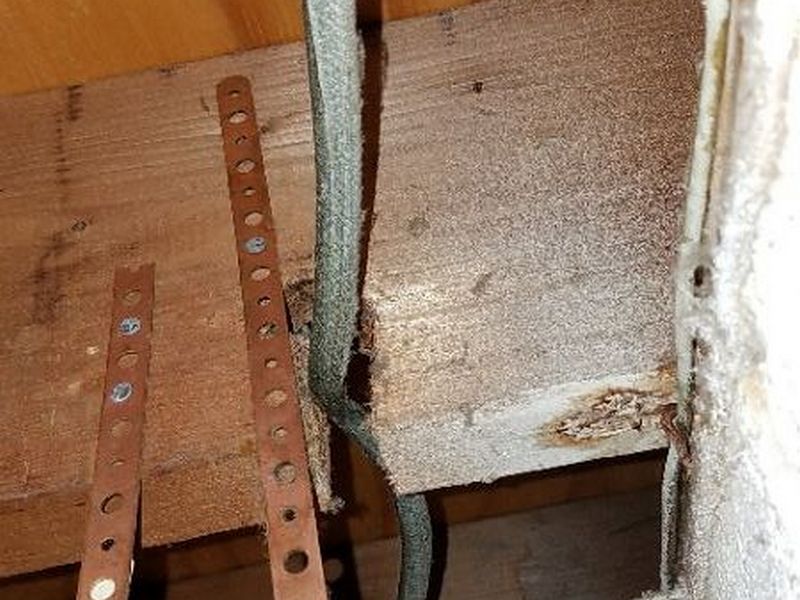
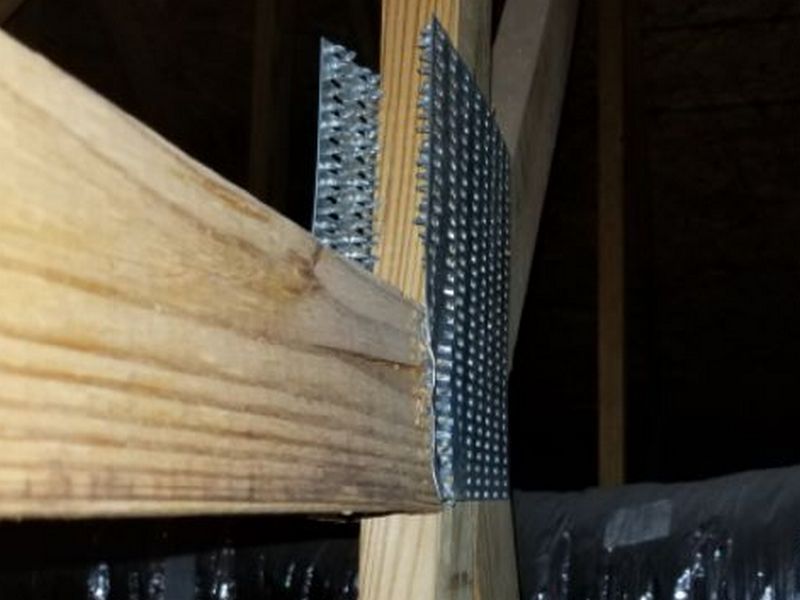
These sisters are completely inadequate
Too loose; it won’t transfer the load
These sisters are too short
Too short; inadequate fasteners
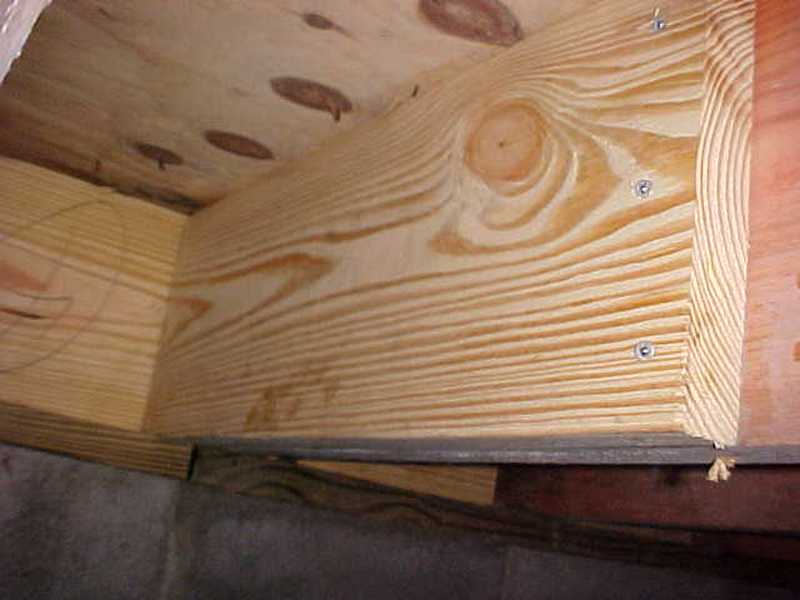
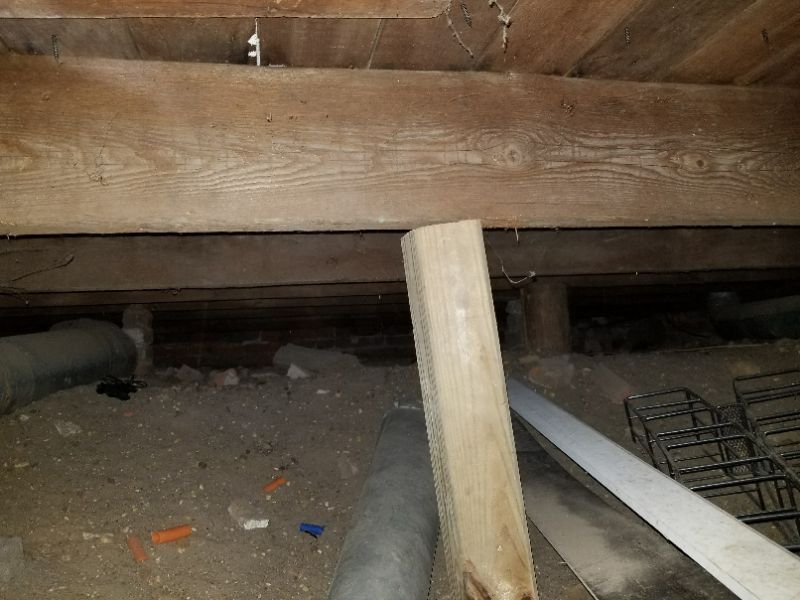
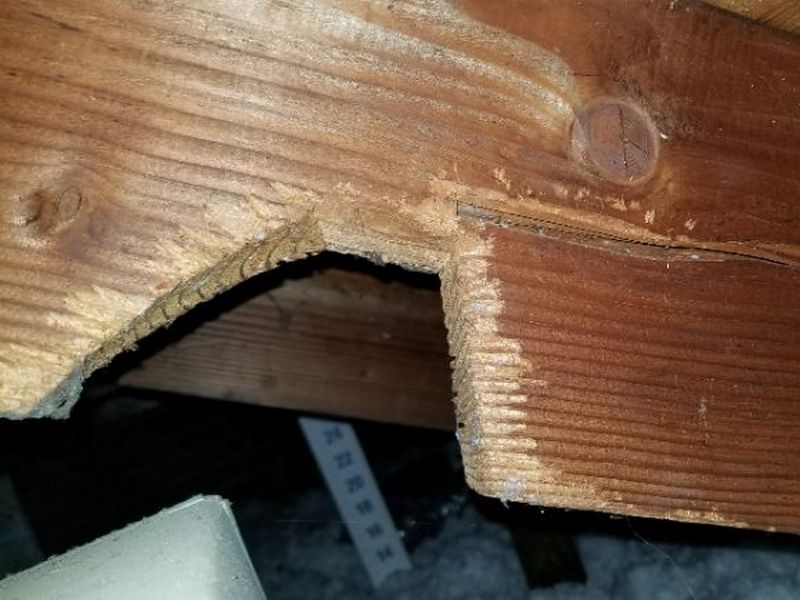
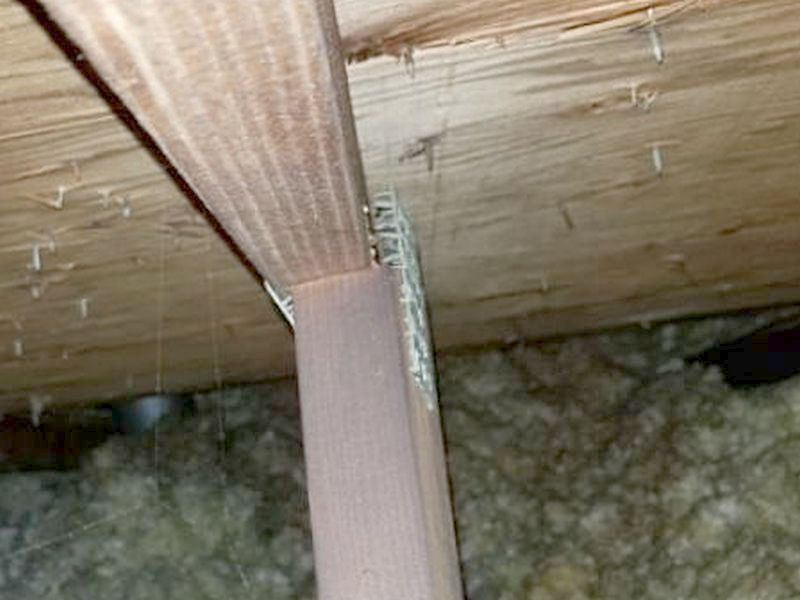
Headers
If a joist has to be cut in the middle of its span, e.g. to accommodate a plumbing stack or HVAC duct, then headers must be constructed around the obstacle. These allow the intact joists on either side of the missing section to carry the loads of the cut joists.
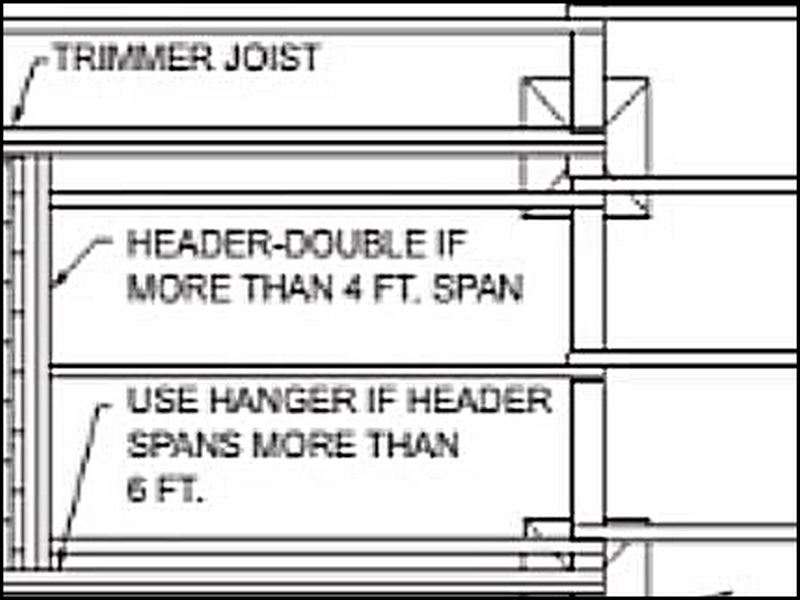
No headers
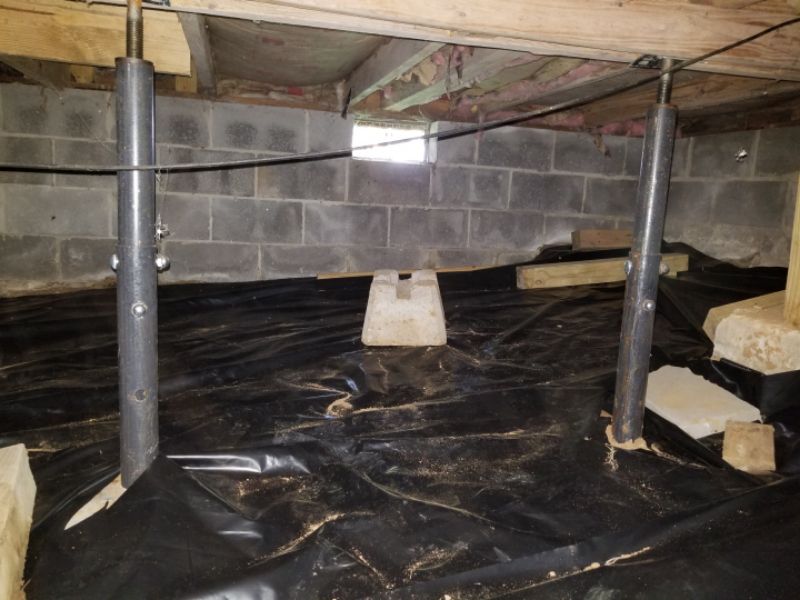
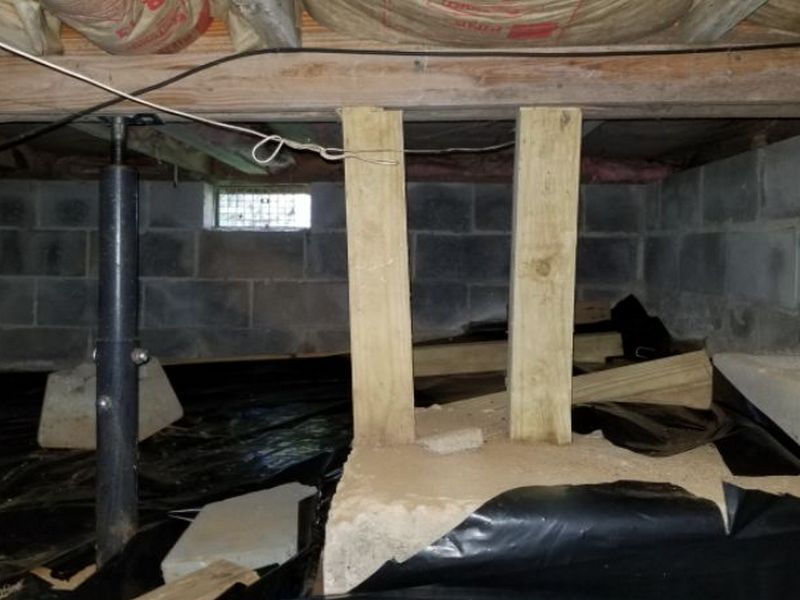
Posts and Beams
An acceptable alternative to bearing on the original foundation or beam is to install a new beam system next to the original bearing point. These must be constructed in a workmanlike manner. Note that most code inspectors will only accept surface support systems when designed and signed-off on by a structural engineer.
- The posts must be be set on foundation-level footers that are below the local frost line. Surface blocks are not acceptable.
- The new beam should be as close to the original bearing surface as possible to avoid a cantilever.
- Posts and beams must be adequately rated and installed in sufficient spacing. Everything must be plumb and level.
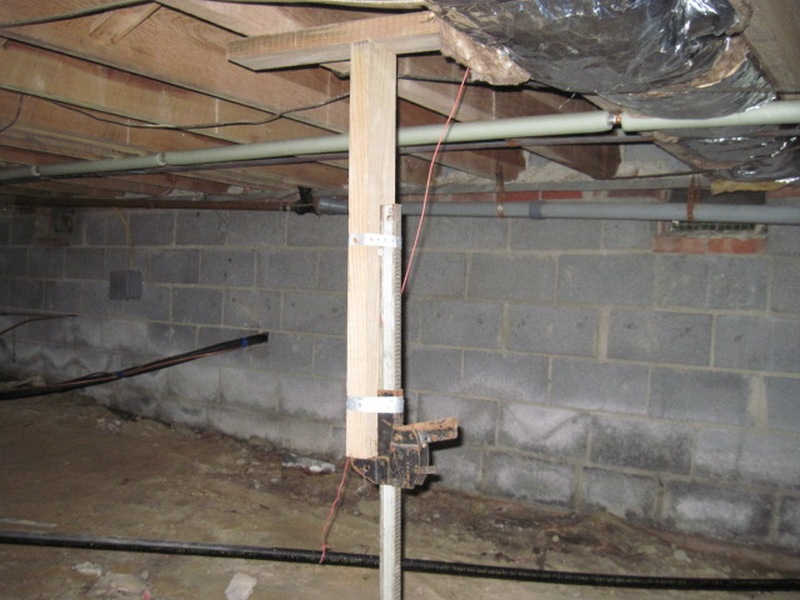
- Dimensional lumber posts and screw jacks are not acceptable.
Screw jacks without footings
A great example of “unworkmanlike”
Floor Limitation and Information Statements
Covered with insulation: The flooring is covered with insulation. Therefore, the inspection is limited.
Finished areas, no view behind walls, above ceilings, or other obstructions: Finished areas limit the inspection. The inspector does not inspect behind walls, above ceilings, or other obstructions which obstruct the inspector’s view.
Floor framing squeaks, not a structural deficiency: There are squeaks in the floor framing. Squeaks typically are the result of loose nails or other fasteners pulling in and out of the floor wood frame members, or joists rubbing against the sub-flooring. Squeaks do not constitute a structural deficiency.
Manufactured trusses composed of wood members and metal gusset plates: The floor framing includes manufactured trusses which are composed of wood members and metal gusset plates. Such trusses are not designed to be altered.
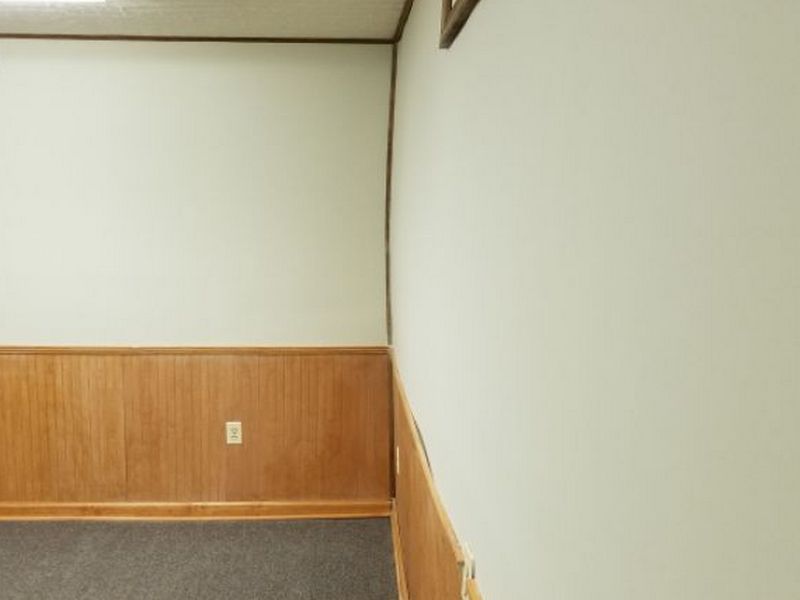
Moderate sloping/related interior door frame distortions throughout house, within acceptable parameters: There is moderate sloping in the floors and related interior door frame distortions throughout the house. The extent of sloping and distortion is within acceptable parameters for a building of this age and type construction, and appear to be a function of normal sagging in the floor system. No deflection or recent large crack patterns are visible to indicate that the conditions are ongoing. Thin diagonal wall cracks may continue to develop at the corners of some interior door frames; such cracks are considered cosmetic unless the cracks widen appreciably.
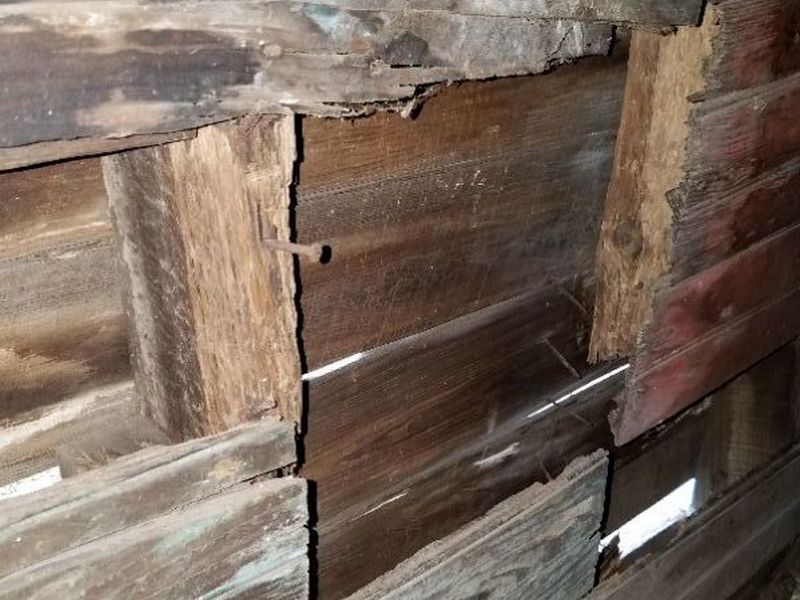
Wall
The walls of a house are not just upright barriers that separate the interior from the outside, or one room from another. They are vertical load-bearing structures that must support the roof, the floors, everything that’s on them, and carry that weight down to the foundation. They must be able to resist the forces of wind, driving rain, and sometimes even seismic events. Openings such as doors and windows must be constructed properly so there are not any weak points that would allow sagging, racking, or failure.
It is vital to inspect the wall structure from the exterior. There you can view from a distance and more easily see any leaning or bowing. If a wall is not plumb, the downward forces will cause stress and lead to failure. Water can enter a house anywhere and damage the structure, but this is most likely at the top and bottom, and at openings. Always report stains; measure for moisture and connect the dots for any implications. Every effort should be made to view the sill plates and studs in the basement or crawlspace, and the top plates in the attic. Look for sagging or displacement at windows and doors. Inspect for and report cracks.
The bearing wall is bowing. This indicates a structural failure. The cause for this should be identified. Hire a contractor for an evaluation and to provide repairs as needed.
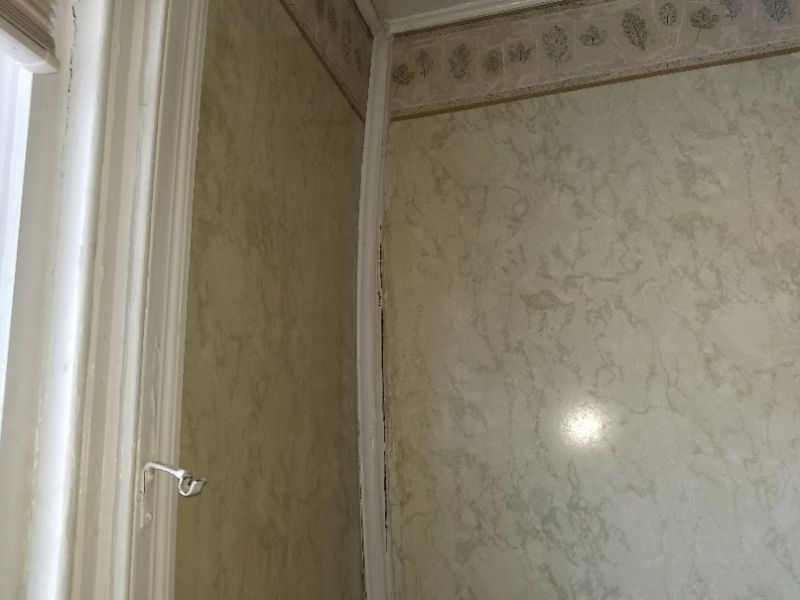

The bearing wall is cracked and shows lateral movement. This can affect its ability to carry the necessary structural loads. The cause for this should be identified. Hire a contractor for an evaluation and to provide repairs as needed.
Studs in the bearing wall have been cut. The repairs are unworkmanlike, and will affect the wall’s structural integrity. Hire a contractor for repairs as needed.

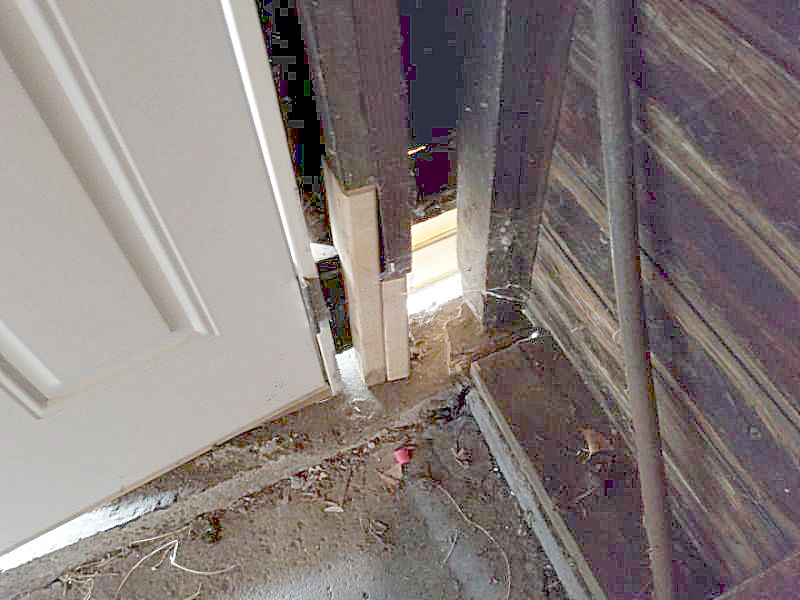
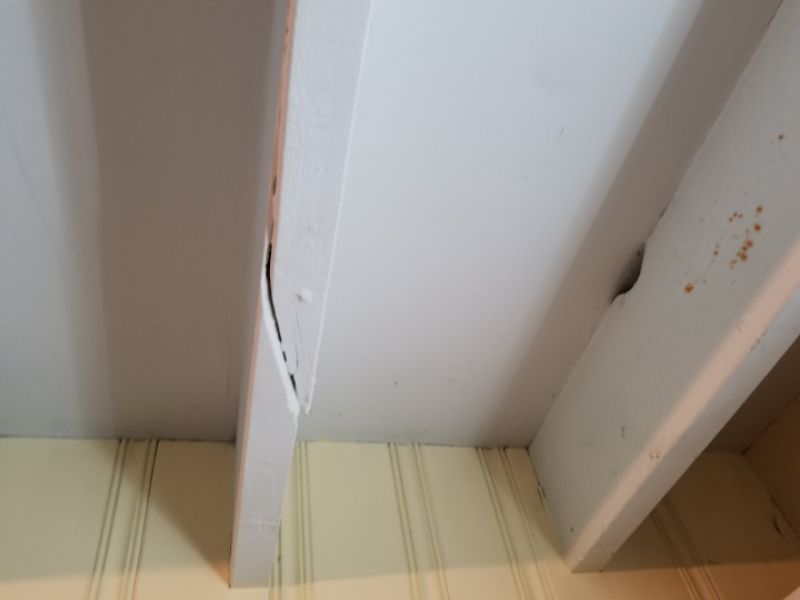
The bearing wall’s top plate has been notched beyond acceptable limits. This affects its load bearing capacity. Hire a contractor to provide repairs as needed.
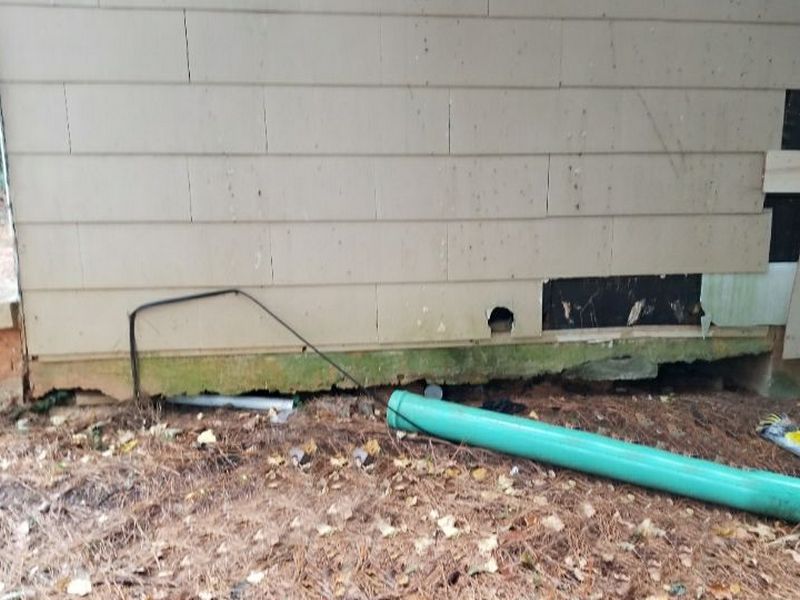
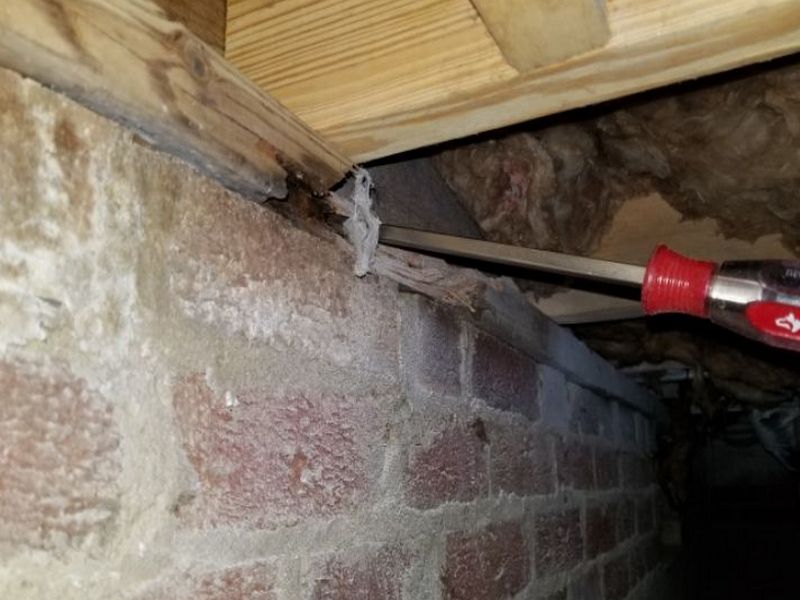
The sill plate is deteriorated. This can affect the wall’s ability to carry the necessary structural loads. The cause for this should be identified. Hire a contractor for an evaluation and to provide repairs as needed.
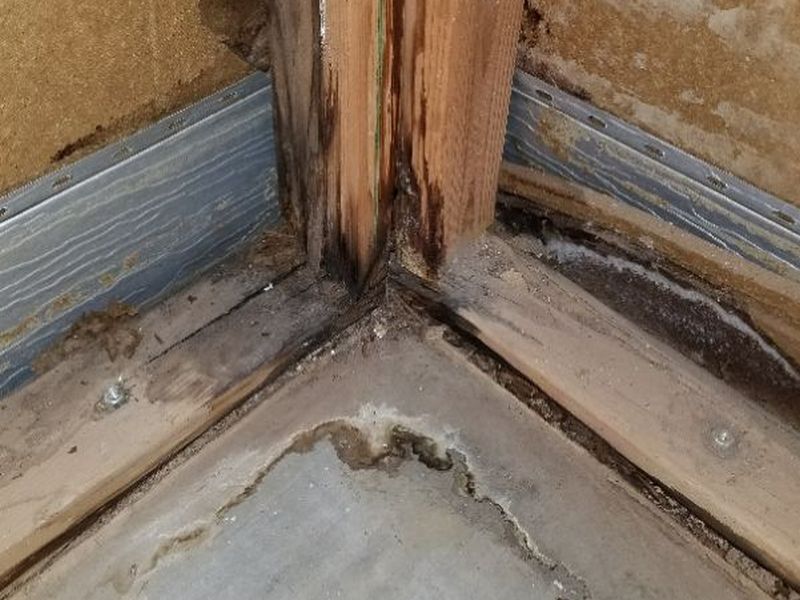
The top plate is deteriorated. This can affect the wall’s ability to carry the necessary structural loads. The cause for this should be identified. Hire a contractor for an evaluation and to provide repairs as needed.
The bearing wall is deteriorated. This can affect its ability to carry the necessary structural loads. The cause for this should be identified. Hire a contractor for an evaluation and to provide repairs as needed.
The bearing wall is bowing. Horizontal cracking is evident. This indicates a structural failure. The cause for this should be identified. Hire a contractor for an evaluation and to provide repairs as needed.
The bearing wall is cracked and shows signs of lateral movement or settlement. This indicates a structural failure. The cause for this should be identified. Hire a contractor for an evaluation and to provide repairs as needed.
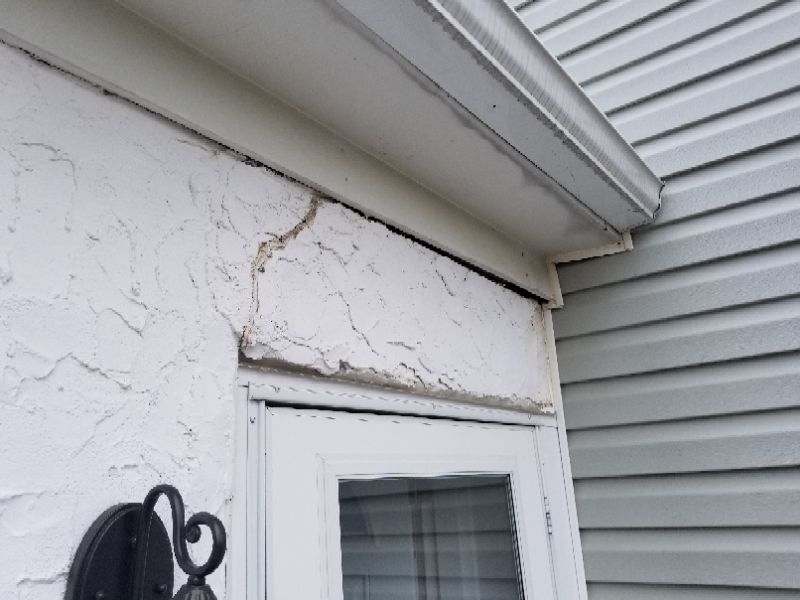
The lintel over an opening is missing or deteriorated. This will allow settlement and failure. Hire a contractor for an evaluation and to provide repairs as needed.
The bearing wall is deteriorated. This can affect its ability to carry the necessary structural loads. The cause for this should be identified. Hire a contractor for an evaluation and to provide repairs as needed.
Wall Limitation and Information Statements
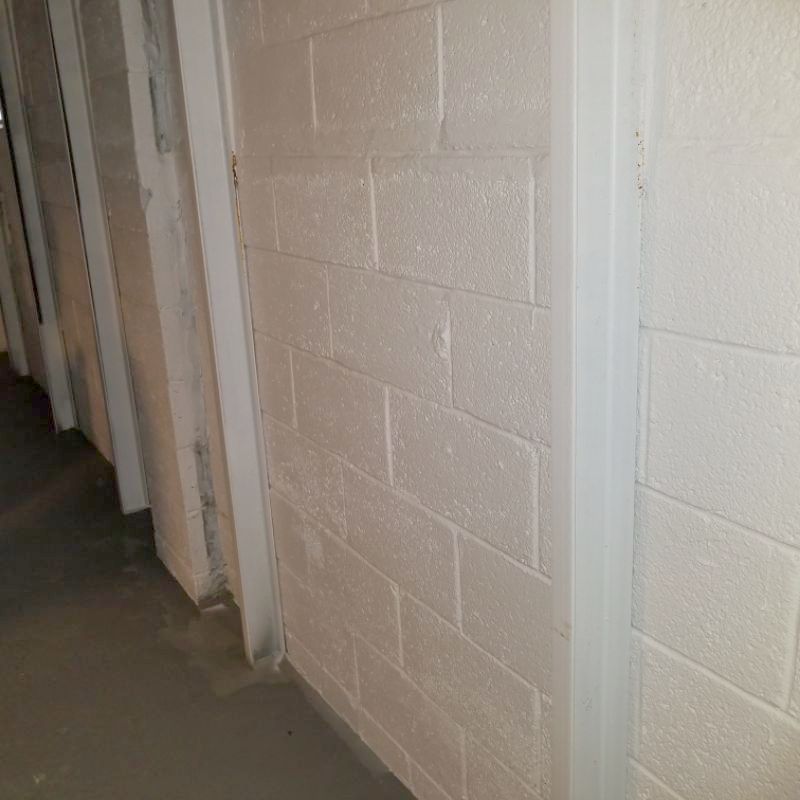
Covered with insulation or finished materials: The wall is covered with insulation and/or finish materials. Therefore, the inspection is limited.
Roof
The roof is the upper-most portion of a home’s structure. It must support the “live” loads of workers and shifting materials during construction or renovations, wind forces, and changing environmental loads such as rain and snow. “Dead” loads, the relatively constant weight of the final construction, must be accommodated. The roof must also provide an adequate base for the waterproof skin that is the roof covering. Even a slight shift in the roof framing can affect the covering’s integrity and allow leaks that will cause damage and further deterioration.
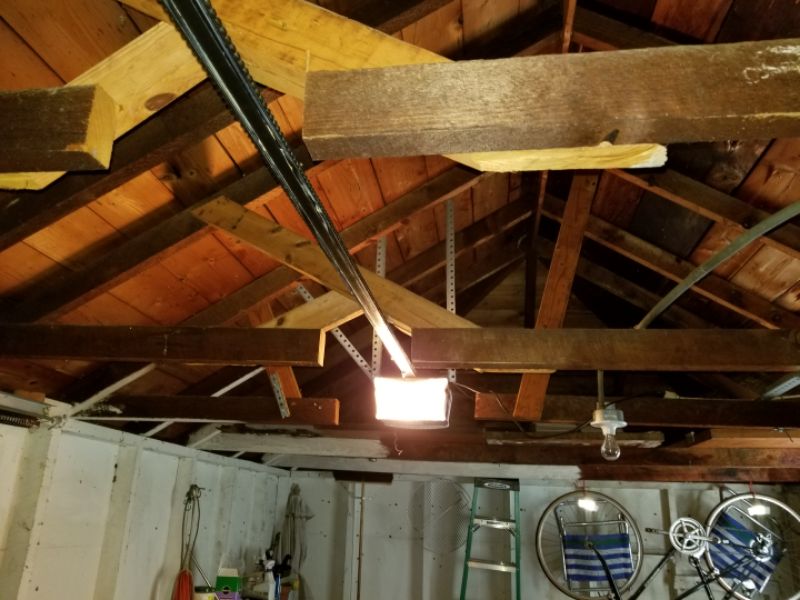
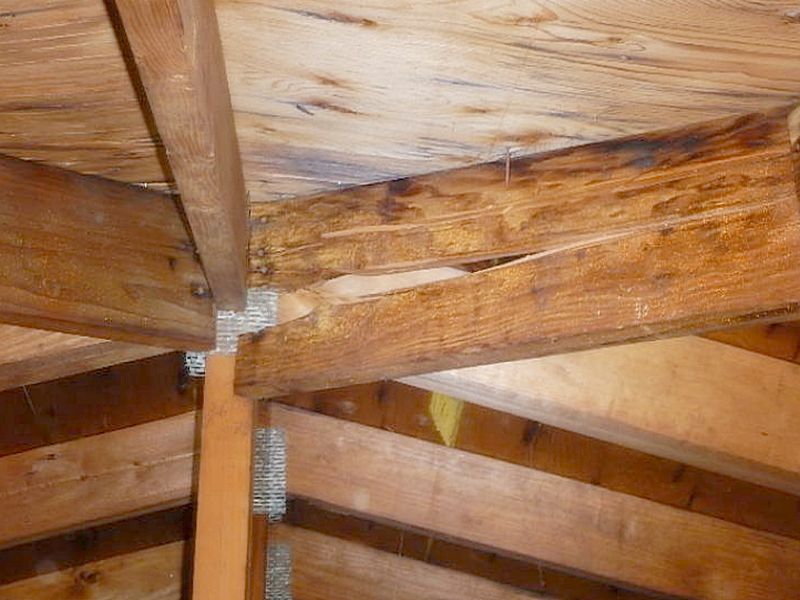
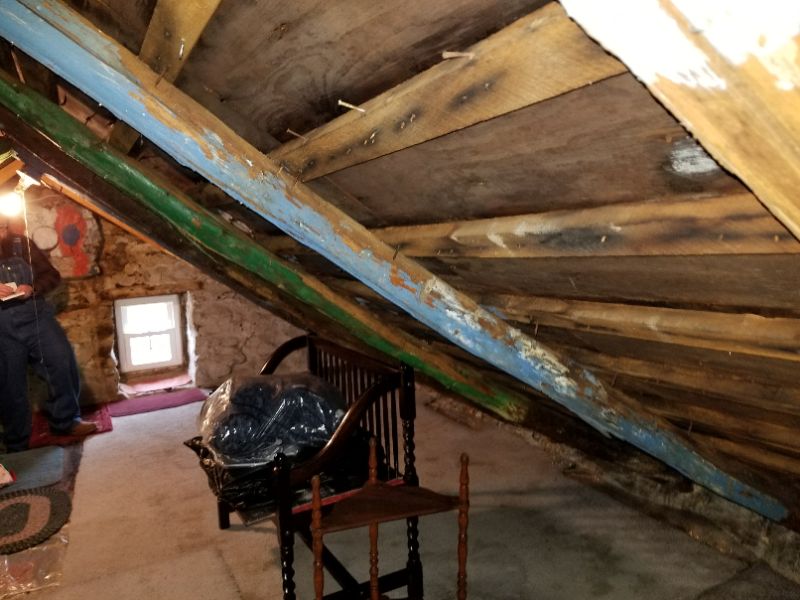
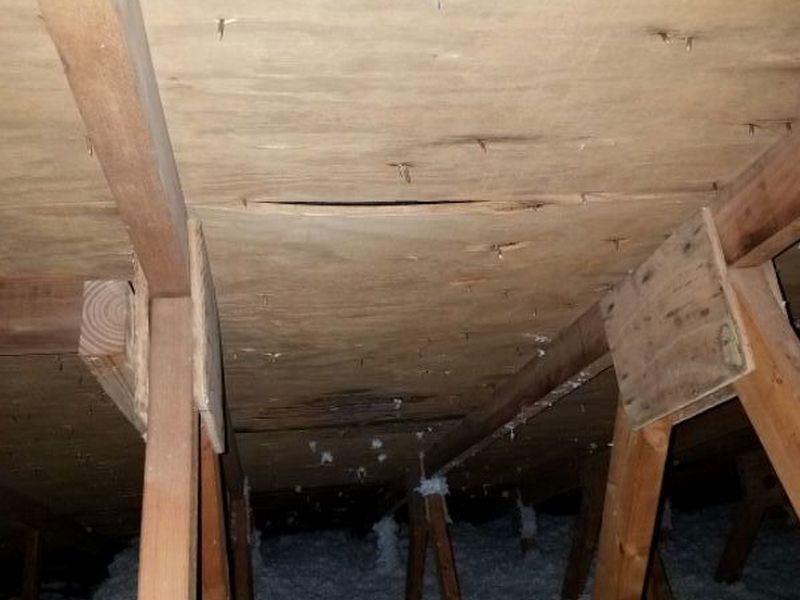
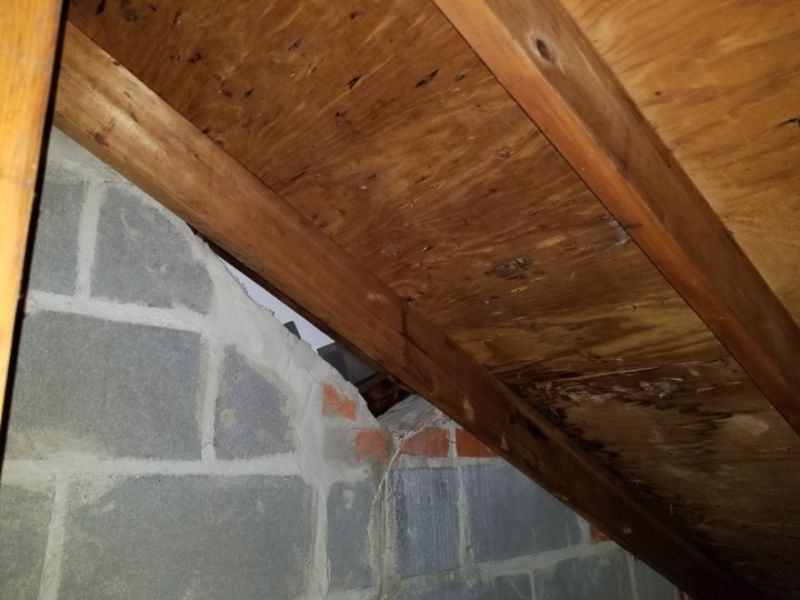
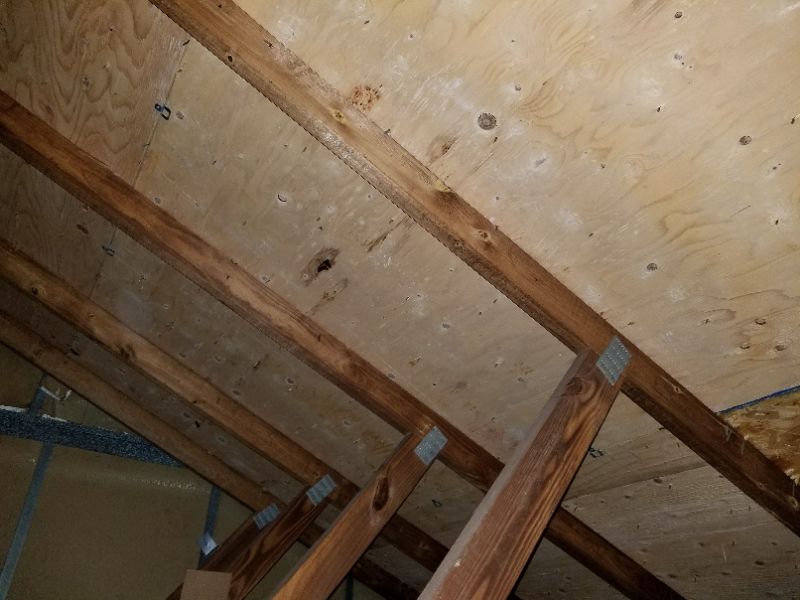
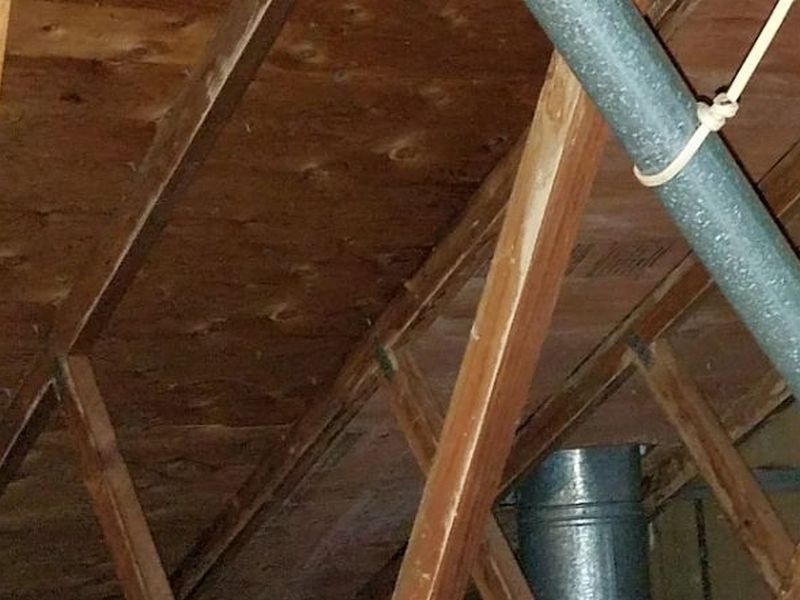
You should gather information when outside that guides your interior inspection. Safety is first when in the attic, but every effort should be made to view as much of the space as possible. Look for damaged, deflected, or deteriorated rafters and trusses. Any staining should be reported. Separations between rafters and ridges, missing collar ties, improper “sister” repairs and excess notching at rafters is notable. Remember that trusses are engineered devices, and must be complete, with all members and gusset plates intact. Field alterations should be reported.
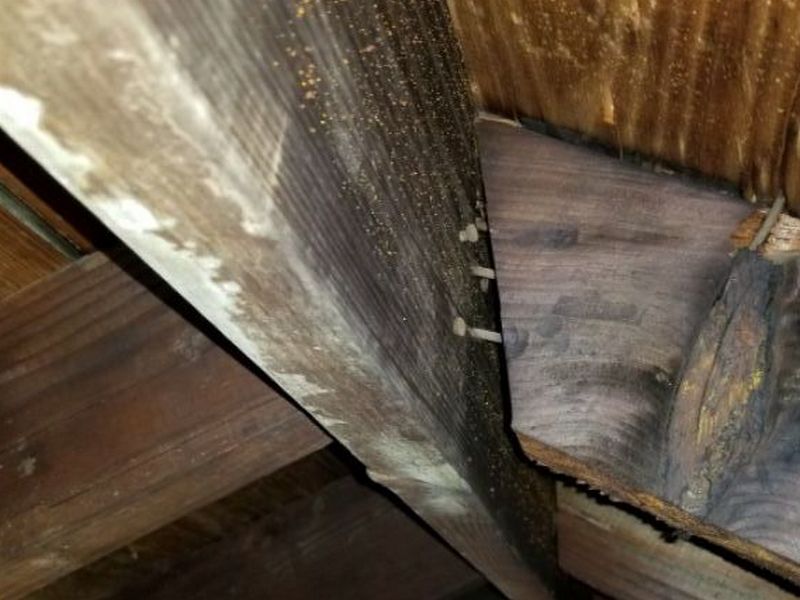
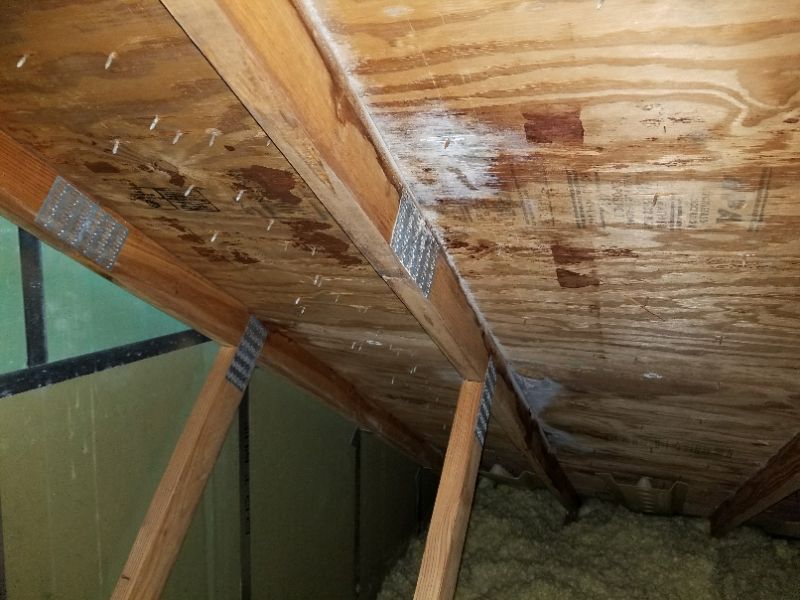
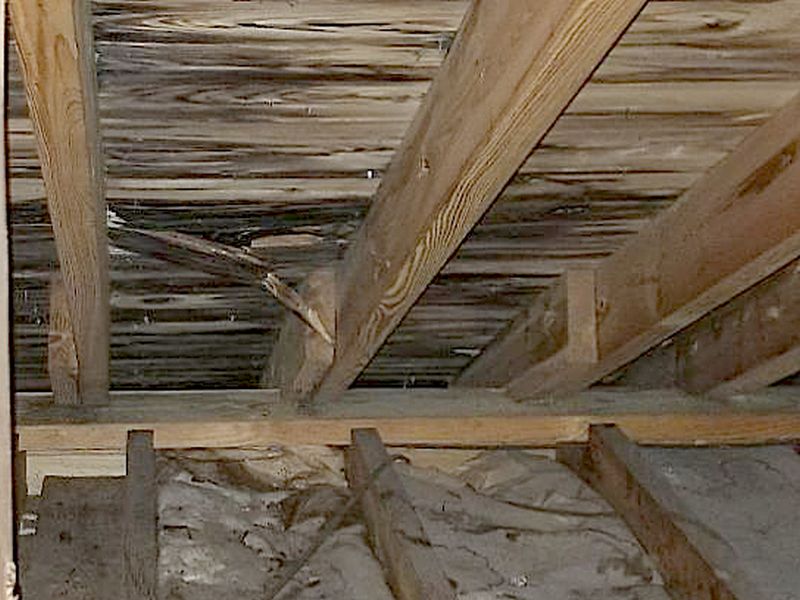
There are moisture stains on the framing. This indicates water penetration. Identify and mitigate the source of water penetration.
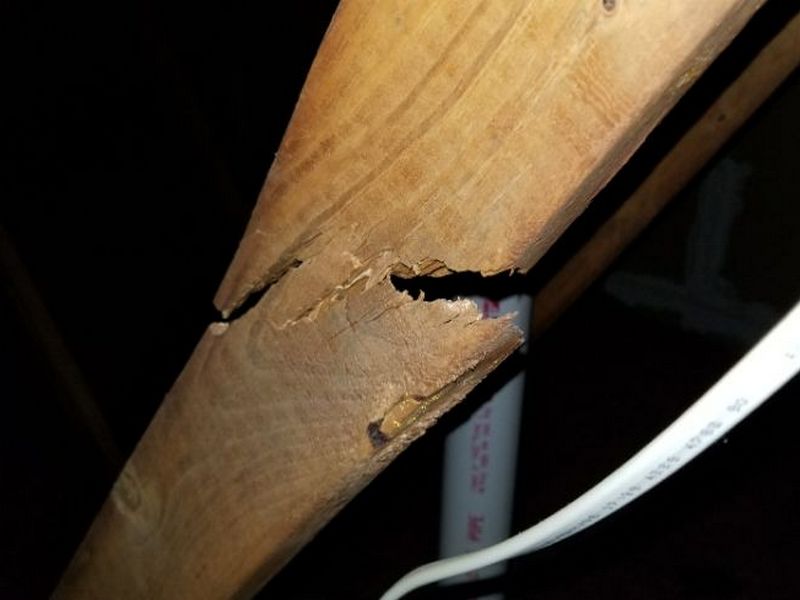
There are damaged rafters. This affects the ability of roofing structure to properly support the roof’s weight. Hire a contractor to evaluate the rafters and to make repairs as required.
There are deteriorated rafters. This affects the ability of roofing structure to properly support the roof’s weight. The cause of the deterioration must be identified. Hire a contractor to evaluate the rafters and to make repairs as required.
There are sagging rafters. This implies an inadequate structure that may not be able to support the roof’s weight. Hire a contractor to evaluate the rafters and to make repairs as required.
There are rafters that are notched beyond acceptable limits. This compromises the load bearing capacity of the rafter. Hire a contractor to evaluate the rafters and to make repairs as required.
There are improperly repaired rafters. “Sister” repairs must the same size lumber, have one end on a bearing surface, and extend at least 1/3 the length of the rafter past the damage. They must be tightly attached with staggered fasteners. Sisters cannot be entirely in the middle of a rafter. Hire a contractor to make repairs as required.
The horizontal floor supports or the collar ties have been cut or removed. This is often done for access or new installations. It weakens the roof structure and can allow the roof to flatten and spread outwards. Hire a contractor for an evaluation and repairs as needed.
Rafters are pulling away from the ridge board. This indicates a possible overall settlement in the roof structure. Hire a contractor for an evaluation and repairs as needed.
The ridge board is damaged. This can allow settlement and affect the stability of the overall roof structure. Hire a contractor for and evaluation and repairs as needed.
The ridge beam is too narrow, and the rafters are not cut at the correct angle. The entire cut end of the rafters should have complete bearing support. This can cause the rafters to crack. Hire a contractor for repairs as needed.
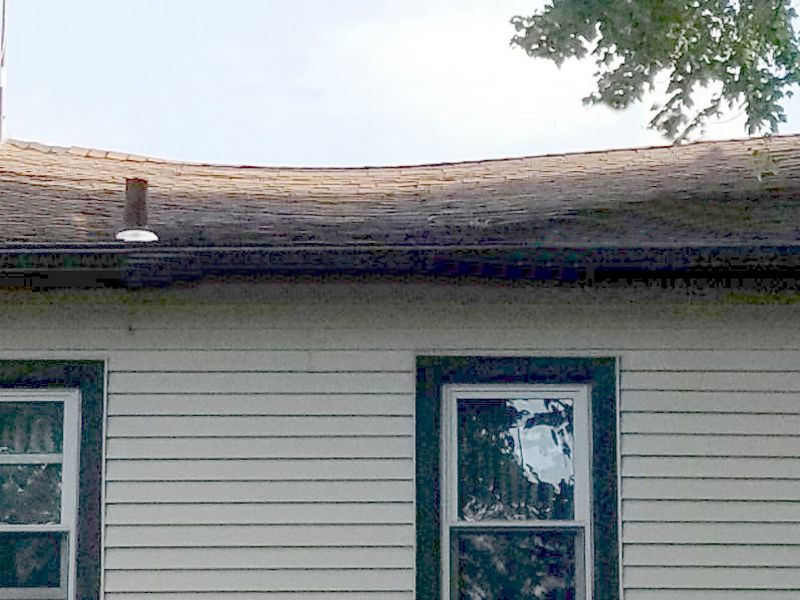
There is deflection or sagging in the roof system. This implies an inadequate structure that may not be able to support the roof’s weight. Hire a contractor to evaluate the deflection and to make repairs as required.
There are damaged truss members. Trusses are engineered systems which rely on the integrity of all of components for proper function. Hire a contractor to replace the truss under the guidance of a truss or structural engineer.

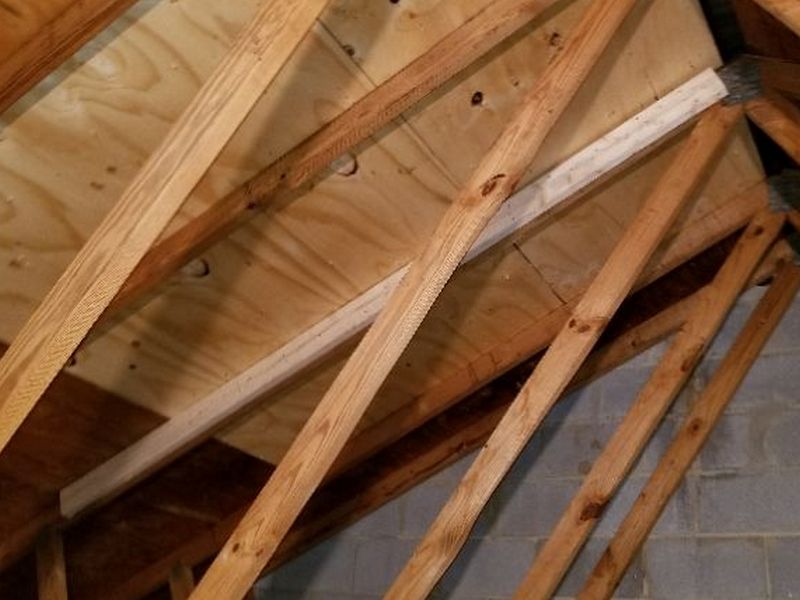
There are cut or field-altered truss members. Trusses are engineered systems which rely on the integrity of all of components for proper function. Hire a contractor to replace the truss under the guidance of a truss or structural engineer.
There are loose or damaged gusset plates. Trusses are engineered systems which rely on the integrity of all of components for proper function. Hire a contractor to repair the gussets under the guidance of a truss or structural engineer.
There is evidence of fire damage. The inspector cannot determine the extent of the damage or the repairs. Ask the homeowner about the fire damage; records of the damage can usually be obtained through the local fire department, and a record of repairs, along with any applicable municipal permits and approvals, can usually be obtained through the municipal building department.
Roof Limitation and Information Statements
Covered with insulation: The roof is covered with insulation. Therefore, the inspection is limited.
Areas inaccessible/not visible due to height, design, materials: Some areas are inaccessible and/or not visible due to height, design and materials. Therefore, the inspection is limited.
Finished areas, no view behind walls, above ceilings, or other obstructions: Finished areas limit the inspection of roof framing. The inspector does not inspect behind walls, above ceilings, or other obstructions which obstruct the inspector’s view.
Blocked entrance, no entry/inspection of roof structure: The attic entrance is blocked, which prevents entry and inspection of the roof structure.
Locked entrance, no entry/inspection of roof structure: The attic entrance is locked, which prevents entry and inspection of the roof structure.
Vaulted/cathedral ceiling: There is a vaulted or cathedral ceiling, which limits the inspection due to lack of access for evaluation of the limited spaces between ceiling and the underside of the roof.
Access too small, no entry/inspection: The entrance is too small for access, which prevents entry and an inspection of the roof structure.
Roof maintained by local association, not inspected: The roof appears to be maintained by local association and, therefore, is not inspected.
Radiant barrier installed, inspection limited: The roof structure has a radiant barrier installed. This prevents viewing the entire roof framing; the inspection is limited.
Manufactured trusses composed of wood members and metal gusset plates: The roof framing includes manufactured trusses which are composed of wood members and metal gusset plates. Such trusses are not designed to be altered.
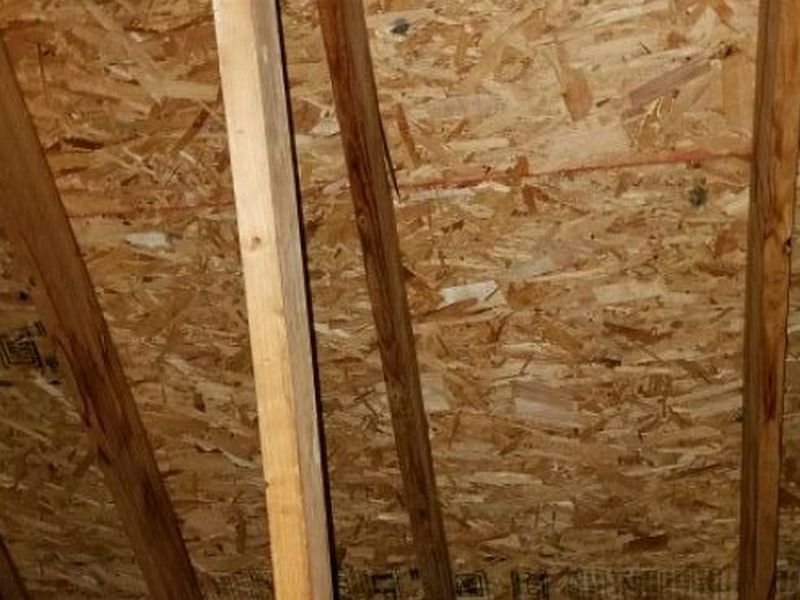
Roof Sheathing
Intact roof sheathing is essential for both the integrity of the roof covering, as well as the overall roof structure. Roofing materials will not secure properly to deteriorated sheathing. The sheathing stabilizes the roof framing, adding strength to it and creating a complete system. While safety comes first, an effort should be made to view as much of the roof sheathing as possible.
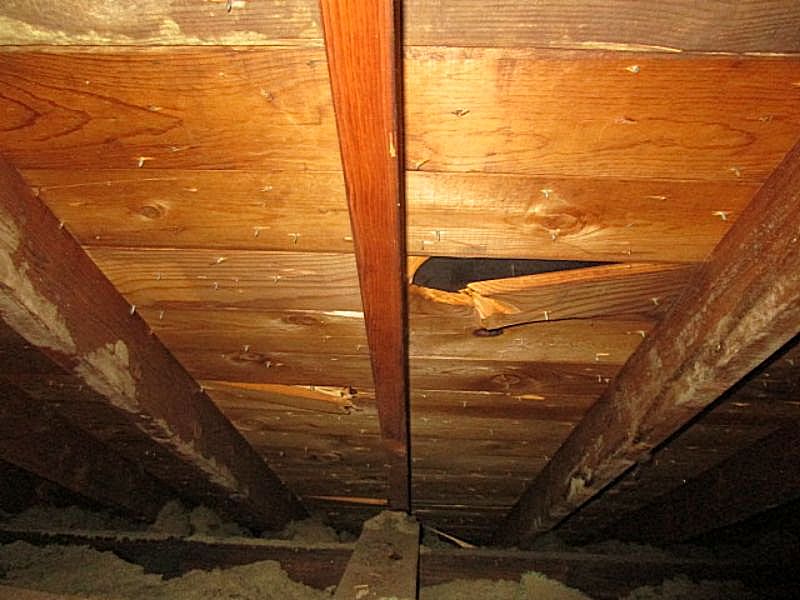
Inspect for any signs of water penetration. Stains, deterioration, openings to daylight, damaged or loose boards, and delaminated plywood should be reported. The presence of suspected fire-retardant plywood (FRT plywood) should be reported. Inspect for any significant number of fasteners that have missed attaching the roof decking to the rafter or truss. Look for “H-Clips” on sheet sheathing at the mid-point between rafters or trusses. They are advised, but not absolutely required, on sheathing <7/16″ installed on 24″ centers.
There are moisture stains on the sheathing. This indicates water penetration. Identify and mitigate the source of water penetration.
There is damaged sheathing. This affects the strength of the sheathing and the proper installation of the roofing materials. The cause of the damage must be identified. Hire a roofing contractor for an evaluation and to make repairs as needed.
There is buckled or sagging sheathing. This affects the strength of the sheathing and the proper installation of the roofing materials. Replace the sheathing.
There is delaminated sheathing. This affects the strength of the sheathing and the proper installation of the roofing materials. Replace the sheathing.
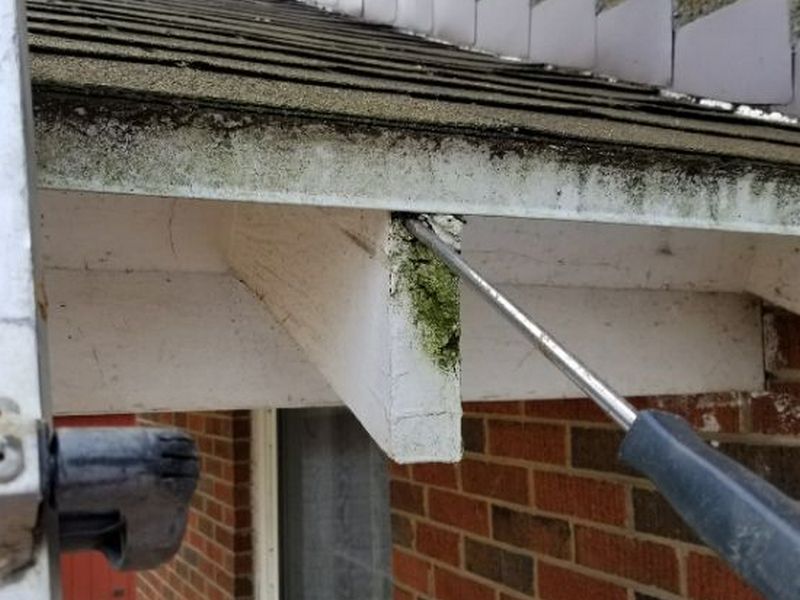
There is deteriorated sheathing. This affects the strength of the sheathing and the proper installation of the roofing materials. The cause of the deterioration must be identified. Hire a roofing contractor for an evaluation and to make repairs as needed.
There are missing H-Clips at the edges of the roof sheathing. Clips function to anchor the sheathing sections to one another and prevent sagging. Replace the fasteners as needed.
Fire-rated materials are missing in the first 4′ of roof sheathing next to the party wall. This is required to prevent flame spread from the adjacent unit. Install fire-rated materials as needed.
The roof sheathing appears to contain fire-retardant plywood (FRT plywood). This older product is subject to deterioration and weakening due to heat buildup in the attic. Hire a contractor for an evaluation and repairs/replacements as needed.
Roof Sheathing Limitation and Information Statements
Covered with insulation: The sheathing is covered with insulation. Therefore, the inspection is limited.
Finished areas, no view behind walls, above ceilings, or other obstructions: Finished areas limit the inspection. The inspector does not inspect behind walls, above ceilings, or other obstructions which obstruct the inspector’s view.
Finished areas, no view behind walls, above ceilings, or other obstructions: All or part of the attic is finished, which limits the inspection. The inspector does not inspect behind walls, above ceilings, or other obstructions which obstruct the inspector’s view.
Near/at end useful life, budget for replacement: The sheathing is near or at the end of its useful life. We recommend establishing a budget to replace the sheathing.
Past end useful life, budget for replacement: The sheathing is past the end of its useful life. We recommend establishing a budget to replace the sheathing.
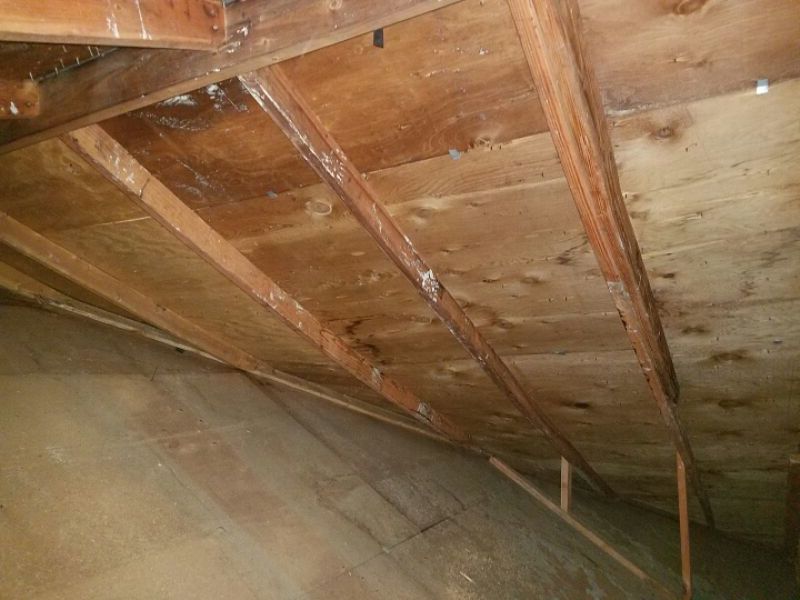
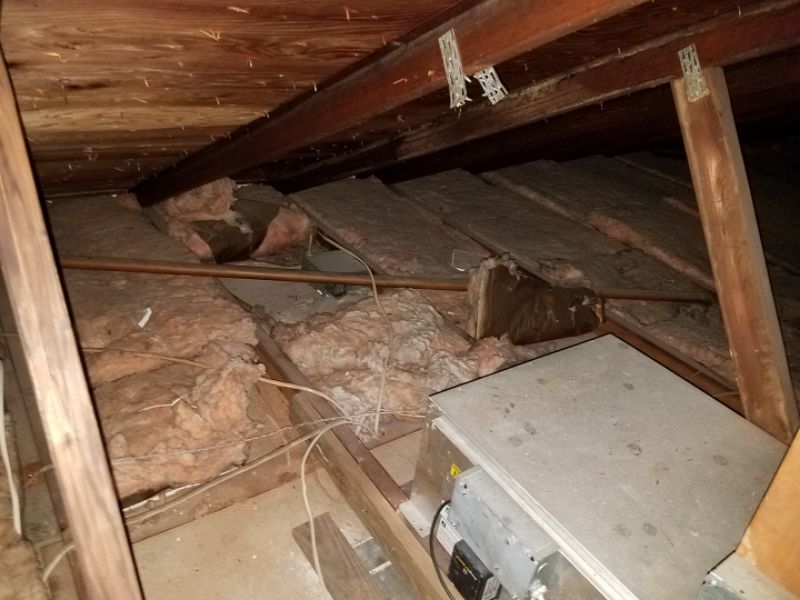
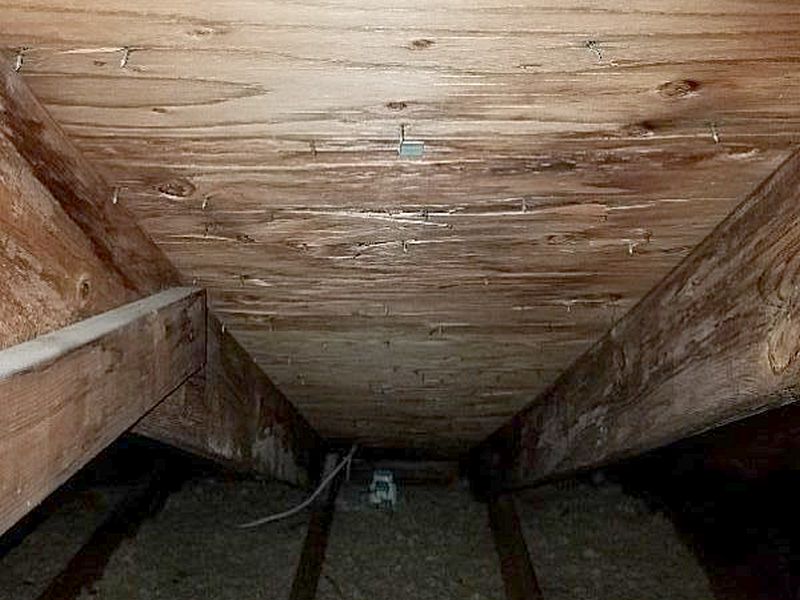
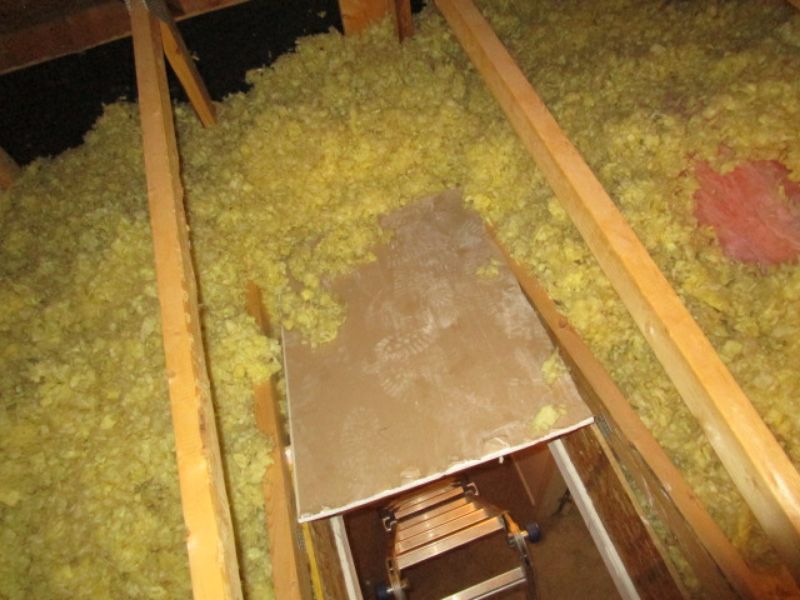
Attic
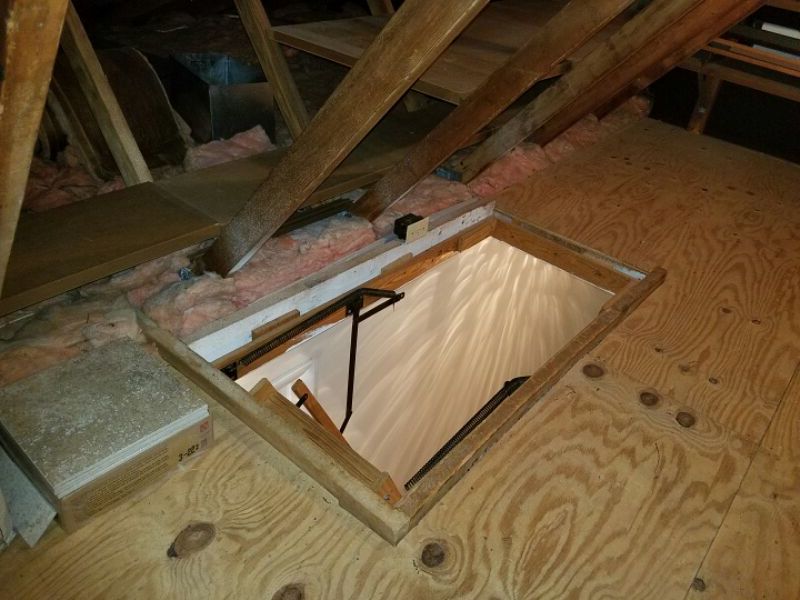
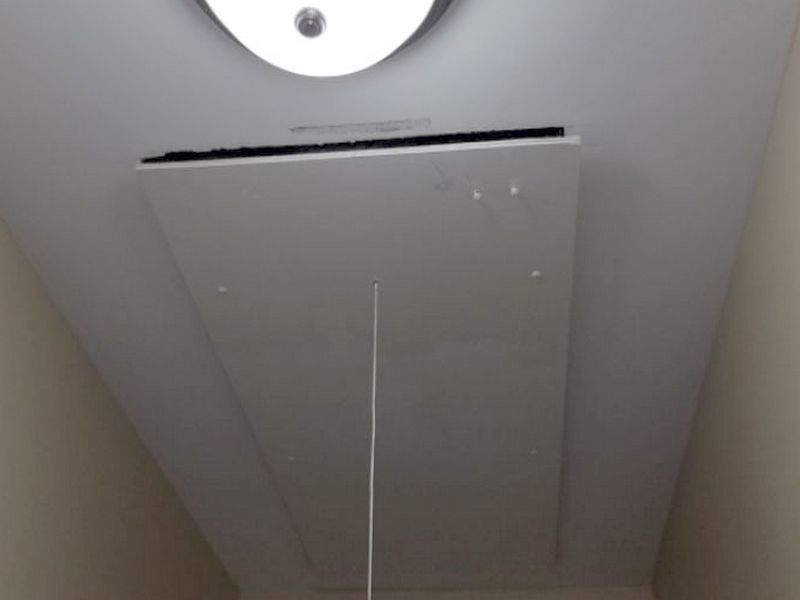
The “attic” in a house is any area between the home’s roof and the ceiling of a habitable space. If there is enough room to move about freely, i.e. not a cathedral ceiling construction, access should be provided. These can be hatches, pull-down steps, or a permanent stairway. Many systems can be evaluated here, including the roofing, structure, insulation, and HVAC. Any limitations created by the structure, height, hazardous conditions, and finished spaces should be reported. A lack of access should be reported.
Hatches should be well-sealed and preferably insulated, although older construction did not require this. Stairs or ladders should be in good repair and acceptable for safe use. Any access in a garage should maintain the required fire rating of the overall ceiling or wall. Inspect to ensure that the access opening does not compromise the structure, especially when trusses are installed. An attic should not have openings to the exterior that can allow pest entry.
There is no access to the attic. The entry is locked or sealed. The conditions inside are undetermined. This prevents any entry necessary for repairs or inspection. Hire a contractor for repairs as needed to allow access to the attic.
The seal or insulation at the attic access is inadequate. This allows energy loss and permits moisture to enter the attic. Repair or replace the access hatch or seal, or add insulation as needed.
The attic access hatch cover is not fire rated. This condition creates a breach in the existing fire rated ceiling or wall. Replace the cover with a fire-rated cover.
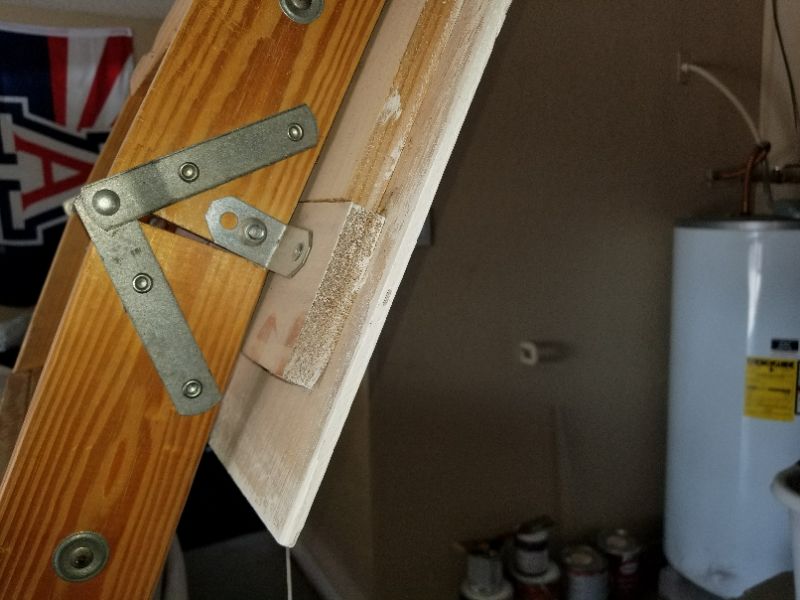
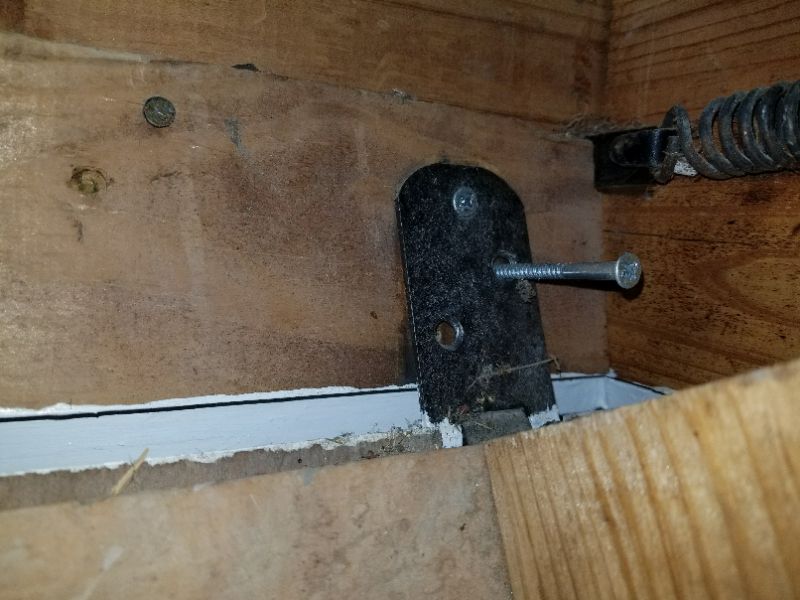
The pull-down stairs have loose or missing hardware. This is a safety hazard. Repair or replace the hardware.
The pull-down stairs are not cut to the proper length. This is a safety hazard. Repair or replace the stairs.
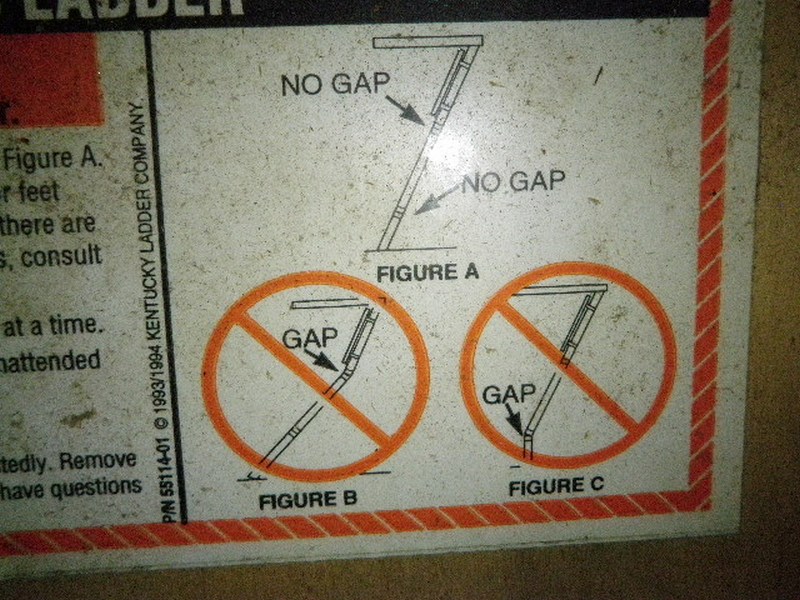

The pull-down stairs are damaged. This is a safety hazard. Repair or replace the stairs.

The pull-down stairs are improperly installed. This is a safety hazard. Repair or replace the stairs.

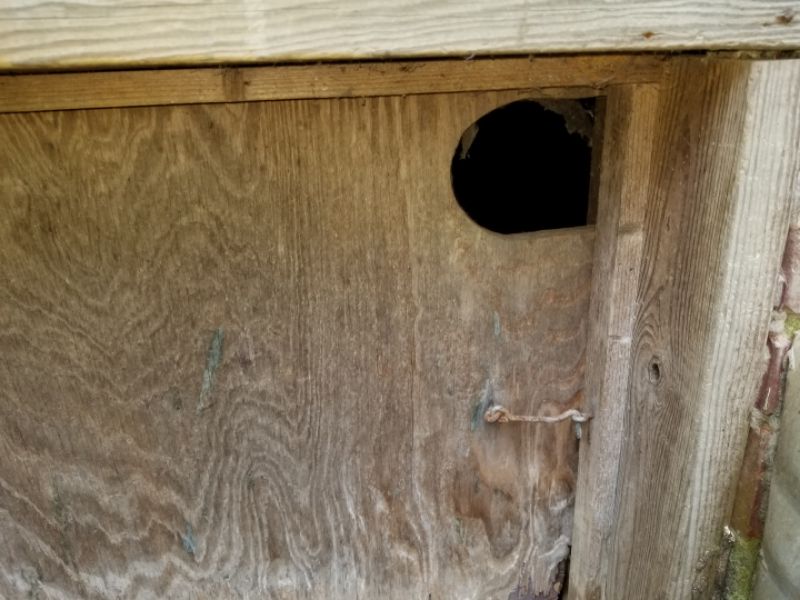
There are gaps large enough to allow bats, birds, vermin and insects to enter. This is a health concern. Hire a contractor to make required repairs.
Attic Limitation and Information Statements
Covered by insulation, no entry/inspection: The attic access is covered by insulation, preventing entry. Therefore, the inspection is limited.
Areas inaccessible/not visible due to height, design, materials: Some attic areas are inaccessible and/or not visible due to height, design and materials. Therefore, the inspection is limited.
Finished areas, no view behind walls, above ceilings, or other obstructions: All or part of the attic is finished, which limits the inspection. The inspector does not inspect behind walls, above ceilings, or other obstructions which obstruct the inspector’s view.
Blocked entrance, no entry/inspection of roof structure: The attic entrance is blocked, which prevents entry and inspection of the attic.
Locked entrance, no entry/inspection of roof structure: The attic entrance is locked, which prevents entry and inspection of the attic.
Access too small, no entry/inspection: The entrance is too small for access, which prevents entry and inspection.
Inaccessible, no entry/inspection: The attic is inaccessible, which prevents an inspection.
Attic maintained by local association, not inspected: The attic appears to be maintained by local association and, therefore, is not inspected.
Access sealed, no entry/inspection: The hatch to the attic is sealed. Access to the interior is not possible. Permission has not been given to take actions necessary to complete the inspection, e.g., cutting the sealant. Evaluate the attic when access is possible.
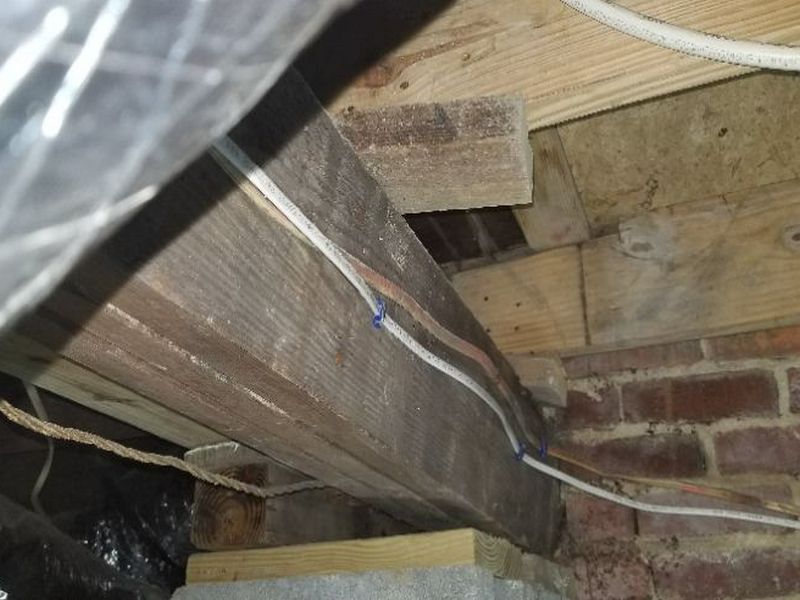
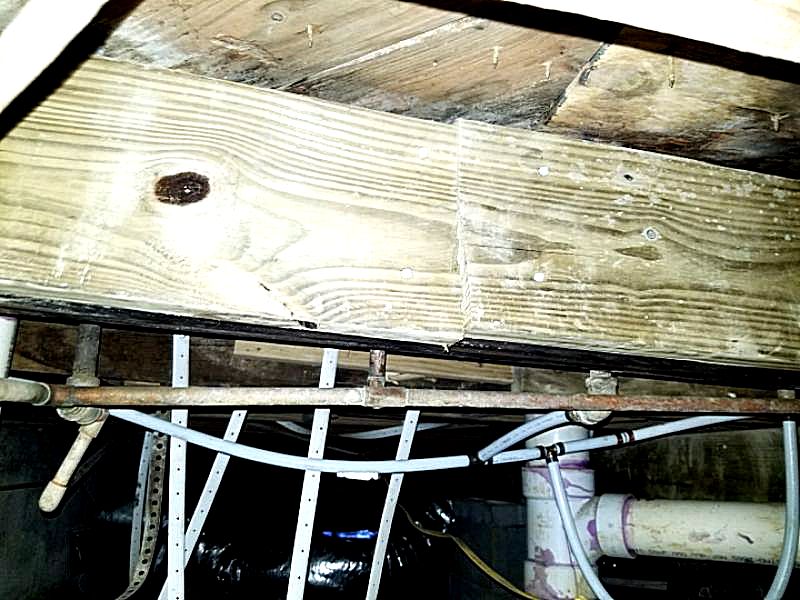
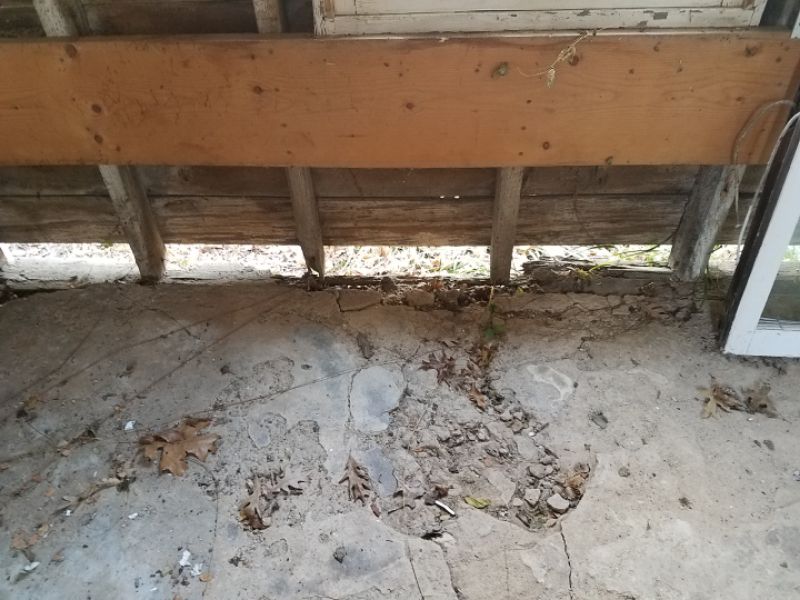
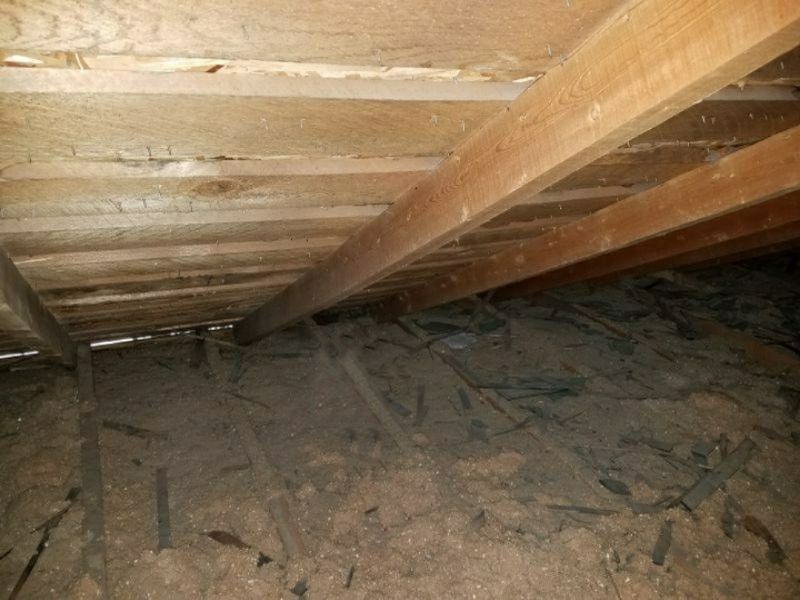
Crawl Space
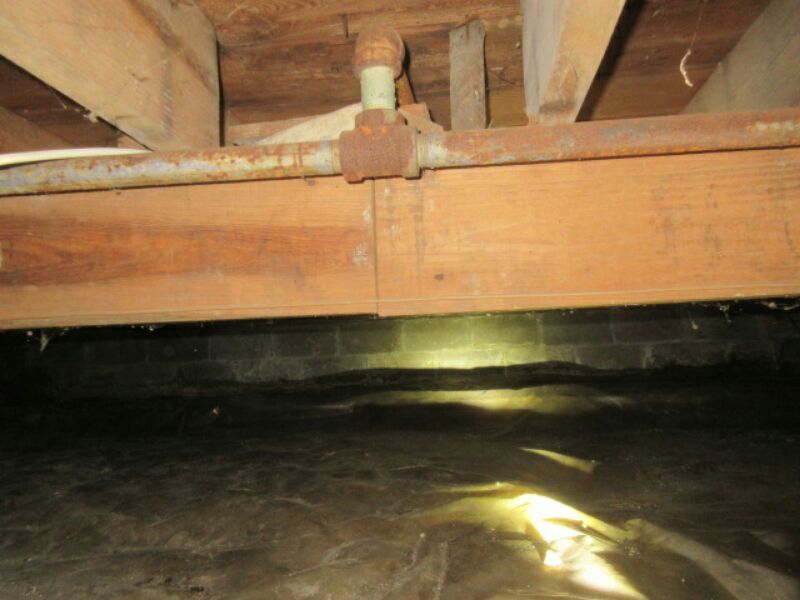
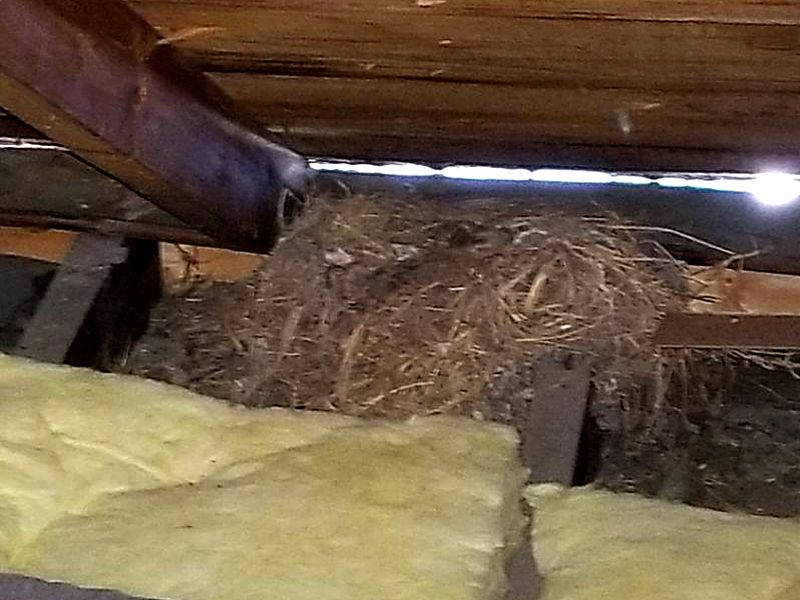
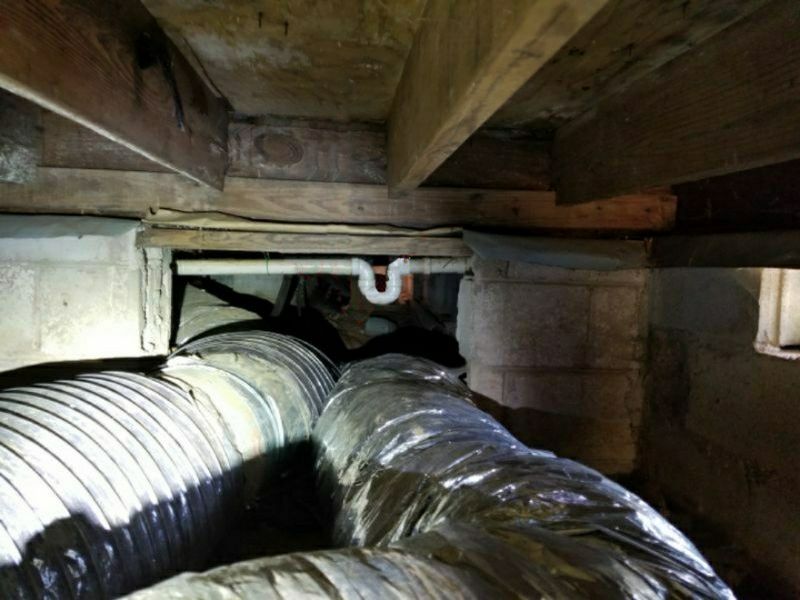
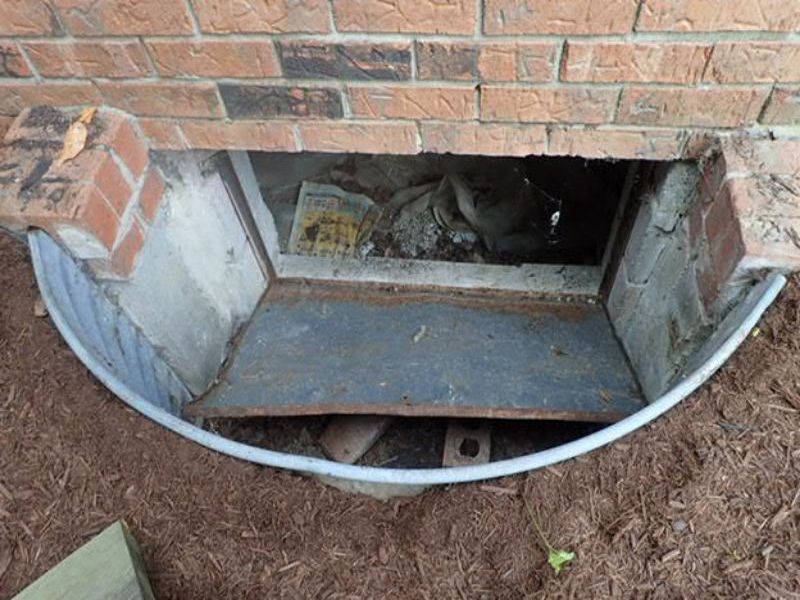
Any home with a crawl space must have a viable entry that allows ready access to the below-floor space. It is essential to be able to inspect this area to the fullest extent possible. Problems revealed there include the most significant and expensive that can occur. While safety is paramount, inspectors are encouraged to enter all crawl spaces. The Standards of Practice dictate entry except when there is less than 24 inches of vertical clearance between components and the ground, or with an access opening smaller than 16 inches by 24 inches. You should never crawl through standing water; it may be electrified or contaminated by sewage. Be alert to animals and dangerous insects, e.g. black widow spiders, bees, etc.
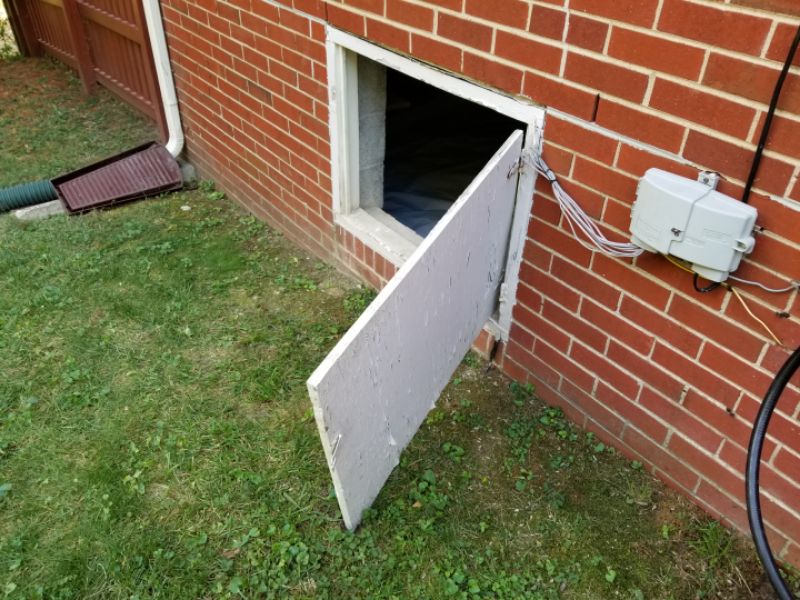
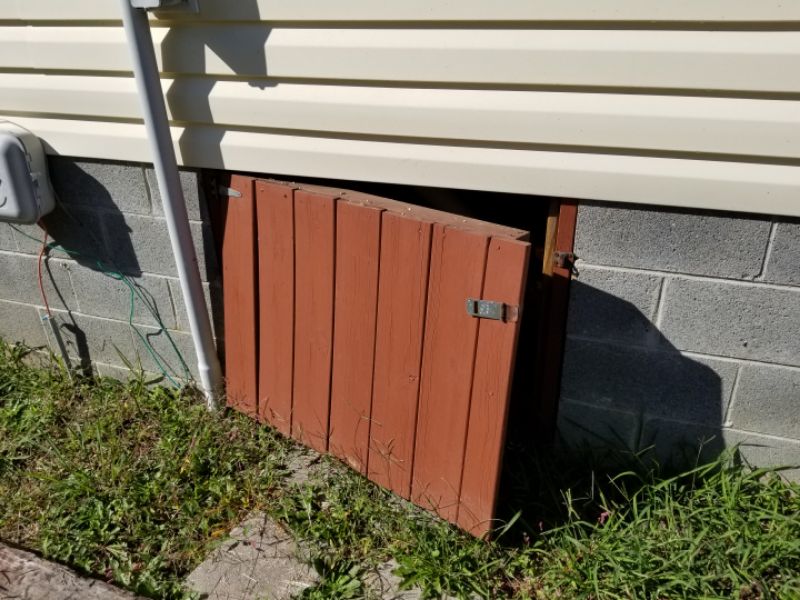
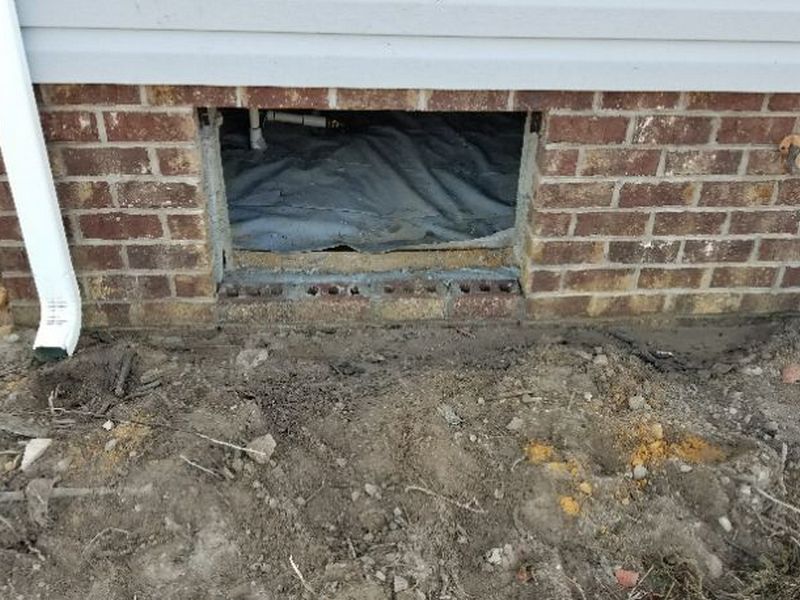
There is no access to the crawl space, or the access is sealed or blocked. The conditions inside are undetermined. This prevents any entry necessary for repairs or inspection. Hire a contractor to add access entry to the crawl space.
The crawl space access cover is damaged. This permits energy loss, and allows moisture and animals to enter the crawl space. Repair or replace the cover.
There are gaps large enough to allow bats, birds, vermin and insects to enter. This is a health concern. Hire a contractor to make required repairs.
The crawl space access cover is missing. This permits energy loss, and allows moisture and animals to enter the crawl space. Replace the cover.
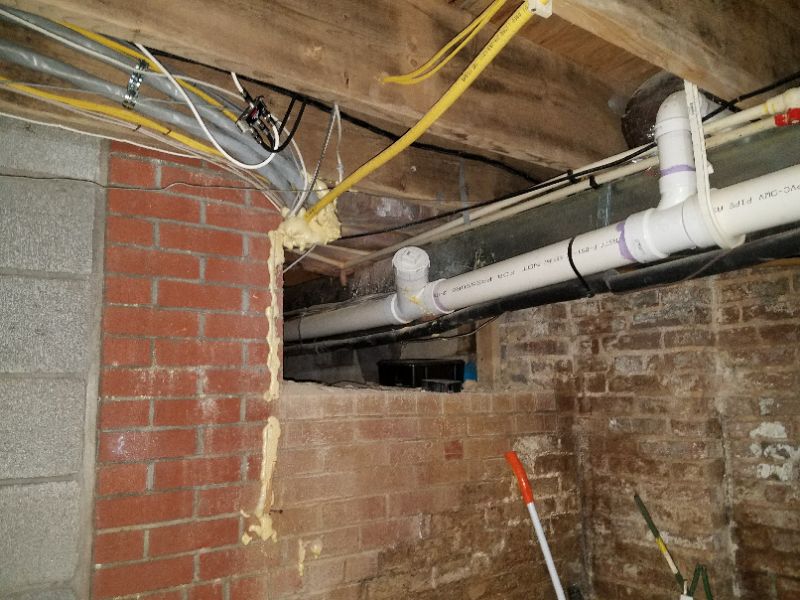
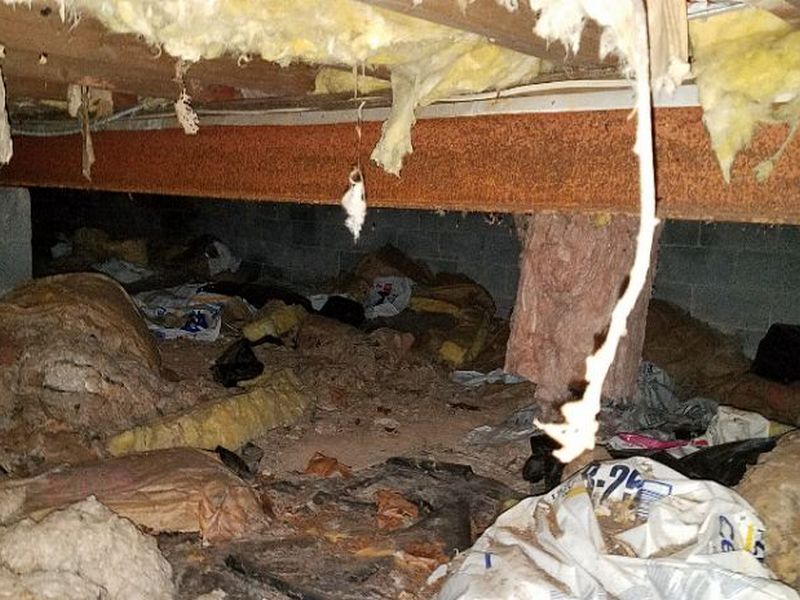
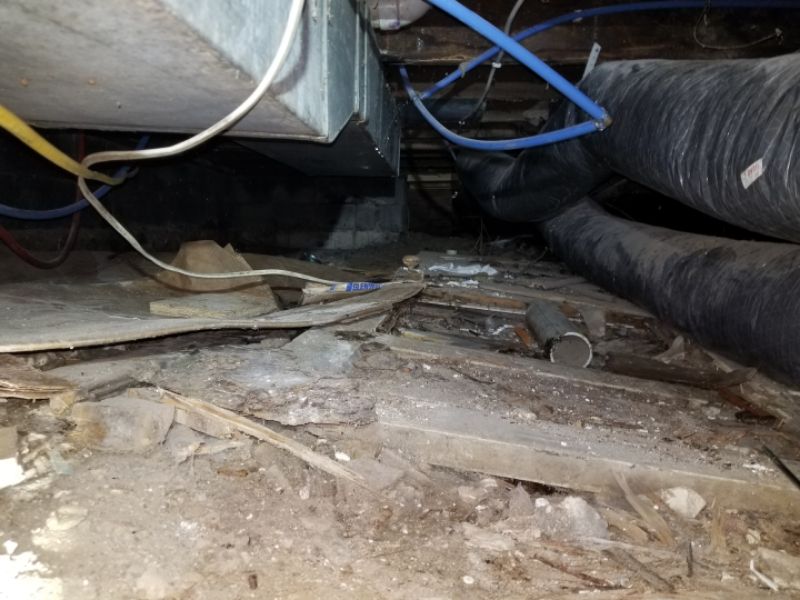
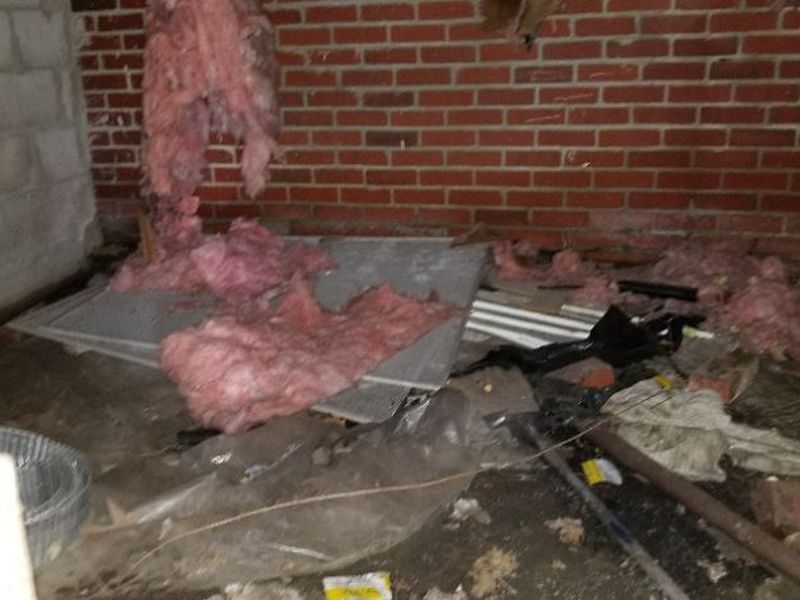
There is trash and debris in the crawl space. This is a conducive condition for pests and wood destroying insect infestation, and impedes proper access for inspecting and servicing. Clear the debris from the crawl space.
There is efflorescence in the crawl space. These white crystalline deposits indicate moisture penetration. This is conducive to mold formation and damage. The source of the penetration must be identified. Hire a contractor for an evaluation and to make repairs or upgrades as needed.
There is standing water in the crawl space. This can cause structural damage and health concerns. The source of the water must be identified. Hire a contractor for an evaluation and to make repairs or upgrades as needed.
Crawl Space Limitation and Information Statements
Areas inaccessible/not visible due to height, design, materials: Some crawl space areas are inaccessible and/or not visible due to height, design and materials. Therefore, the inspection is limited.
Covered by insulation, no entry/inspection: The crawl space access is covered with insulation. Therefore, the inspection is limited.
Blocked entrance, no entry/inspection of roof structure: The entrance is blocked, which prevents entry and inspection of the crawl space.
Locked entrance, no entry/inspection of roof structure: The entrance is locked, which prevents entry and inspection of the crawl space.
Access too small, no entry/inspection: The entrance is too small for access, which prevents entry and inspection.
Inaccessible, no entry/inspection: The crawl space is inaccessible, which prevents entry and inspection.
Crawl space maintained by local association, not inspected: The crawl space appears to be maintained by local association and, therefore, is not inspected.
Other
The component Structure – Other is where we report Wood Destroying Insects and Organisms (WDI and WDO). We use this section because the evidence and damage can occur across several different structural components. WDI includes termites, powder post beetles, old house borers, carpenter ants, and carpenter bees. WDO brings wood destroying fungus into the picture. We will not address carpenter bees here because their activity and damage is rarely structural.
It is essential that you report WDI/WDO using language that clearly states that the extent of any activity or damage cannot be determined. Defect statements for WDI specifically do not “name the insect.” This is not necessary, and may be restricted by regulations to licensed specialists. Any signs of chronic excess moisture in a crawl space requires that you inspect and probe carefully for damage, as well as reporting the moisture conditions in the “Insulation and Ventilation / Humidity Control” section.
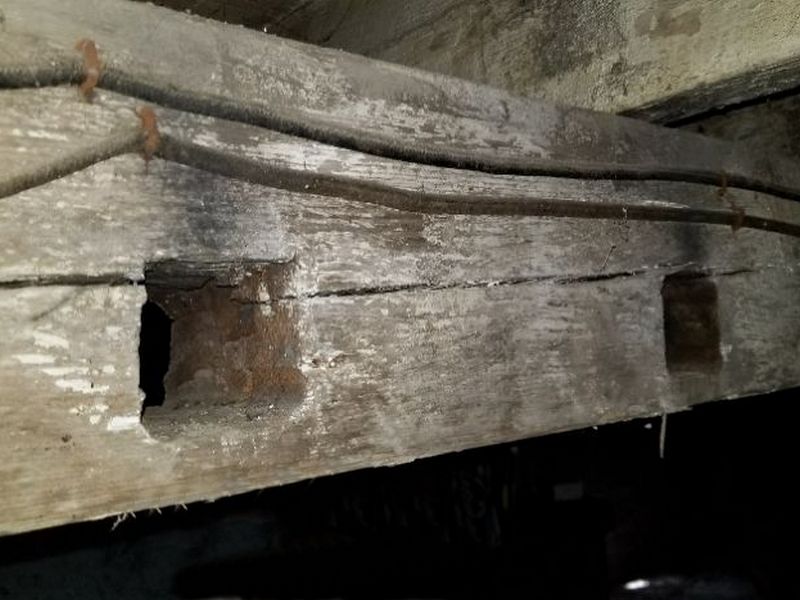
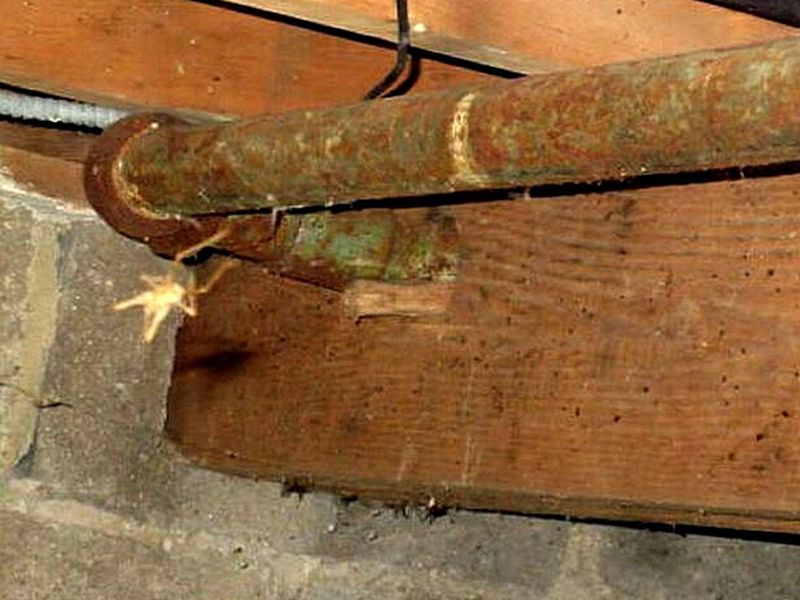
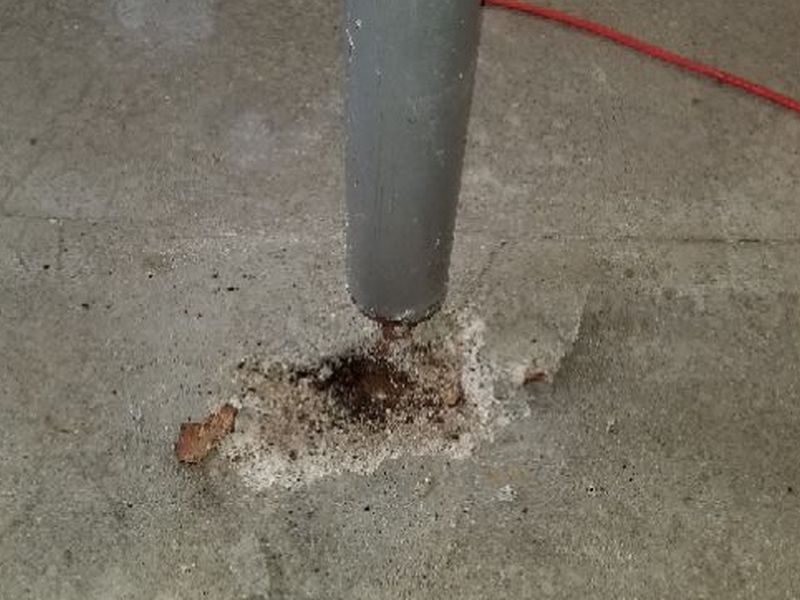
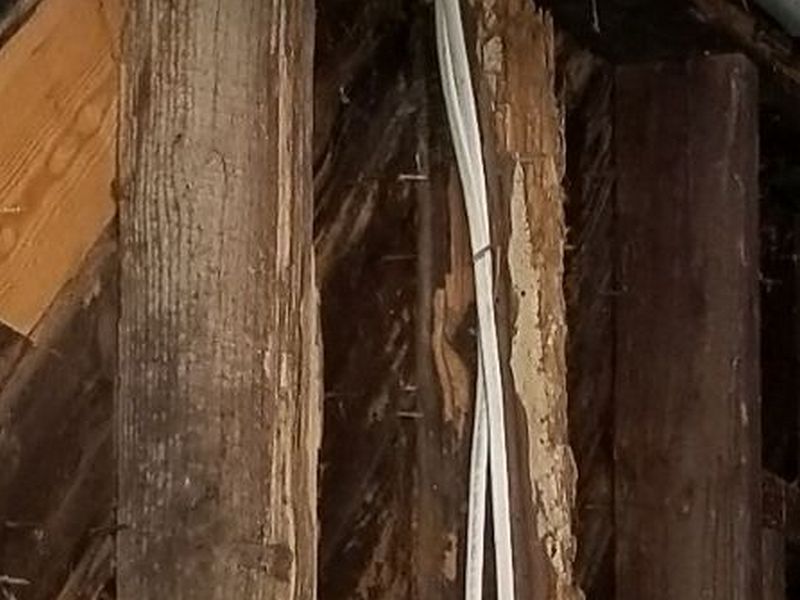
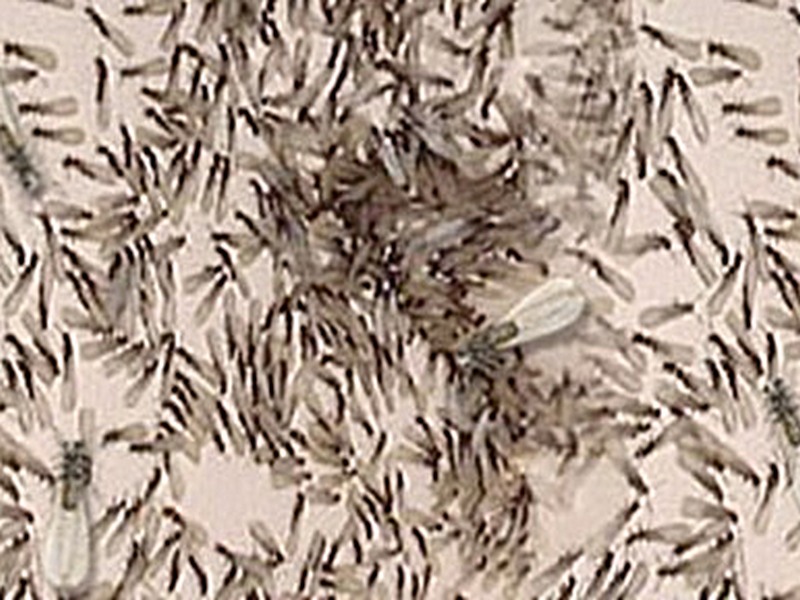
Termites, at least the ones we are concerned with, eat wood. They are responsible for billions of dollars in damage to US homes every year. We can broadly separate termites into 2 types: subterranean and drywood.
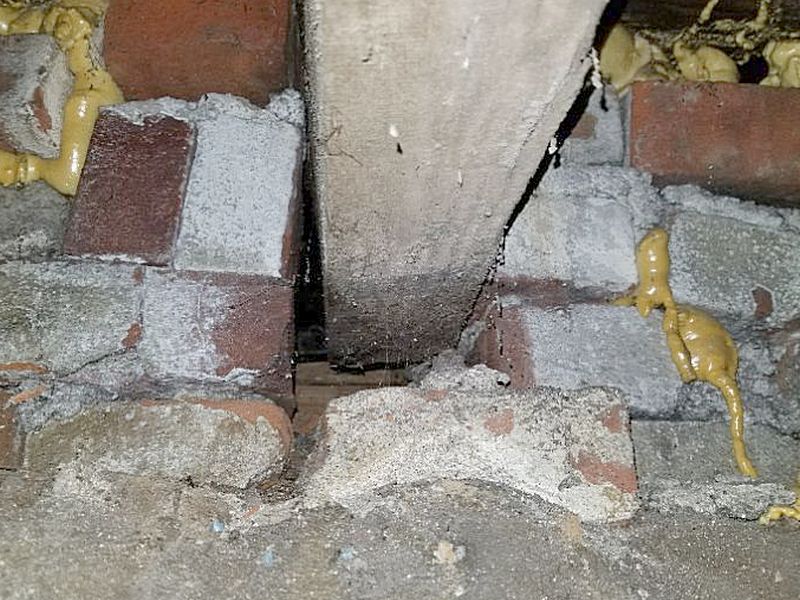
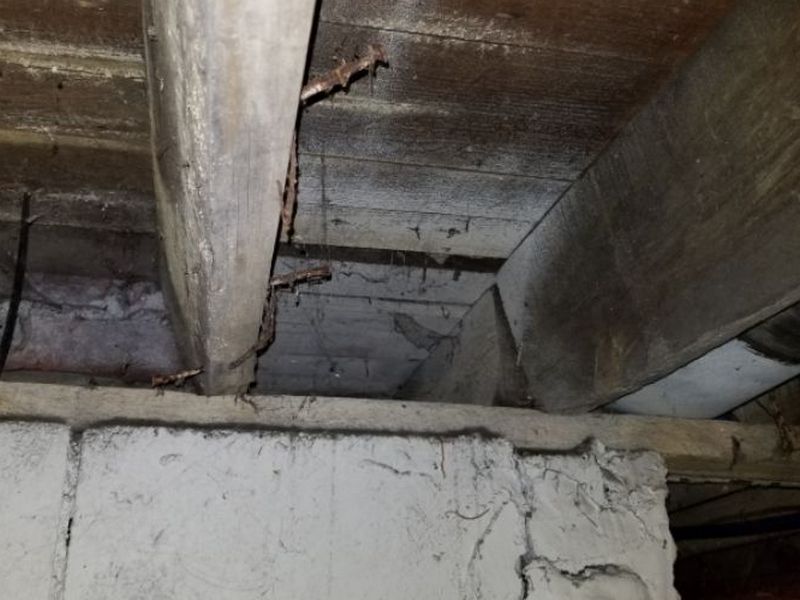
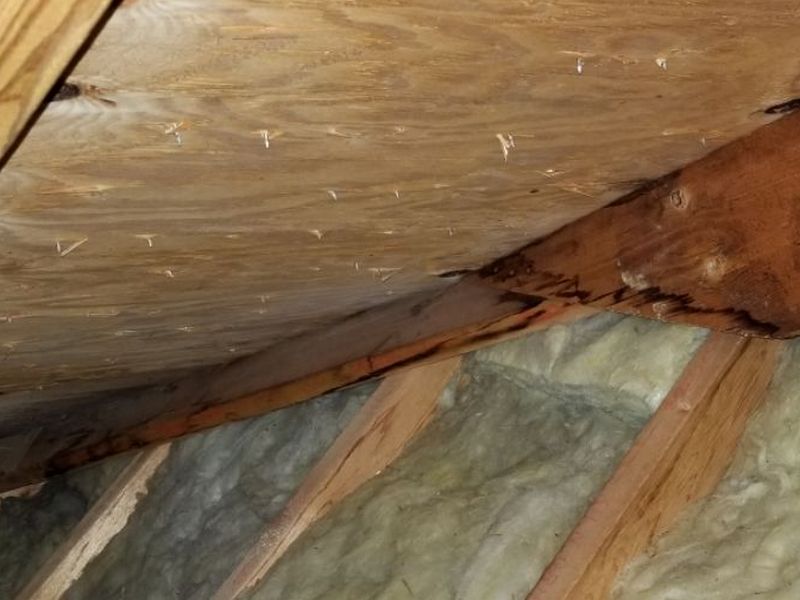
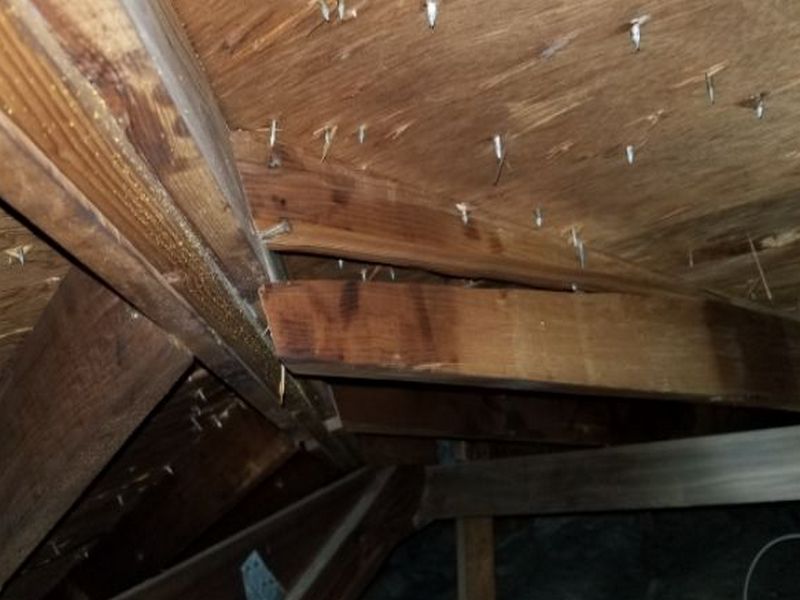
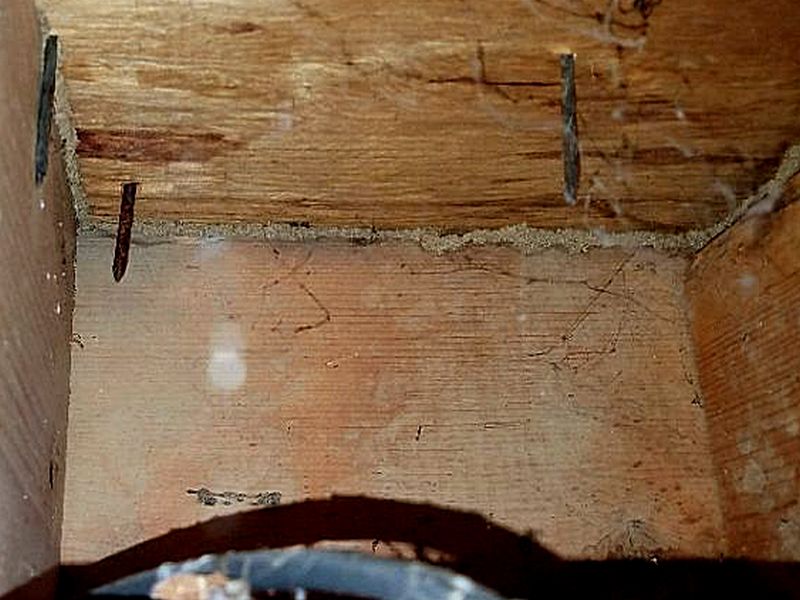
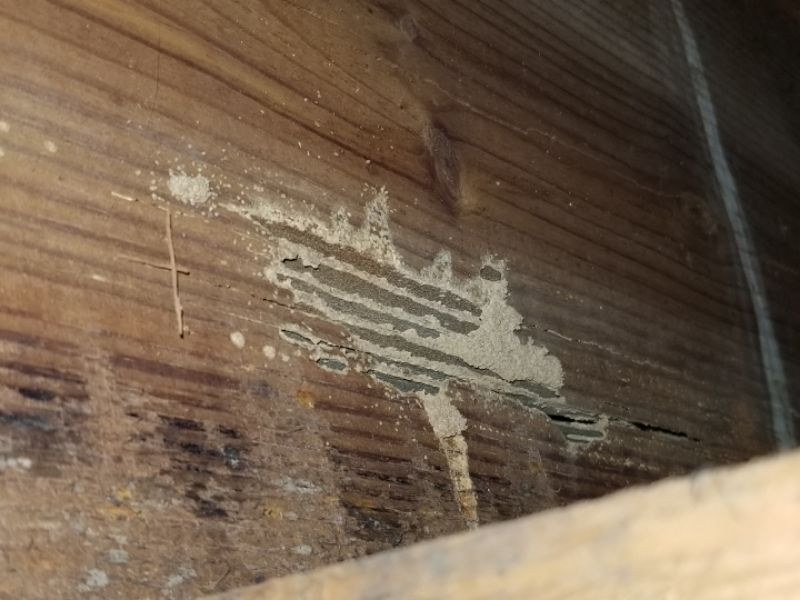
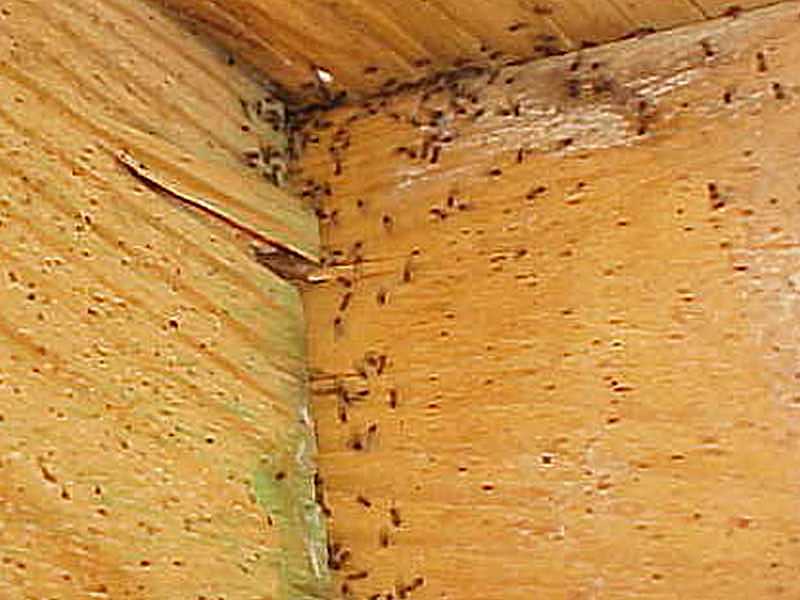
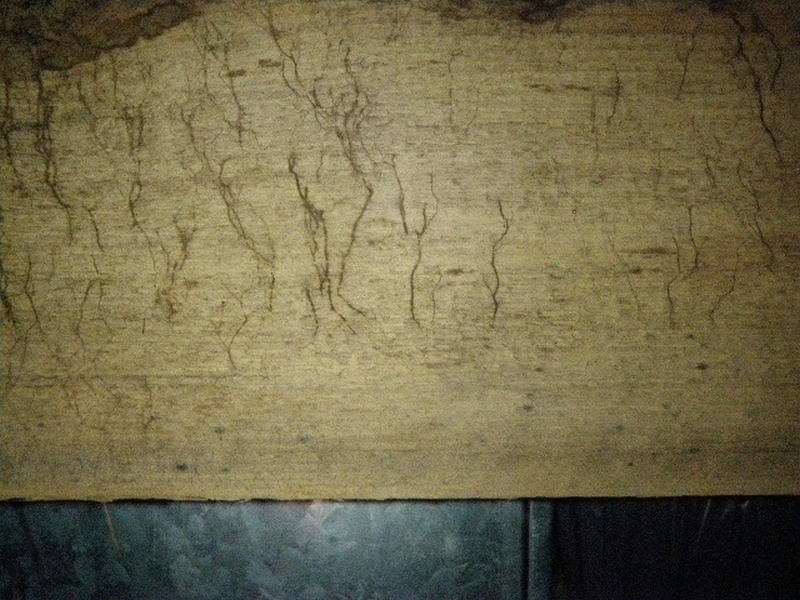
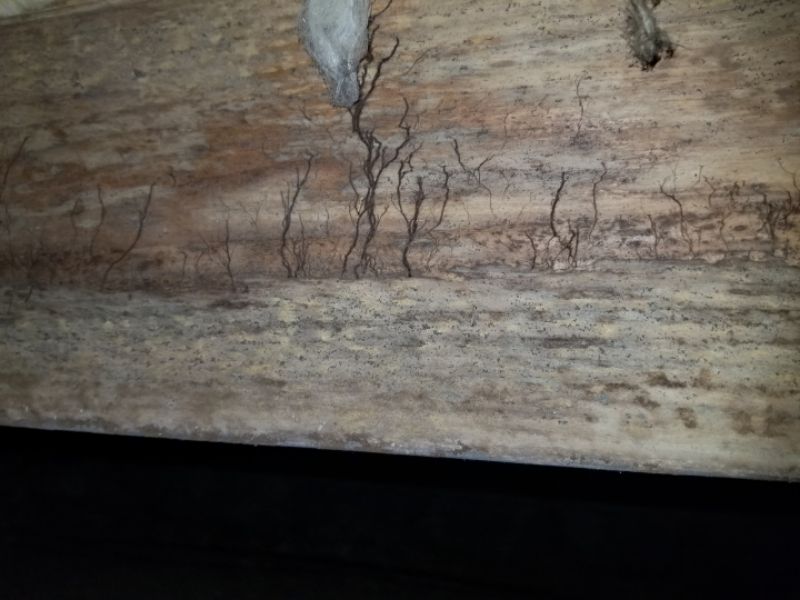
Subterranean termites can be found throughout the country. Their activity can often be identified by the mud “shelter tubes” between the ground and their food supply, i.e. the wooden parts of the house. These shelter tubes can be identified across a crawlspace. You can also often see the dirt of the tubes at the foundation sill plate, between framing members, and in damaged wood. Additionally, you may see discarded pairs of equal-sized wings on window sills from “swarmers.” This occurs when a colony expands, but doesn’t absolutely mean there’s an infestation in the home.
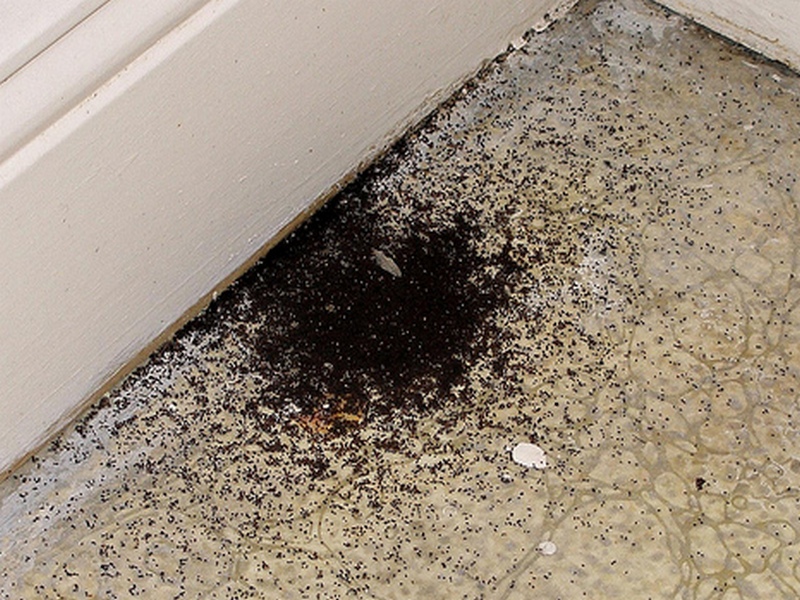
Drywood termites, found in the southern and south coastal states, don’t require shelter tubes. It’s not unusual for them to completely destroy a framing member without any outward signs. Probing is always required during an inspection. The feces, or pellets, from drywood termites is distinctive and may be the only visible sign. Remember: we do not report wood destroying insects by name.
Subterranean Termites and Shelter Tubes
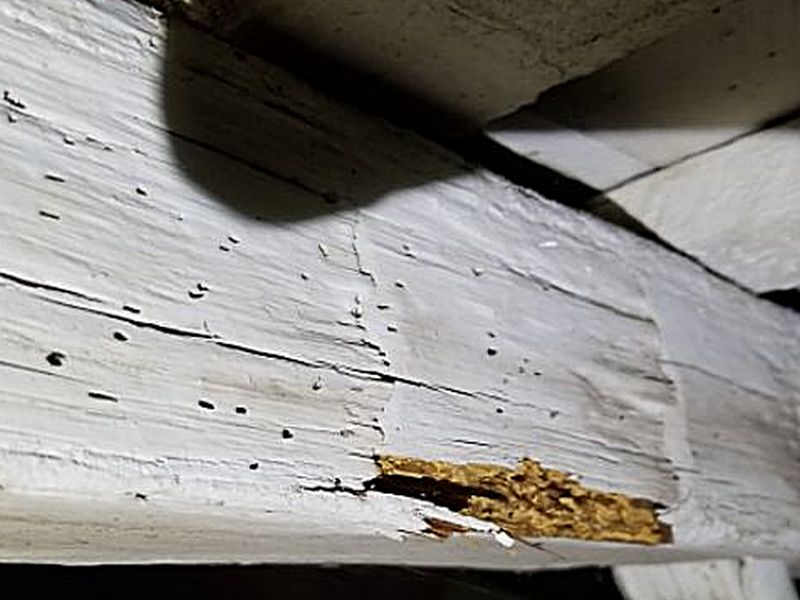
There is evidence of possible wood-destroying insect activity. The extent of the activity or any damage present is not determined during a home inspection. Hire a pest specialist for further evaluation and required action.
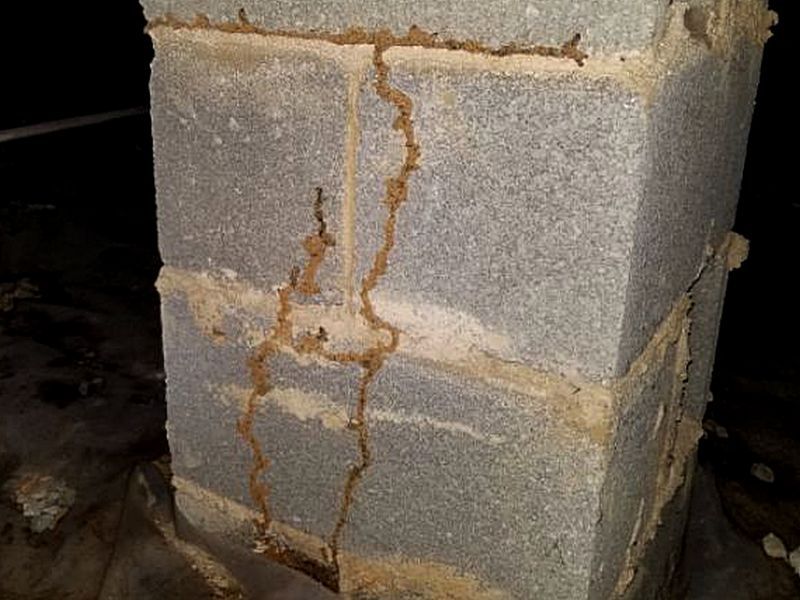
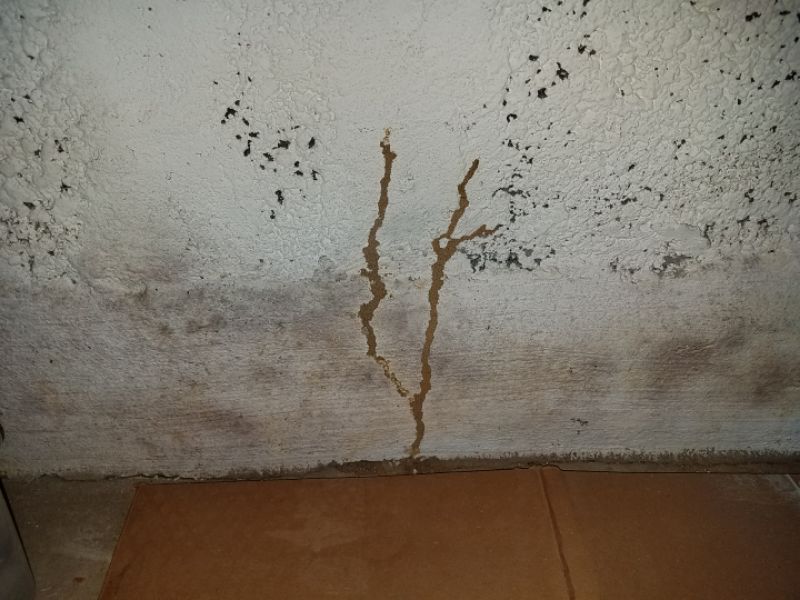
There is evidence of possible wood-destroying insect activity and damage. The extent of the activity or any damage present is not determined during a home inspection. Hire a pest specialist for further evaluation and required action.

Drywood Termite Pellets
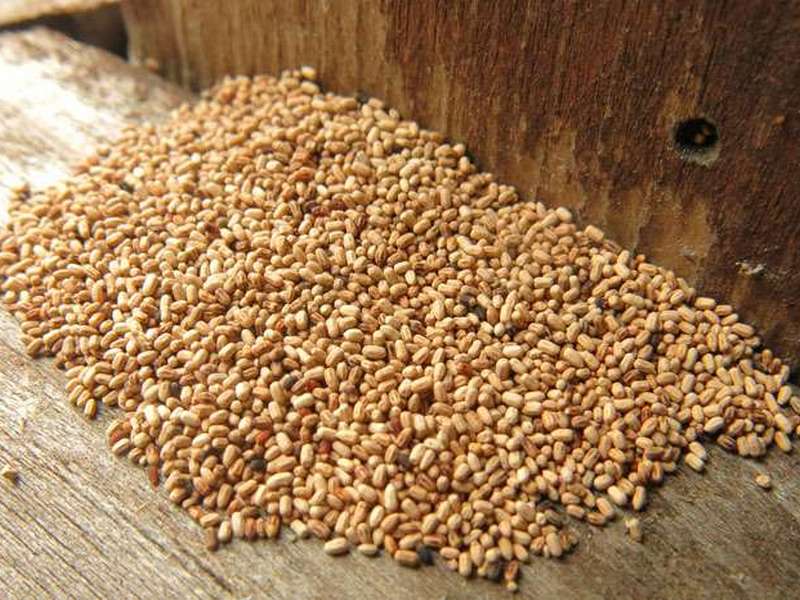
Termite “Swarmers” and Wings

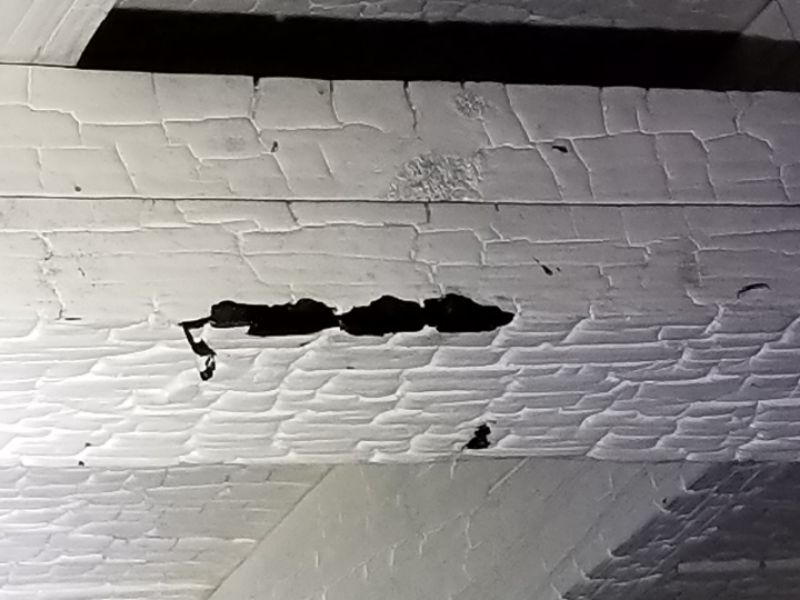
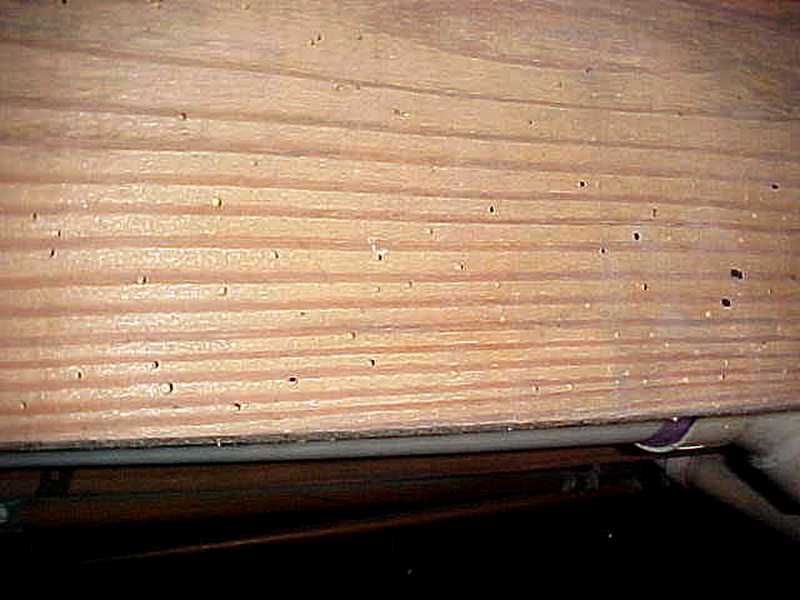
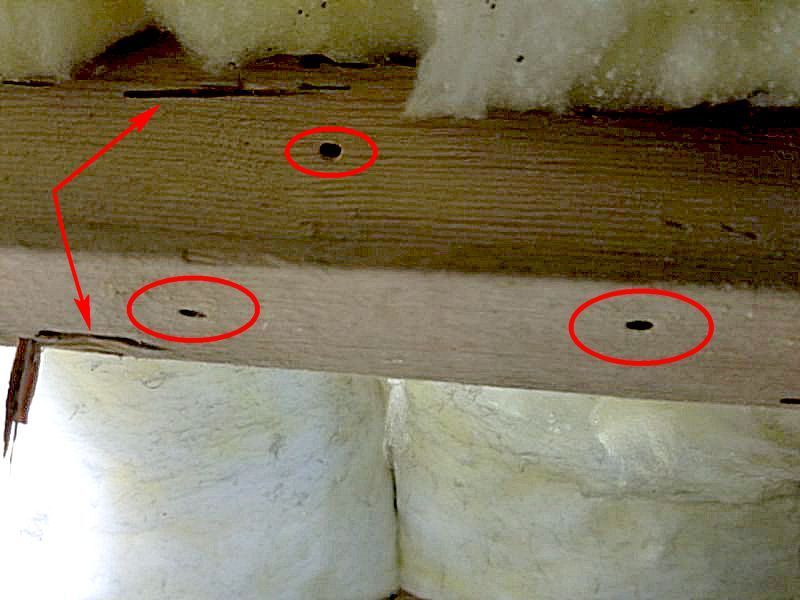
Powder post beetles are second only to termites in WDI damage. There are 3 groups of beetles. Lyctids and Bostrichids primarily infest hardwoods, e.g. flooring, furniture, and paneling. Anobiids also infest softwoods, and are responsible for framing damage. The beetles do their damage unseen within the wood while in the larval stage. The small exit holes they create when emerging as adults is the main telltale sign. The other is the fine flour-like wood powder, or frass, that comes out of the holes.
A joist damaged by powder post beetles can sometimes be pulled apart by hand. That’s the bad news. The good news is that the kiln drying treatment for modern dimensional lumber will kill the beetles. While poor storage can allow a reinfestation, generally speaking newer homes don’t have structural damage from Anobiid beetles. The easiest key for identification is to remember “PP” for Powder Post beetles; the exit holes are “Pin Point”, about as big as a pencil lead. Always probe suspected areas! You can also look for the frass. New frass will be bright in color, while old activity frass will have darkened. Remember: we do not report wood destroying insects by name.
There is evidence of possible wood-destroying insect activity. The extent of the activity or any damage present is not determined during a home inspection. Hire a pest specialist for further evaluation and required action.
There is evidence of possible wood-destroying insect activity and damage. The extent of the activity or any damage present is not determined during a home inspection. Hire a pest specialist for further evaluation and required action.
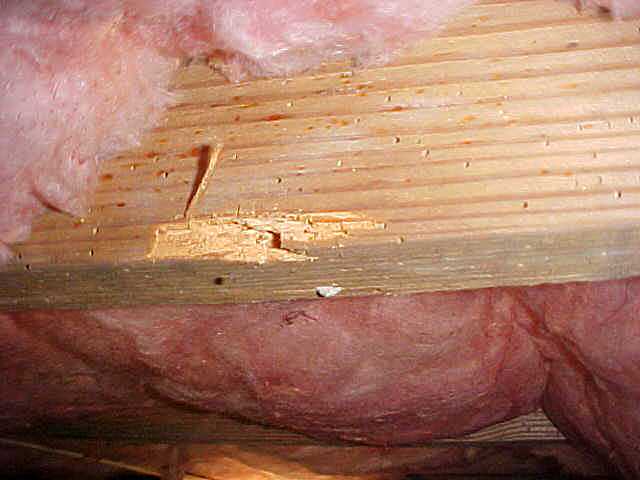
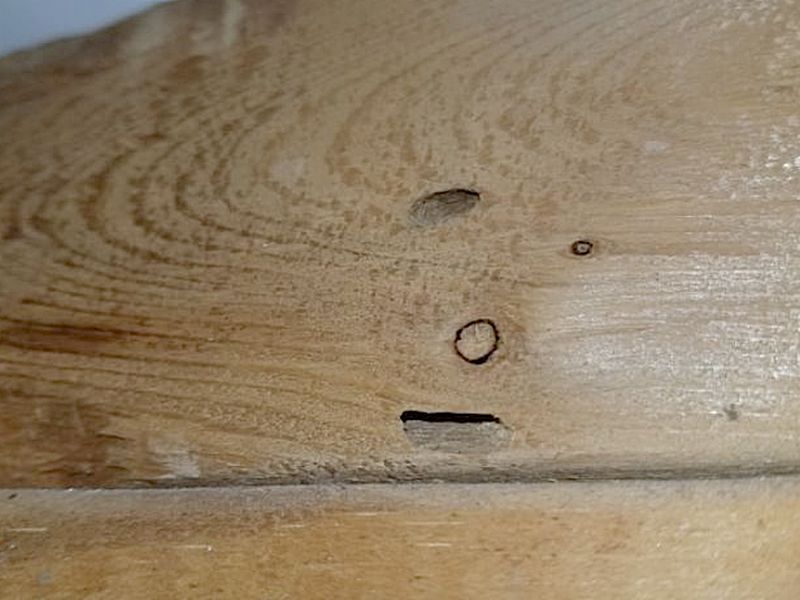
Contrary to their name, “Old House Borers” are beetles that are more likely to be found in newer homes. This is because they generally attack softwoods, e.g. pine, spruce, during the storage stage. Higher humidity is a conducive condition. In some southern states old house borer damage is as serious as that of powder post beetles and even termites. Any individual framing member, even in an attic, can be affected.
These larger beetles are usually only detected by their exit holes as they emerge from the wood. For identification purposes, remember “OH“: Old House borers make Oval Holes when they exit. These holes are about 1/4″ across. It is also possible that you can actually hear the larvae feeding inside the wood. They make a clicking or rasping sound. Always probe any area where exit holes are noted. Remember: we do not report wood destroying insects by name.
There is evidence of possible wood-destroying insect activity. The extent of the activity or any damage present is not determined during a home inspection. Hire a pest specialist for further evaluation and required action.
There is evidence of possible wood-destroying insect activity and damage. The extent of the activity or any damage present is not determined during a home inspection. Hire a pest specialist for further evaluation and required action.
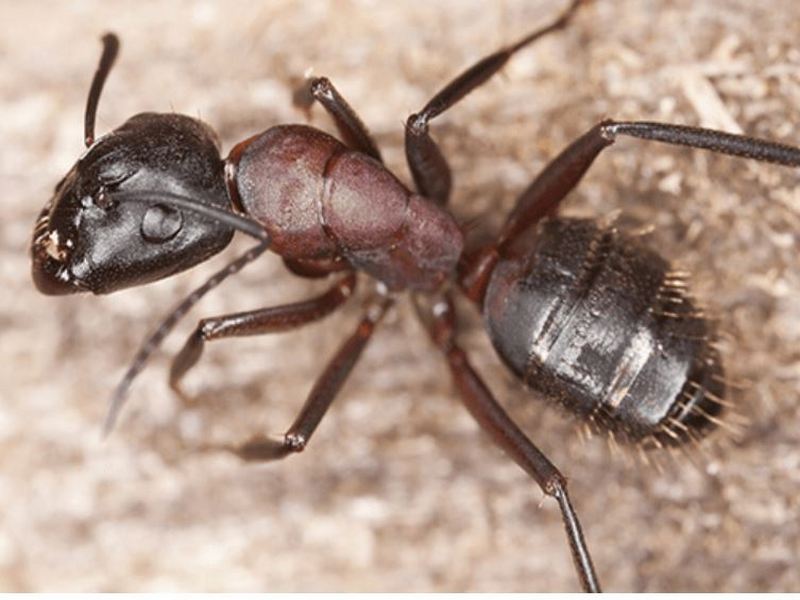
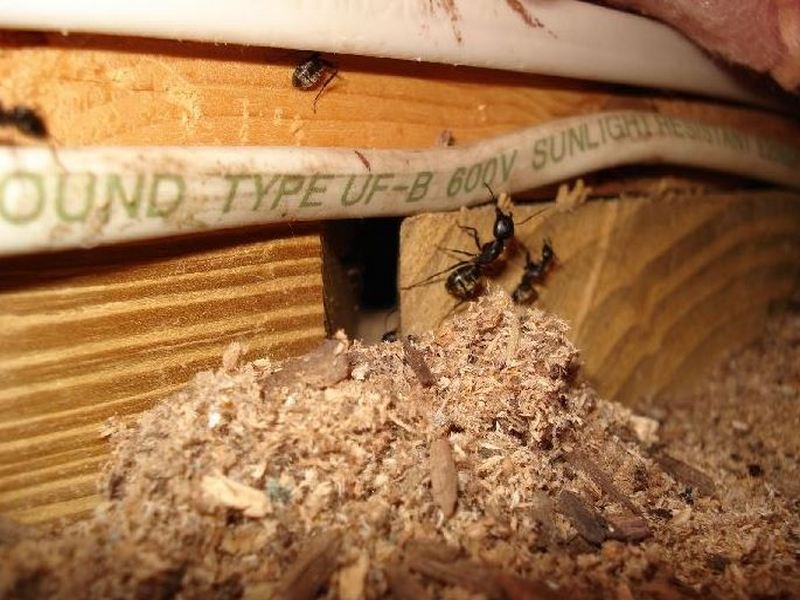
Unlike termites, carpenter ants do not eat wood. They hollow it out, creating galleries in which to raise their young. This can also occur in foam insulation. They are attracted to soft, moist wood, so water intrusion is a primary conducive condition. Inspect carefully in these locations. From the moist area they can move onto sound wood. While structural damage is generally not as great as for termites and beetles, it can be an issue. Nests inside a house are frequently “satellite” nests; the Queen and the main colony will likely be outside in a woodpile or the rotted area of a tree or stump.
Carpenter ants can be black, brown, or red. It’s more common to see a few large ants rather than a lot, unless you disturb a nest. A trail of many small ants inside the home is probably not carpenter ants. During the “swarmer” flight stage, they may leave behind double, unevenly-sized wings. As with termites, this does not absolutely mean there’s an infestation. The ants have bent antennae, a single node between the thorax and abdomen, and hairs on the abdomen. The frass that they kick out from their galleries is coarse and stringy. Always probe around areas of concern. Remember, we do not report wood destroying insects by name.
Identifying Carpenter Ants
There is evidence of possible wood-destroying insect activity. The extent of the activity or any damage present is not determined during a home inspection. Hire a pest specialist for further evaluation and required action.

Carpenter Ant Frass: Possible Damage
There is evidence of possible wood-destroying insect activity and damage. The extent of the activity or any damage present is not determined during a home inspection. Hire a pest specialist for further evaluation and required action.
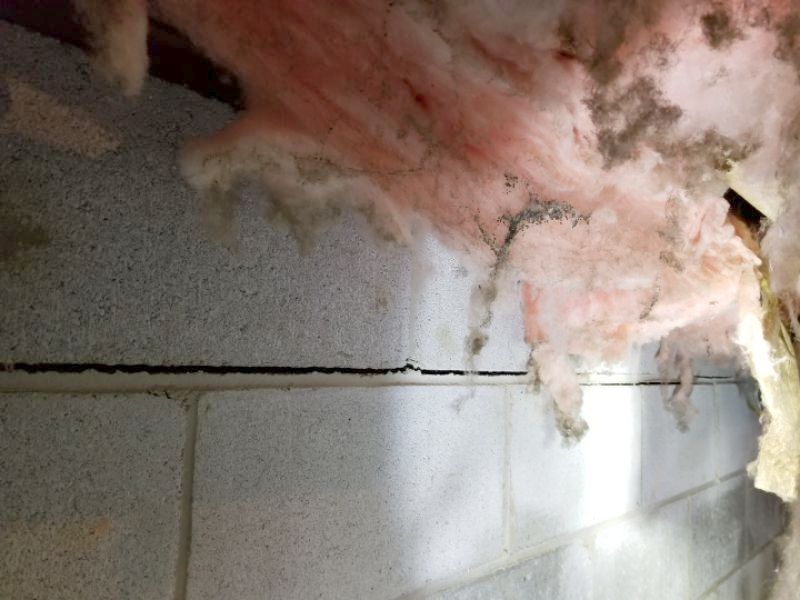
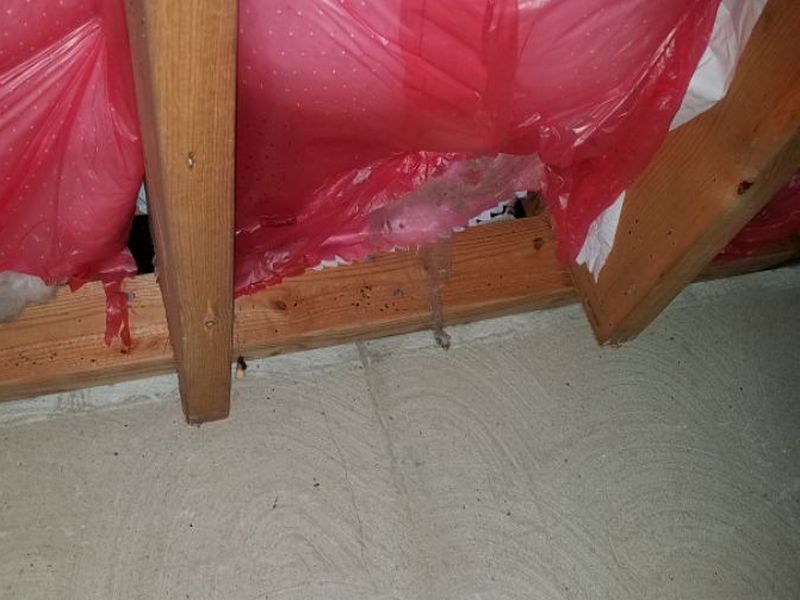
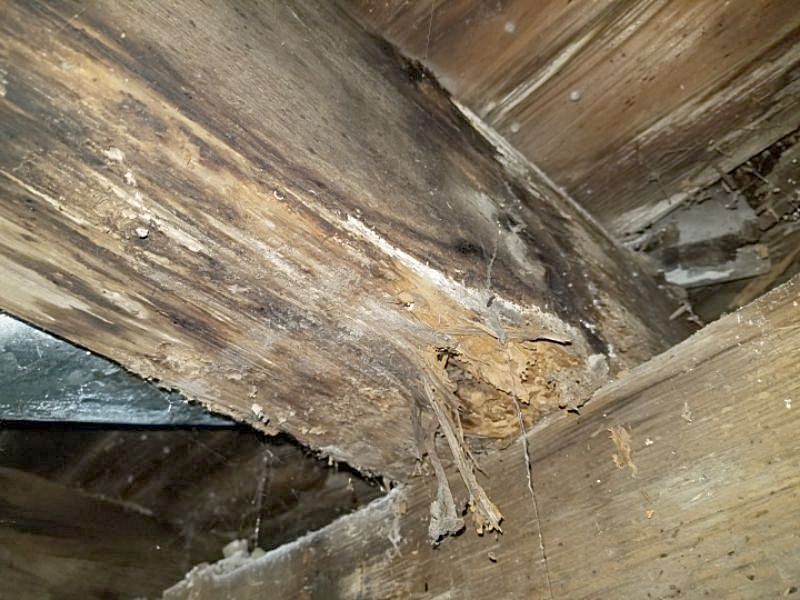
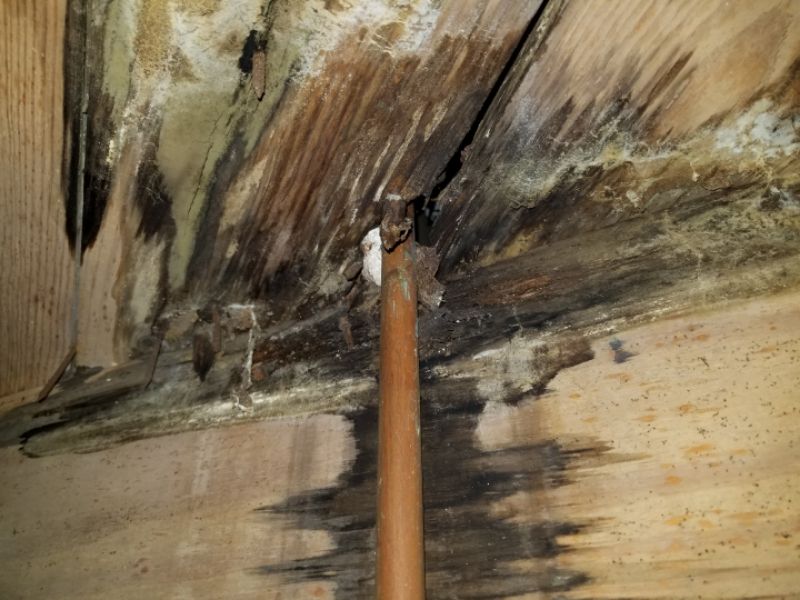
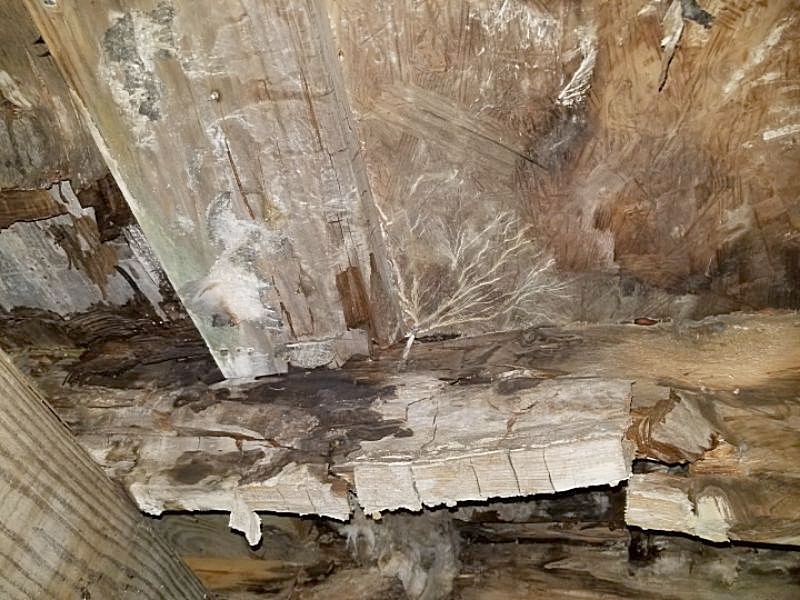
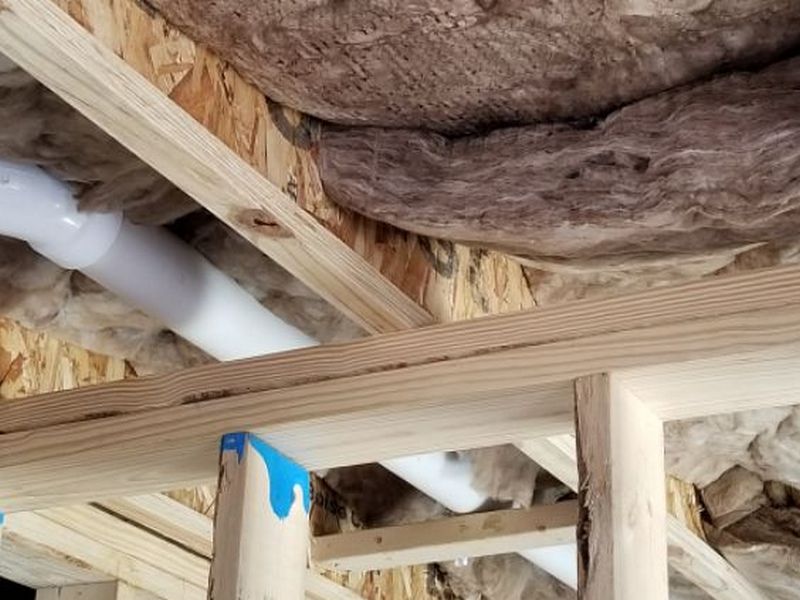
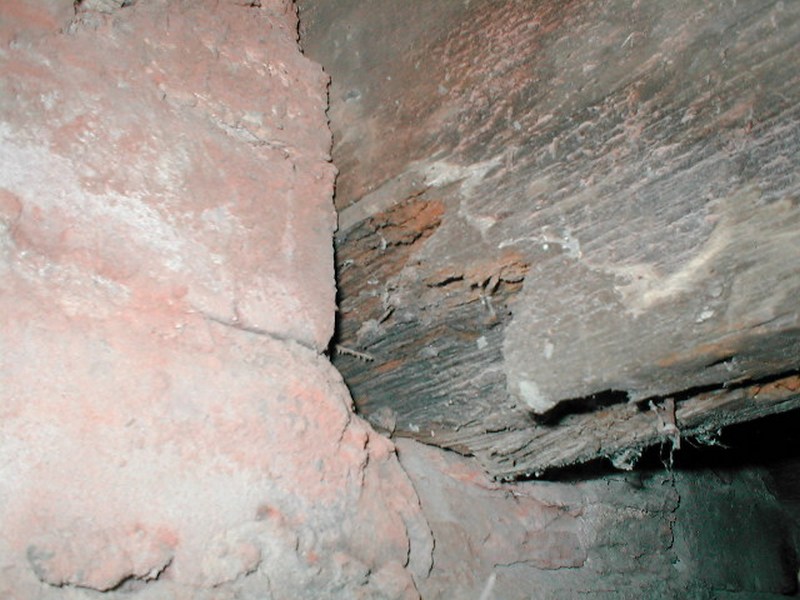
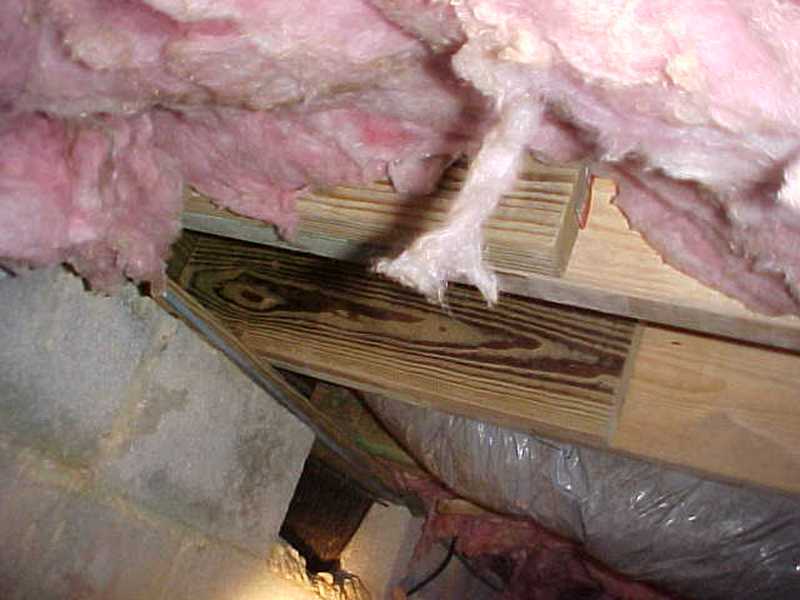
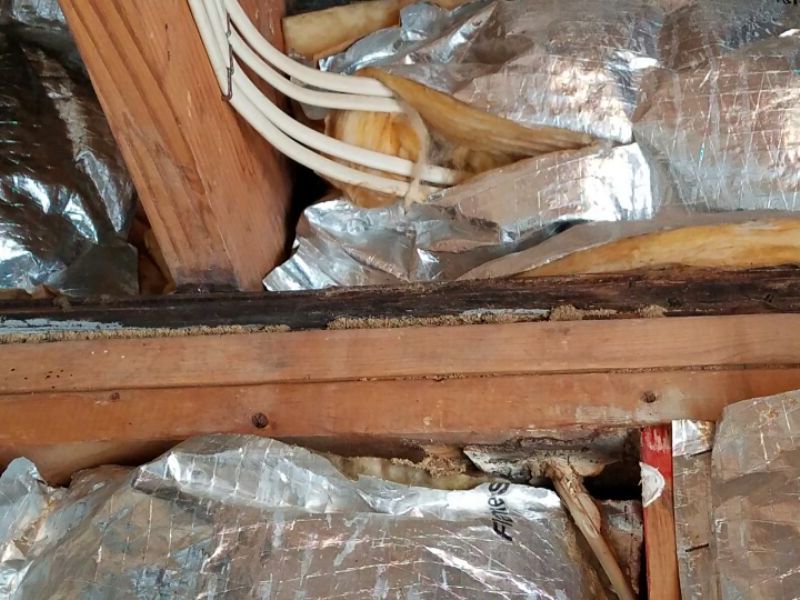
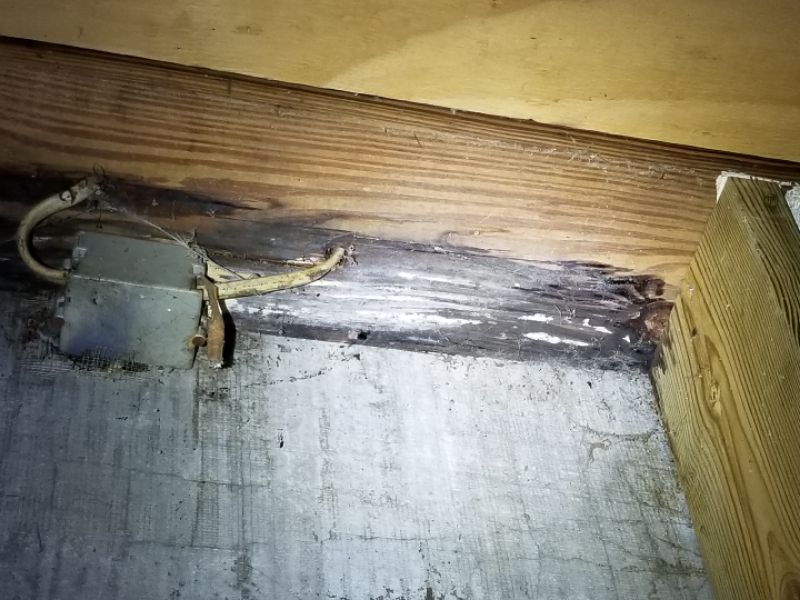
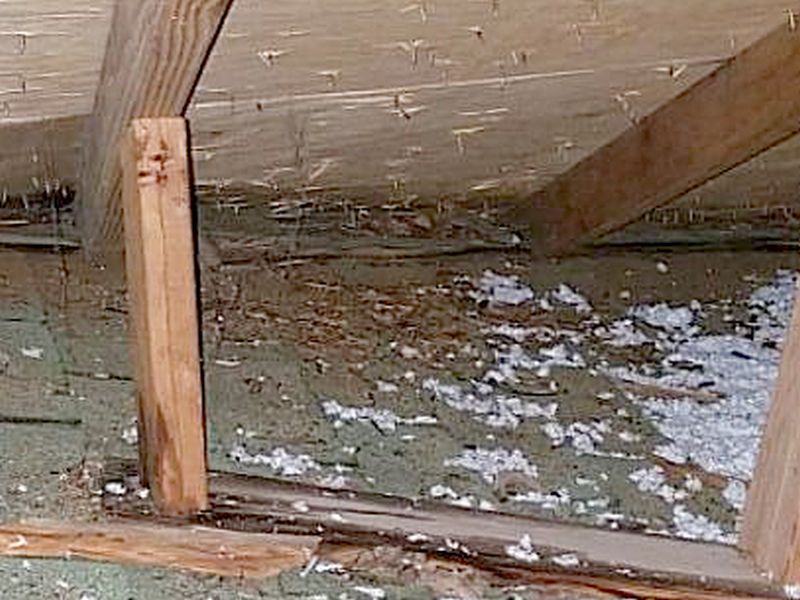
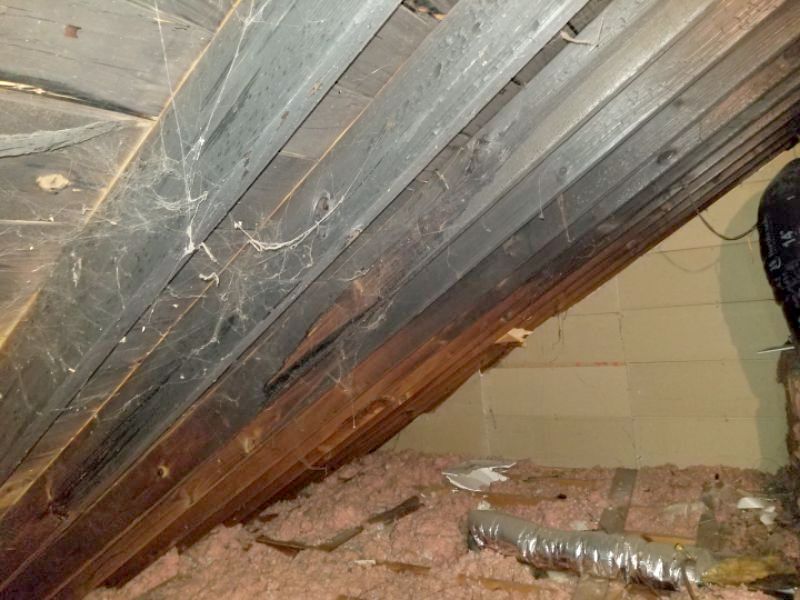
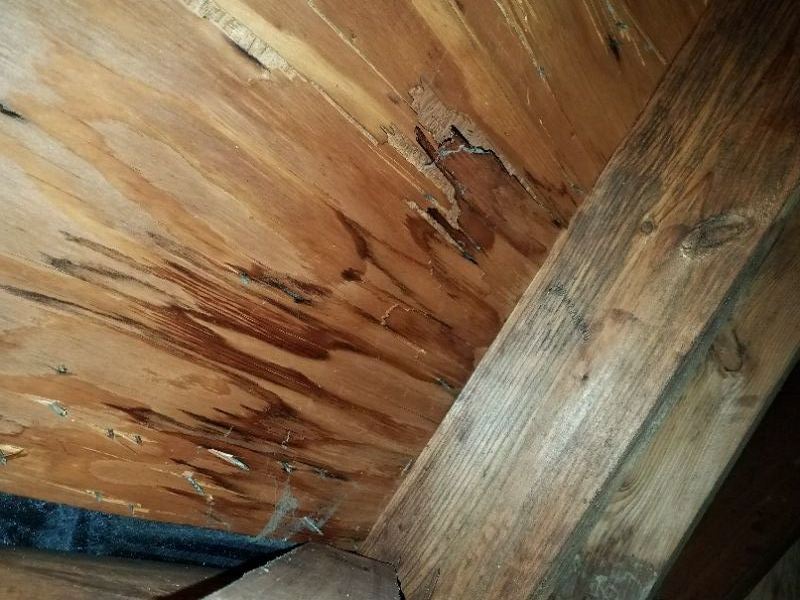
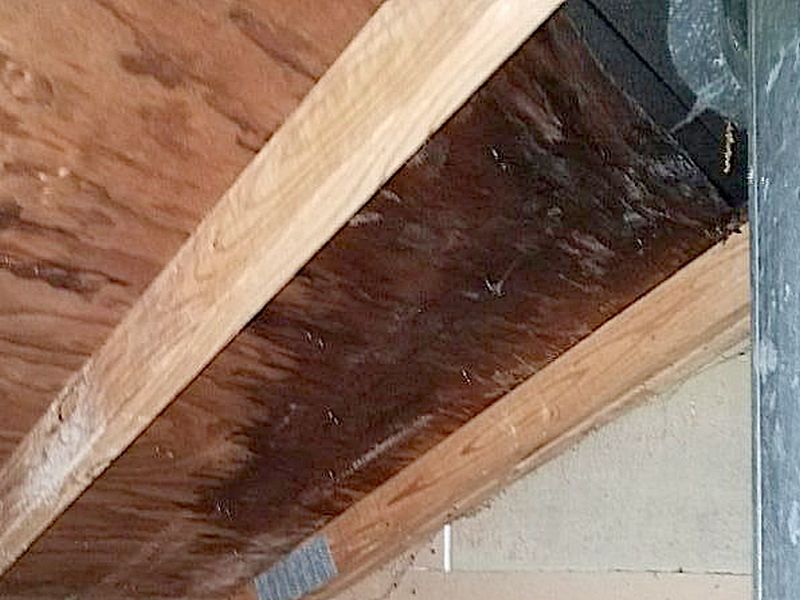
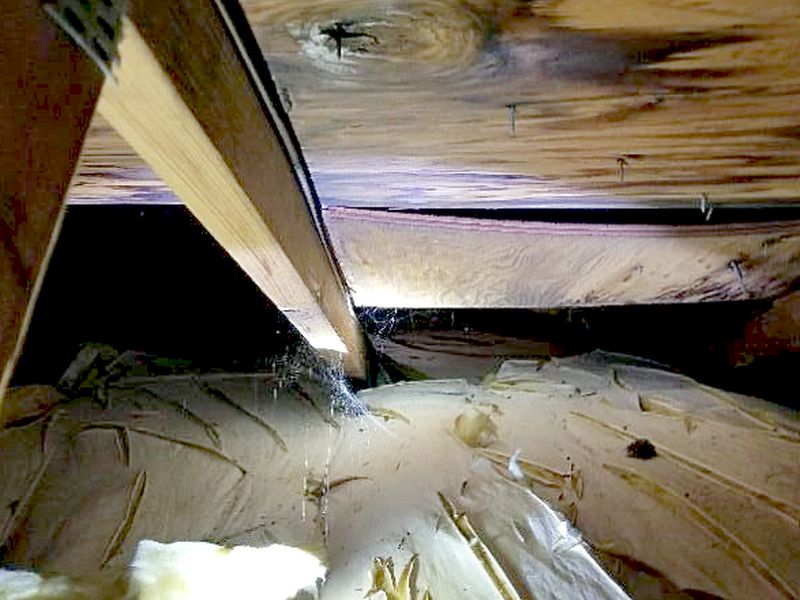
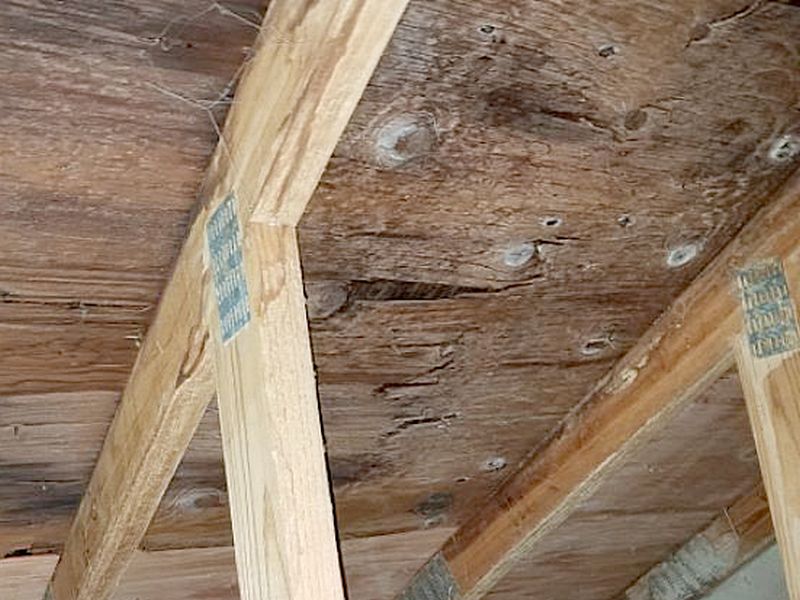
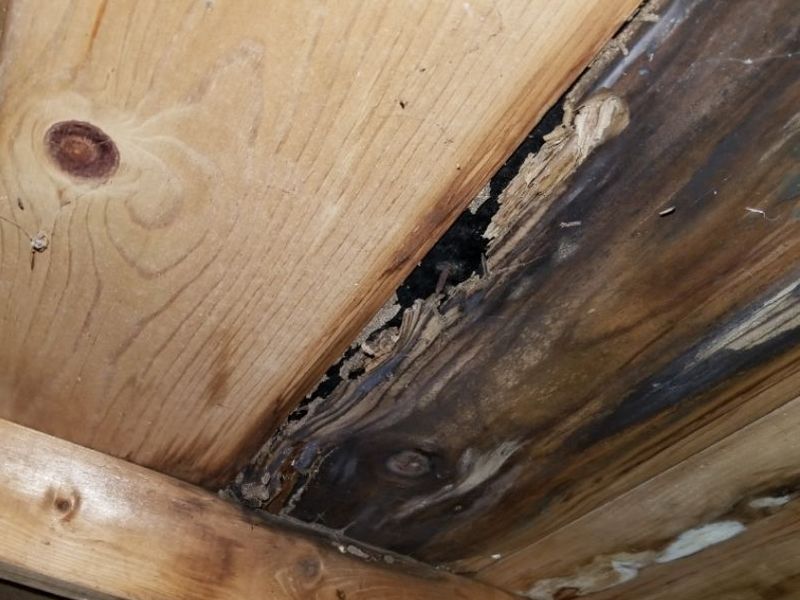
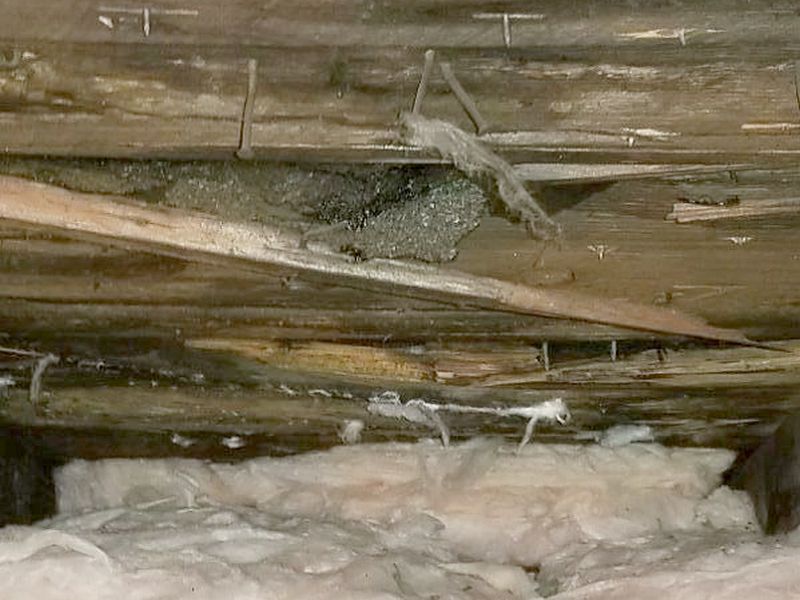
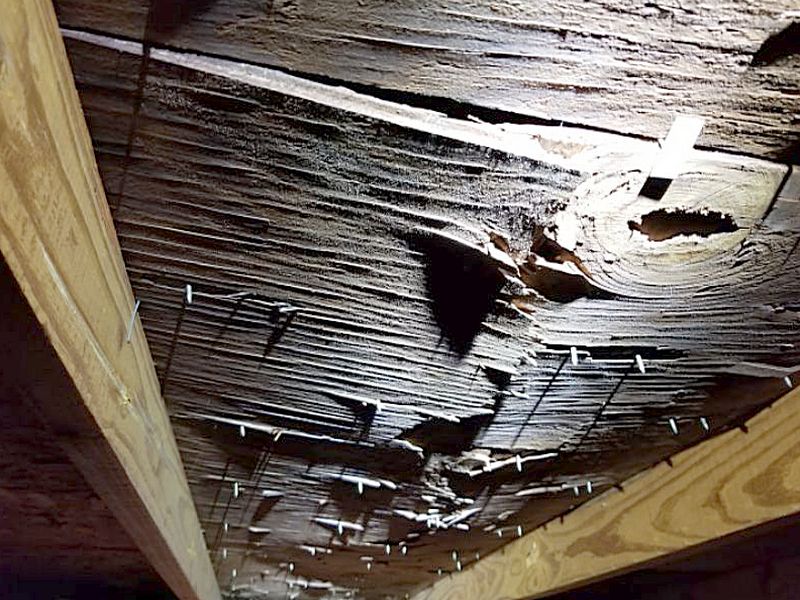
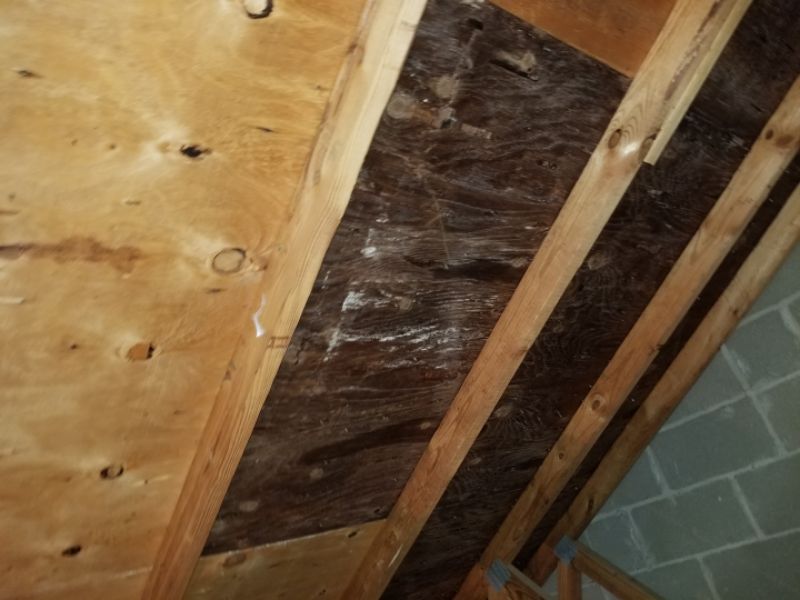
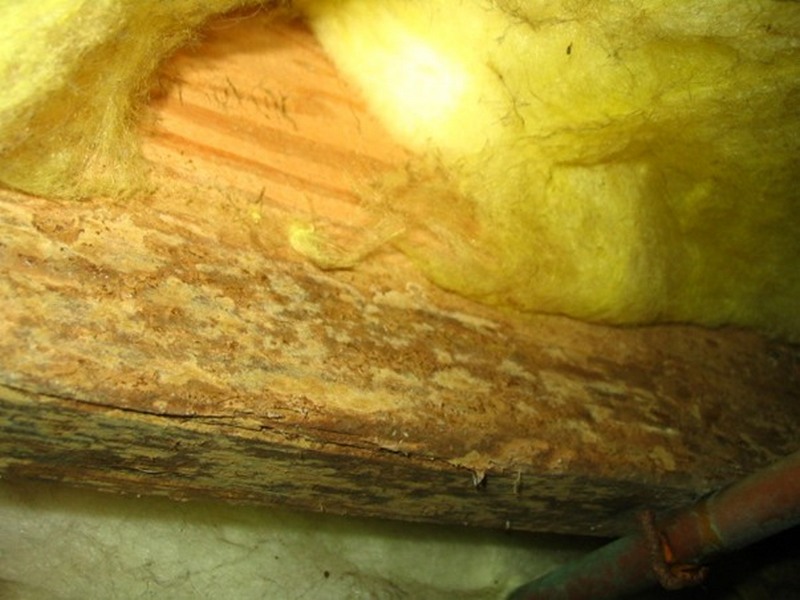
Wood Destroying Fungus requires chronic, elevated moisture levels to thrive. This is why water intrusion into a poorly-managed crawl space is an ideal scenario for significant problems in humid climates. The warm, moist exterior air enters the crawl space, and condenses into liquid on the cooler surfaces such as the framing members. Floor joists can be heavily affected where exposed, but clean where covered by insulation. It is essential that we identify conducive conditions and the early signs, as well as damage.
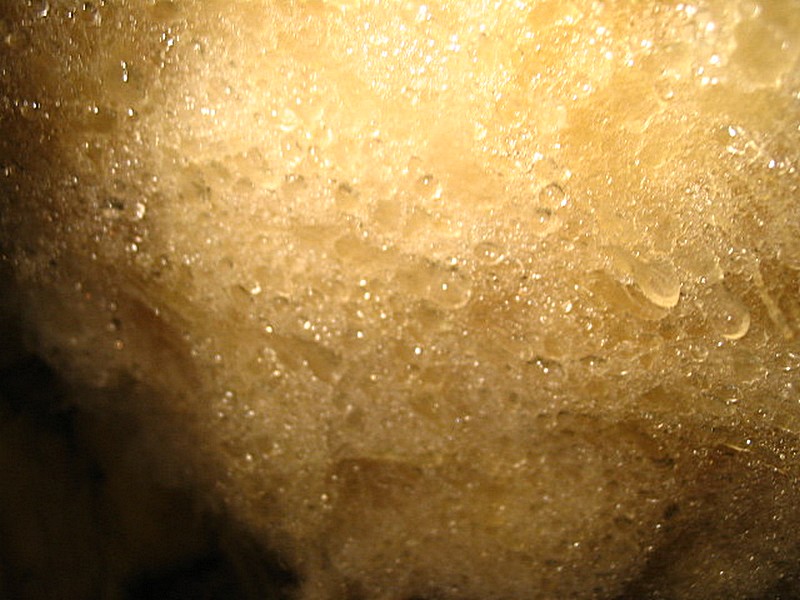
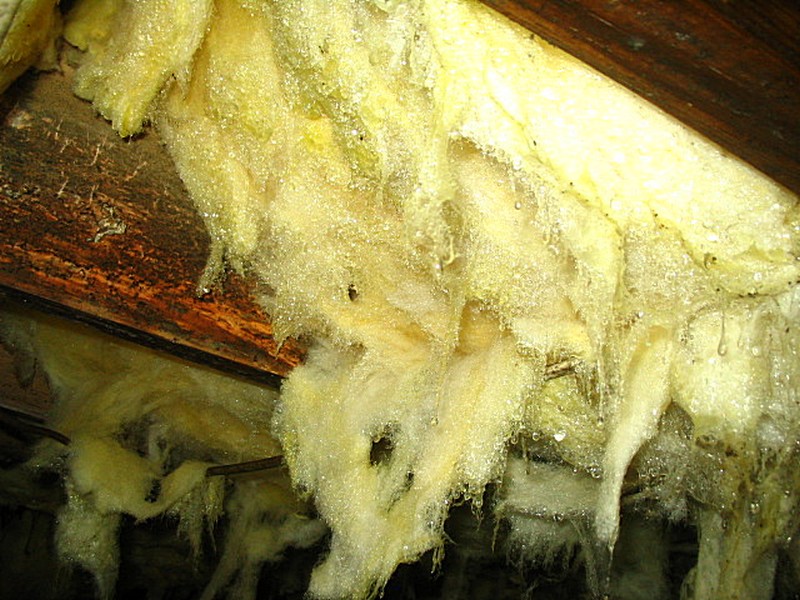
Fiberglass insulation that is hanging and “stringy”, or damp with condensation, is a warning sign. It must be reported in “Insulation and Ventilation – Humidity Control.” Fungus spreads by spores and thread-like filaments called Hyphae. When staining, spores, or hyphae are visible on the framing, a wood destroying organism must be reported in “Structure – Other.” A “treatment” is not the answer, especially not bleach or Timbor. The underlying conditions must be corrected. Left unchecked, extensive damage will occur. Remember, we always use the word “possible” or “suspected” when reporting molds, mildews, or fungi.
Signs of Conducive Conditions
“Stringy” fiberglass from condensation
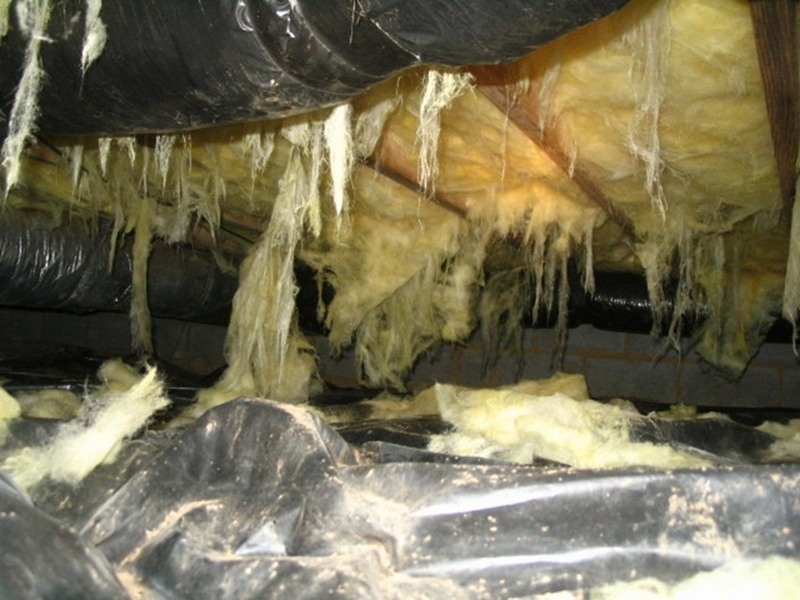
Condensation cannot be ignored
The fiberglass protects the wood from condensation
The thread-like filaments are Hyphae
There is evidence of possible wood-destroying organism activity. Molds and fungi are usually the result of chronic excess humidity. The extent of the activity or any damage present is not determined during a home inspection. Hire an environmental specialist for further evaluation and required action. Treatment alone will likely not be adequate to prevent a recurrence. The underlying conditions must be addressed.
There is evidence of possible wood-destroying organism activity and damage. Molds and fungi are usually the result of chronic excess humidity. The extent of the activity or any damage present is not determined during a home inspection. Hire an environmental specialist for further evaluation and required action. Treatment alone will likely not be adequate to prevent a recurrence. The underlying conditions must be addressed.