
- Inspect
- Floors, walls, and ceilings
- Stairs, steps (including pull-down steps) and railings
- Countertops and a representative number of installed cabinets
- Representative number of readily accessible doors and windows
- Fireplaces and solid fuel-burning appliances systems and components
- Describe
- Fireplaces and solid fuel-burning appliances
- Not required
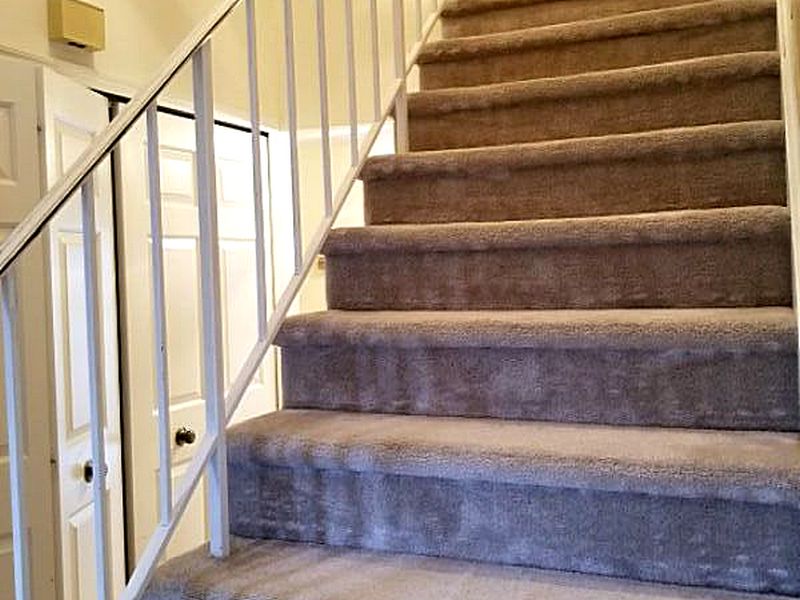
- Carpeting except in areas in which condition presents a safety hazard (stairs and landings)
- Paint, wallpaper, and other finish treatments
- Window treatments
- Interiors of flues or chimneys
- Fire screens, fireplace doors, seal, gaskets, mantles, and surrounds
- Automatic fuel feed devices and combustion make-up air devices
- Heat distributions assists (gravity or fan assisted)
- Ignite or extinguish fires
- Determine draft characteristics
- Move fireplace inserts, stoves, or firebox contents
Floors
In this Component we are inspecting the interior floor coverings, rather than the underlying support covered in “Structural – Floors.” While flooring is generally outside of the scope of most SOPs, we do want to report on certain defects. Some indicate an ongoing condition that will create further damage and expense. Others are safety issues. Additionally, we use infrared thermography in the Interior evaluation. Those defects are reported here using specific language and dedicated photo slots.
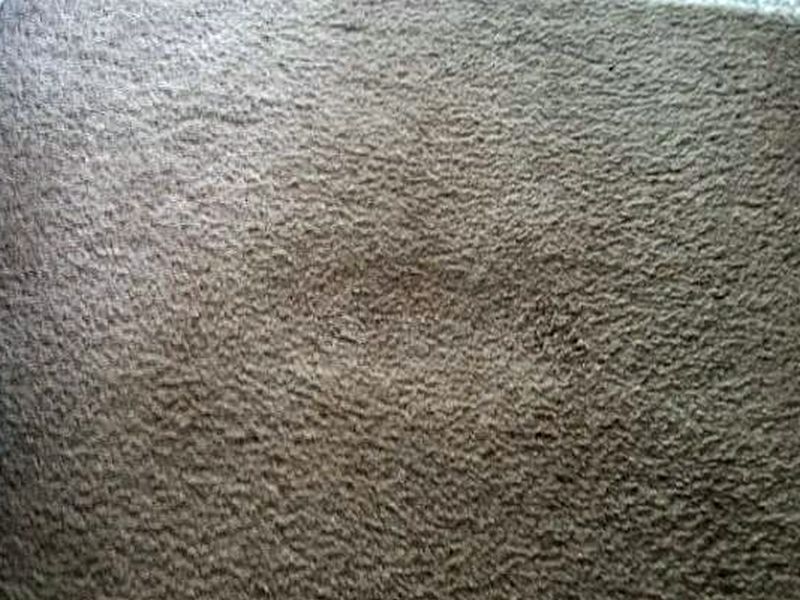
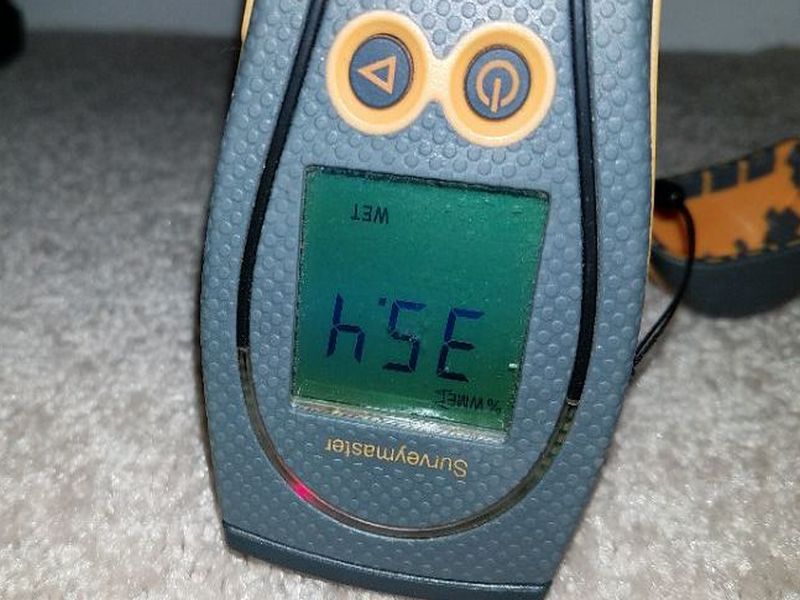
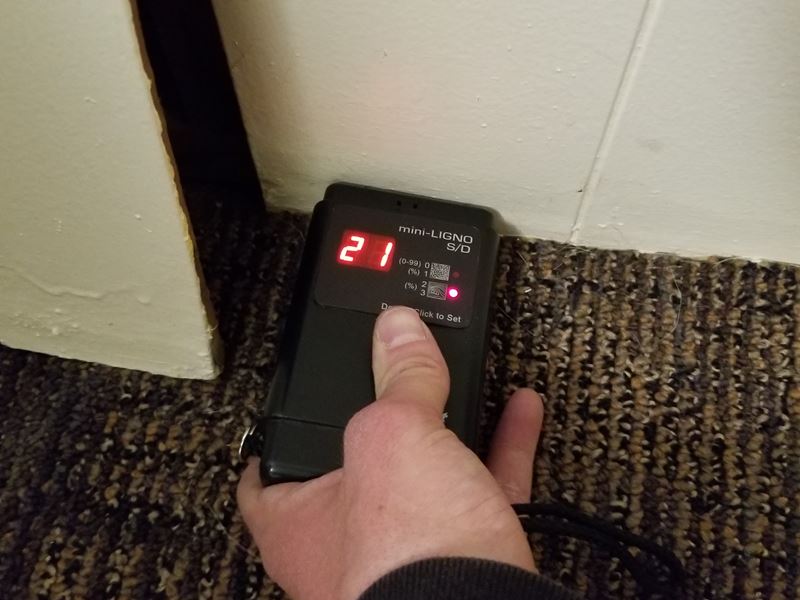
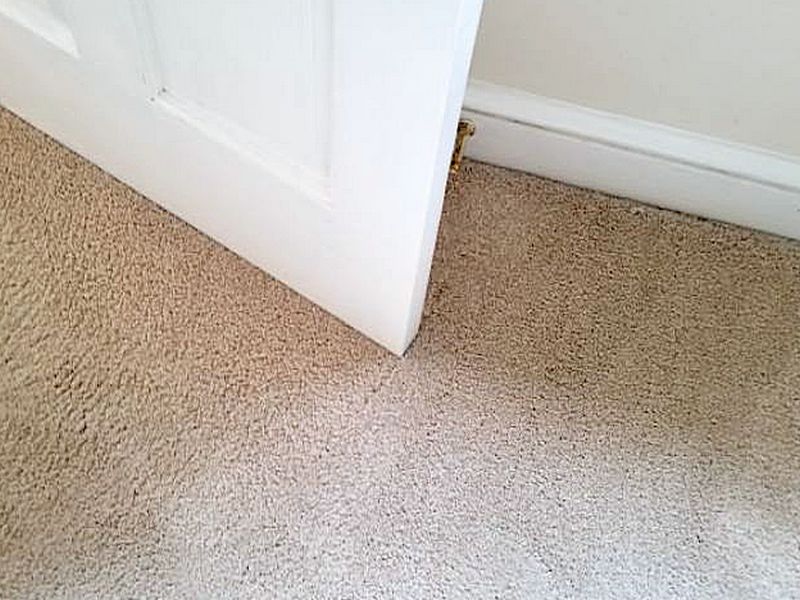
Inspect for damage, including cracked and/or loose tiles, missing grout, and loose carpet or flooring that may be a tripping hazard. Voids under carpeting are notable. Any water damage should be reported; cupping and curling in a wood floor implies uncontrolled moisture, usually from below. Perform an interior Infrared scan following the protocols and techniques taught in the CRET training.
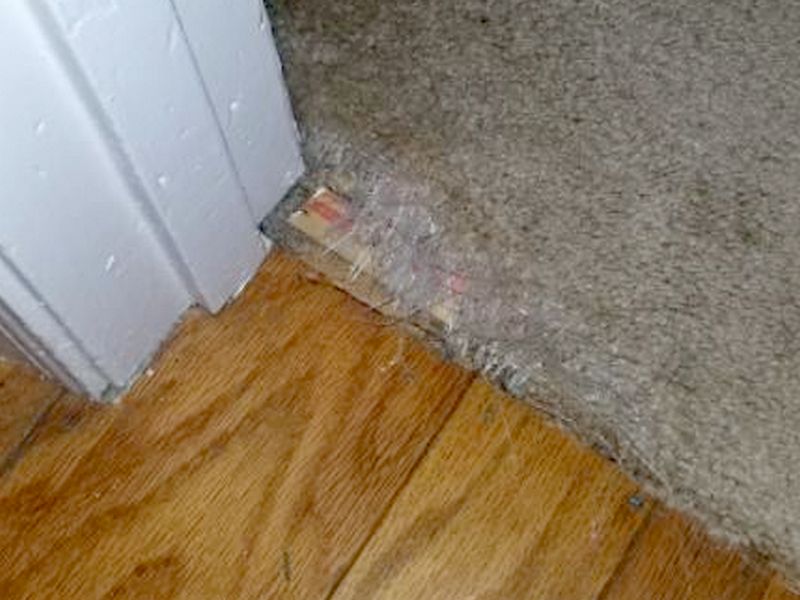
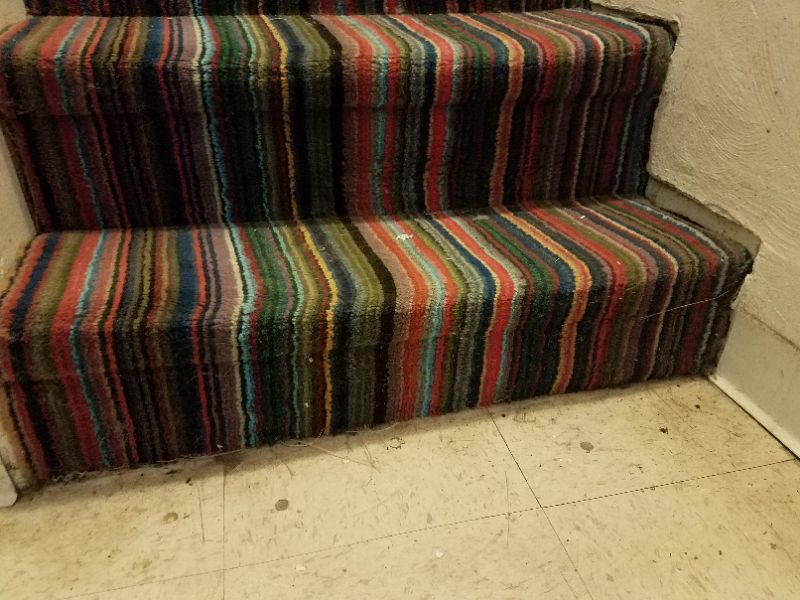
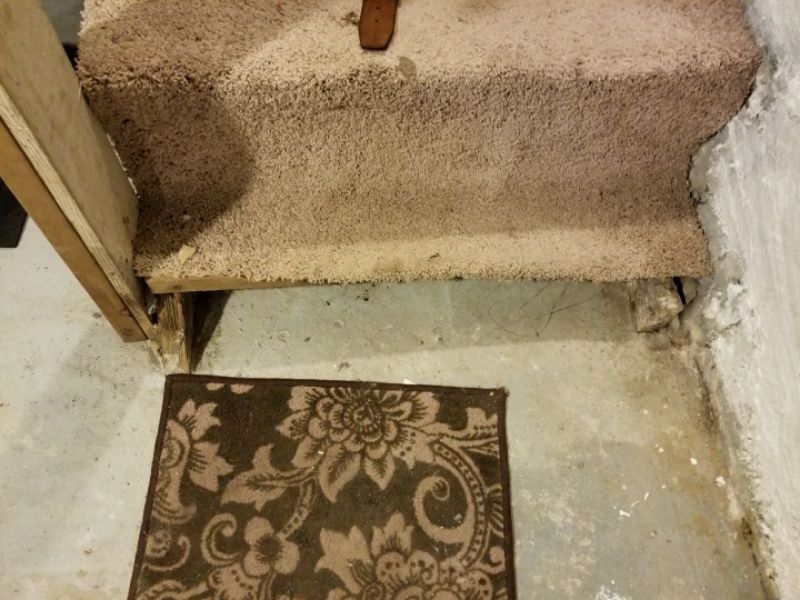
There is a void under the carpet. There may be damage which is not visible. Remove the carpeting to identify the source of the void and repair as required.
The carpeting is loose. This is a trip hazard. Secure or replace the carpeting.
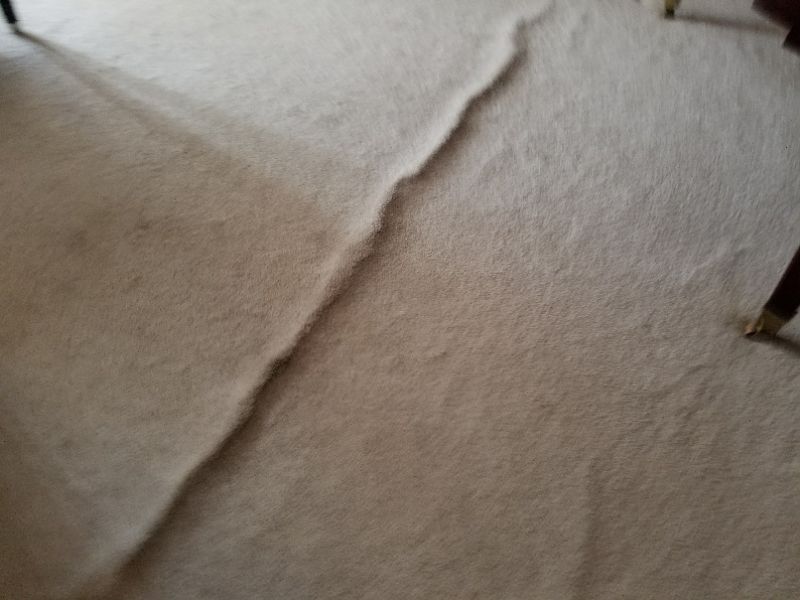
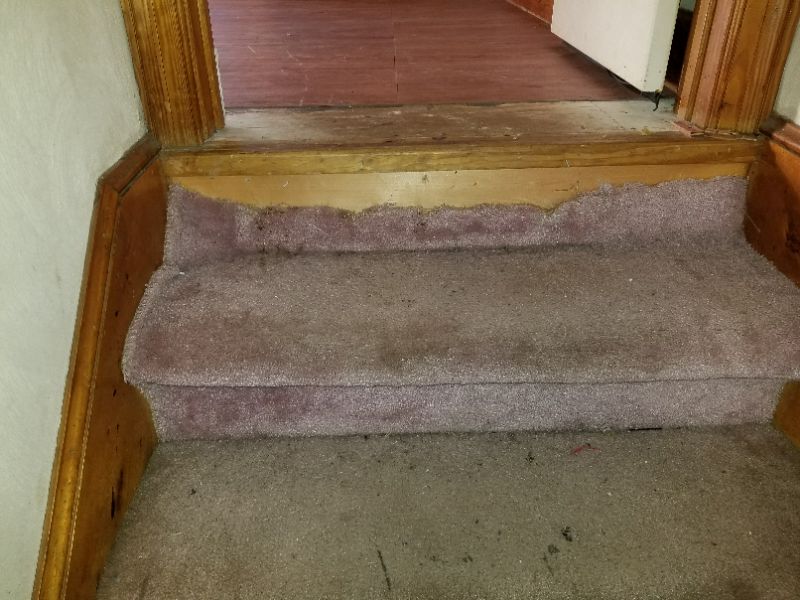
The carpeting is damaged. This is a trip hazard. Repair or replace the carpeting.
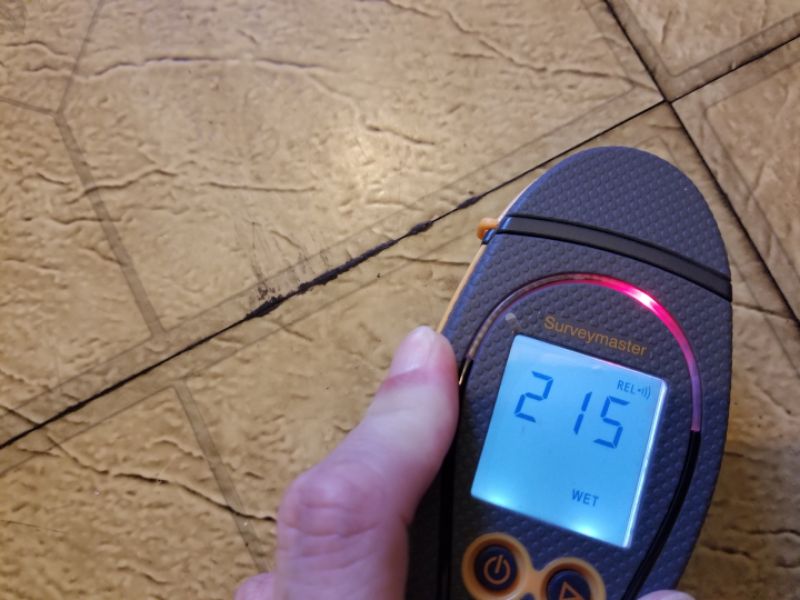
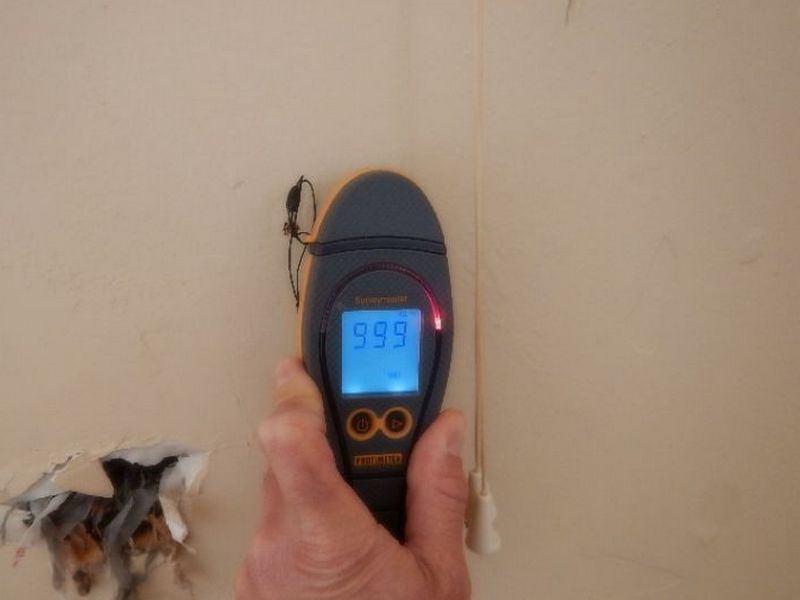
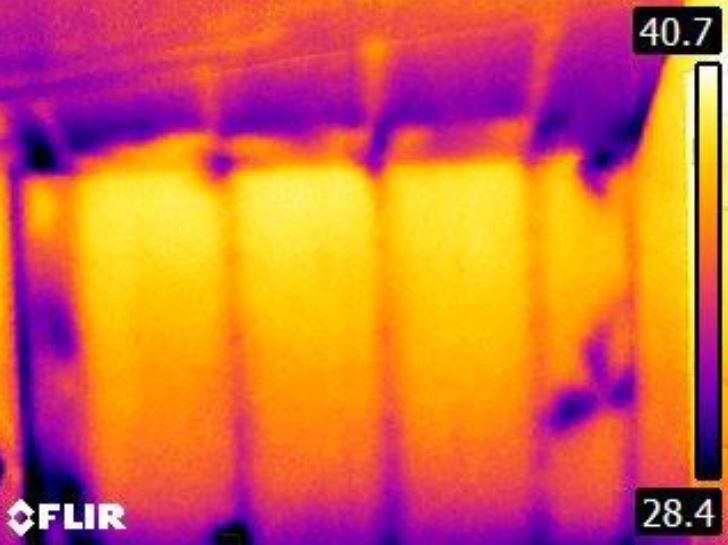
Infrared thermal imaging shows an area in the floor with likely water penetration. Testing with a moisture meter indicates high moisture content at the time of this inspection. There may be hidden damage. See the supplied infrared images. Hire a contractor for an evaluation and to make repairs as needed.

The flooring is damaged. Repair or replace the flooring.
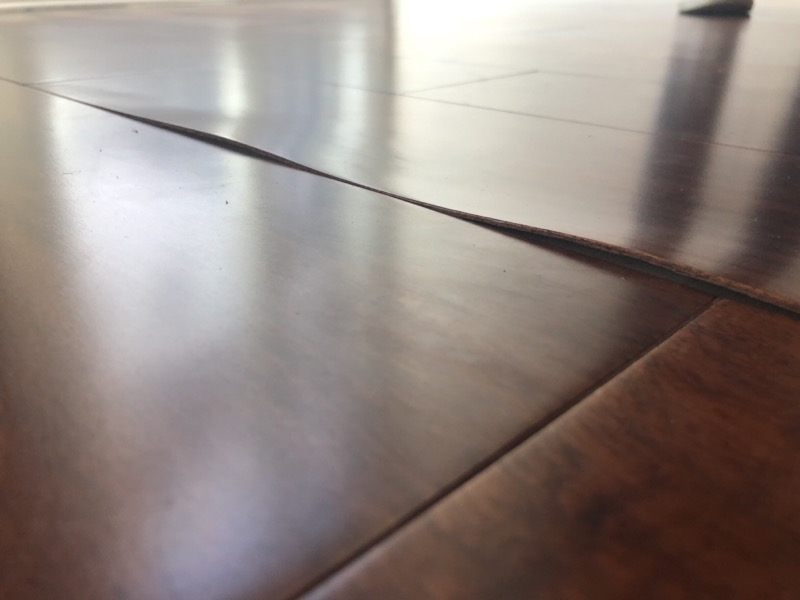
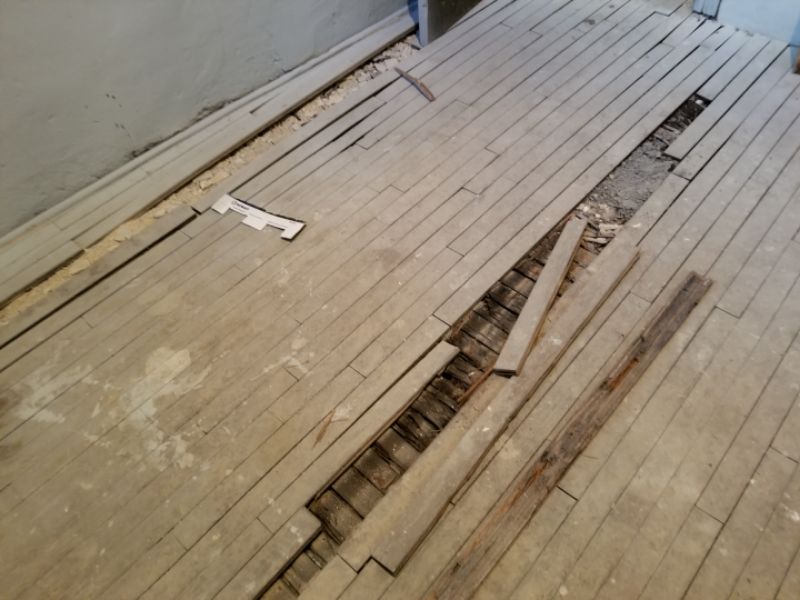
The laminated wood flooring is damaged and separating. This is a tripping hazard and can allow further deterioration. Hire a contractor to repair the floor.
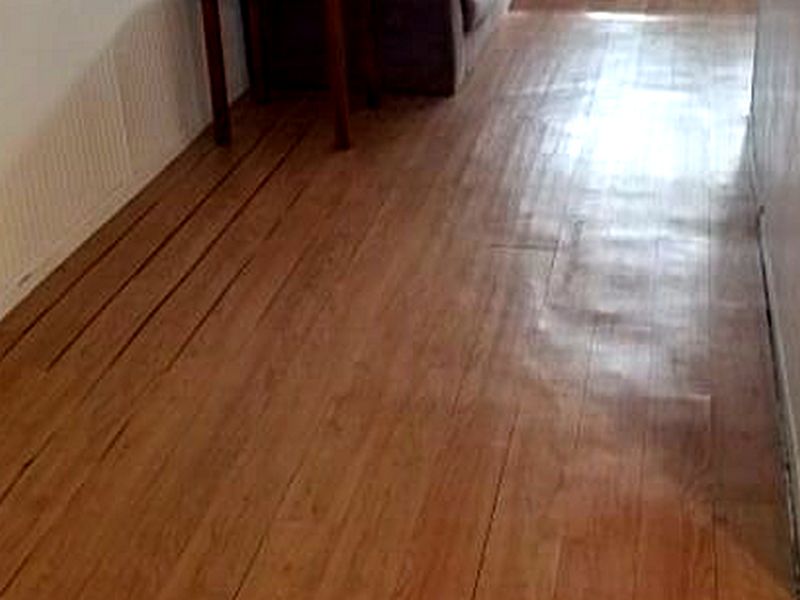
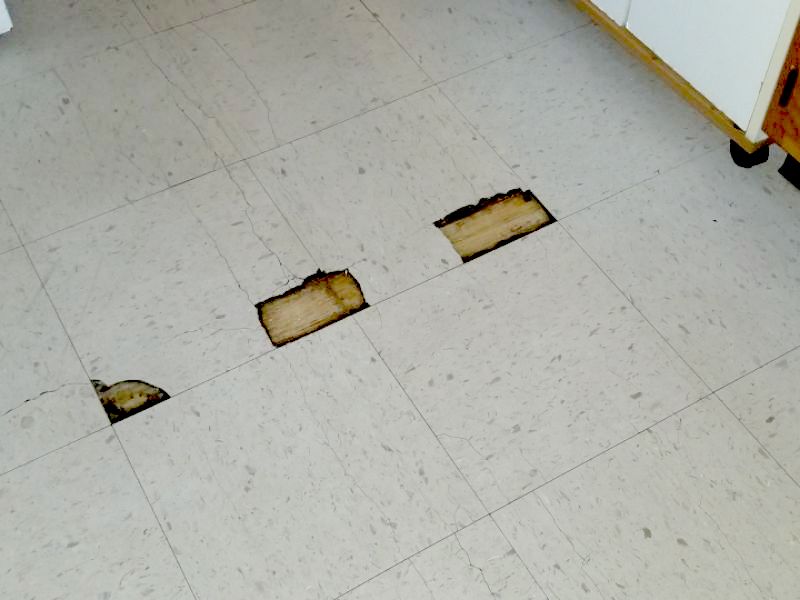
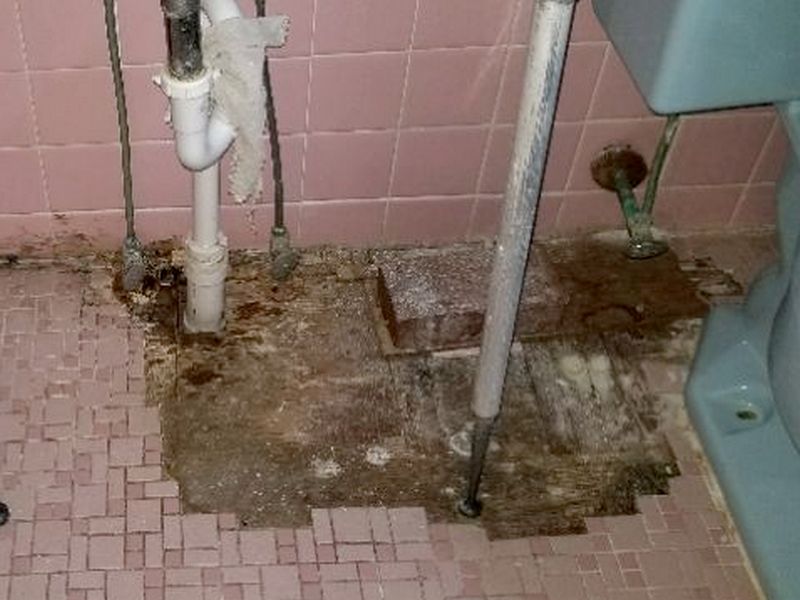
The wood flooring has been patched in an unworkmanlike manner. It is springy and uneven. Hire a contractor for repairs or replacements as needed.

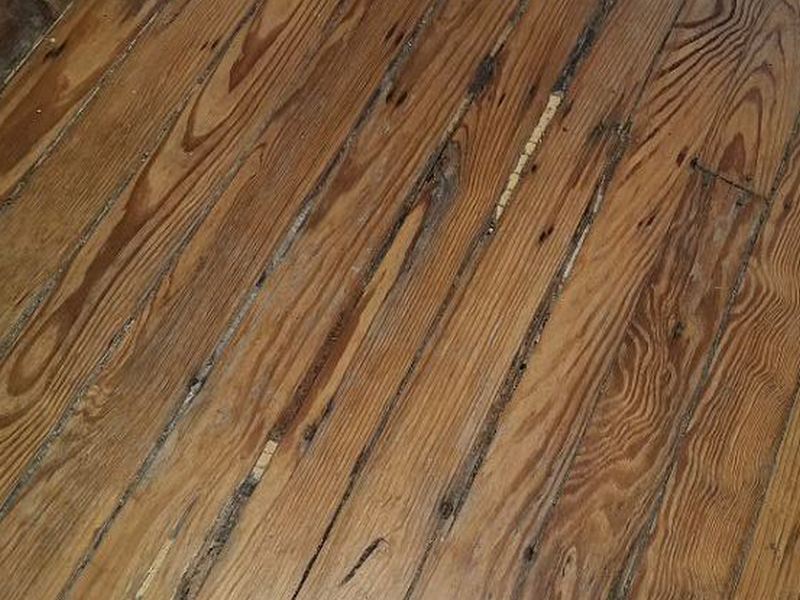
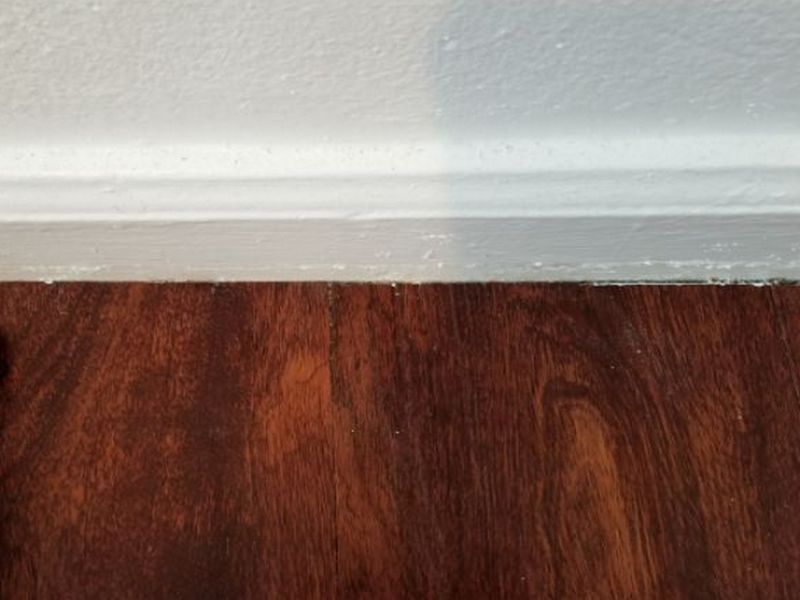
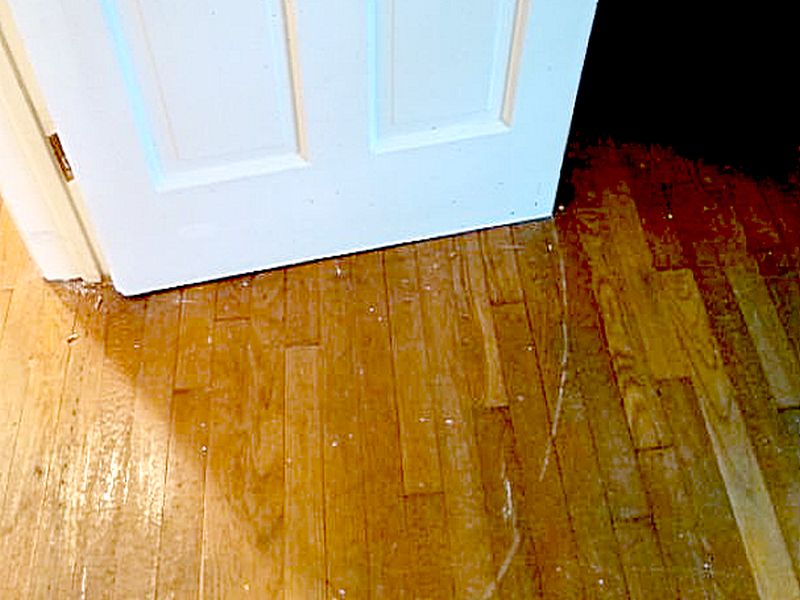
The wood flooring is curling at the edges. This implies chronic excess moisture is present, usually from a crawlspace or basement below the floor. Hire a contractor for an evaluation and repairs as needed.

The wood flooring is damaged due to improper installation over a slab or dirt floor. Replace the flooring.
The flooring is water damaged. The source of the moisture, and whether this is an ongoing problem, cannot be determined. Hire a contractor for an evaluation and to make repairs as needed.
The laminate flooring is loose. This is a trip hazard. Hire a contractor for repairs as needed.
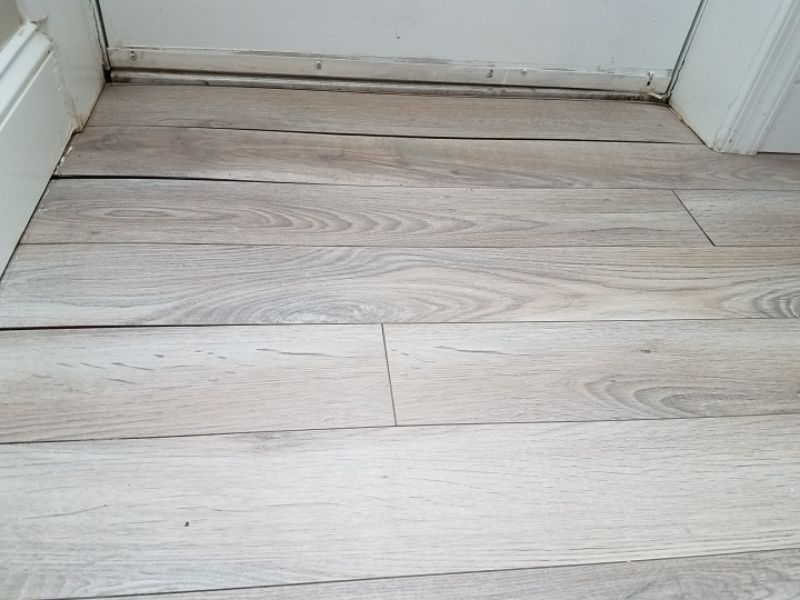
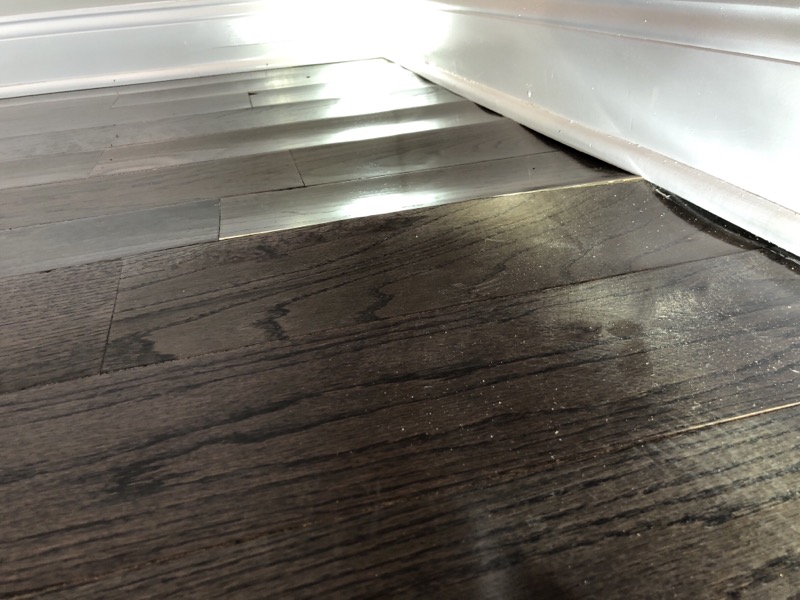
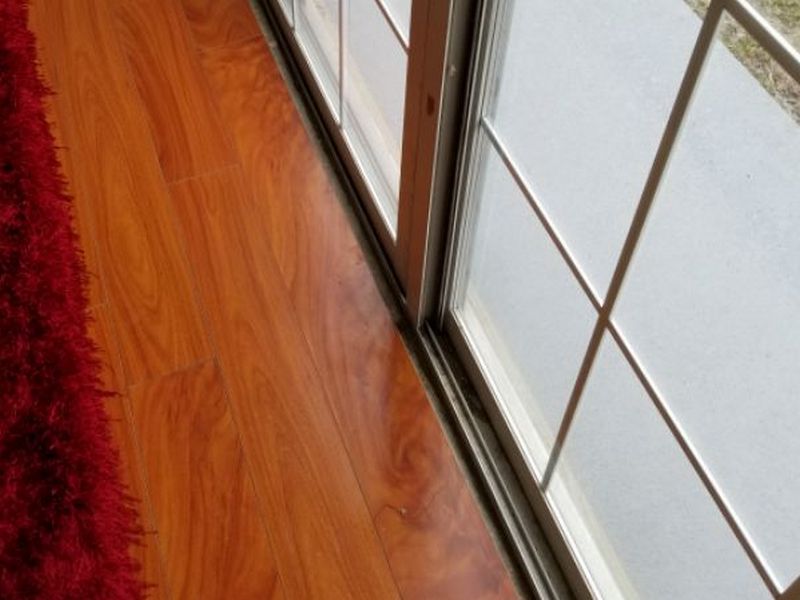
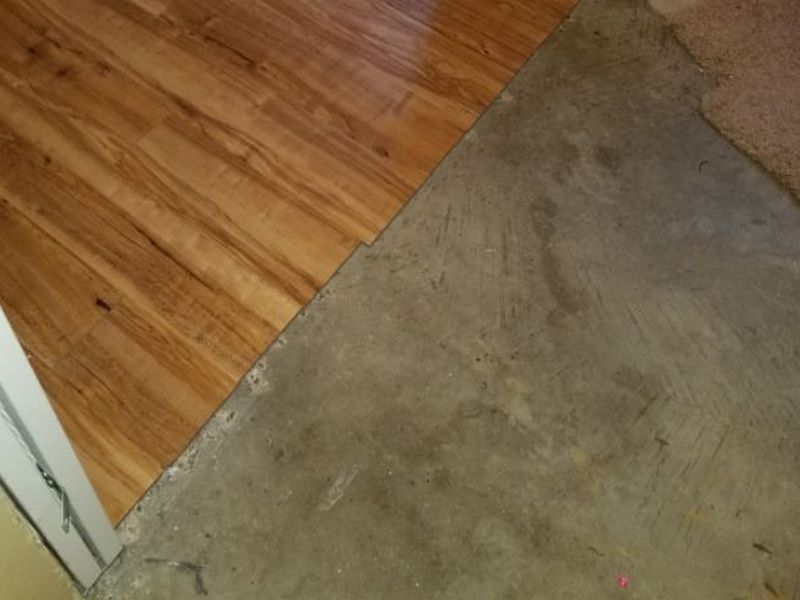
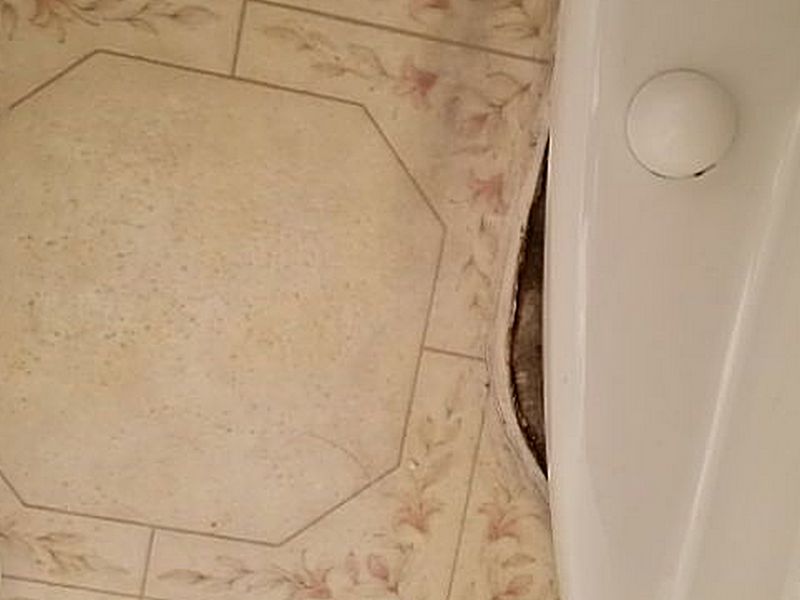
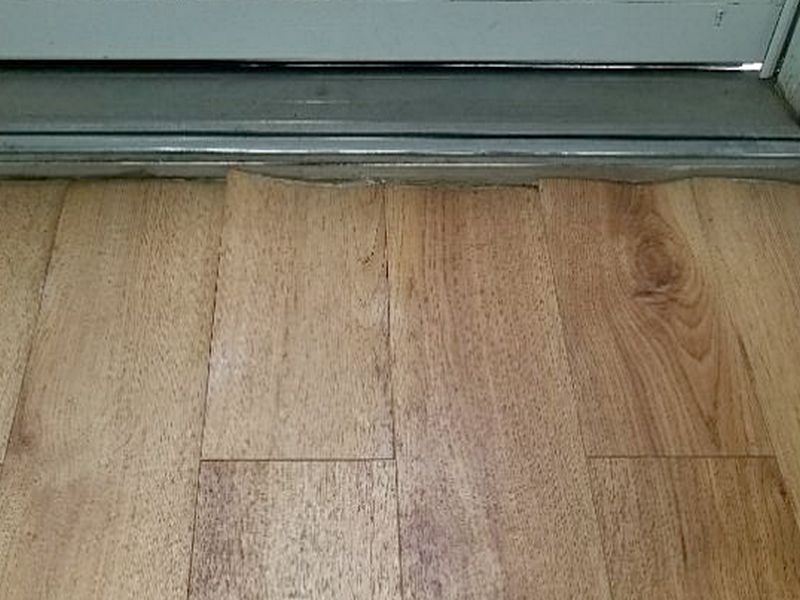
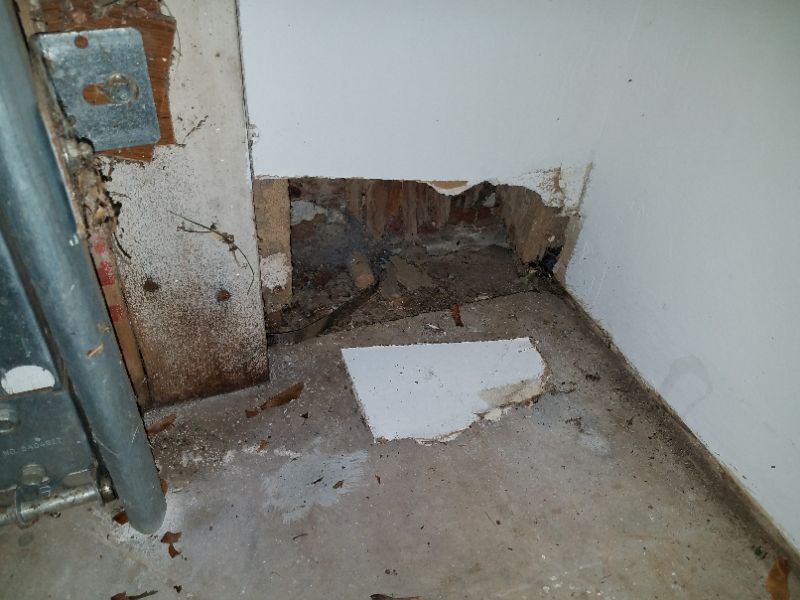
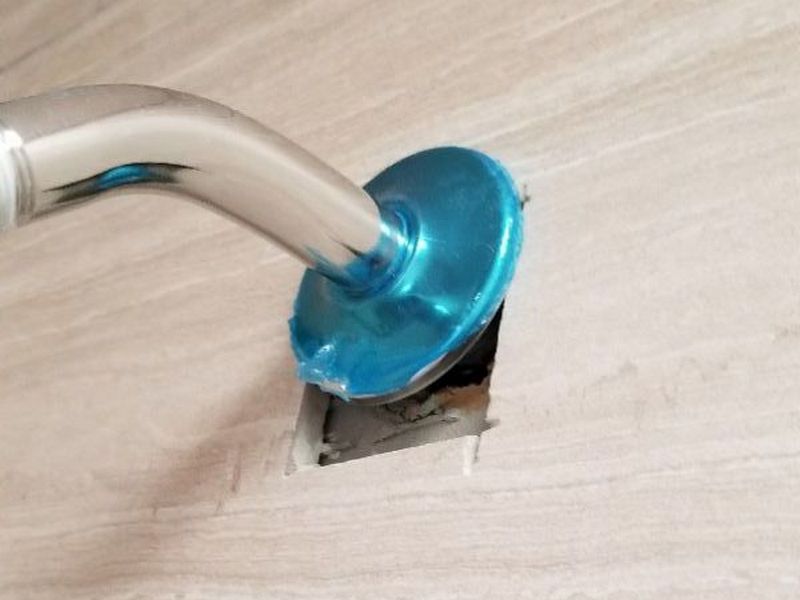
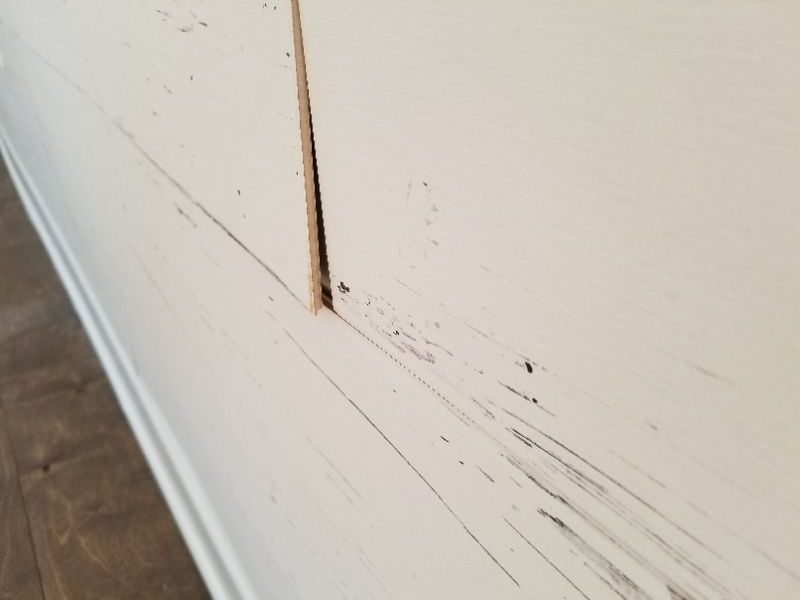
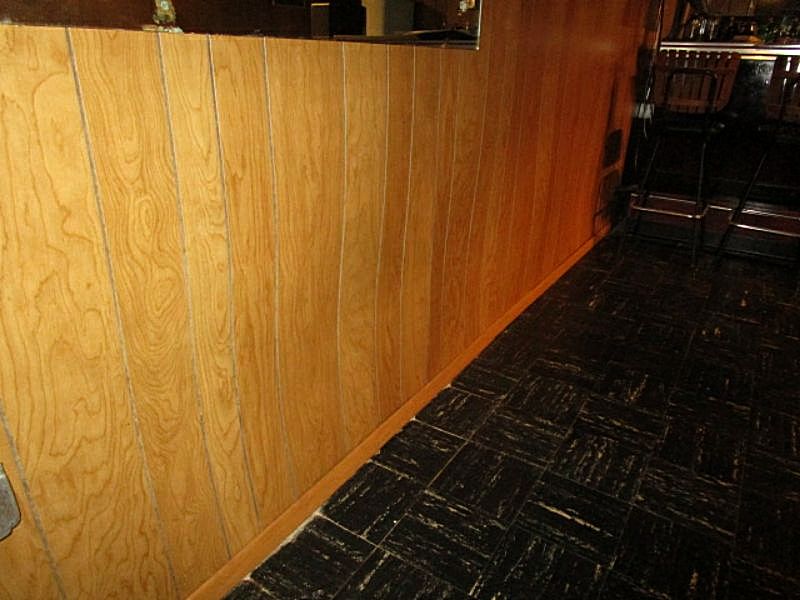
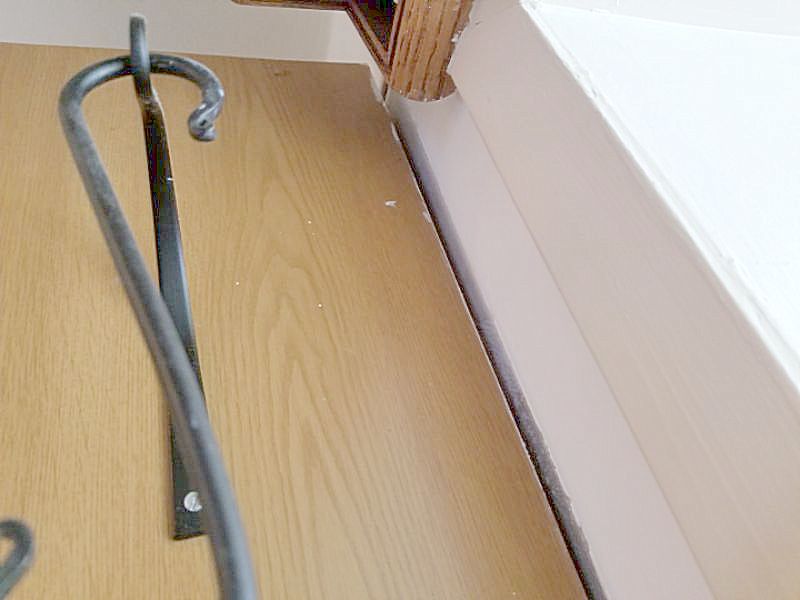
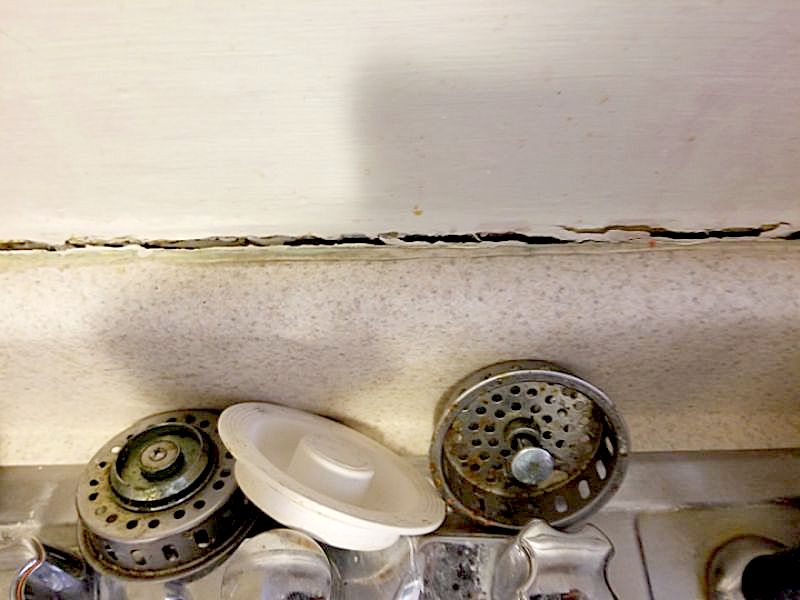
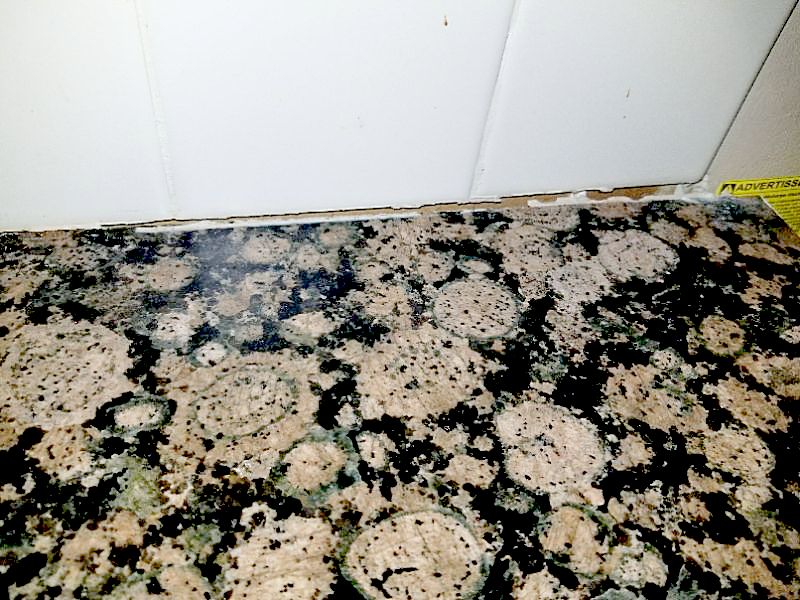
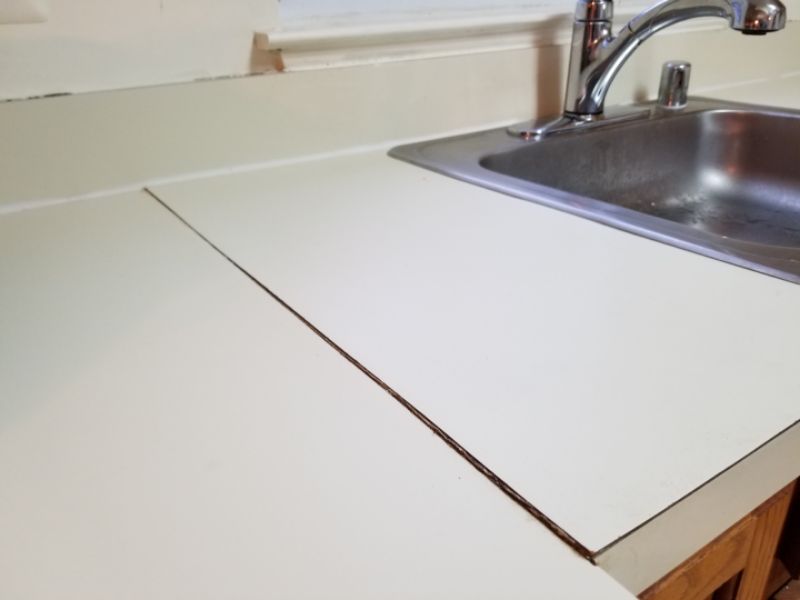
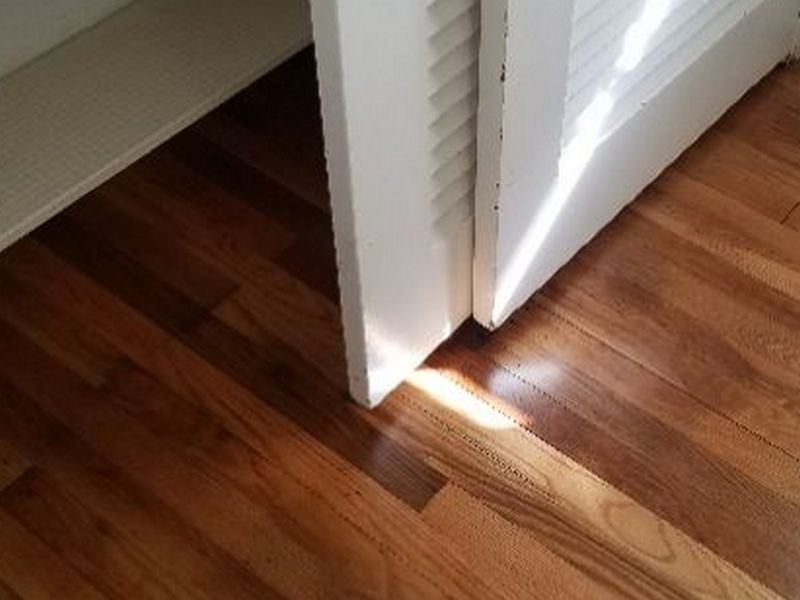
The laminate flooring is installed without an expansion gap at the wall termination. This is contrary to manufacturer guidelines, and will cause buckling. Hire a contractor for repairs as needed.
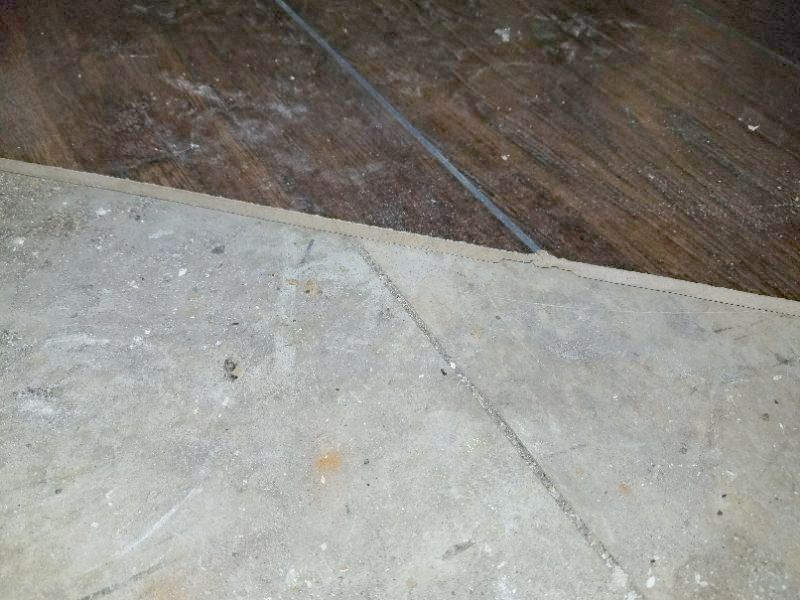
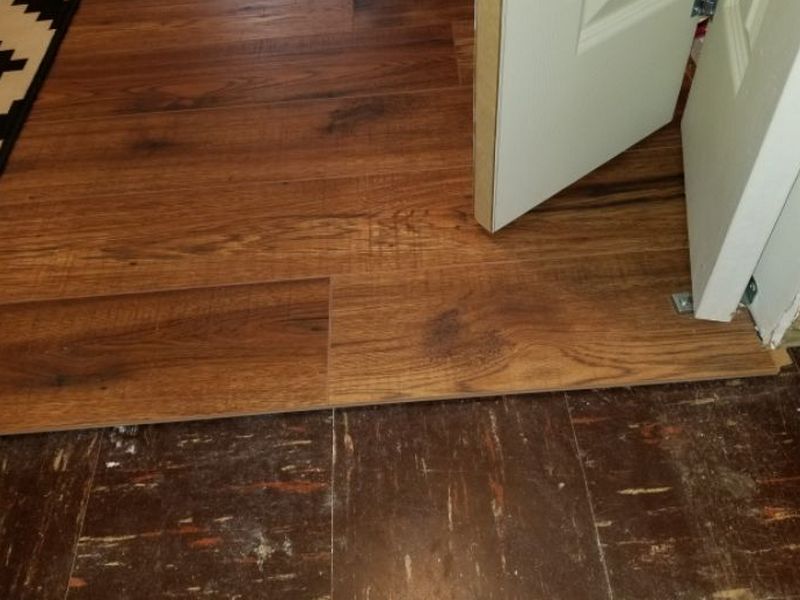
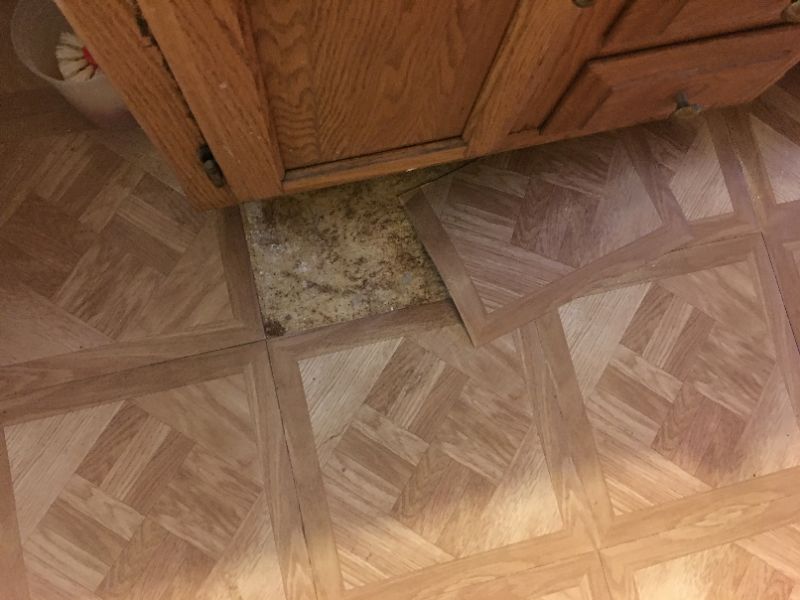
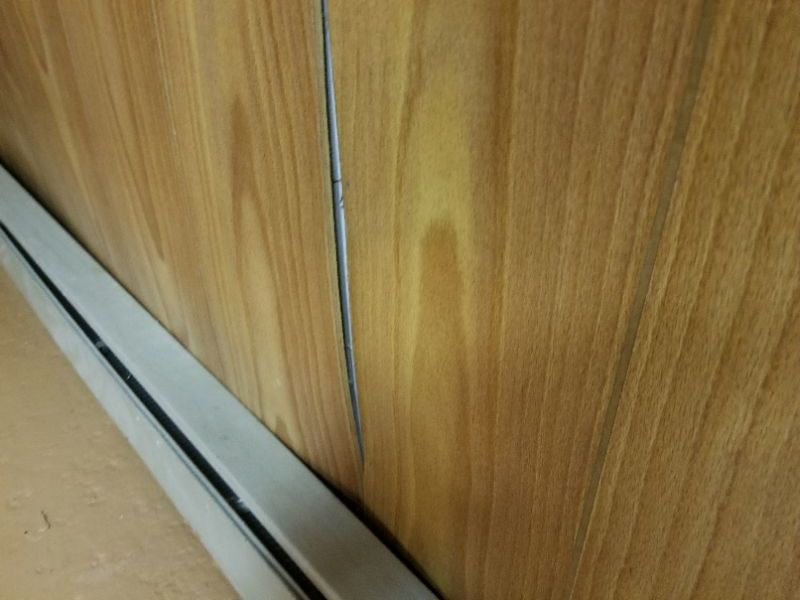
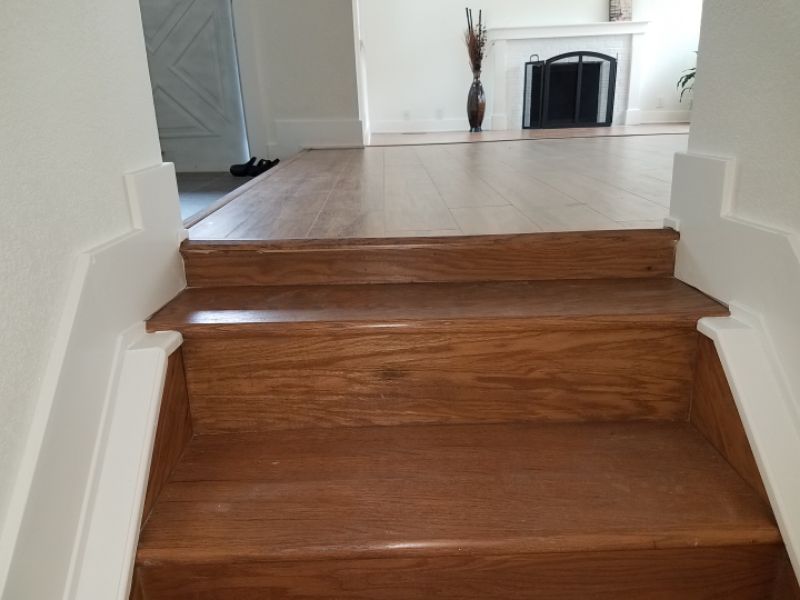
The laminate flooring is installed without a secured transition molding where the flooring changes or terminates. This is a trip hazard and can allow damage to the laminate. Hire a contractor for repairs as needed.
![]()
![]()
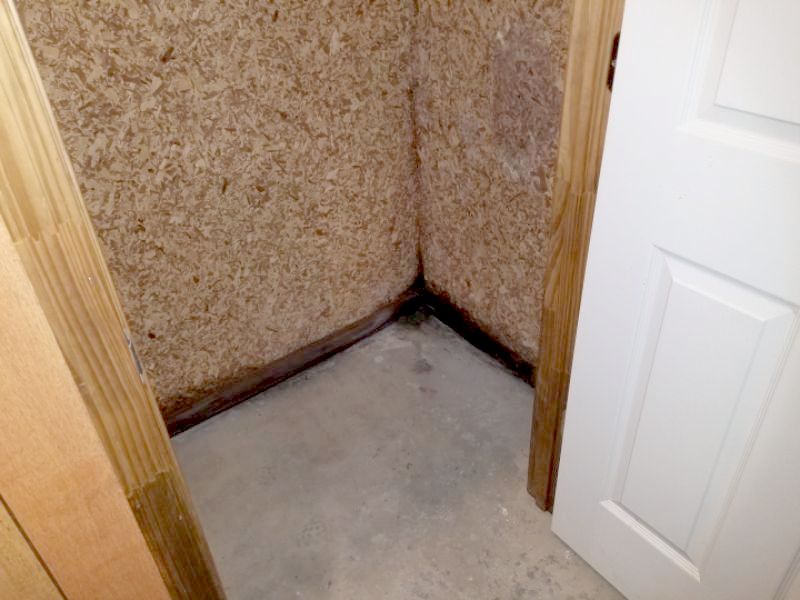
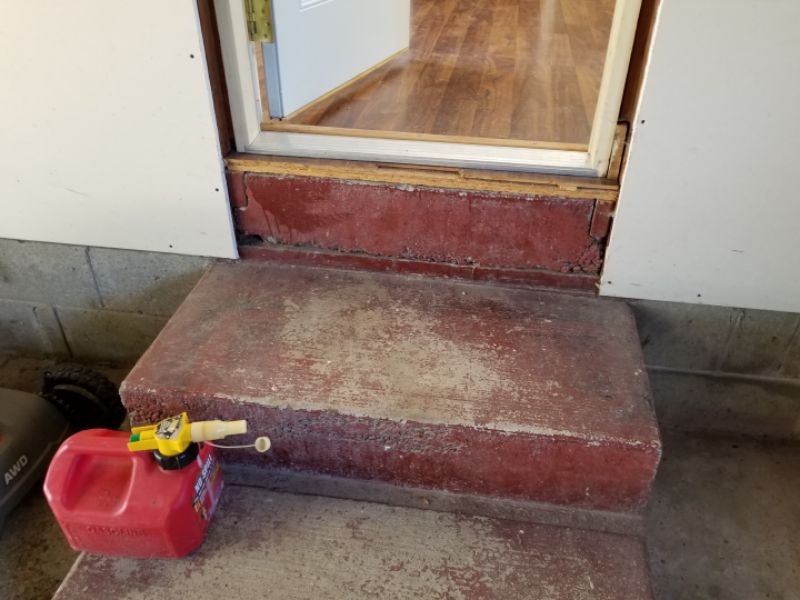
The laminate flooring is installed over a slab. Manufacturer guidelines prohibit this without specific testing of the sub-surface. If permissible, an underlayment must be used to prevent deterioration and failure. Hire a contractor for an evaluation and repairs as needed.
The laminate flooring is water damaged. The source of the moisture, and whether this is an ongoing problem, cannot be determined. Hire a contractor for an evaluation and to make repairs as needed.
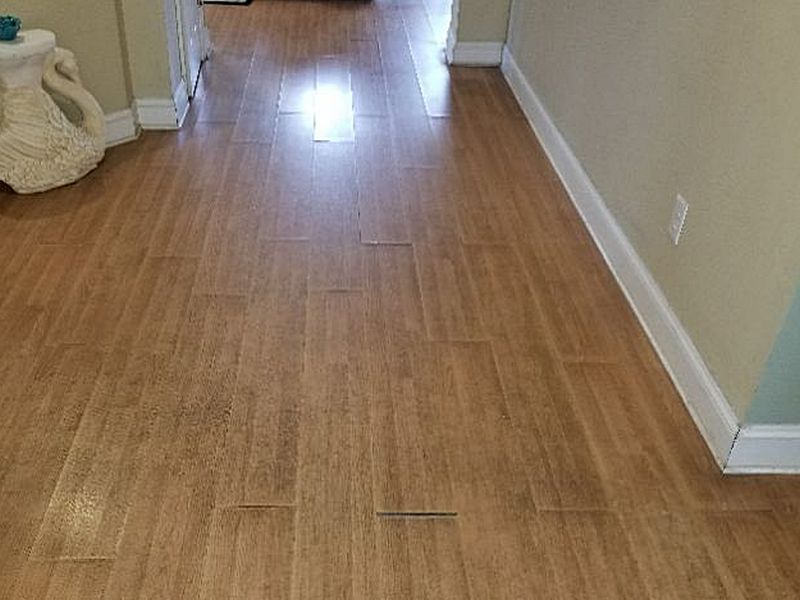

The laminate flooring is uneven and soft underfoot. The reason for this is unknown, but may be an installation error. Hire a contractor for an evaluation and to make repairs as needed.
.
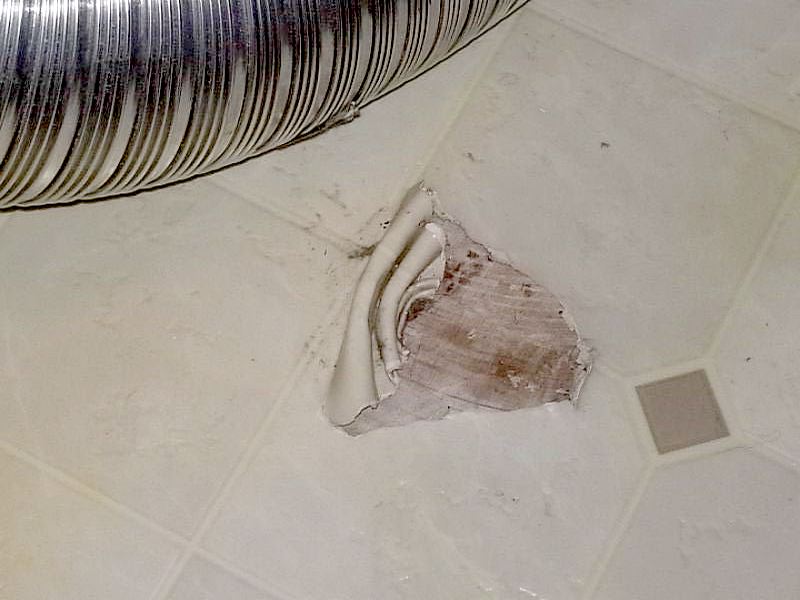
The vinyl flooring is loose or has gaps. This will allow water damage and continued loosening. Hire a contractor for repairs as needed.
The seams in the vinyl sheetgoods are separating. This will allow water damage and additional damage. Hire a contractor for repairs as needed.
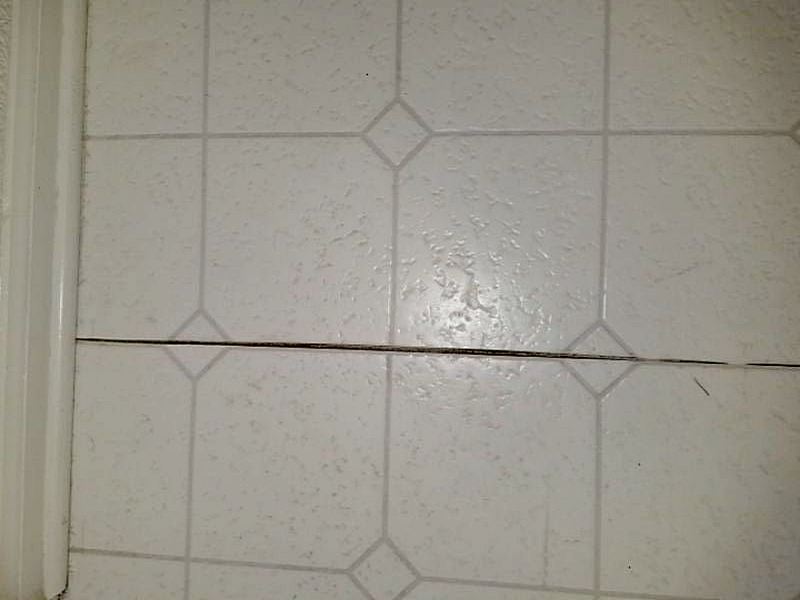
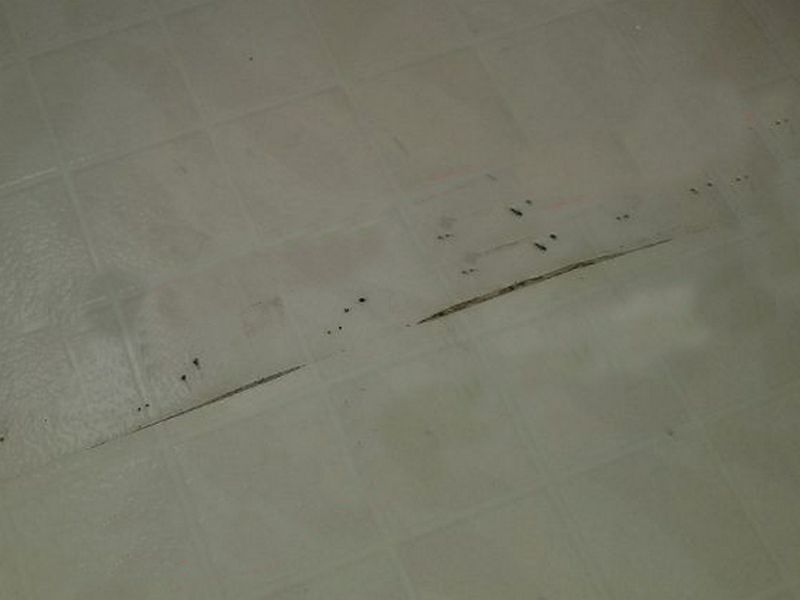
The vinyl flooring is damaged. This will allow water penetration and additional damage. Hire a contractor for repairs or replacements as needed.
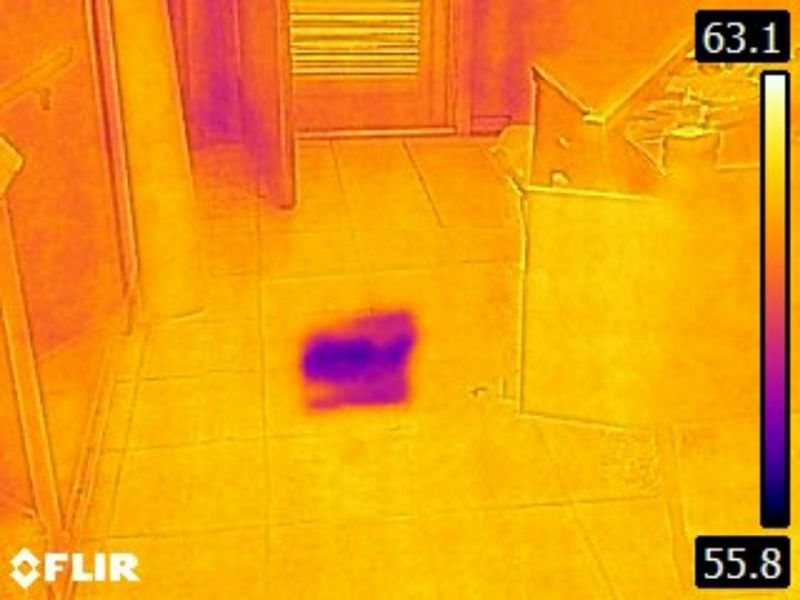
Infrared thermal imaging shows an area in the floor with likely water penetration. Testing with a moisture meter indicates high moisture content at the time of this inspection. There may be hidden damage. See the supplied infrared images. Hire a contractor for an evaluation and to make repairs as needed.
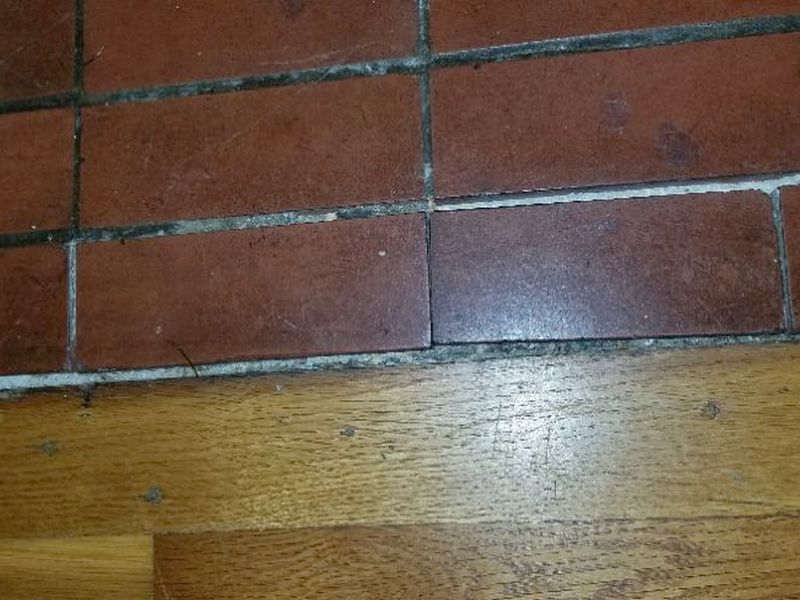
The floor tiles are missing grout. This will allow water penetration and deterioration. Regrout the tiles.
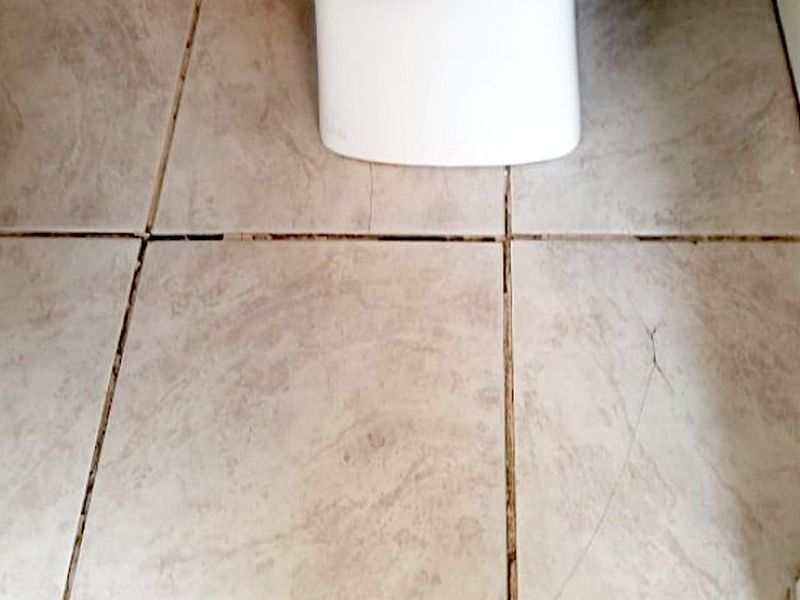
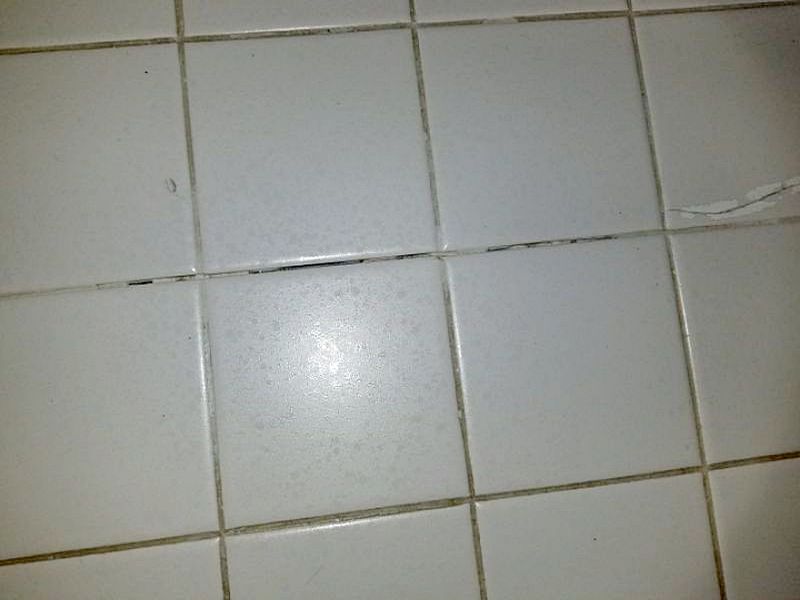
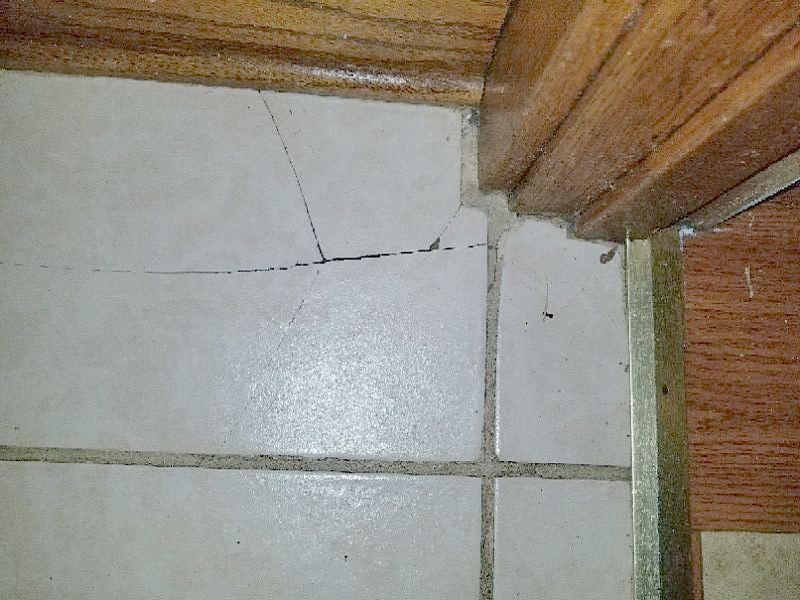
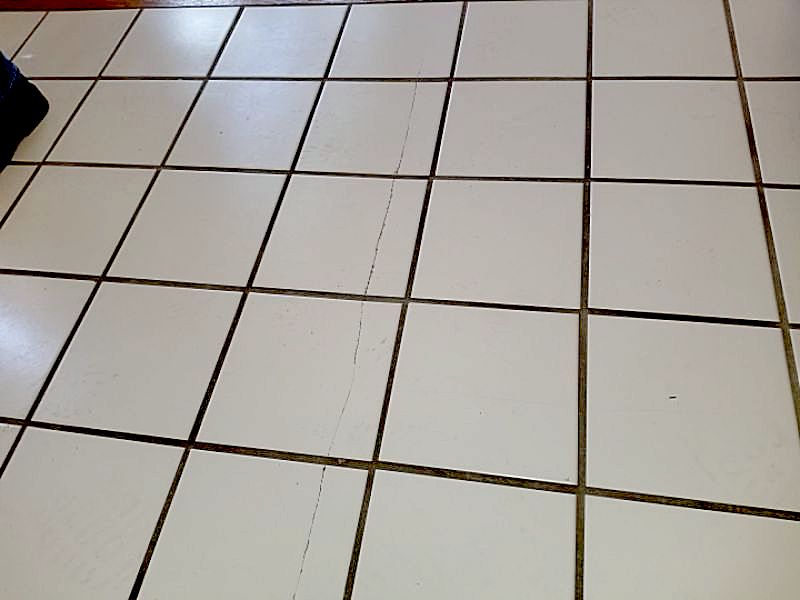
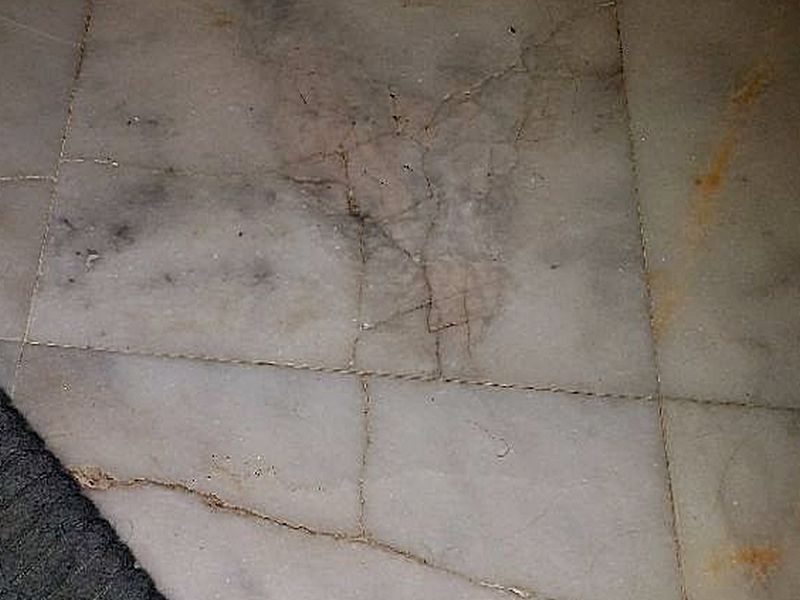
The floor tiles are cracked. This damage will likely progress and cause tiles to loosen and come up. Repair or replace the tiles.
The floor tiles are loose, as apparent by lightly tapping the surface. This reveals tiles that are not bonded to the subfloor. These tiles will move, have grout breakage, crack, and come up. Repair or replace the tiles.
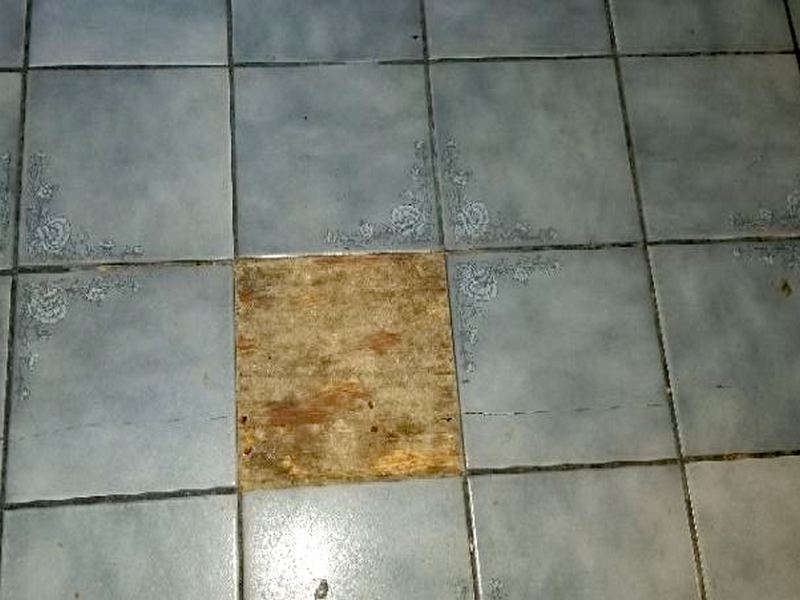
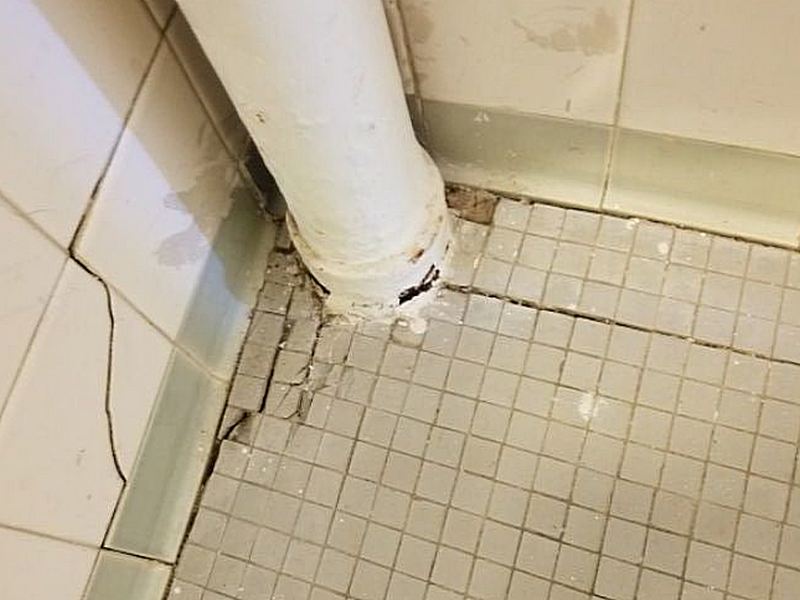
The tile floor is deteriorated. Repairs would not be practical or reliable. Replace the tile floor.
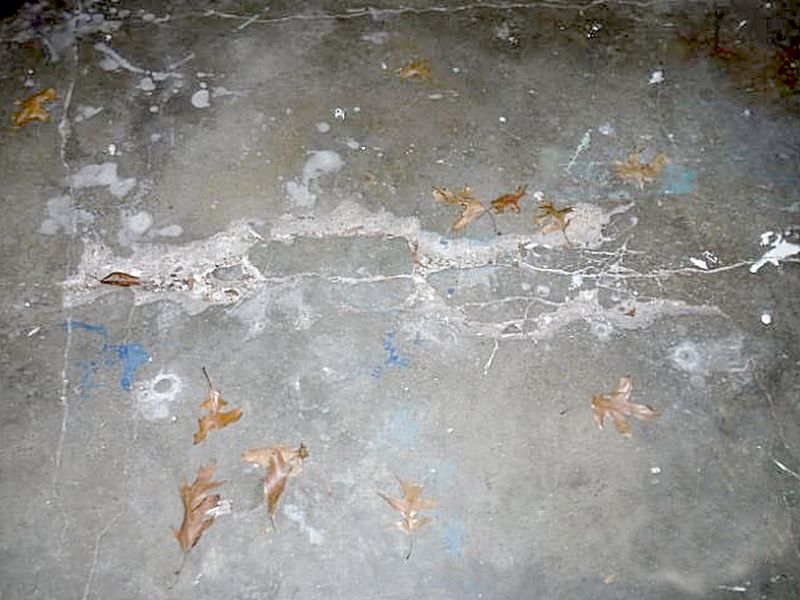
The concrete floor is cracked and damaged. This can be a tripping hazard and may allow further deterioration. Repair the floor.
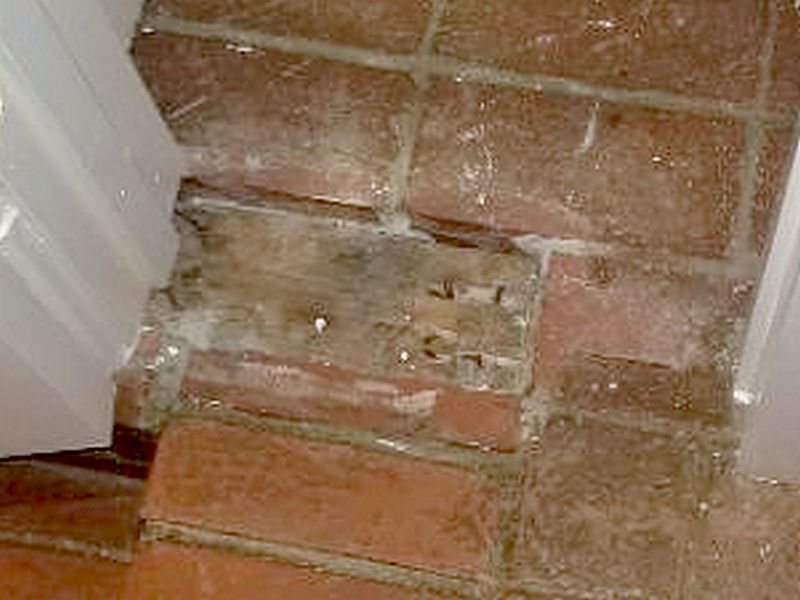
Pavers in the masonry floor are missing. This is a tripping hazard and can allow further damage. Repair the floor.
Floors Limitation and Information Statements
Covering material, limited access: The floors cannot be properly inspected because a covering material (e.g., carpet, rug or other material) prevents unobstructed access. Therefore, the inspection is limited.
Walls
In the Structure category, we considered the walls as it relates to their stability and load-bearing capacities. In this section we are inspecting the walls’ finish coverings. While we focus on conditions that seem more “cosmetic”, we must consider whether changes or damage in a wall covering also imply an ongoing or potential structural issue with the wall itself. Why is that crack there? Is this a load-bearing wall, or is it a wall dropping away from the bearing wall? Is there a water penetration issue present?
Inspect for cracks, damage, separations, loose areas, and stains. Loose plaster can be a hazard. Remember that walls separating a garage from the living spaces should be fire-rated and intact. Always perform an Infrared scan on the interior surfaces, and follow-up any anomalies with your moisture meter. Water penetration can cause significant damage and expense, and has structural implications.
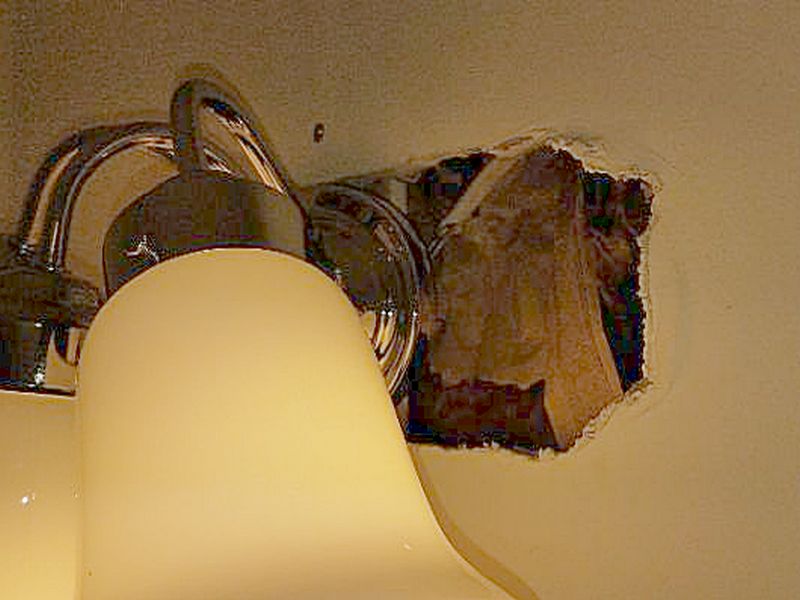
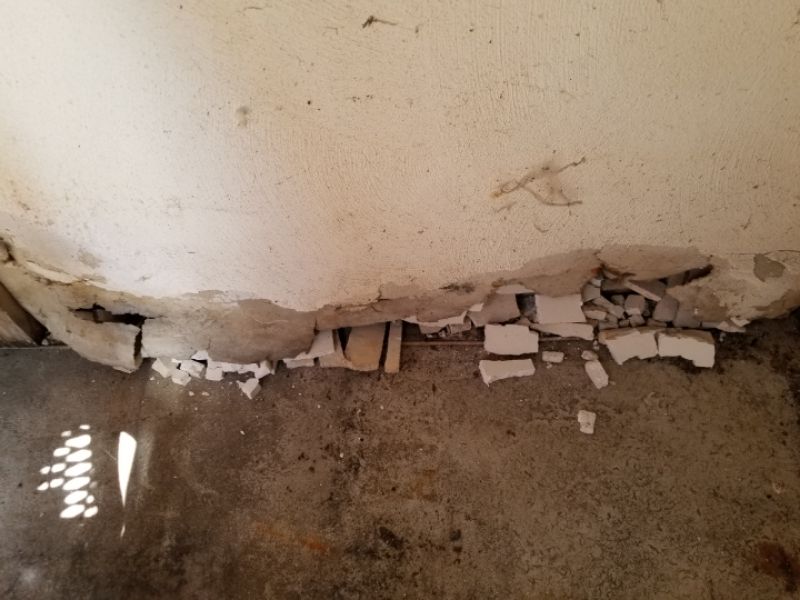
The interior wall is damaged. Repair or replace the wall.
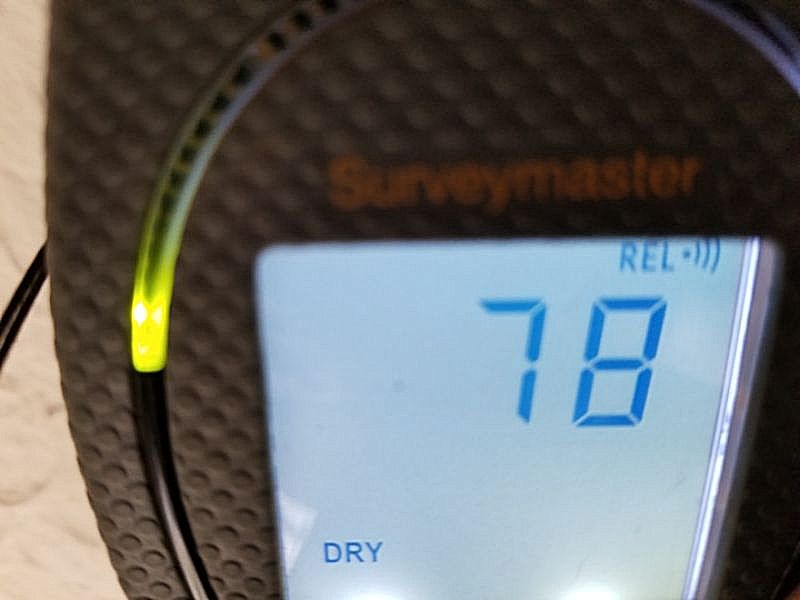
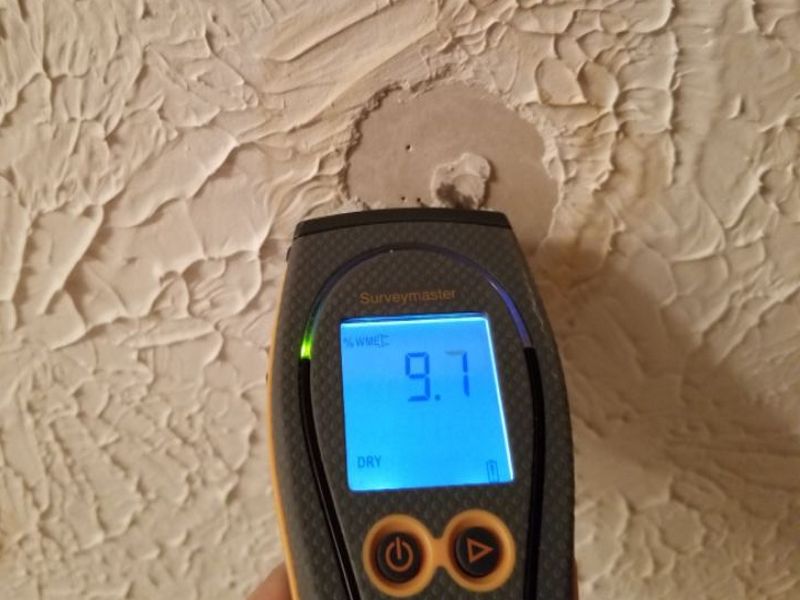
The interior wall is water damaged. Testing with a moisture meter indicates low moisture content (dry) at the time of this inspection. Hire a contractor for an evaluation and to make repairs as needed.
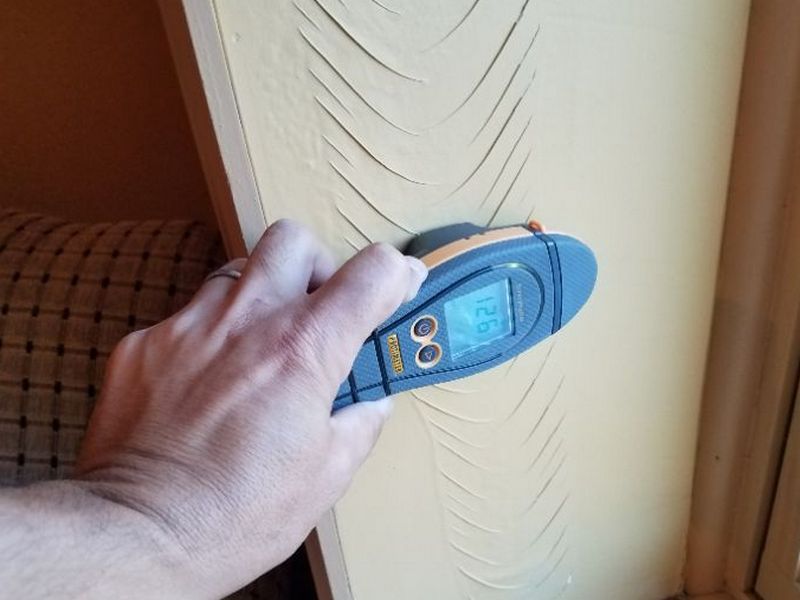
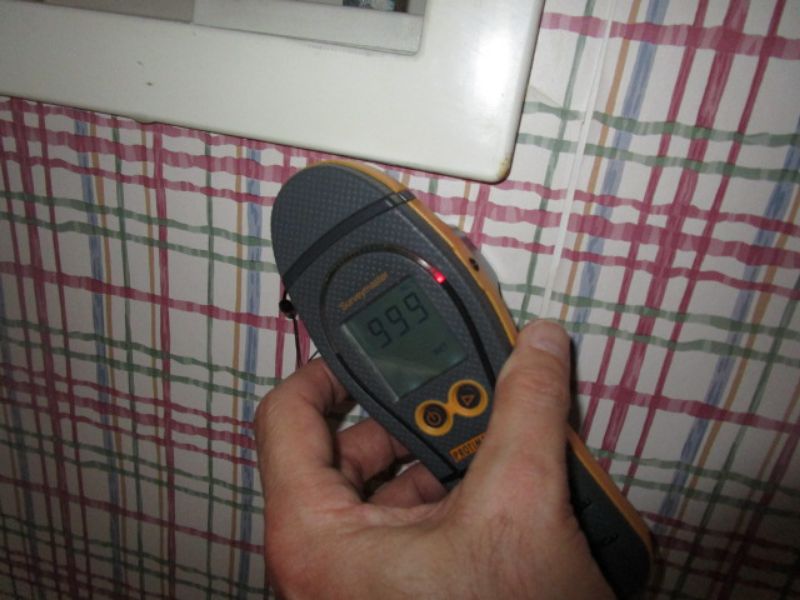
The interior wall is water stained or damaged. Testing with a moisture meter indicates high moisture content at the time of this inspection. There may be hidden damage. Hire a contractor for an evaluation and to make repairs as needed.
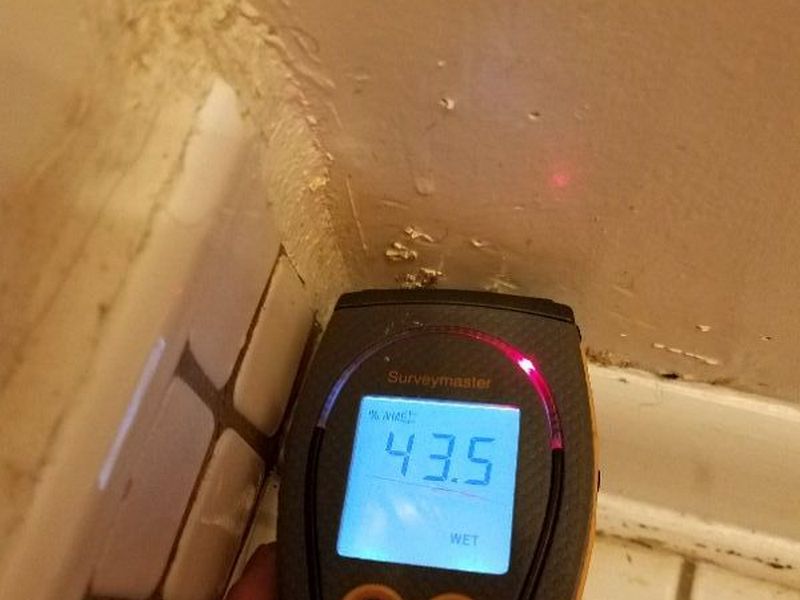
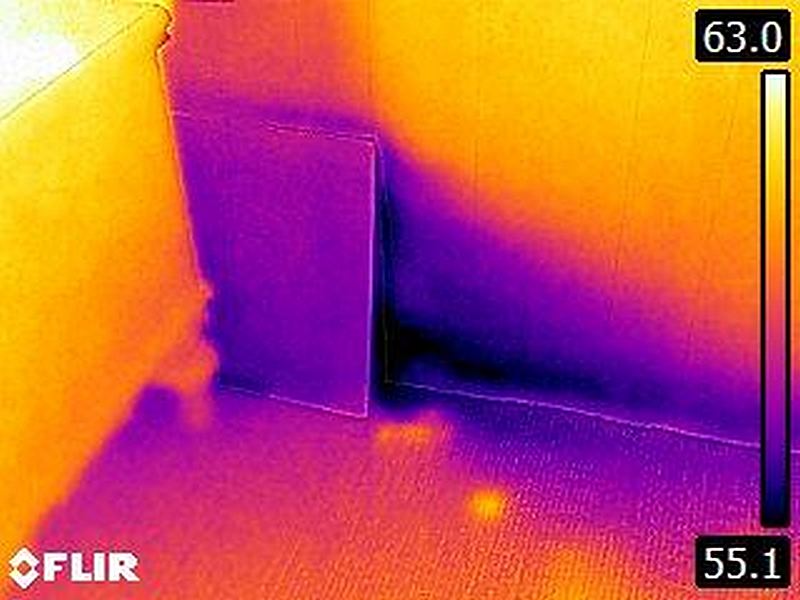
Infrared thermal imaging shows an area in the interior wall with likely water penetration. Testing with a moisture meter indicates high moisture content at the time of this inspection. There may be hidden damage. See the supplied infrared images. Hire a contractor for an evaluation and to make repairs as needed.
Infrared thermal imaging shows an inaccessible area in the interior wall with likely water penetration. Confirmation with a moisture meter for high moisture content is not possible. There may be hidden damage. See the supplied infrared images. Hire a contractor for an evaluation and to make repairs as needed.
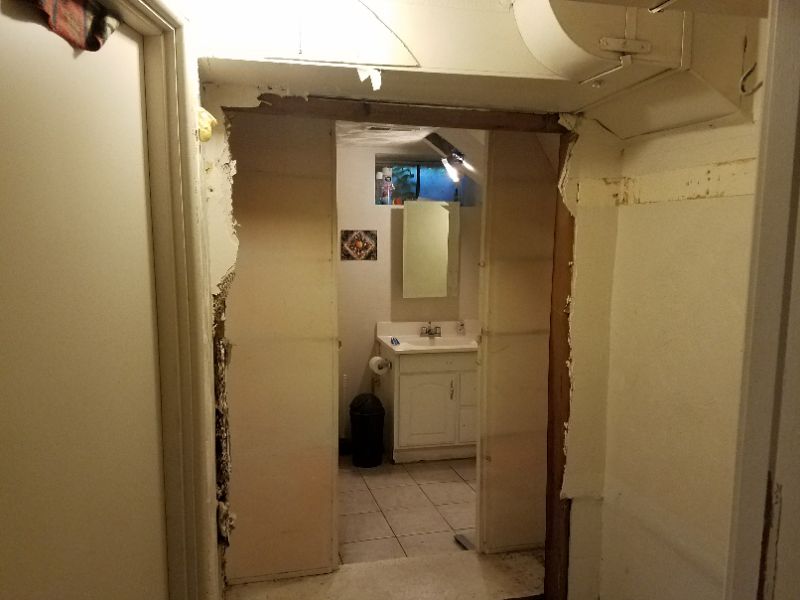
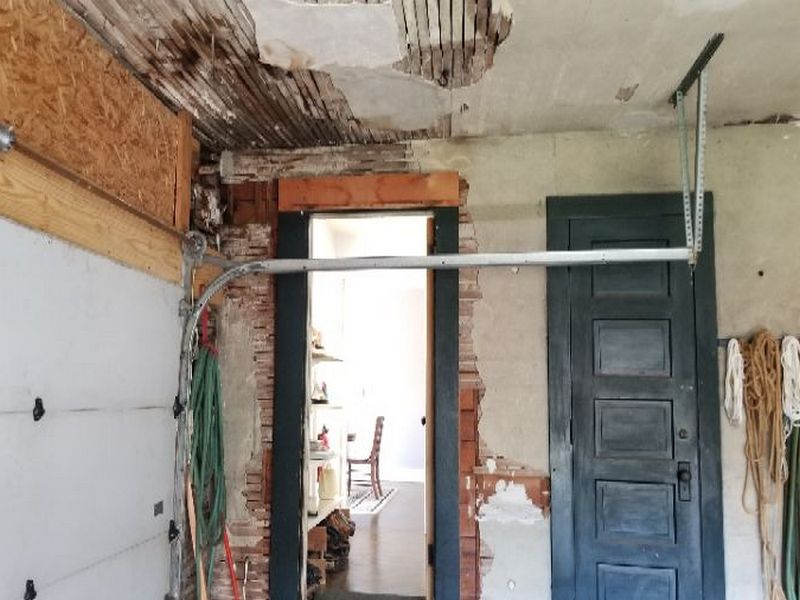
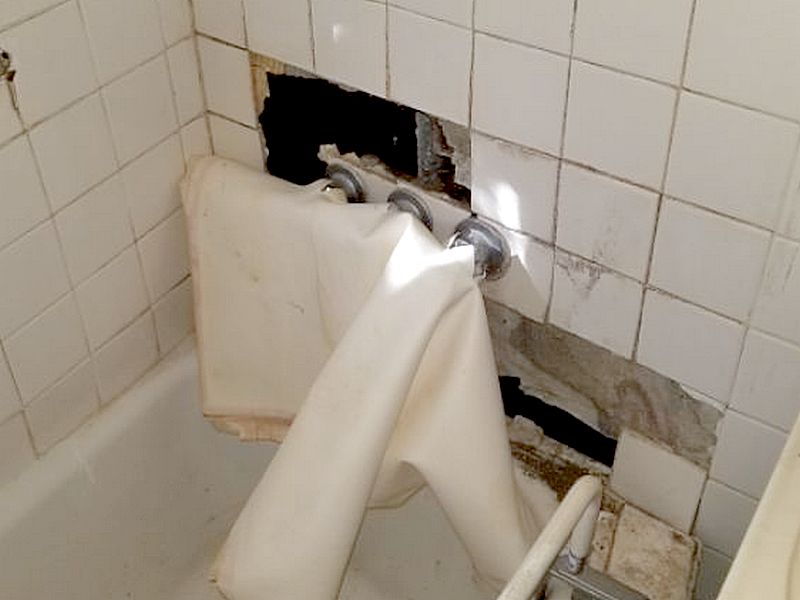
There is a breach (hole, damage or opening) in the fire-rated wall. This is a safety concern. Replace the portions of the wall with fire-rated material.
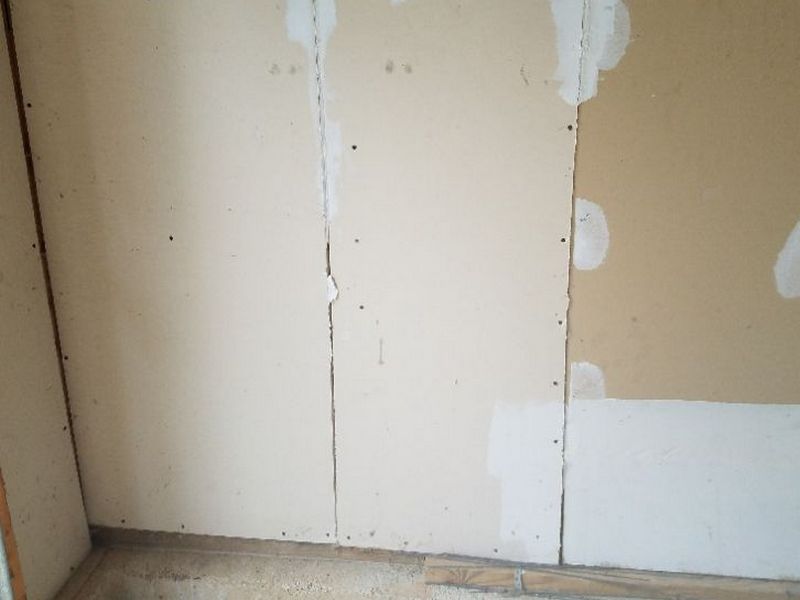
The wall separating the garage from the adjacent living area is not fire-rated. This is a safety concern. Replace the wall with fire-rated materials.
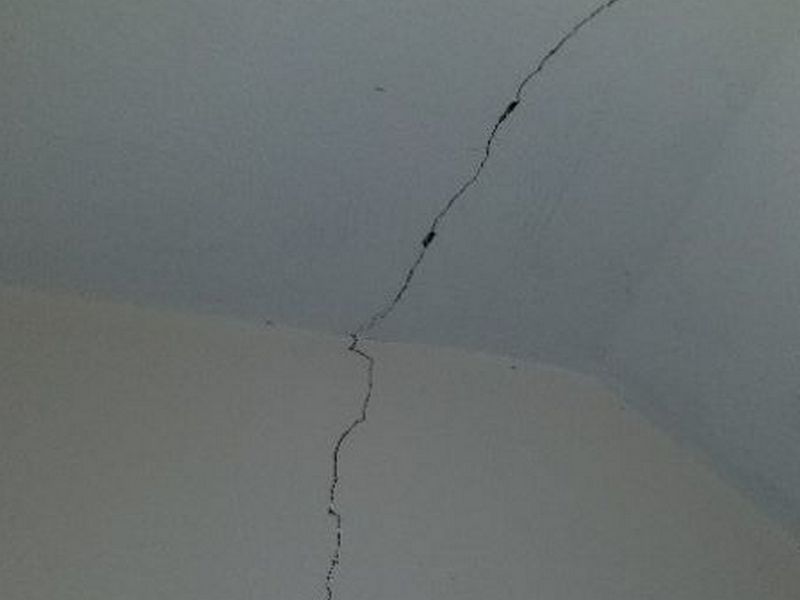
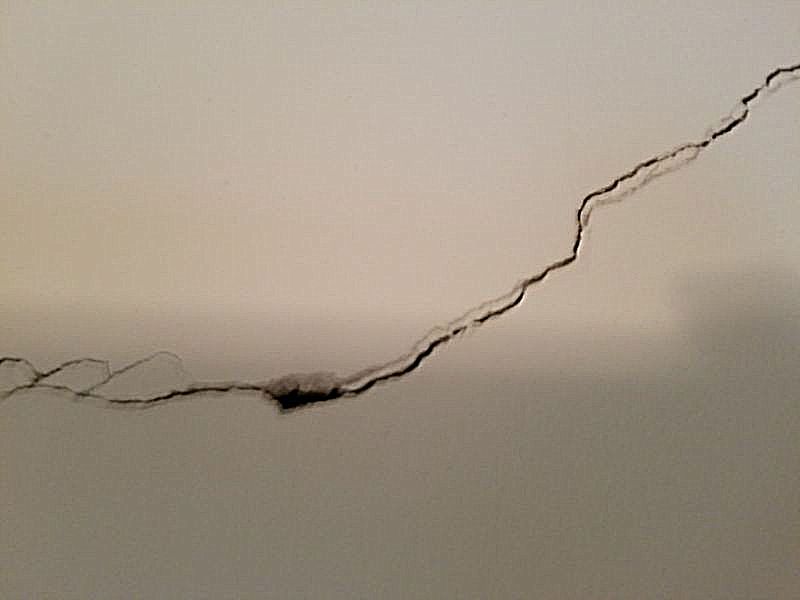
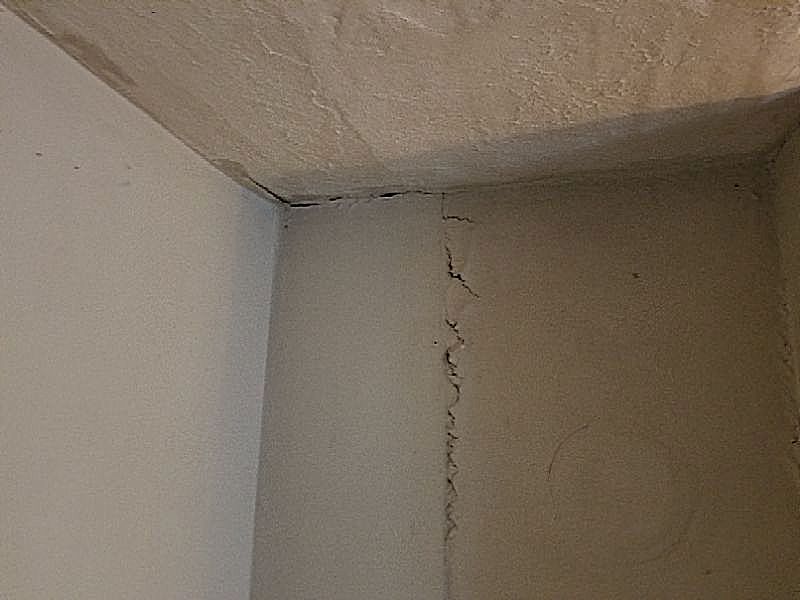
There is cracking at the interior wall that is larger than what would be expected with typical settlement. This may be a structural issue. Hire a contractor for an evaluation and to make repairs as needed.
There are gaps in the tile wall. This will allow water penetration and deterioration. Repair the wall.
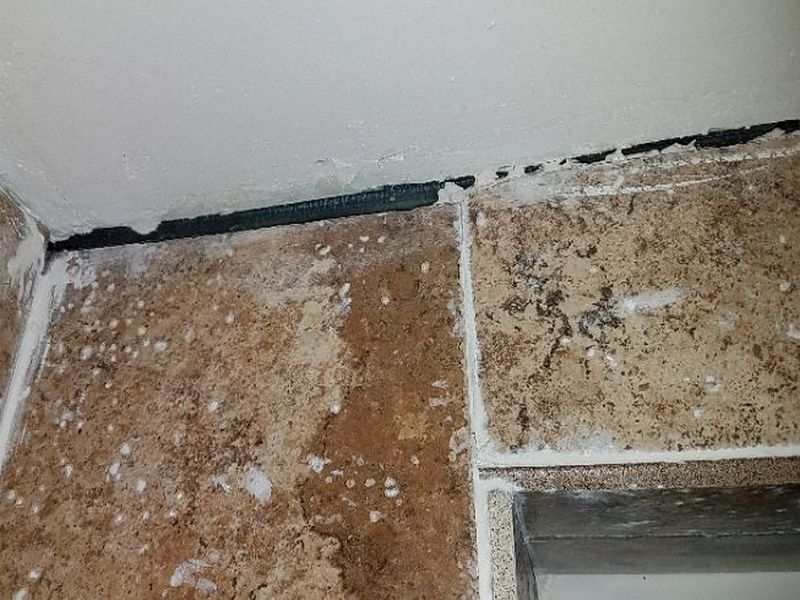
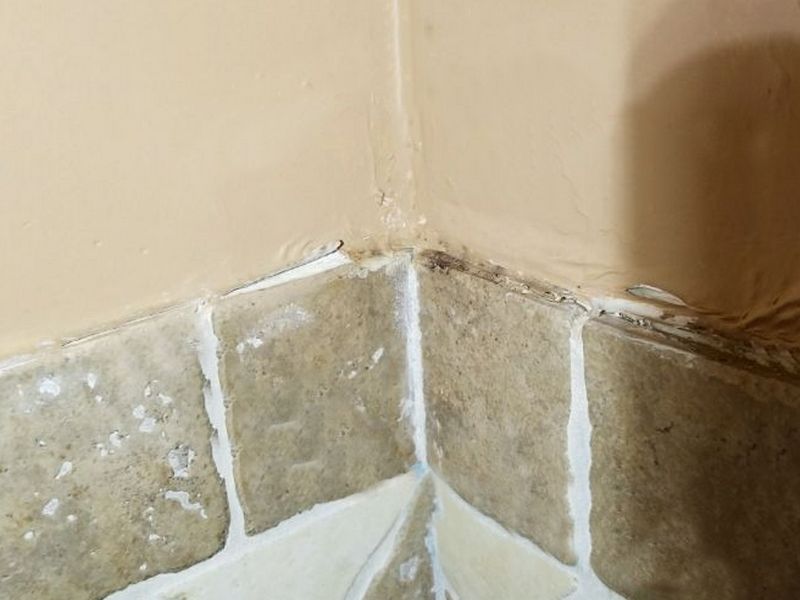
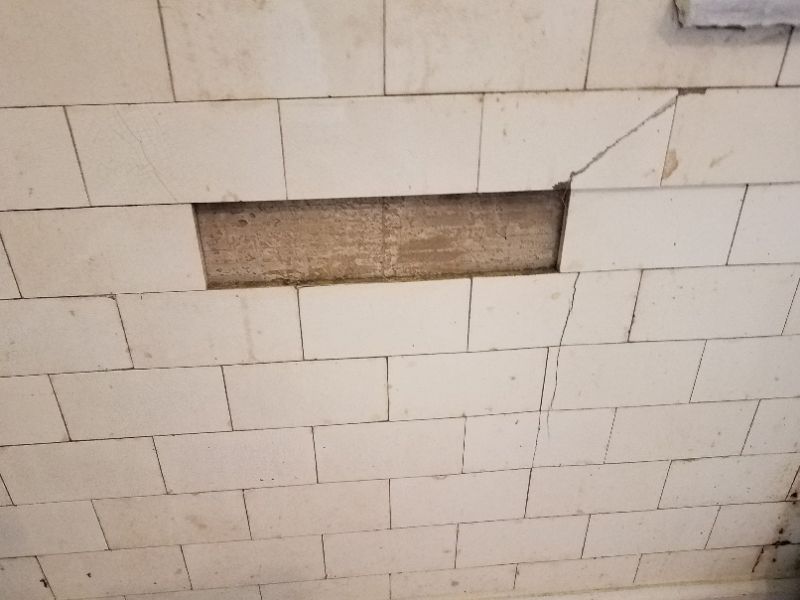
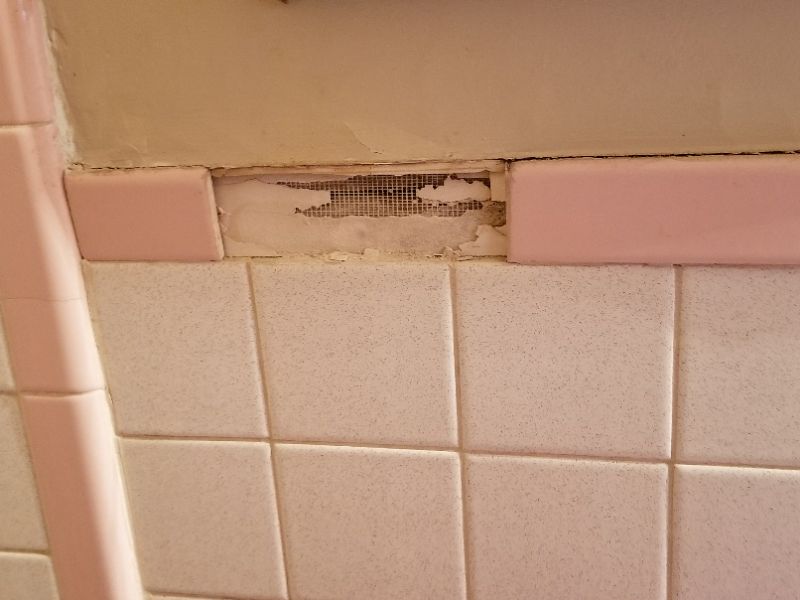
There are missing tiles in the wall. This will allow water penetration and deterioration. Repair the wall.
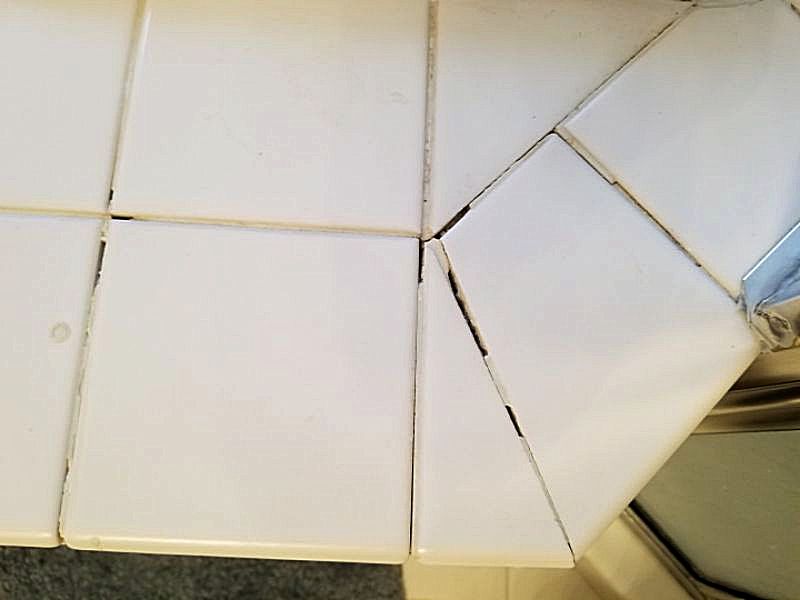
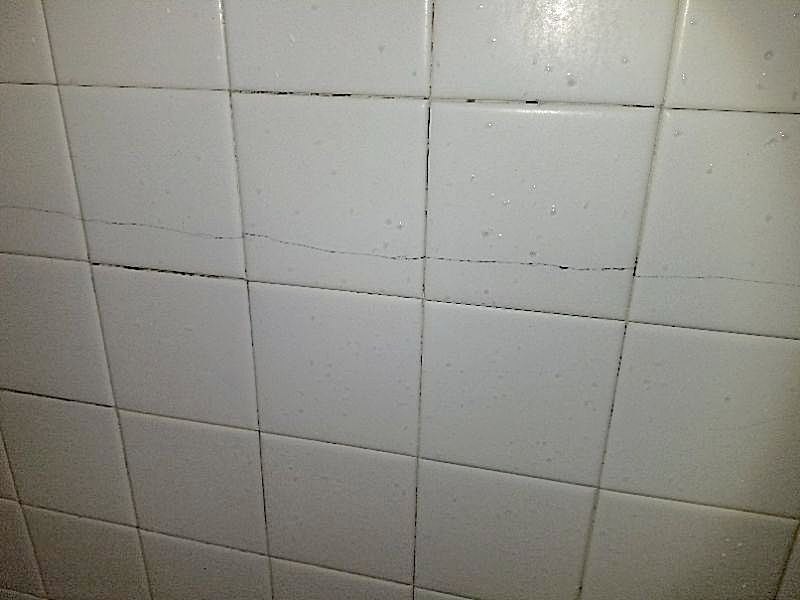
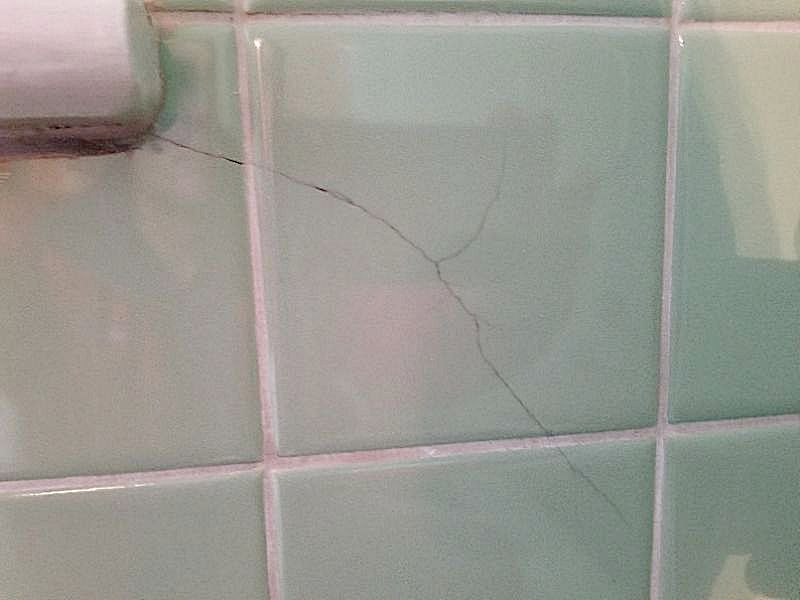
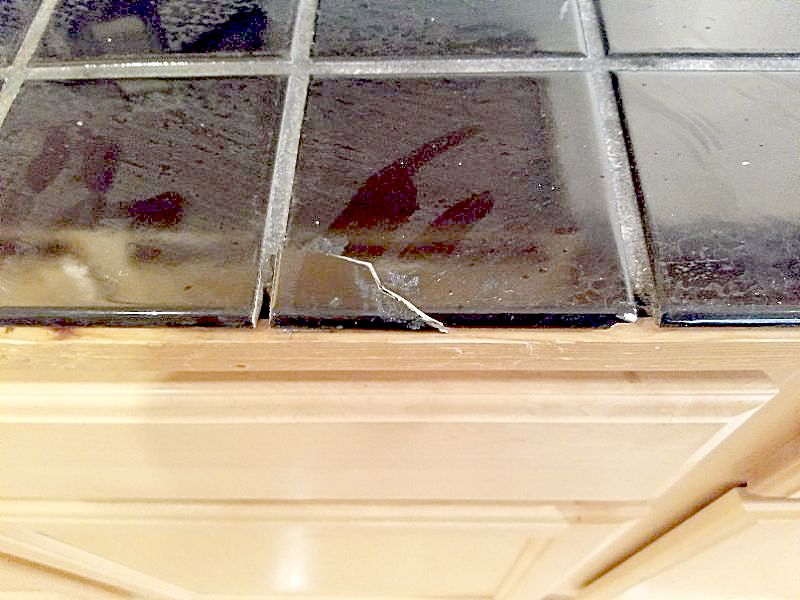
There are cracked tiles in the wall. This will allow water penetration and deterioration, and will cause the tiles to become loose. Repair the wall.
The wall tiles are loose or damaged. Loose tiles are apparent by lightly tapping the surface. This reveals tiles that are not properly bonded and will move, have grout breakage, crack, and come off. Repair the wall.
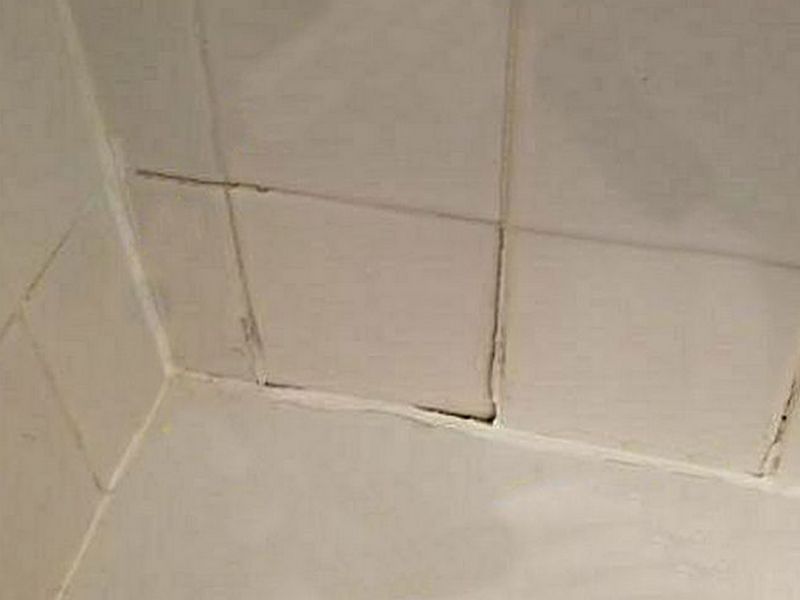
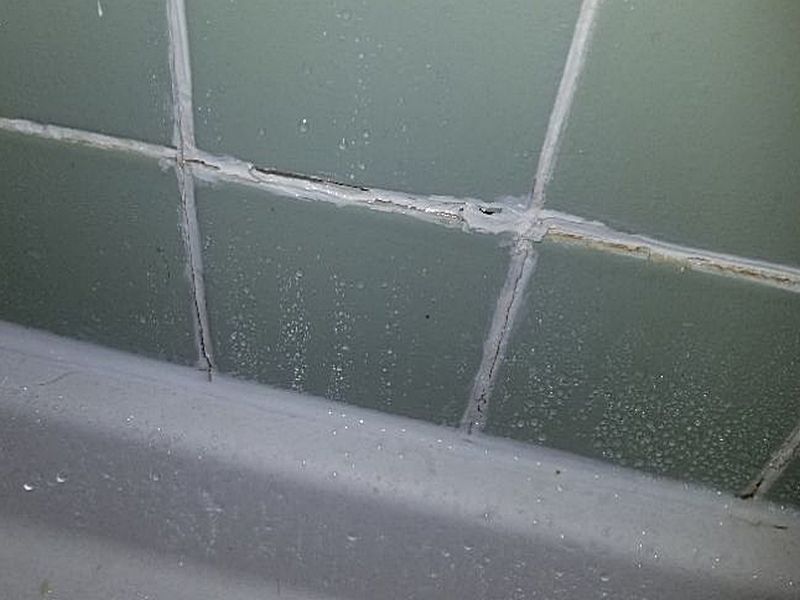
The tile wall is damaged. This will allow water penetration and further deterioration. Repair or replace the tiles.
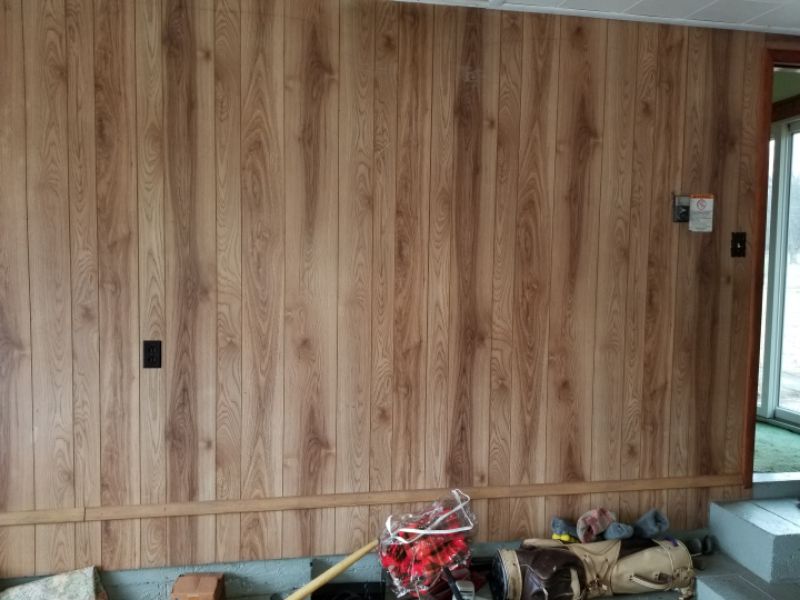
The wall paneling is loose. This may allow it to come off completely. Repair the paneling.
The wall paneling is damaged. Repair or replace the paneling.
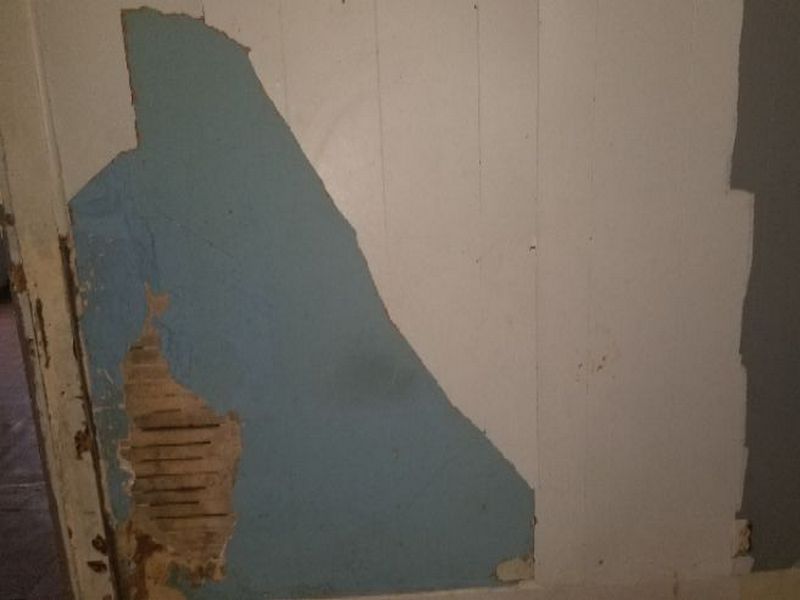
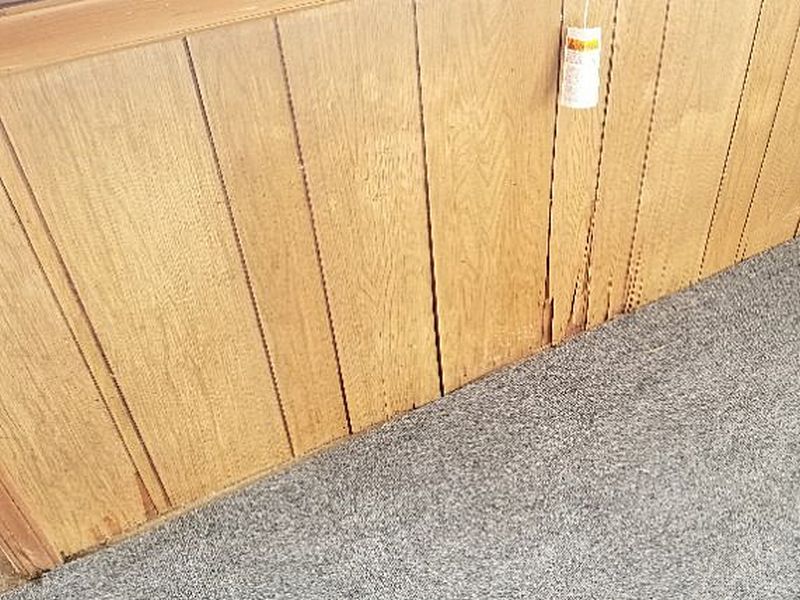
The wall paneling is missing. Replace the paneling as needed.

The wall paneling is warped. This indicates excess humidity or water penetration in the area. Hire a contractor for an evaluation and repairs as needed.
Infrared thermal imaging shows an area in the interior wall paneling with likely water penetration. Testing with a moisture meter indicates high moisture content at the time of this inspection. There may be hidden damage. See the supplied infrared images. Hire a contractor for an evaluation and to make repairs as needed.
An infrared camera DOES NOT “see” or measure moisture. All it does is show differences in surface temperatures. This has a significant effect on correct image interpretation when working in cold weather.
Evaporative Cooling vs. Thermal Capacity
Evaporative cooling and water’s high thermal capacity are the two reasons we can use infrared to detect possible moisture.
Thermal Capacity
Water’s high thermal capacity, or ability to absorb heat energy, comes into play when moisture is “trapped.” In our work this occurs primarily under roofing membranes, e.g. modified bitumen, EPDM, etc. We normally do not perform roofing membrane inspections as a part of a Home Inspection; we work from the interior of the house.
Evaporative Cooling
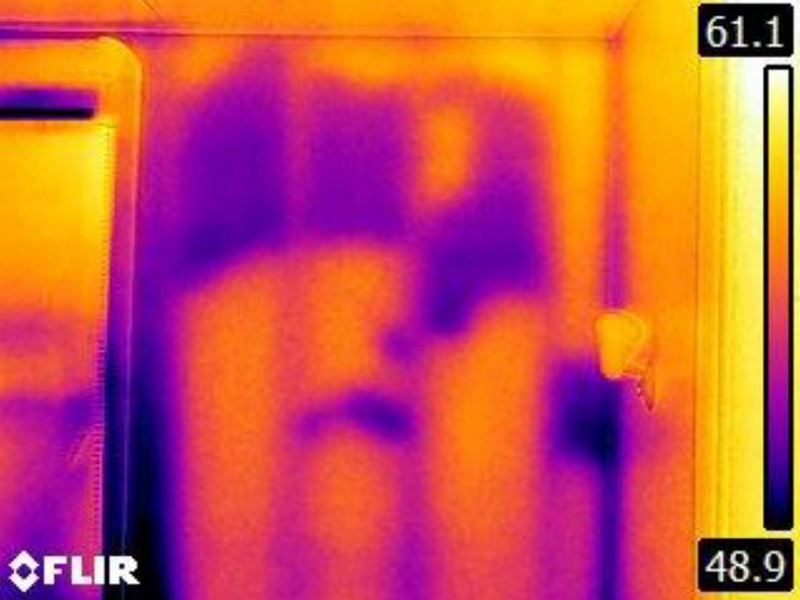
Evaporative cooling is the main thermodynamic mechanism that we rely upon to detect possible moisture. This occurs in a “open” system. While we think of a wall or ceiling area as somewhat sealed, they are sufficiently open to allow air and vapor flow.
In order for water to change state from a liquid to a vapor, heat must be added. That heat is drawn from the surrounding materials, e.g., the insulation, framing, drywall, etc. Infrared allows us to see the temperature drop when heat is removed from the building materials to fuel the water’s state change.
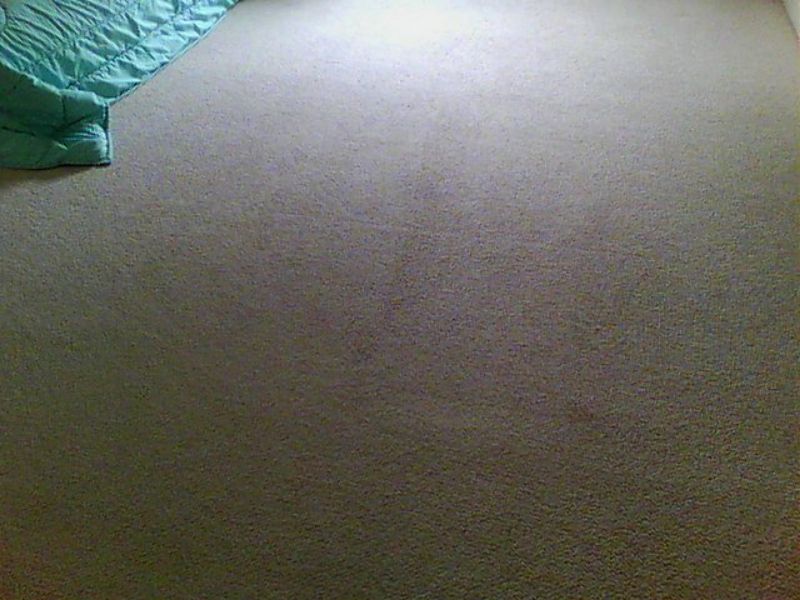
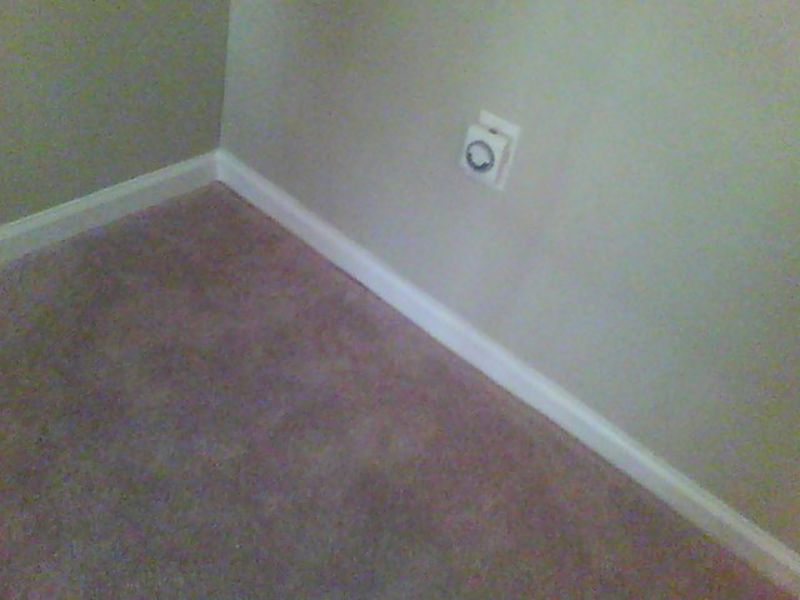
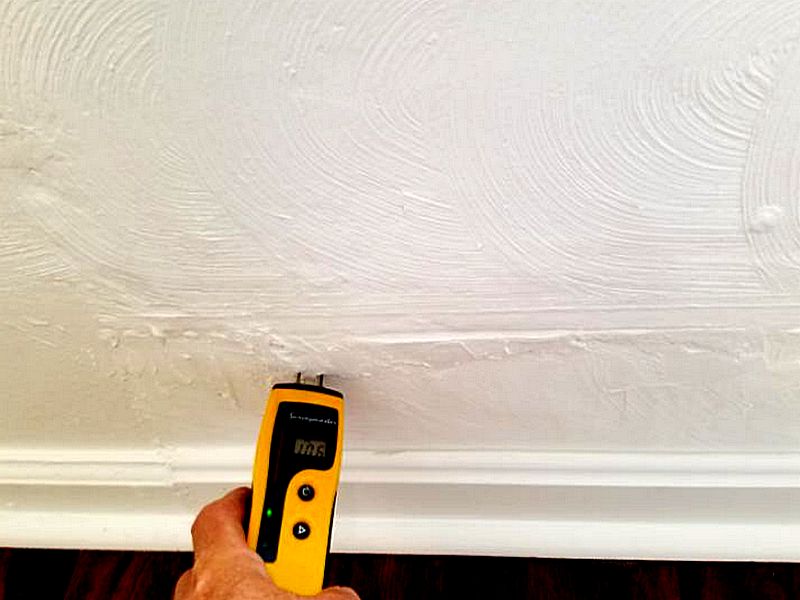
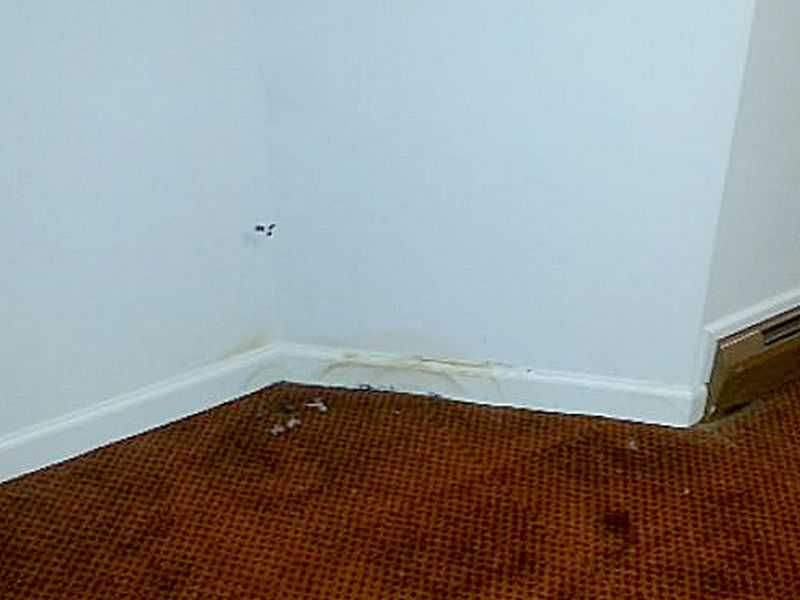
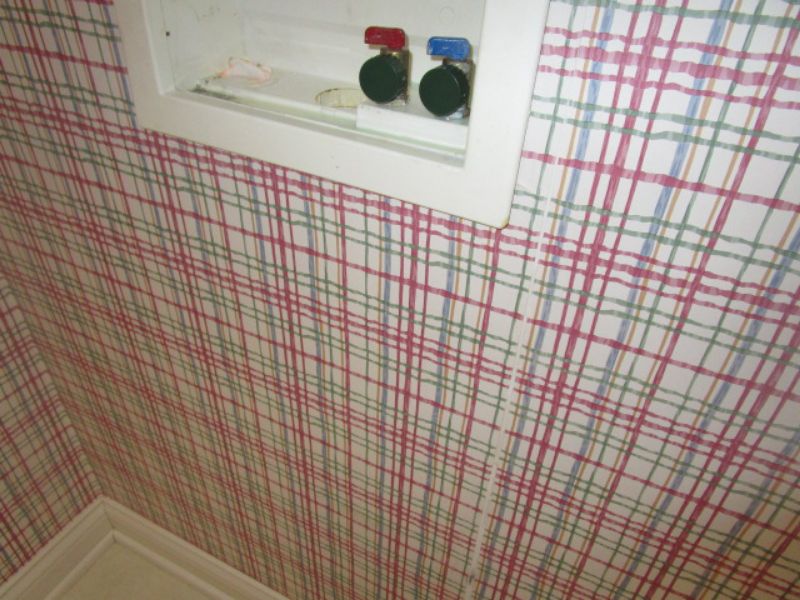
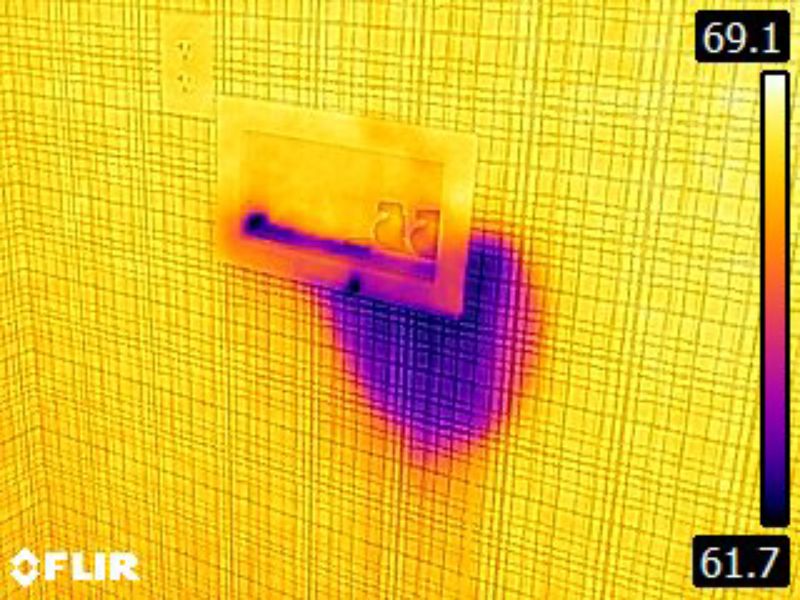
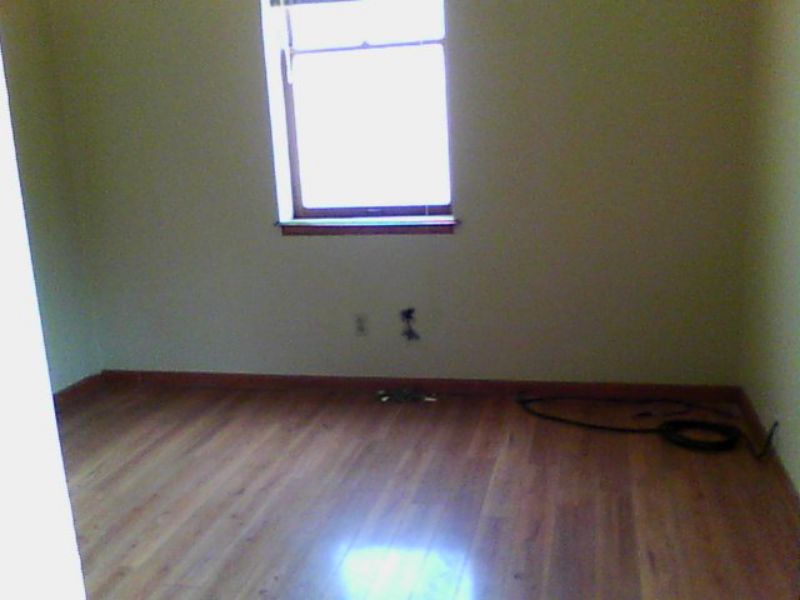
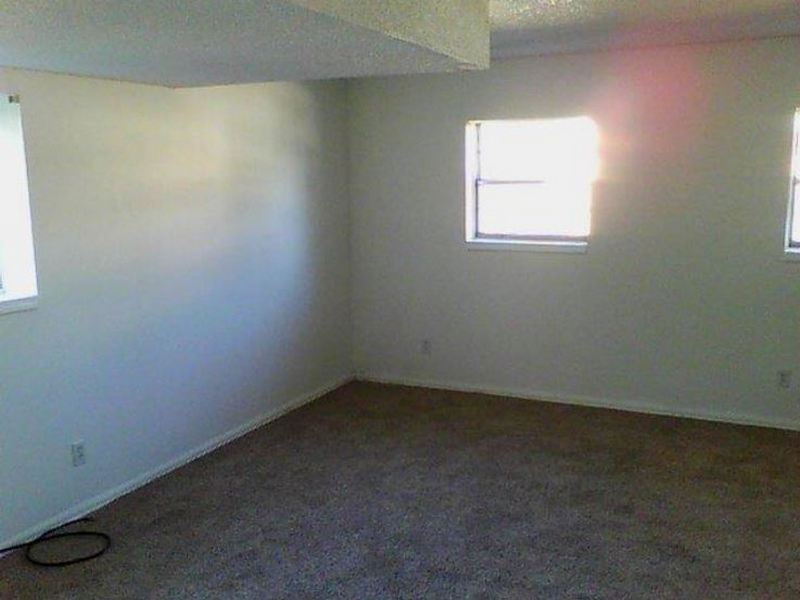
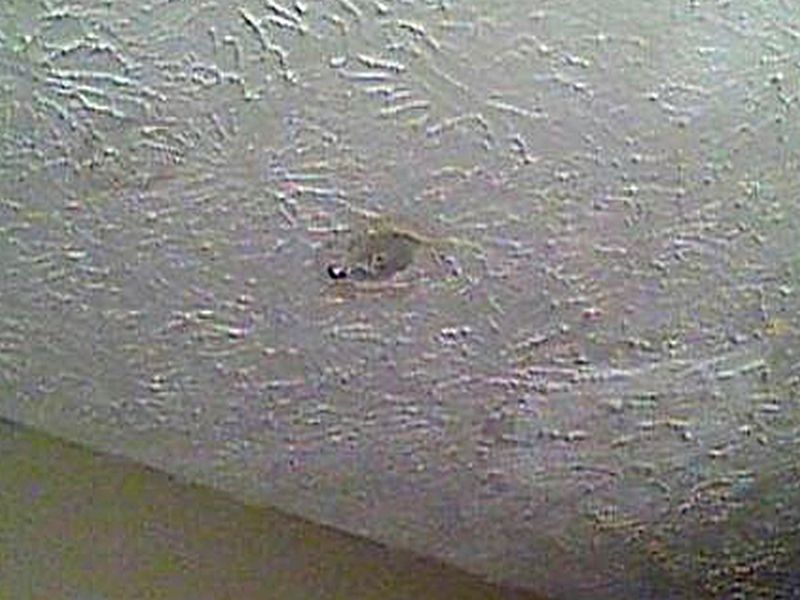
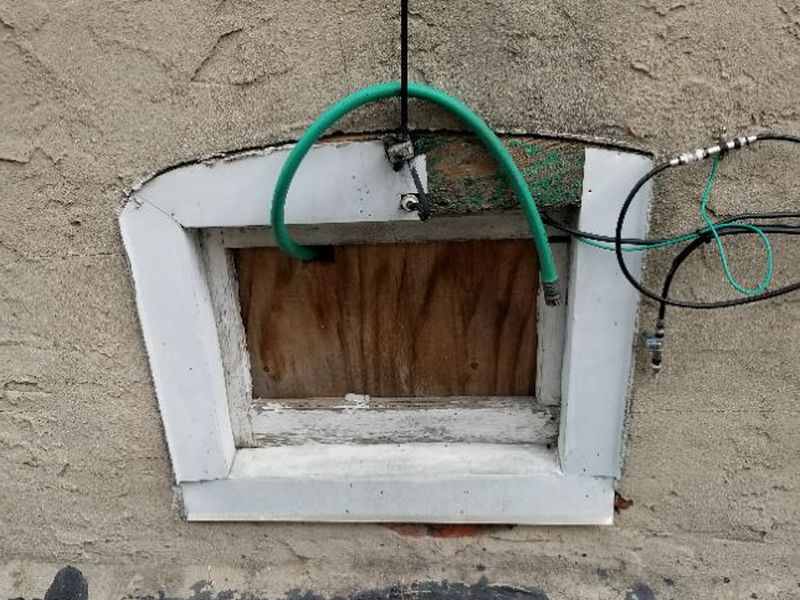
Everything looks good. The outside grade is just below the window:
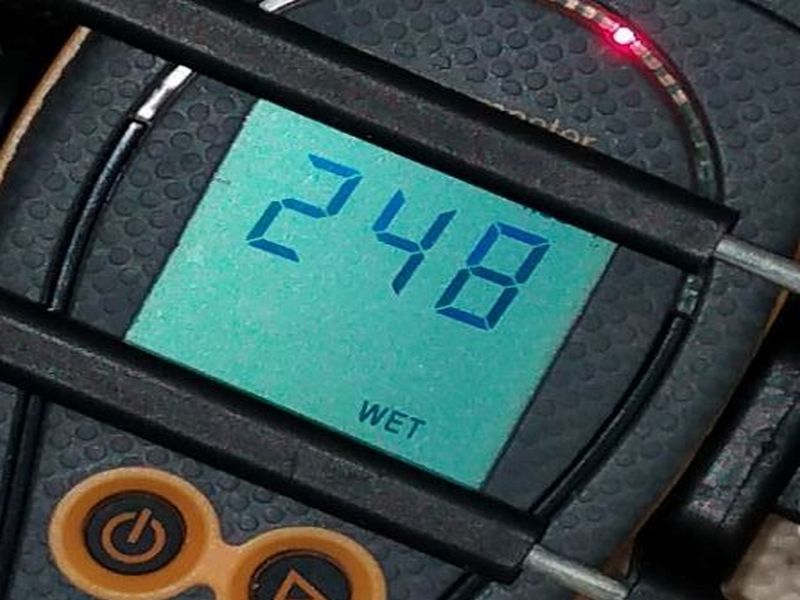
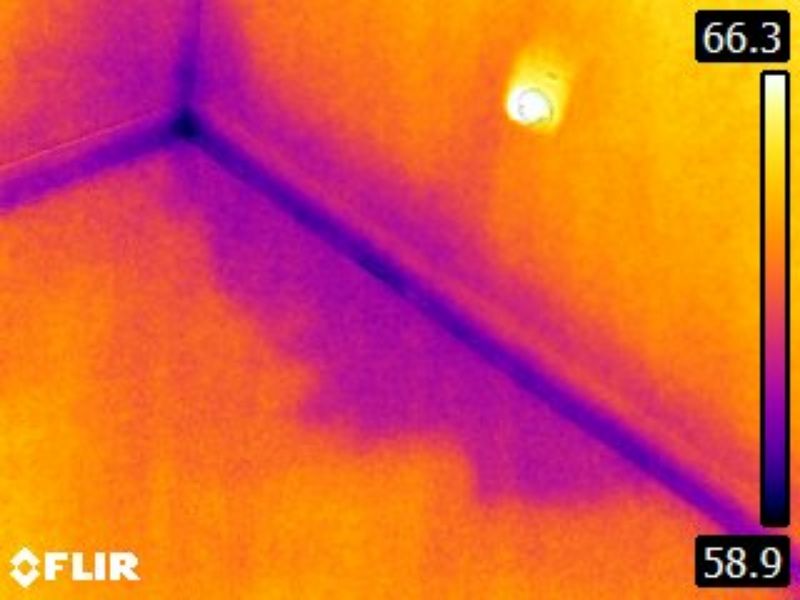
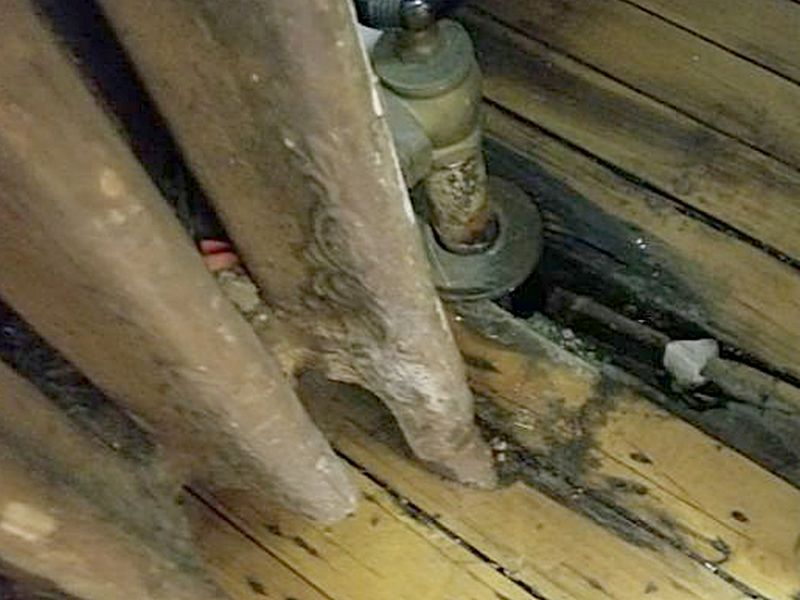
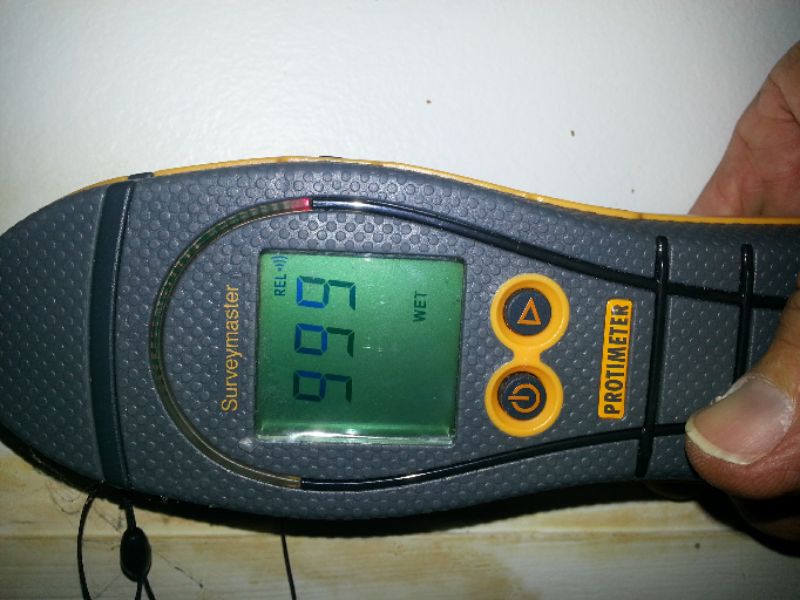
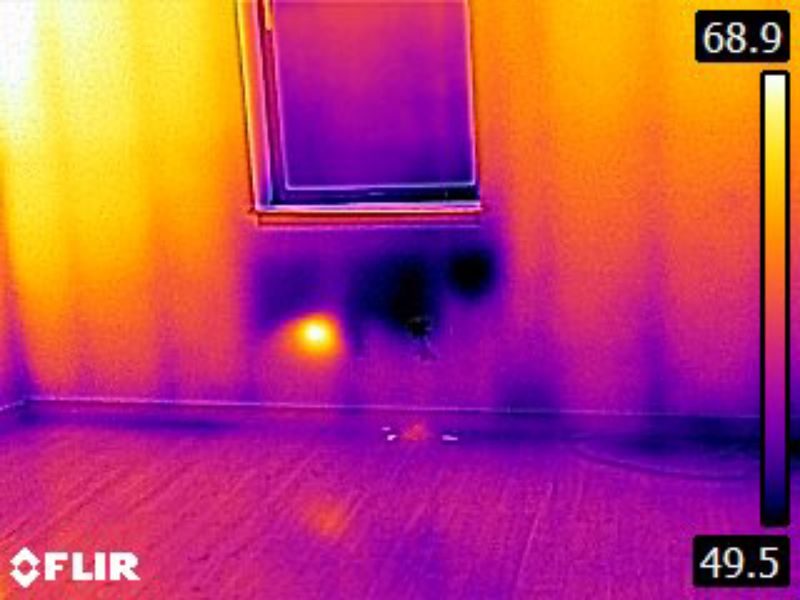
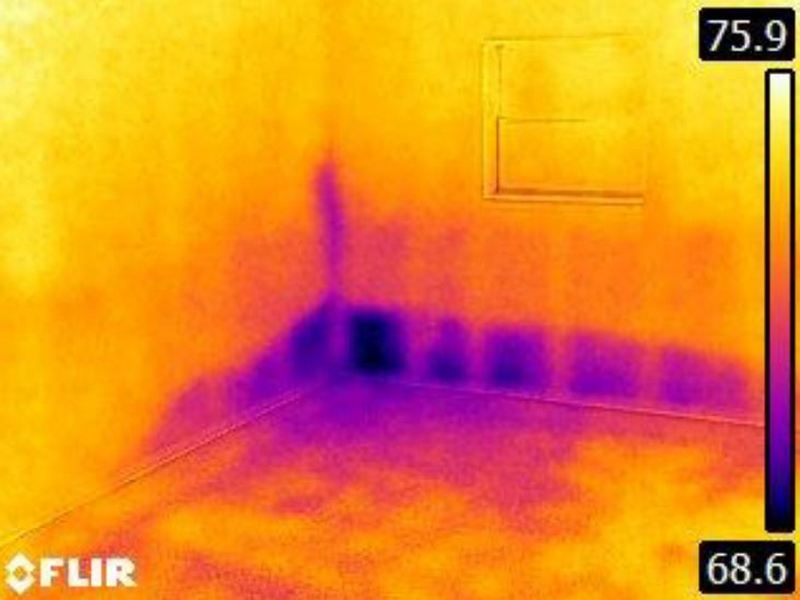
The hose faucet in the corner is leaking. Heat is drawn away from the wall materials and carpet as the water changes state:
Why does cold weather matter?
First of all, this concerns infrared imaging of exterior walls and ceilings. By exterior, we mean that the other side of the surface is an unconditioned area. This applies to a ceiling below an unconditioned attic as well as a home’s actual “exterior” wall structure. This does not apply to fully interior walls, or to ceilings below conditioned areas, i.e. the 1st. floor ceiling in a 2-story house.
Cold weather matters because, as noted, we rely primarily on evaporative cooling to detect possible moisture. Simply put, water has a hard time changing from a liquid to a vapor when it’s 45°F outside. True, some heat conducts into the wall cavity in a heated house. But the colder it is outside, the harder evaporative cooling becomes. In the Winter cold spots are much more likely to indicate an insulation anomaly.
Confirm suspected moisture with your meter whenever possible!
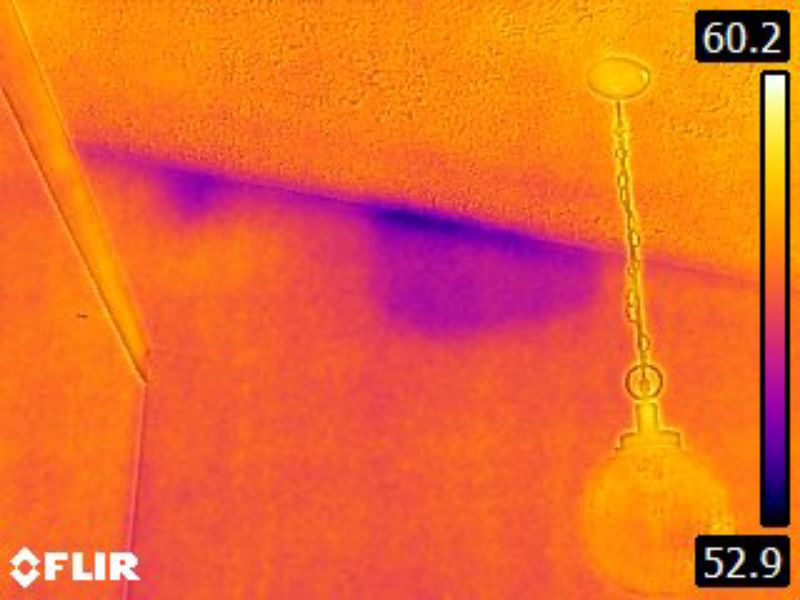
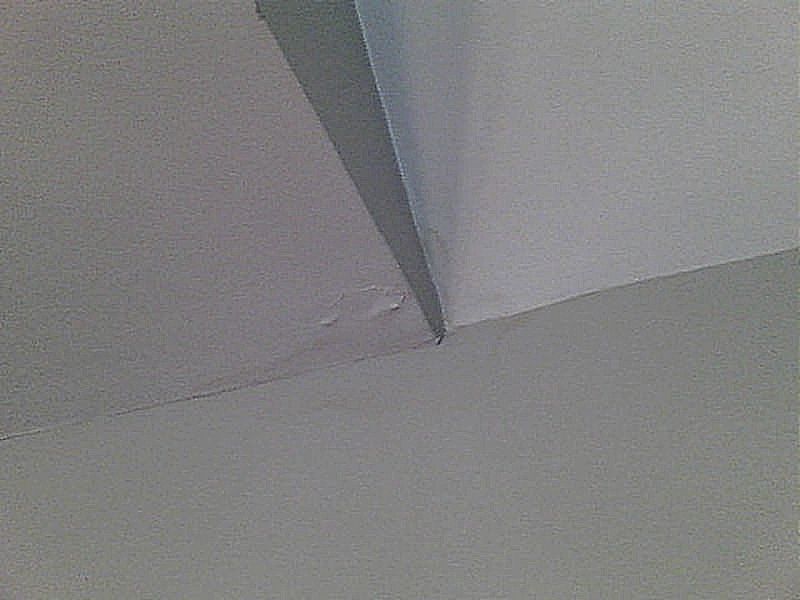
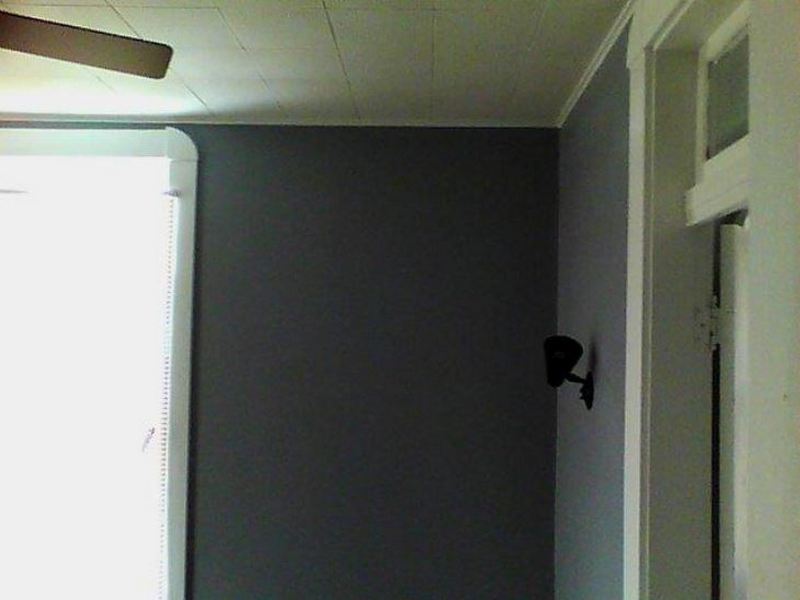
Visible light image in Winter:
IR image: why would moisture flow downwards like this? Confirm with your moisture meter; it’s an insulation anomaly!
Winter IR image: the kneewall isn’t insulated, and it’s too cold for evaporative cooling. Use your moisture meter.
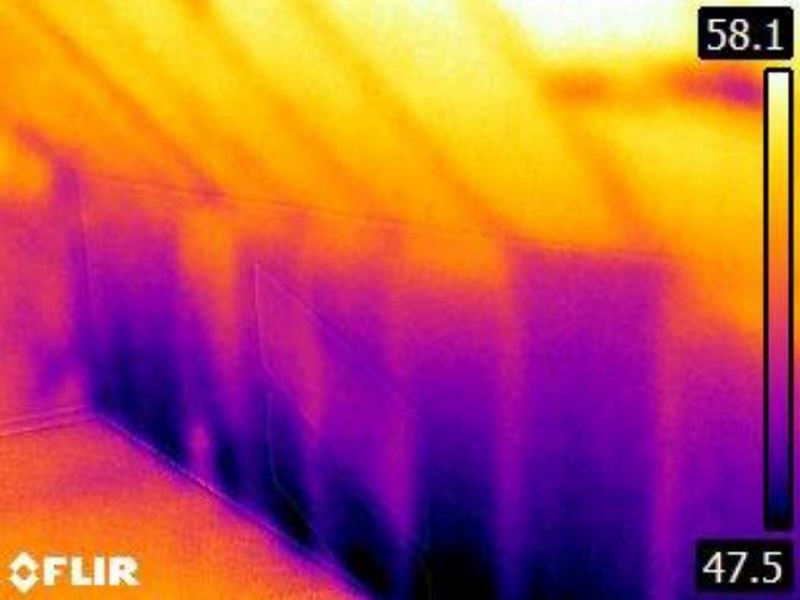
Look at the temperatures! Why would water flow this way? Use your moisture meter.
Walls Limitation and Information Statements
Wall surfaces cracks are typical, generally due to shrinkage, cosmetic repairs: The cracks in the wall surfaces are typical. These are generally due to the shrinkage of lumber and/or normal settlement. Make cosmetic repairs before painting.
Ceilings
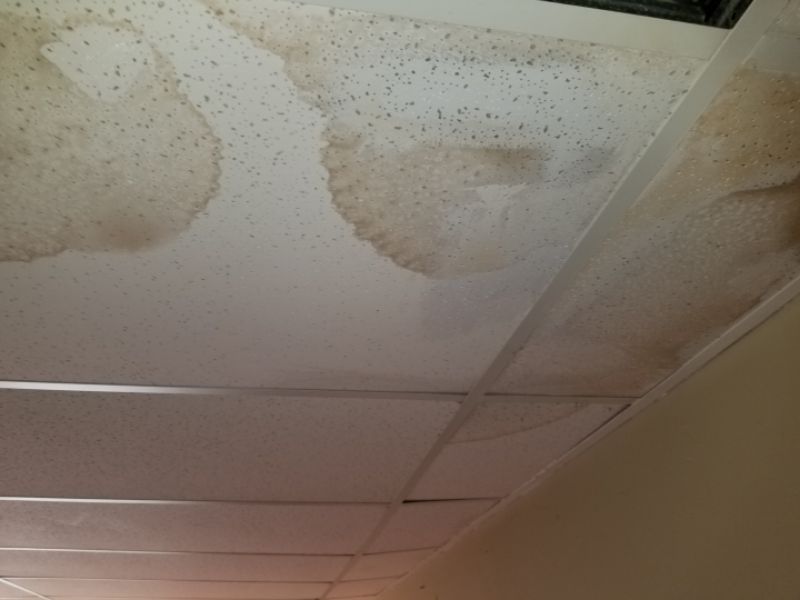
Ceilings are not just cosmetic “caps” for interior rooms. They are also load-bearing floors for the spaces above. This is true even if that space is an unfinished, unconditioned attic. As such, we must be concerned with what a ceiling’s condition may be revealing beyond just the possibility of drywall or acoustic tiles falling on us. Is there an failing floor above due to excess loading or a structural defect? Why are the tiles or suspended panels loose? What’s the significance now and in the future of a stain? Your IR inspection must include the ceilings, and a follow-up as possible with your moisture meter.
Inspect for cracks, damage, loose coverings and tiles, sagging surfaces, and stains. Remember that garages must be separated from living spaces by an intact firewall, including any access hatches or stairs. Carry a lightweight step stool or a selfie stick to enable using your moisture meter to confirm the condition of any stains. Always report using the relevant IR “picture pairs” and meter views placed in the dedicated photo slots in the template.
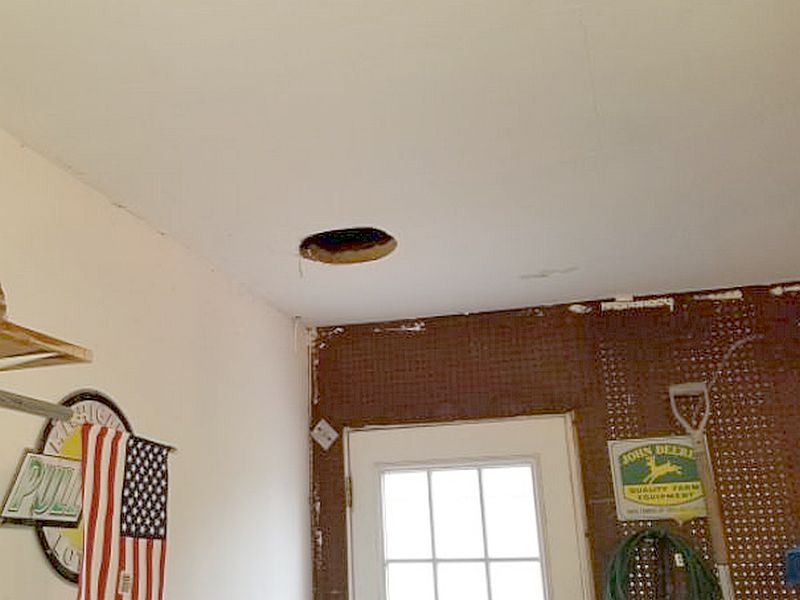
The ceiling is damaged. This is a potential safety issue. Repair the ceiling as needed.
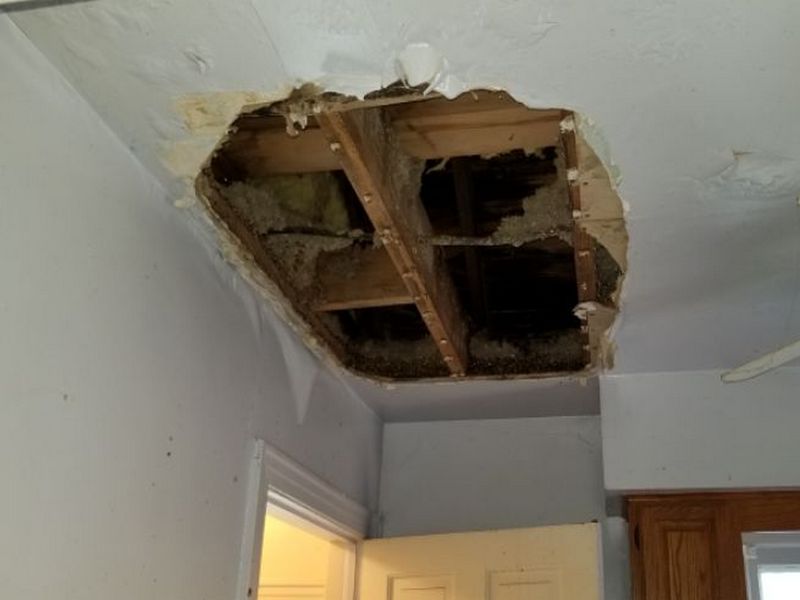
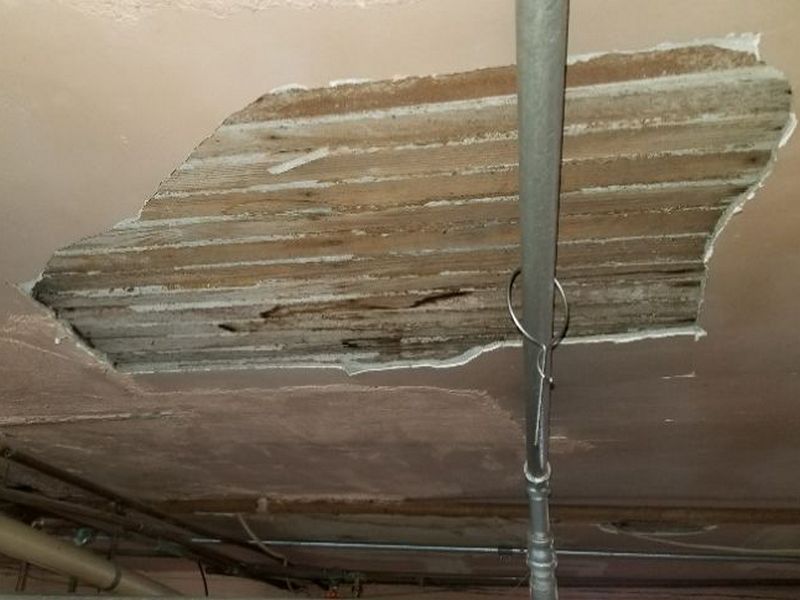
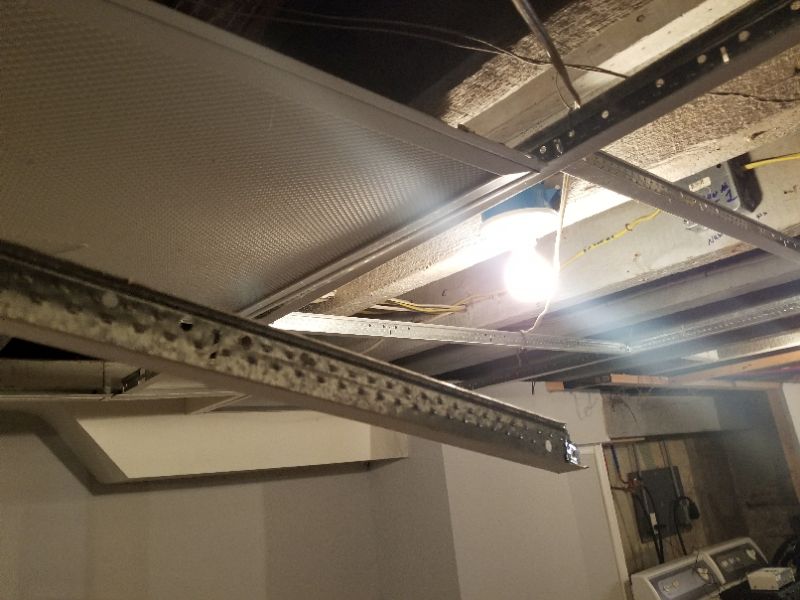
The ceiling is loose or sagging. The reason for this is not known, and may allow a failure and personal injury. Hire a contractor for an evaluation and repairs as needed.
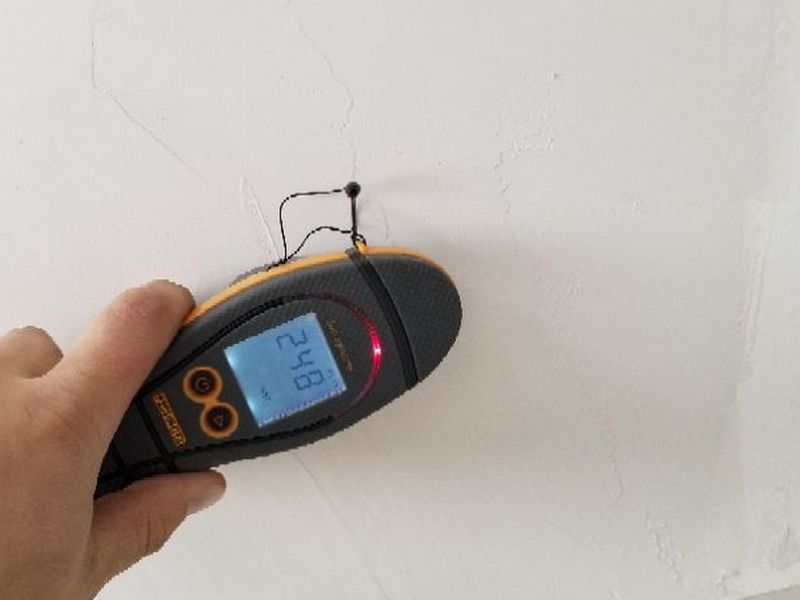
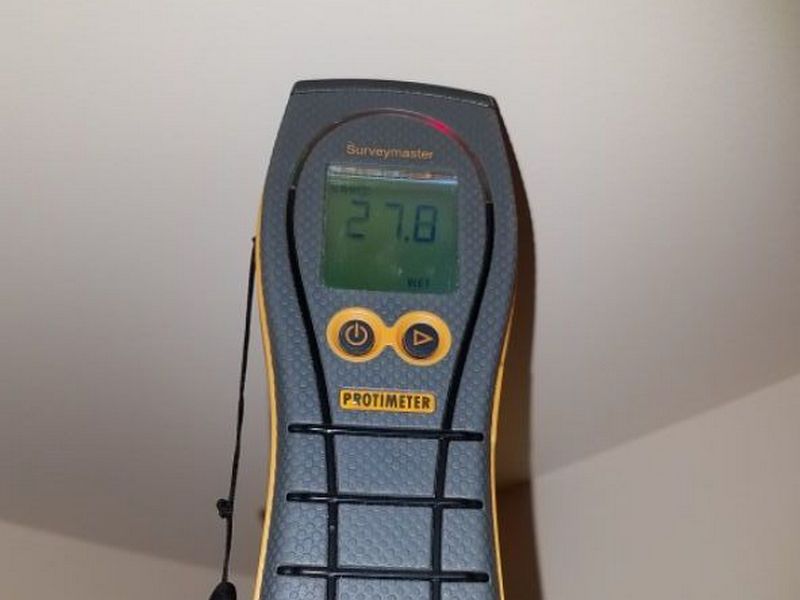
The ceiling is water stained or damaged. Testing with a moisture meter indicates low moisture content (dry) at the time of this inspection. Hire a contractor for an evaluation and to make repairs as needed.

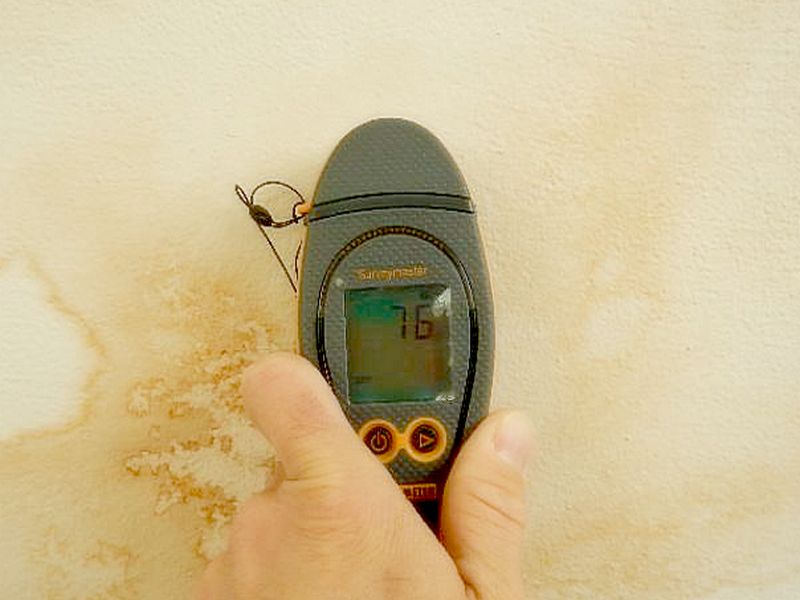
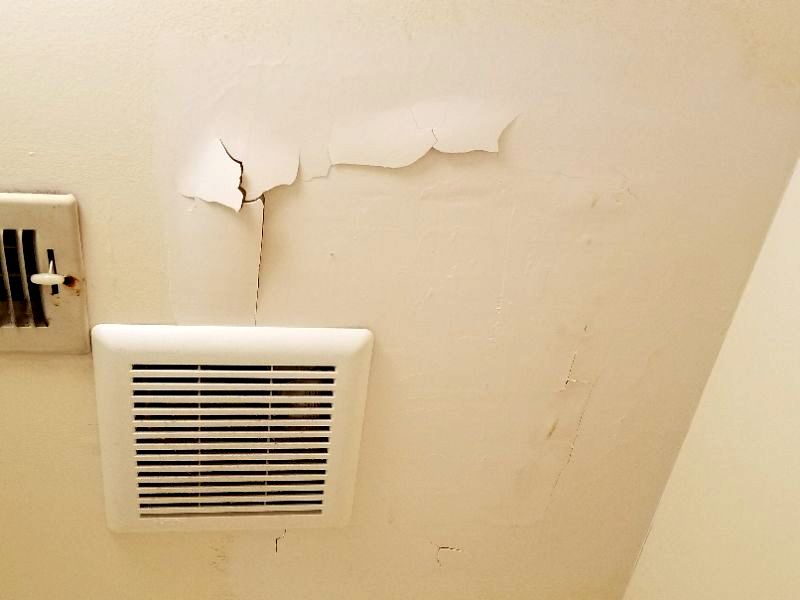
The ceiling is water stained or damaged. Testing with a moisture meter indicates high moisture content at the time of this inspection. There may be hidden damage. Hire a contractor for an evaluation and to make repairs as needed.
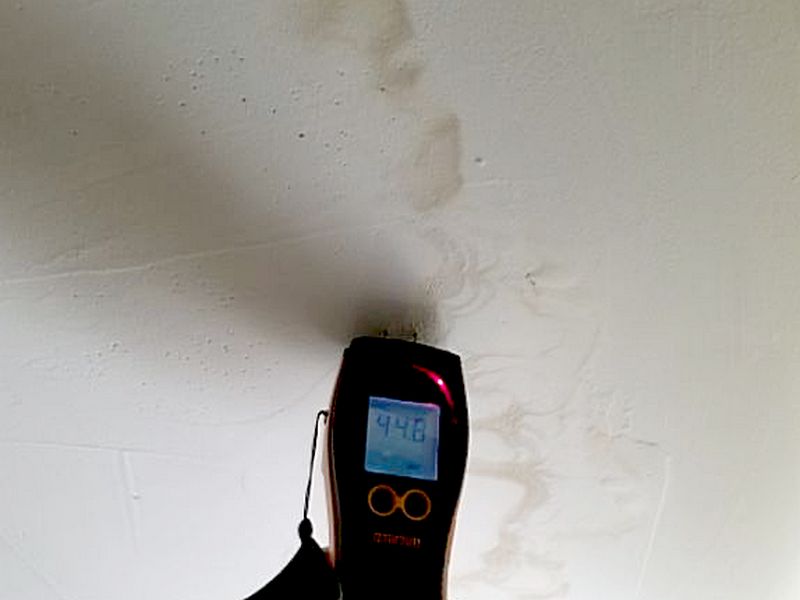
Infrared thermal imaging shows an area in the ceiling with likely water penetration. Testing with a moisture meter indicates high moisture content at the time of this inspection. There may be hidden damage. See the supplied infrared images. Hire a contractor for an evaluation and to make repairs as needed.
Infrared thermal imaging shows an inaccessible area in the ceiling with likely water penetration. Confirmation with a moisture meter for high moisture content is not possible. There may be hidden damage. See the supplied infrared images. Hire a contractor for an evaluation and to make repairs as needed.
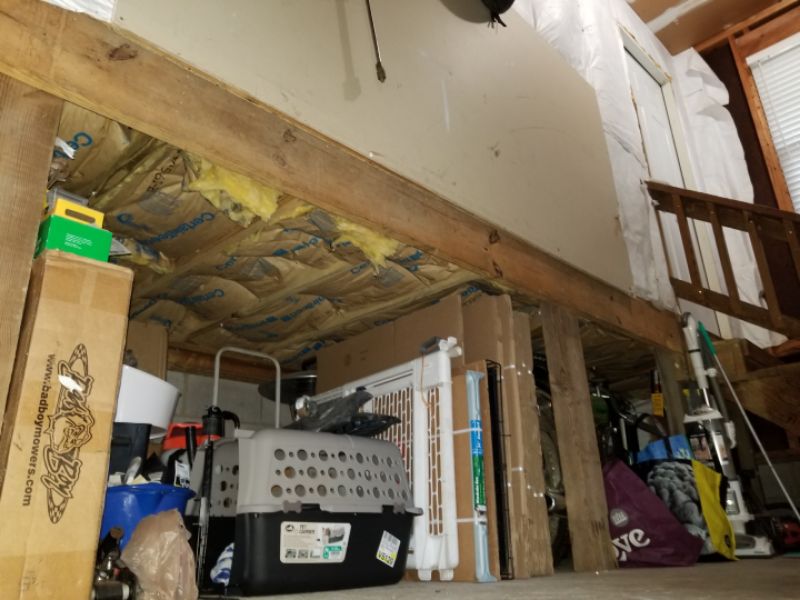
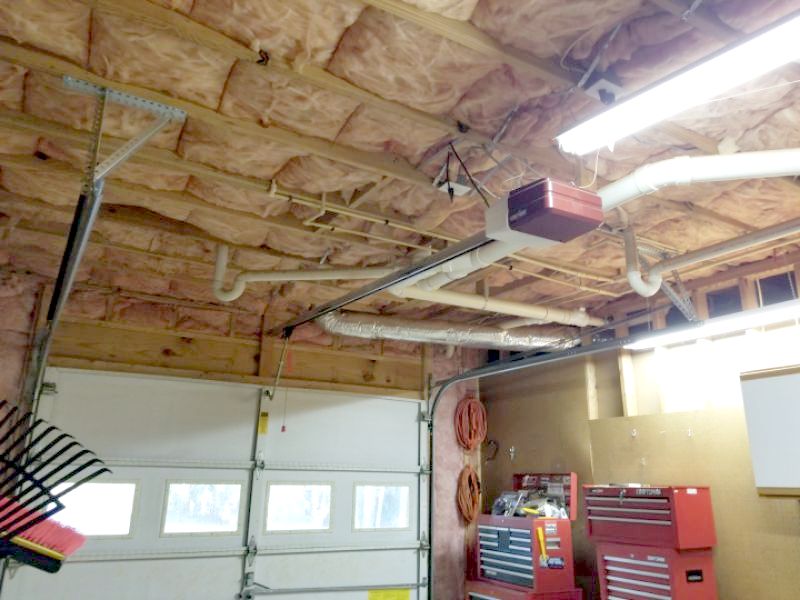
There is a breach (hole, damage or opening) in the fire-rated ceiling. This is a safety concern. Replace the portions of the ceiling with fire-rated material.

The ceiling separating the garage from the adjacent living area is not fire-rated. This is a safety concern. Replace the ceiling with fire-rated materials.

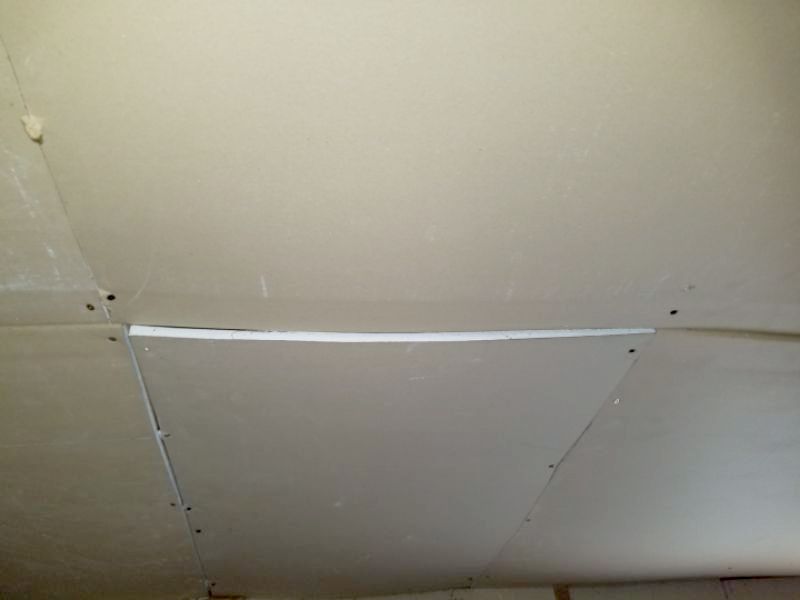
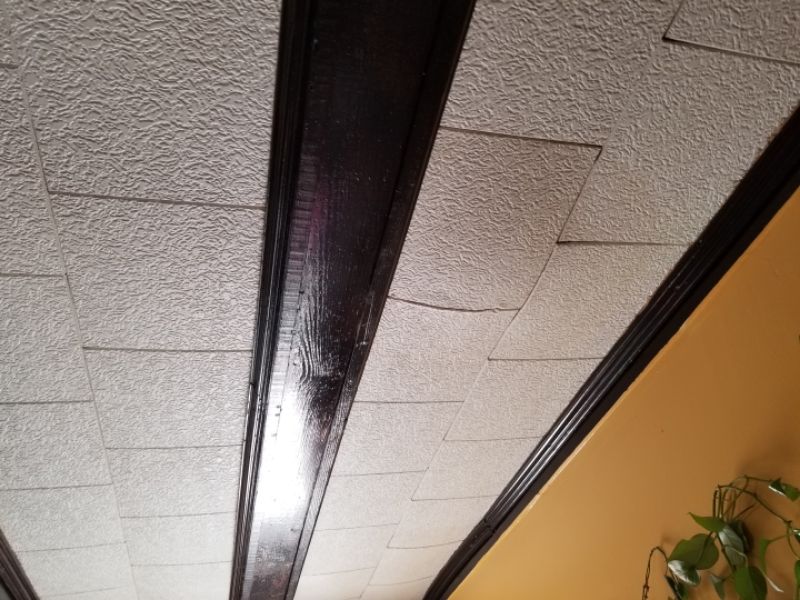
The ceiling tiles are loose or damaged. This is a potential safety hazard. Repair or replace the tiles.
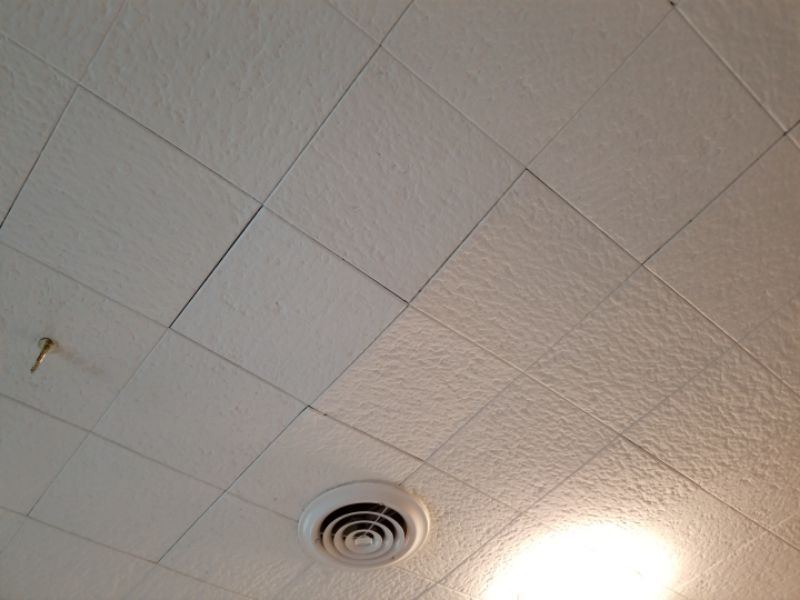
The ceiling tiles are water stained or damaged. Testing with a moisture meter indicates low moisture content (dry) at the time of this inspection. Hire a contractor for an evaluation and to make repairs as needed.

An infrared camera DOES NOT “see” or measure moisture. All it does is show differences in surface temperatures. This has a significant effect on correct image interpretation when working in cold weather.
Evaporative Cooling vs. Thermal Capacity
Evaporative cooling and water’s high thermal capacity are the two reasons we can use infrared to detect possible moisture.
Thermal Capacity
Water’s high thermal capacity, or ability to absorb heat energy, comes into play when moisture is “trapped.” In our work this occurs primarily under roofing membranes, e.g. modified bitumen, EPDM, etc. We normally do not perform roofing membrane inspections as a part of a Home Inspection; we work from the interior of the house.
Evaporative Cooling
Evaporative cooling is the main thermodynamic mechanism that we rely upon to detect possible moisture. This occurs in a “open” system. While we think of a wall or ceiling area as somewhat sealed, they are sufficiently open to allow air and vapor flow.
In order for water to change state from a liquid to a vapor, heat must be added. That heat is drawn from the surrounding materials, e.g., the insulation, framing, drywall, etc. Infrared allows us to see the temperature drop when heat is removed from the building materials to fuel the water’s state change.
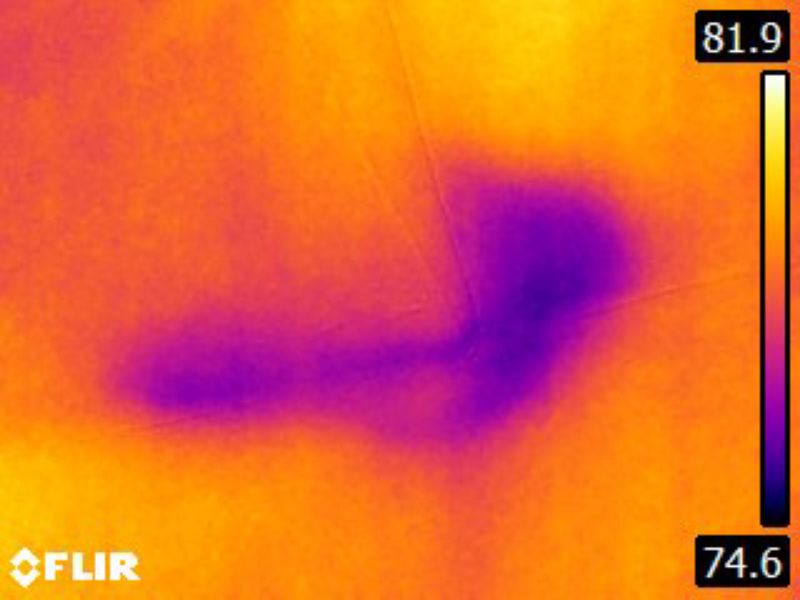
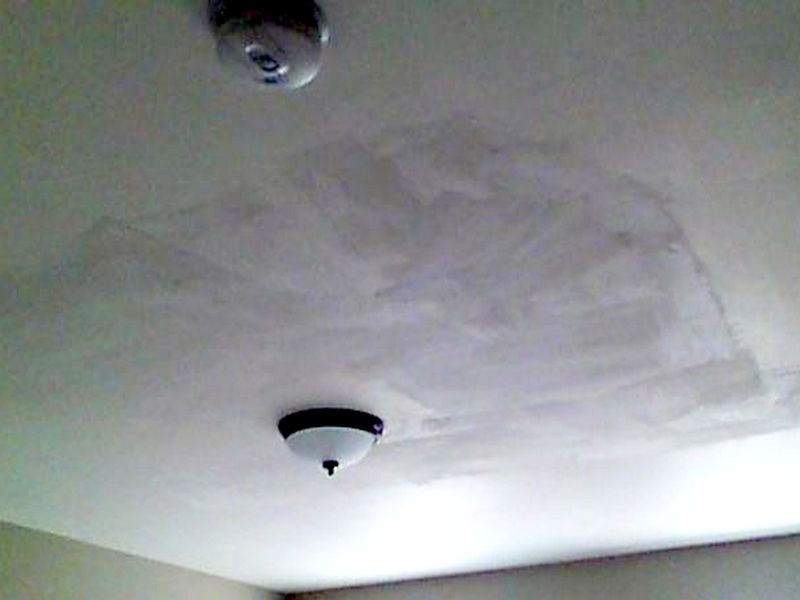
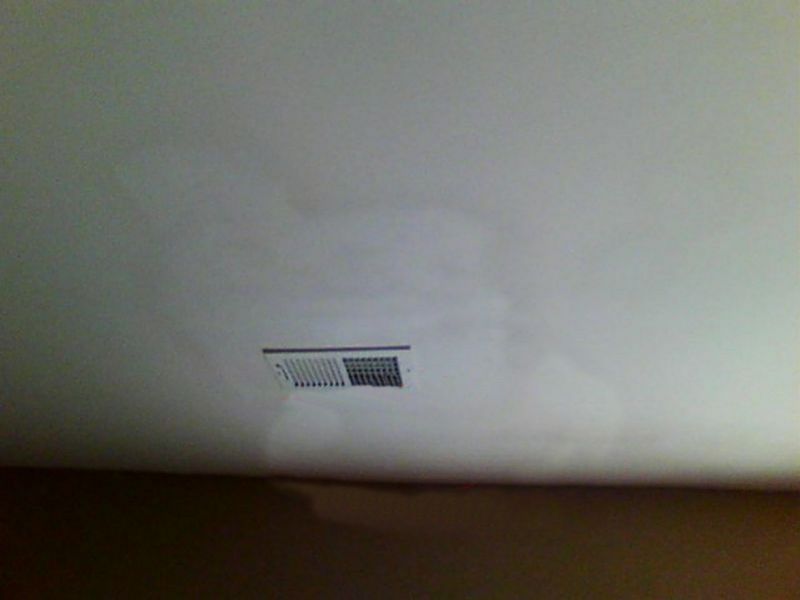
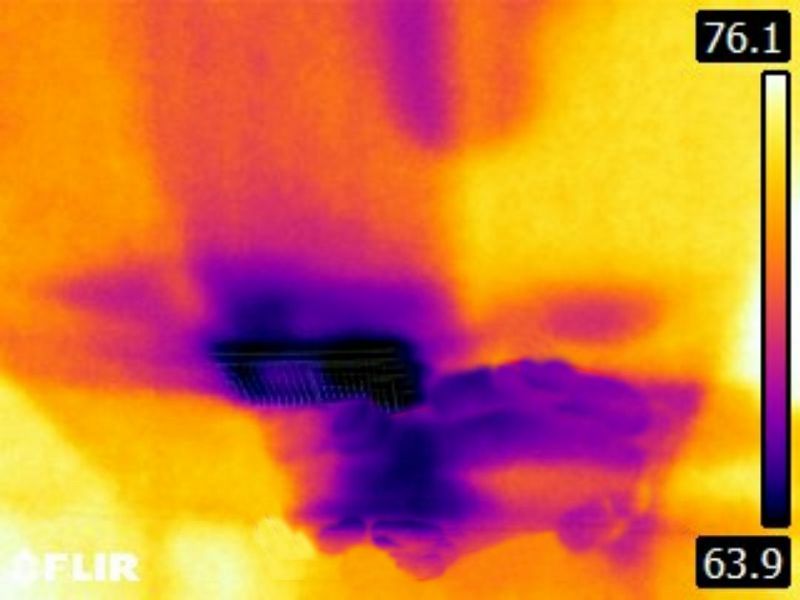
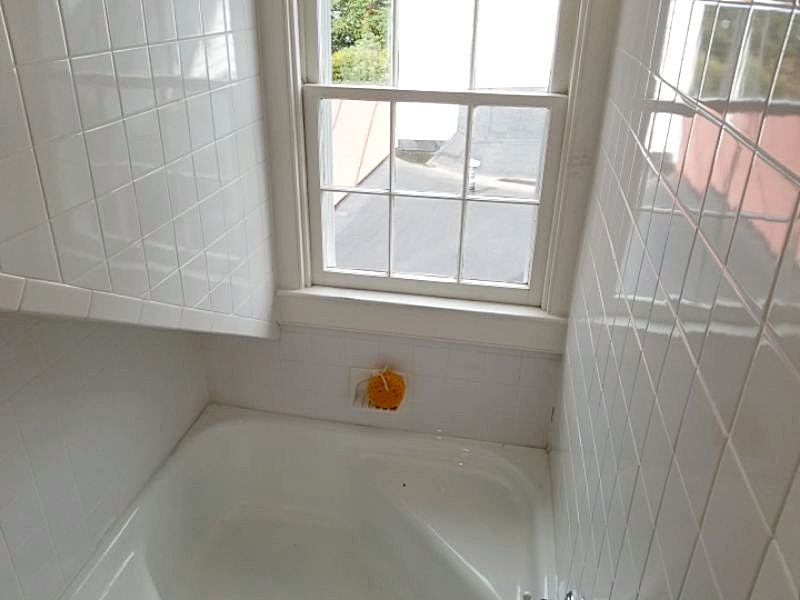
Everything looks good. This is the kitchen ceiling just below the master bathroom:
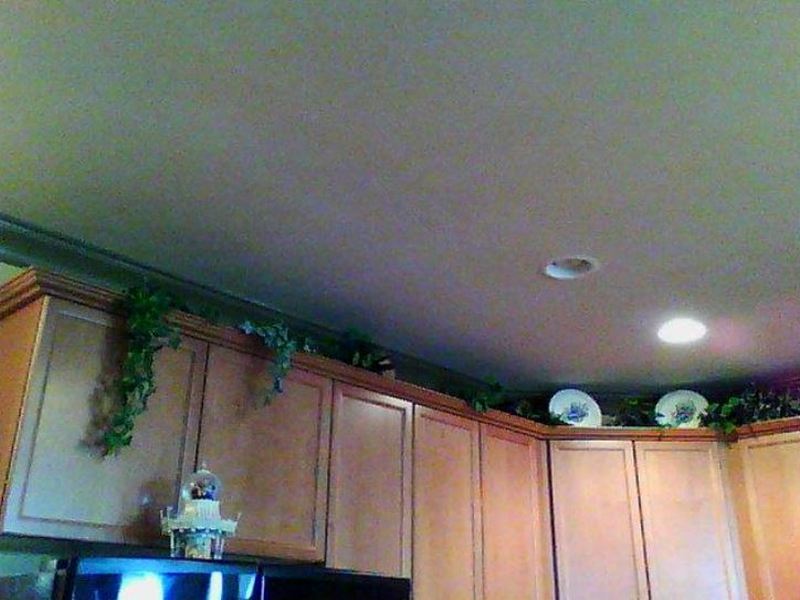
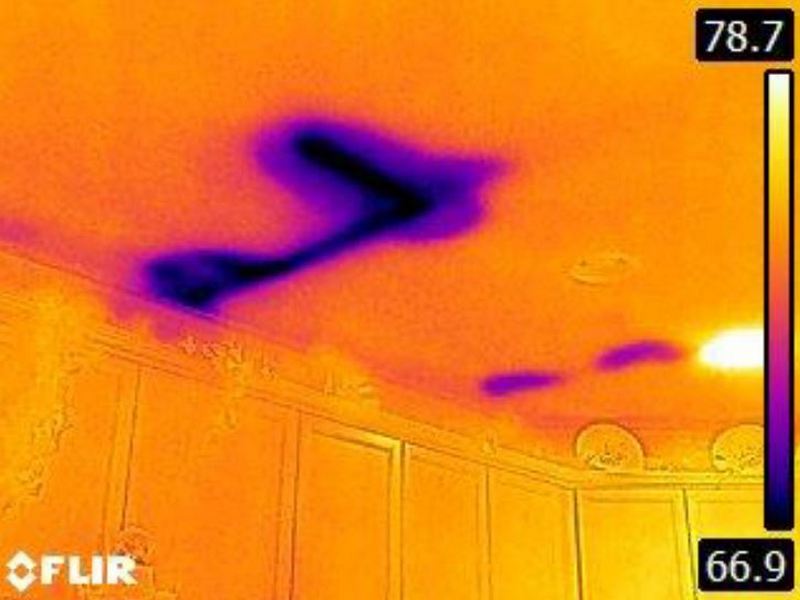
The tub and shower are leaking. Heat is drawn away from the ceiling and floor materials as the water changes state:
Why does cold weather matter?
First of all, this concerns infrared imaging of exterior walls and ceilings. By exterior, we mean that the other side of the surface is an unconditioned area. This applies to a ceiling below an unconditioned attic as well as a home’s actual “exterior” wall structure. This does not apply to fully interior walls, or to ceilings below conditioned areas, i.e. the 1st. floor ceiling in a 2-story house.
Cold weather matters because, as noted, we rely primarily on evaporative cooling to detect possible moisture. Simply put, water has a hard time changing from a liquid to a vapor when it’s 45°F outside. True, some heat conducts into the wall cavity in a heated house. But the colder it is outside, the harder evaporative cooling becomes. In the Winter cold spots are much more likely to indicate an insulation anomaly.
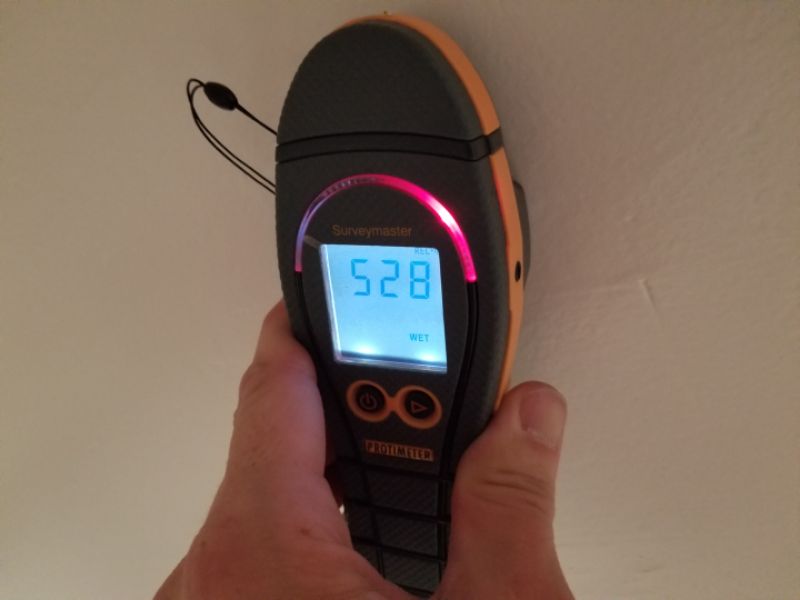
Confirm suspected moisture with your meter whenever possible!
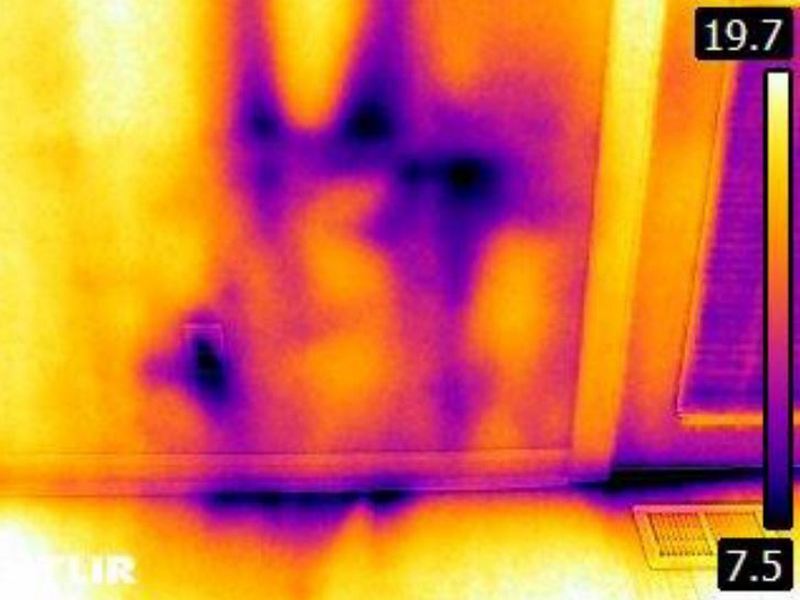
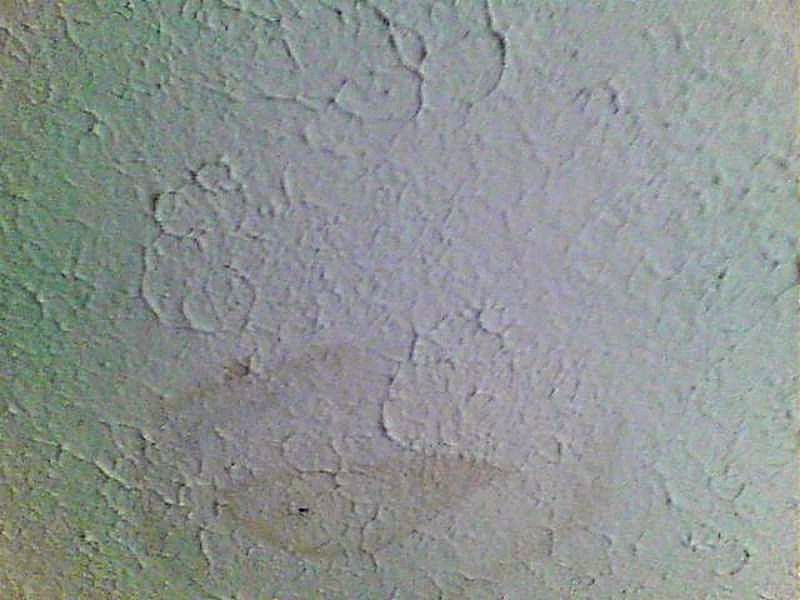
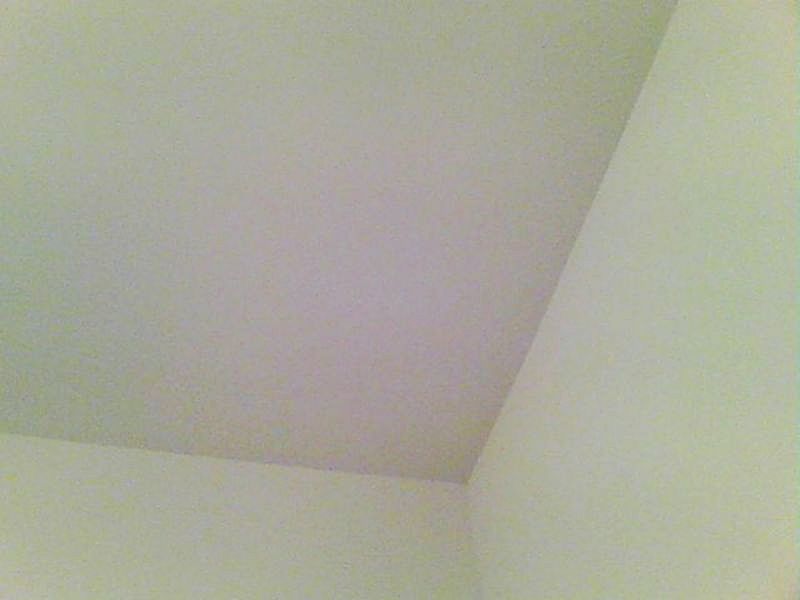
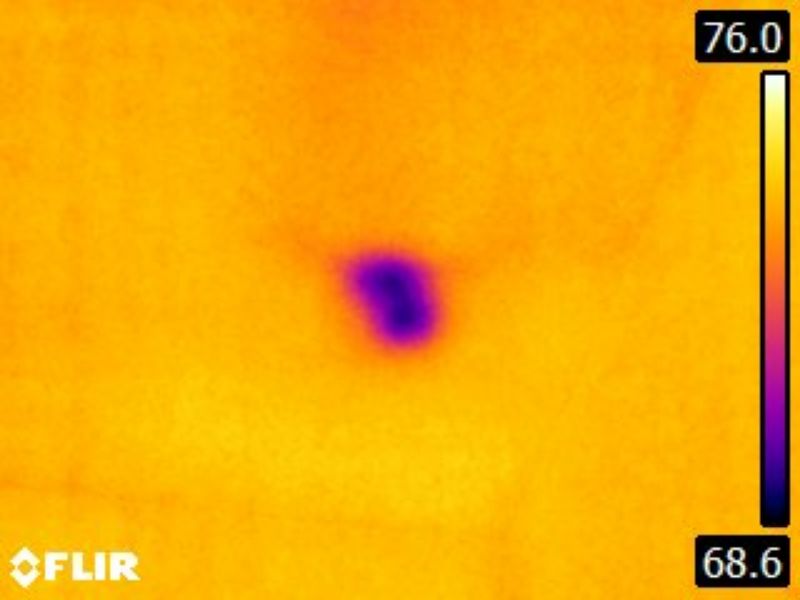
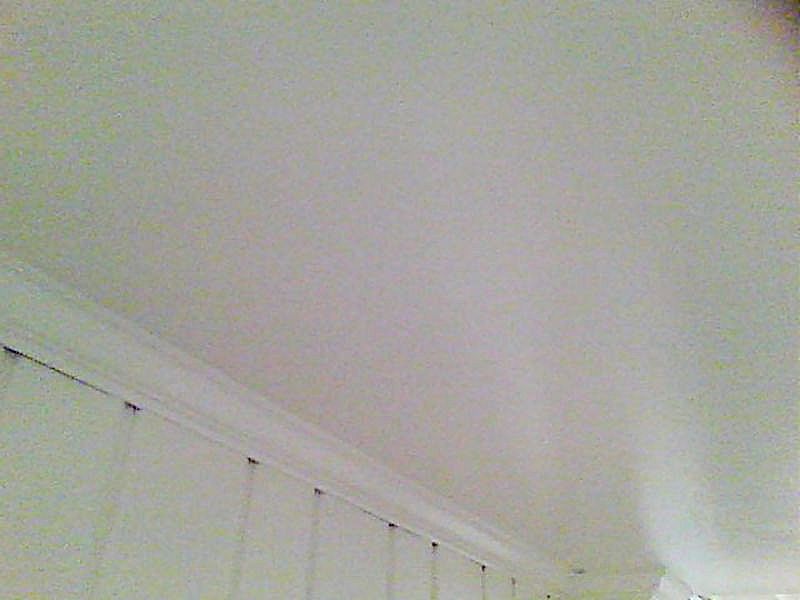
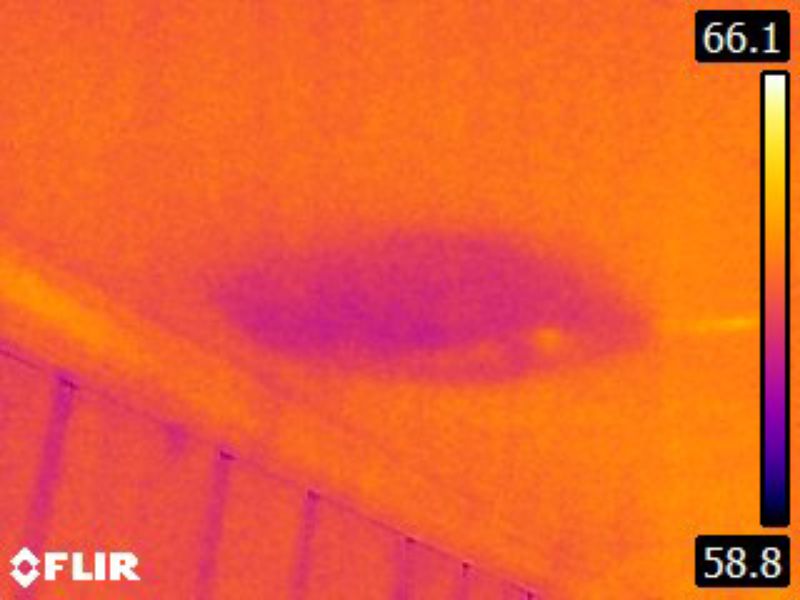
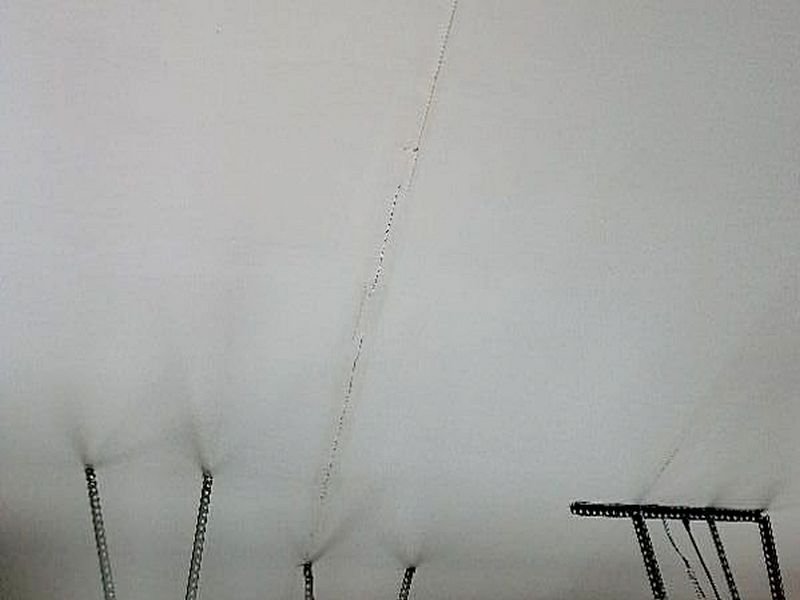
Visible light image in Winter:

IR image: why would moisture flow downwards like this? Confirm with your moisture meter; it’s an insulation anomaly!
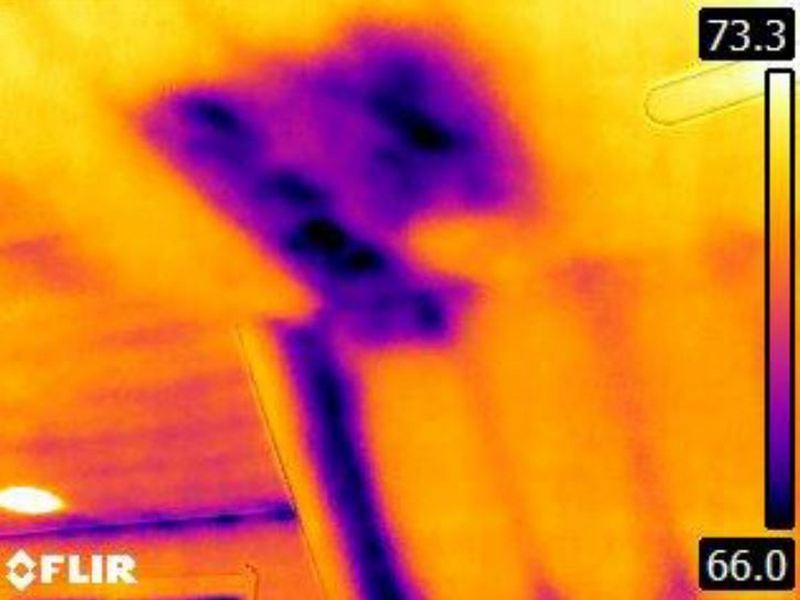
Winter IR image: the ceiling isn’t insulated, and it’s too cold for evaporative cooling. Use your moisture meter.
Ceilings Limitation and Information Statements
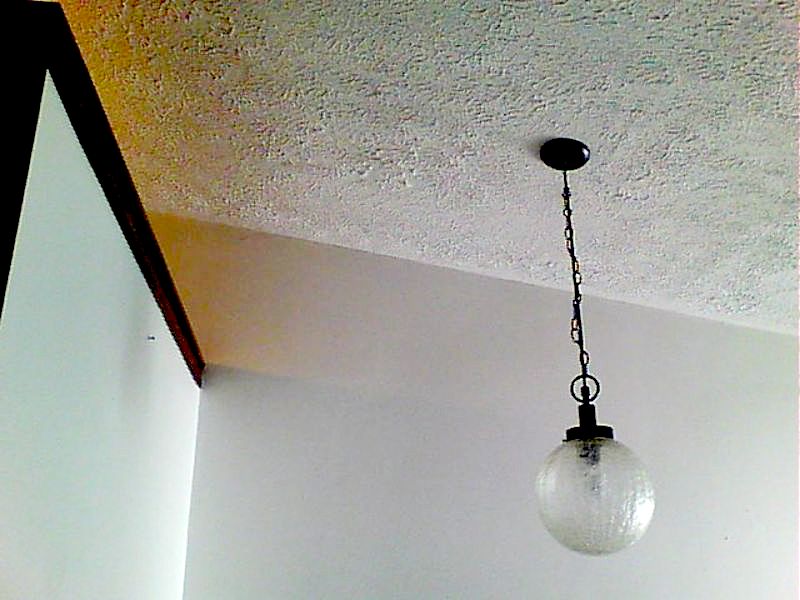
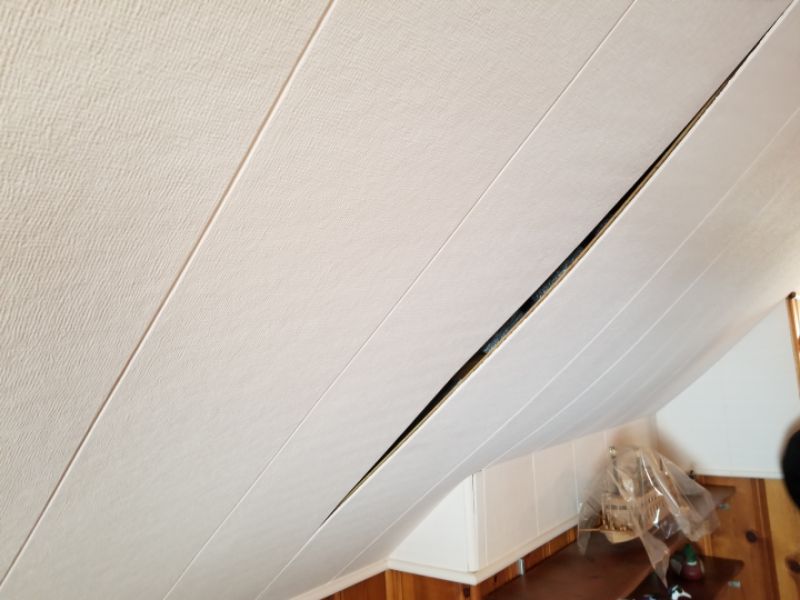
Vaulted/cathedral ceiling: There is a vaulted or cathedral ceiling. This limits the inspection due to lack of access for evaluation of spaces between ceiling and underside of roof.
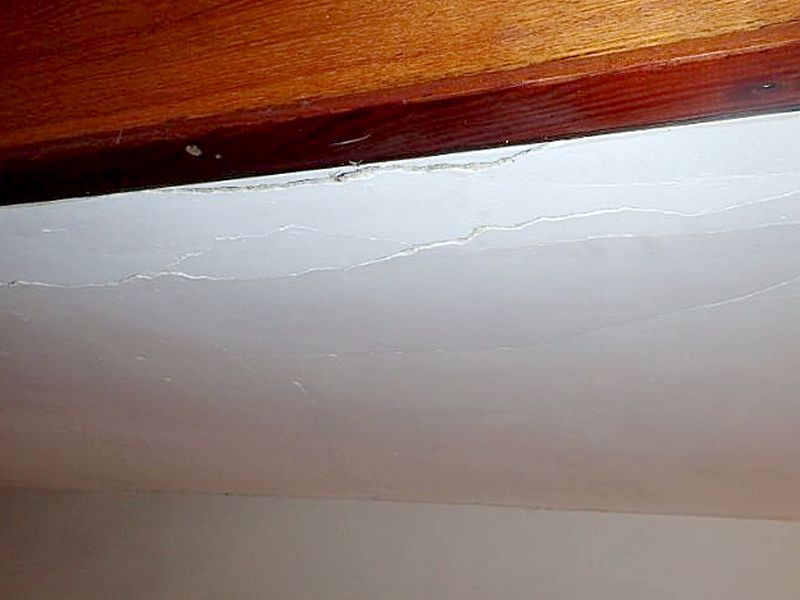
Ceiling cracks are typical, generally due to shrinkage, cosmetic repairs: The cracks in the ceiling surfaces are typical. These are generally due to the shrinkage of lumber and/or normal settlement. Make cosmetic repairs before painting.
Stairs/Steps
Stairs and steps are a basic and heavily-used part of any multi-level house. Additionally, more accidents and injuries occur on or around them than anywhere else in the home. Improper construction, damage, and neglected maintenance can turn these commonplace features we all take for granted into a significant hazard. They must be inspected thoroughly and reported on accurately.
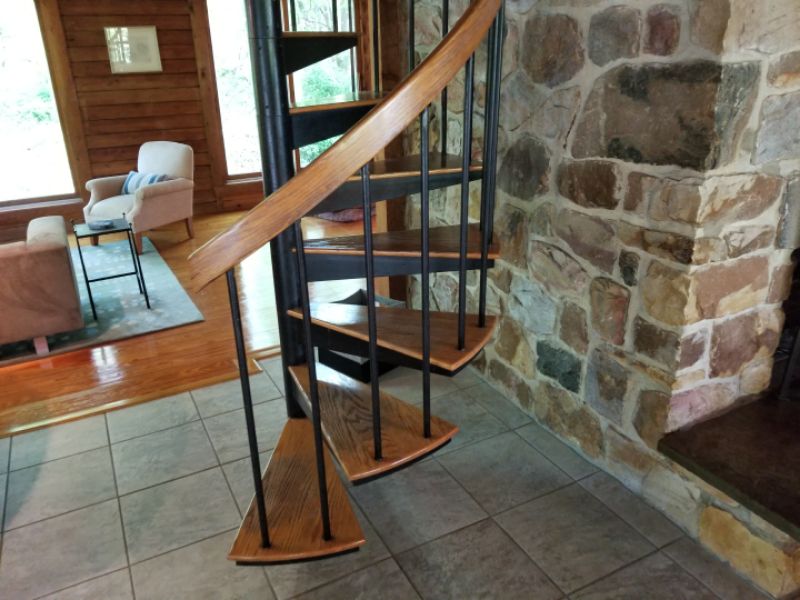
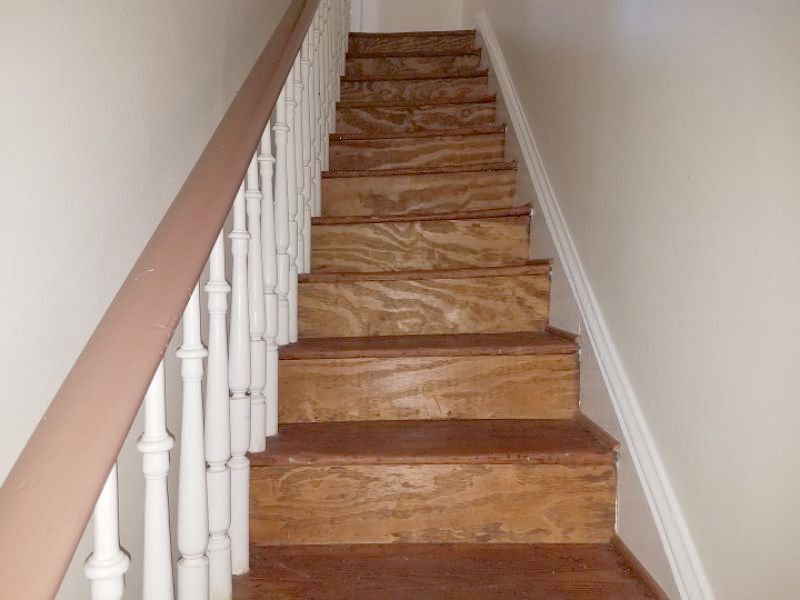
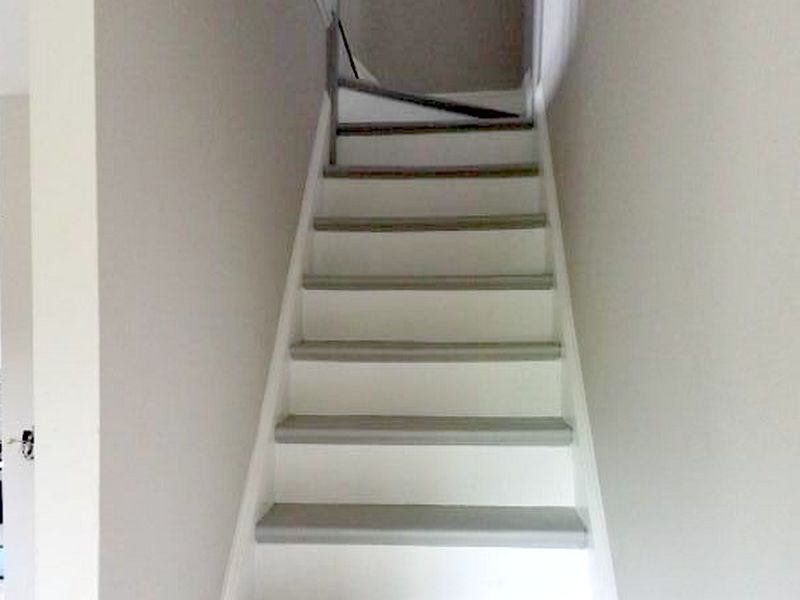
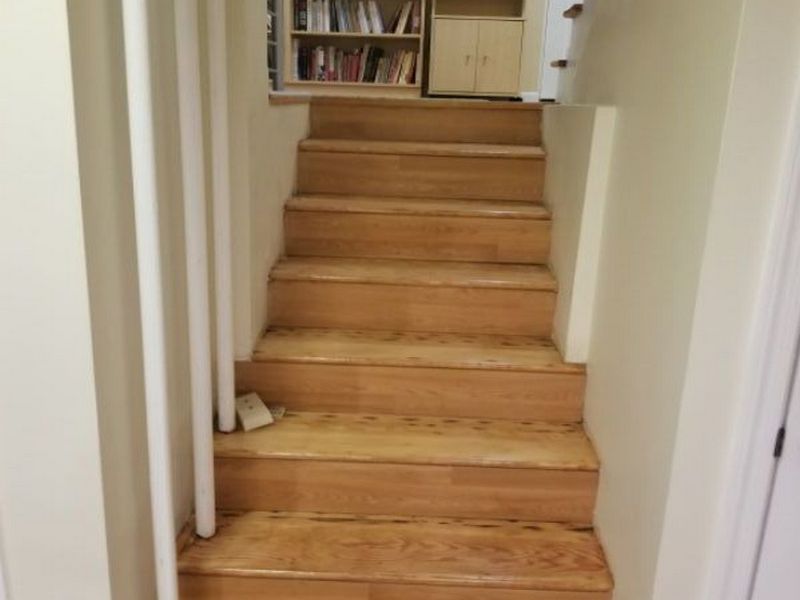
Safe and secure handrails and guardrails are essential: see the Handrails and Guardrails section. Inspect stairs and steps for a solid, level installation and for condition. Check the run and rise of the steps for minimum requirements and for consistency. Report any loose or damaged treads. Pull-down stairs must be solidly installed, and trimmed correctly and to the proper length. All hardware must be in good working order. Spiral stairs should be securely mounted, and have identical treads at least 26″ wide.
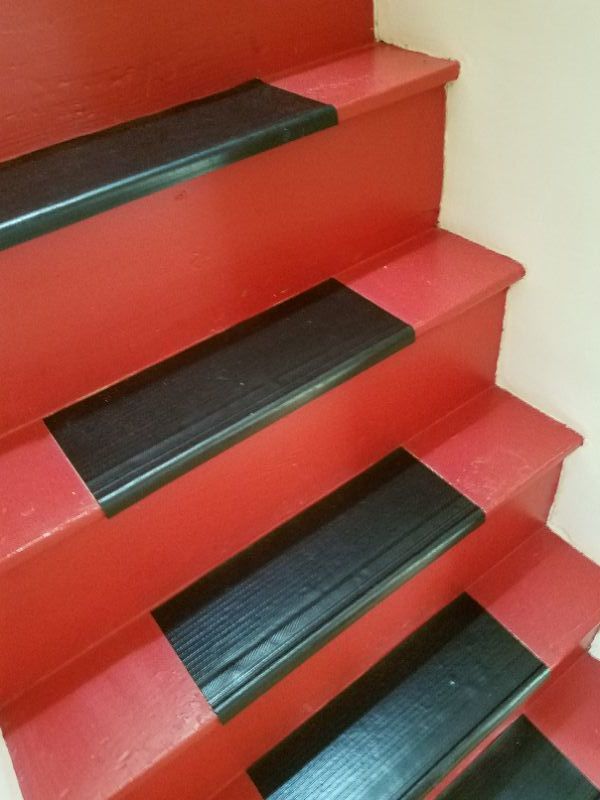
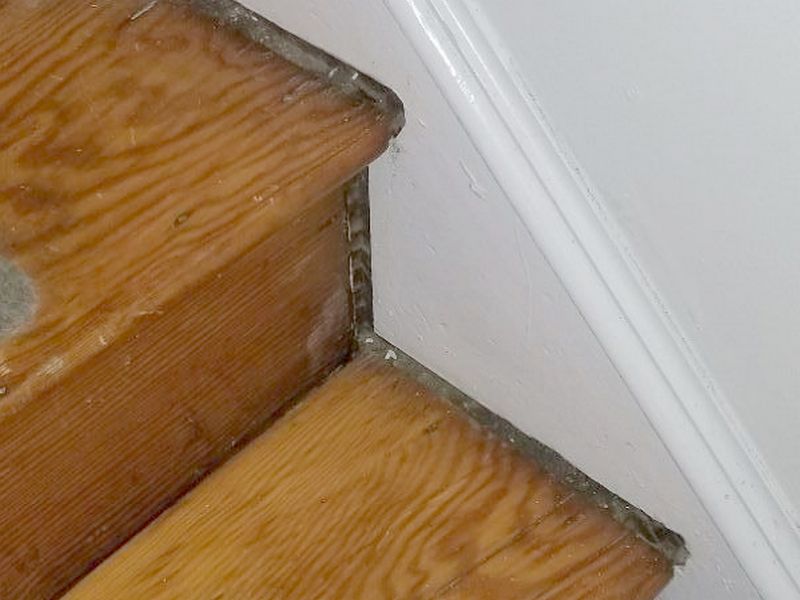
The step’s riser height is uneven. Standards require a maximum variation of no more than 3/8″. This is a safety issue. Repair or replace the steps to ensure a consistent riser height.
The step’s riser height is excessive. Standards require a maximum height no greater than 7.75″. This is a safety issue. Repair or replace the steps to ensure an appropriate and consistent riser height.
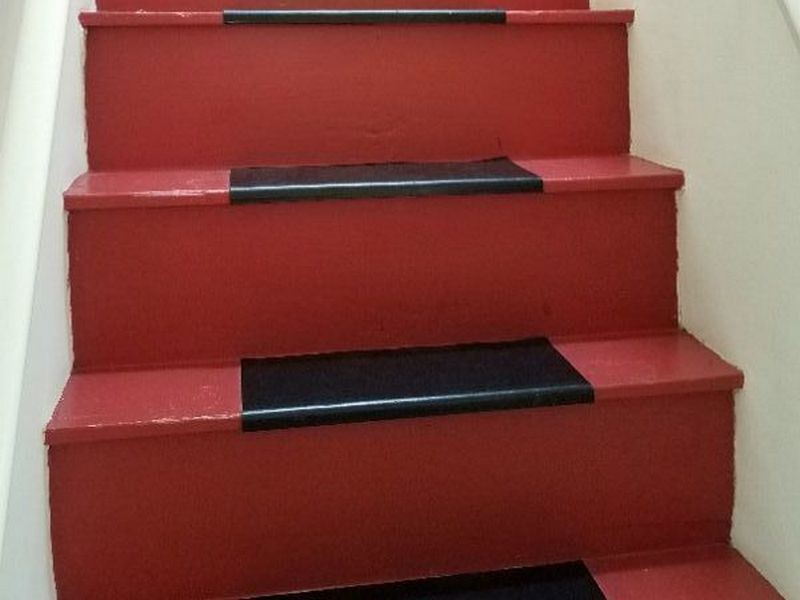

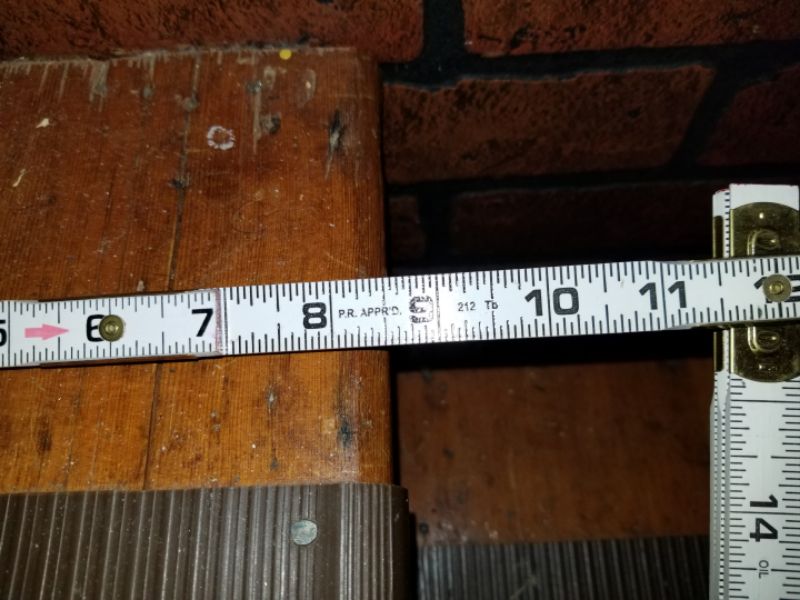
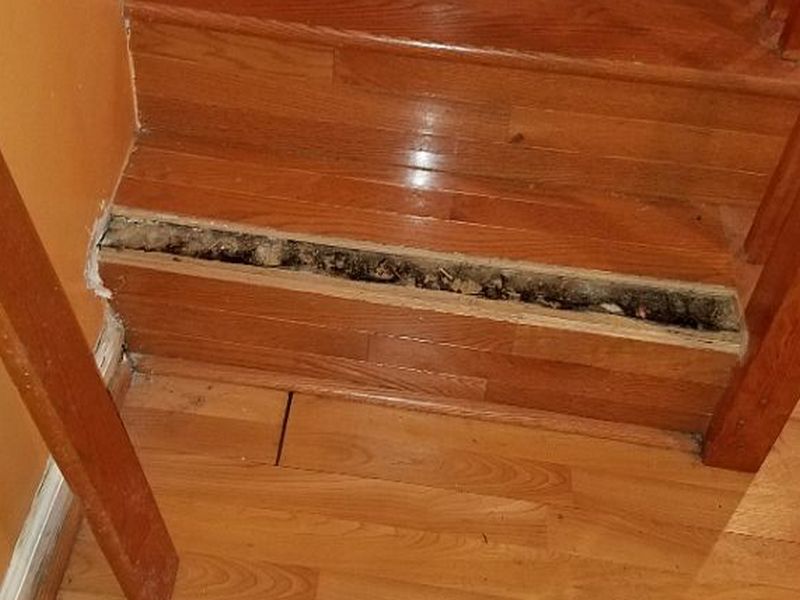
The step treads’ “run” is inadequate. This is a safety hazard. The run is the distance from the front edge of the tread to the rear of the tread. Current standards call for a minimum run of 11″. Repair or replace the steps to ensure a safe tread run.
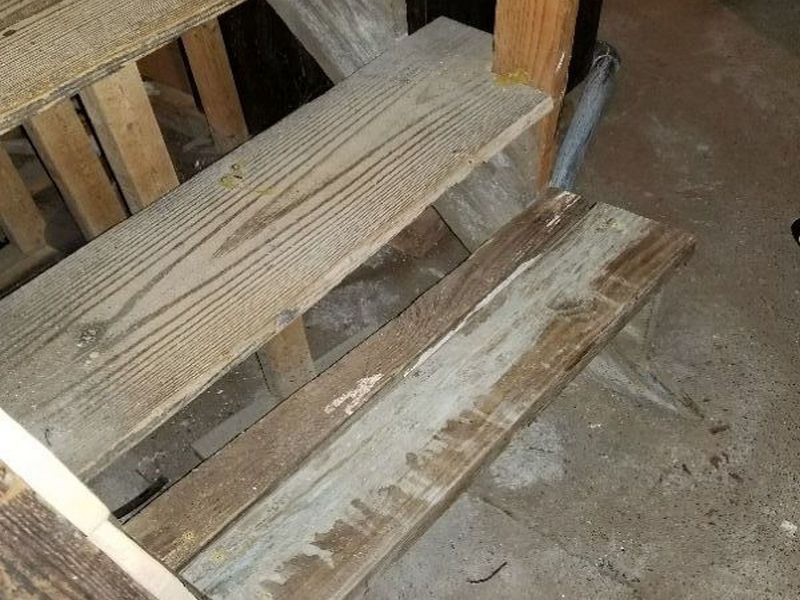
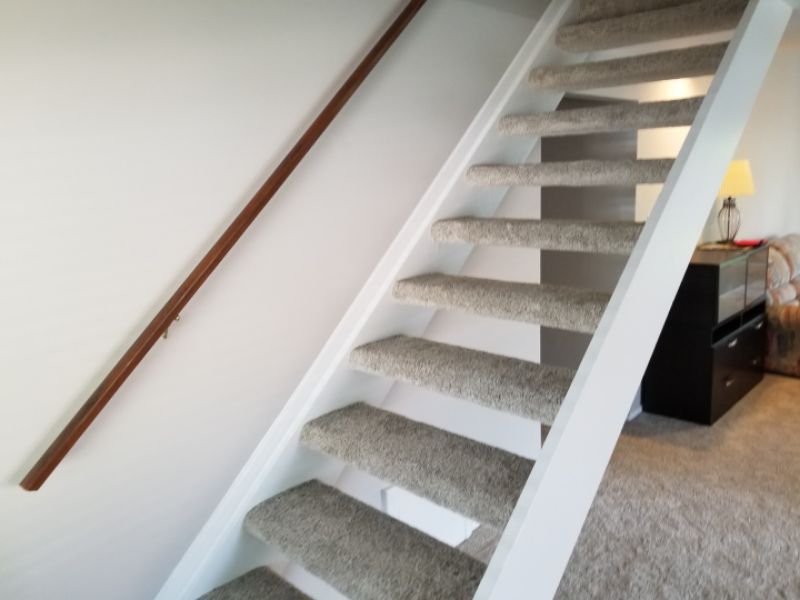
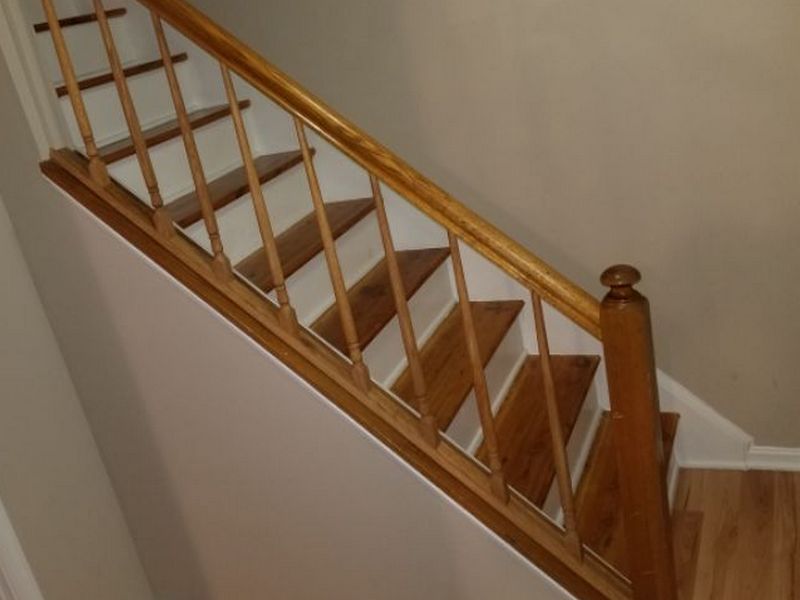
The stairs have “open” risers. This is a safety hazard. Current standards limit the space or opening between the treads to a maximum of 4″. Repair or replace the stairs as needed.
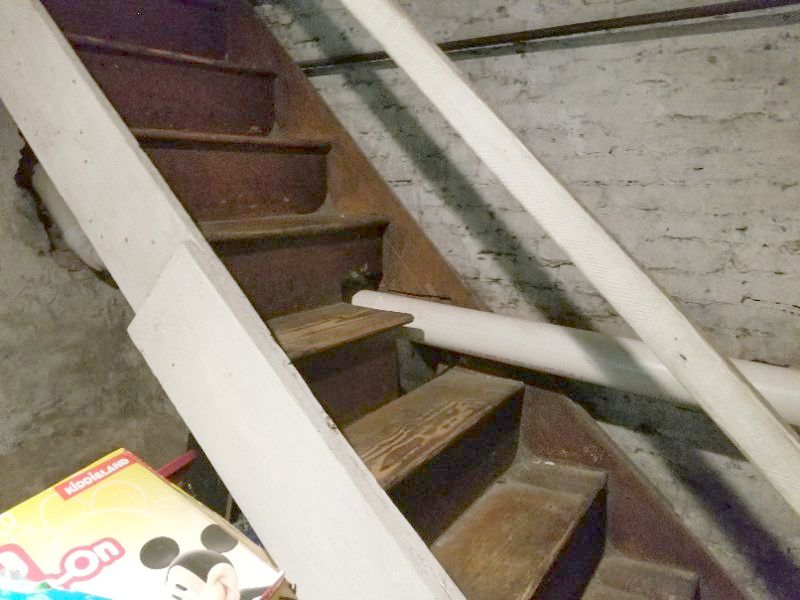
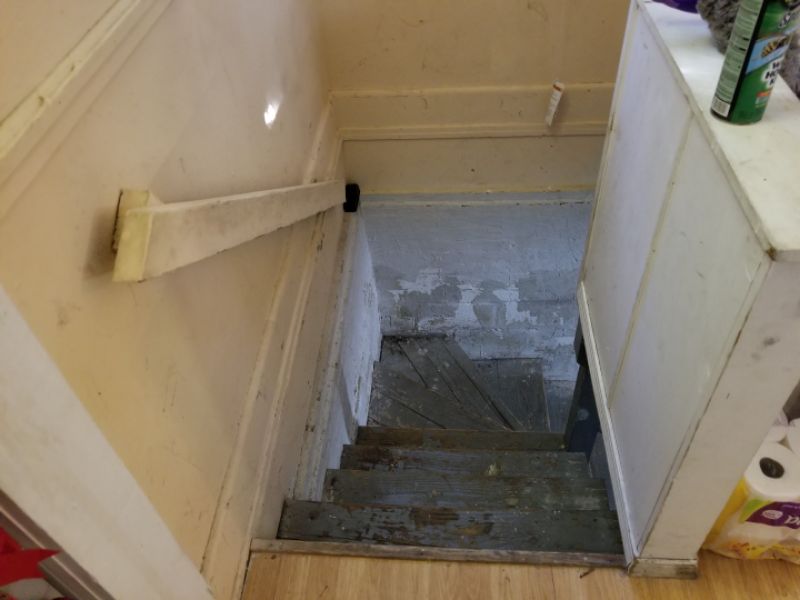
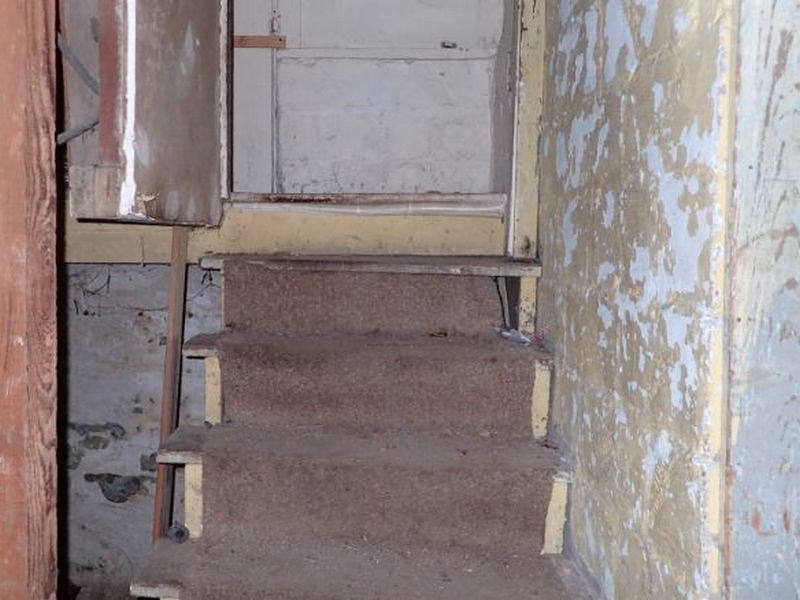
The stairs are damaged. This is a safety issue. Repair or replace the stairs.

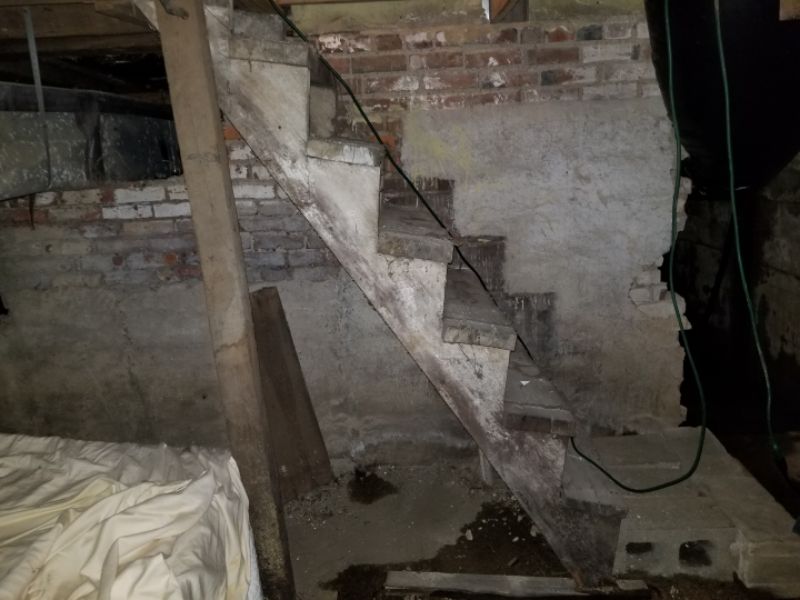
The stairs are settled; the reason for this is unknown. This is a potential safety issue. Hire a contractor for an evaluation and repairs as needed.
The stairs are deteriorated and unreliable. This is a safety concern. Replace the stairs.

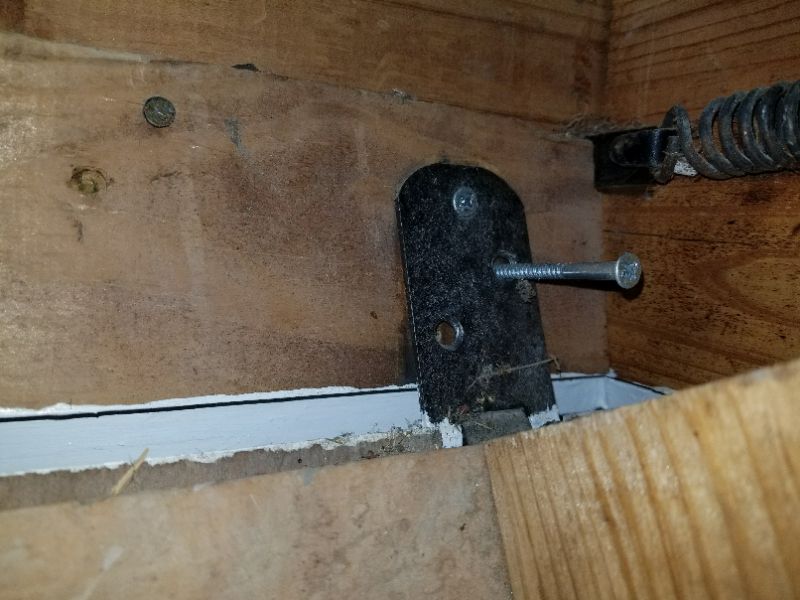
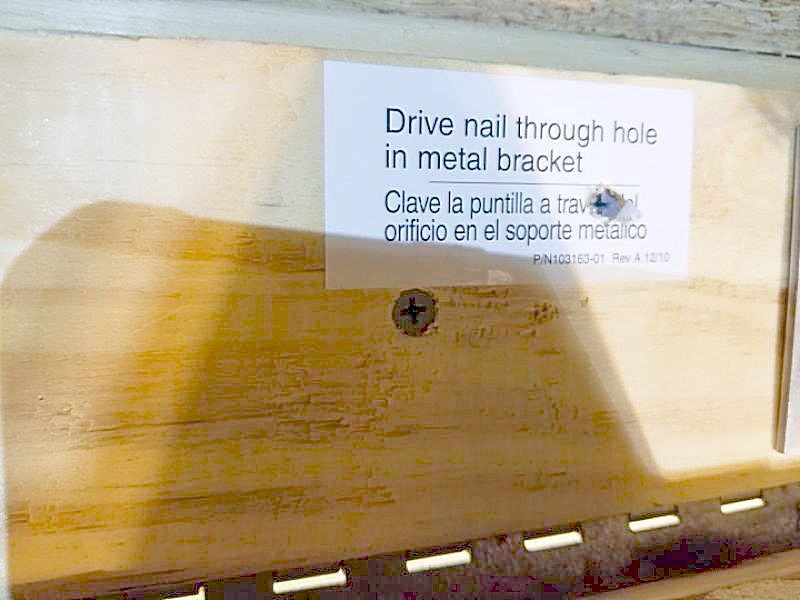
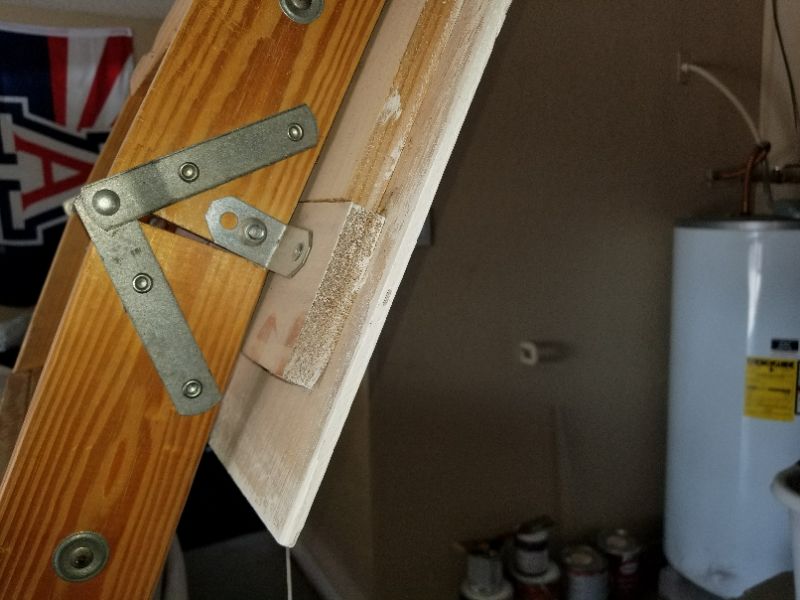
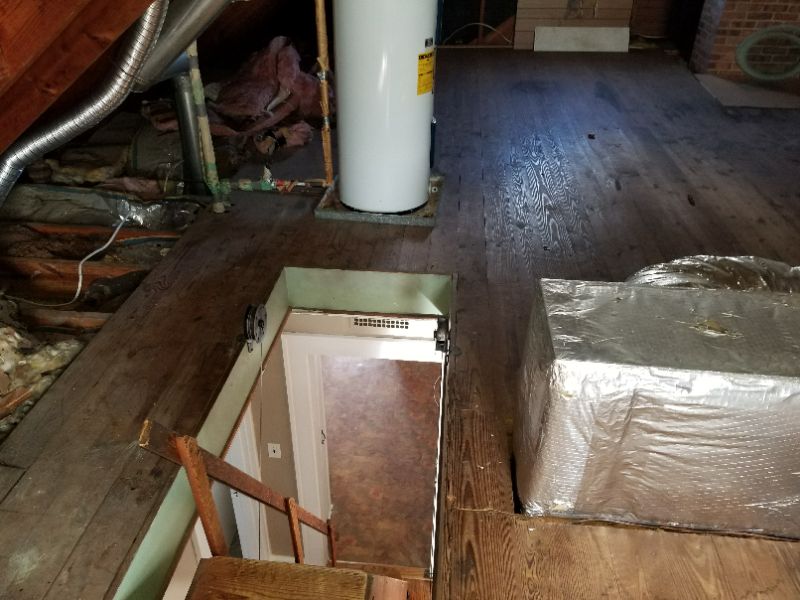
The pull-down stairs have loose or missing hardware. This is a safety hazard. Repair or replace the hardware.
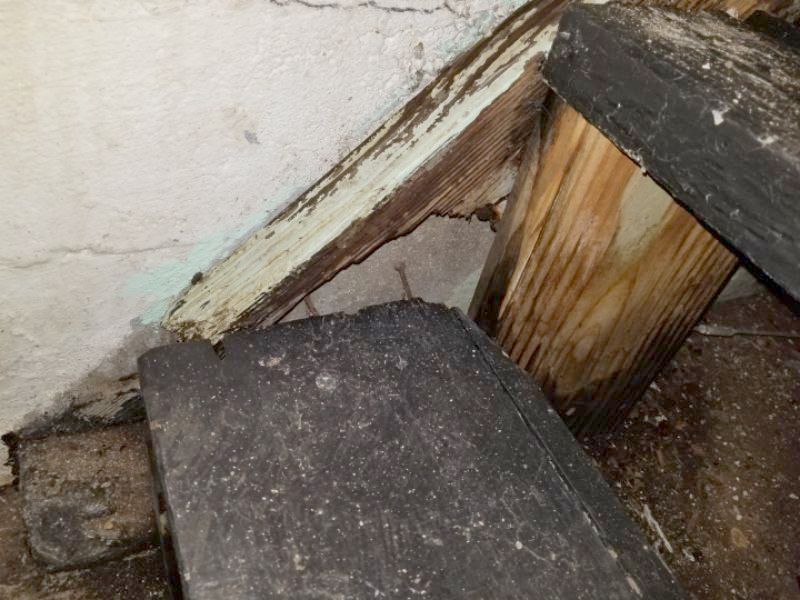
The pull-down stairs are not cut to the proper length. This is a safety hazard. Repair or replace the stairs.

The pull-down stairs are damaged. This is a safety hazard. Repair or replace the stairs.

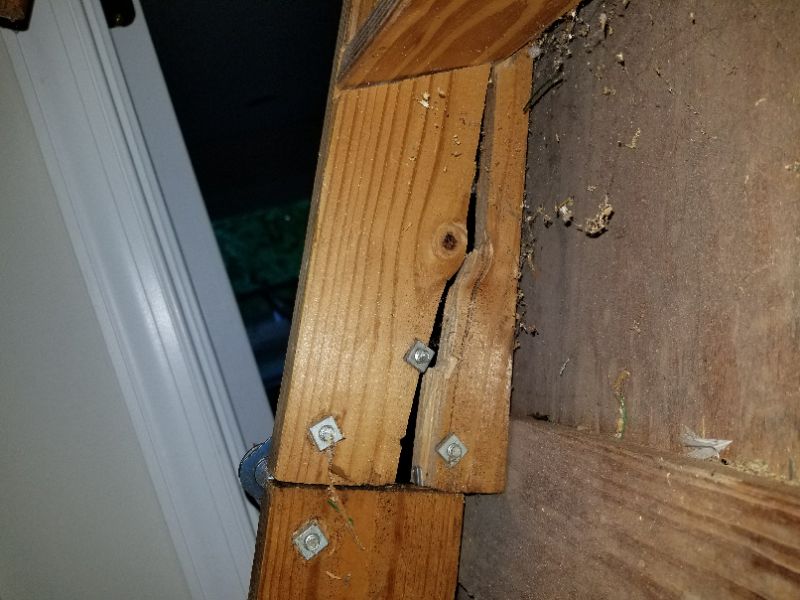
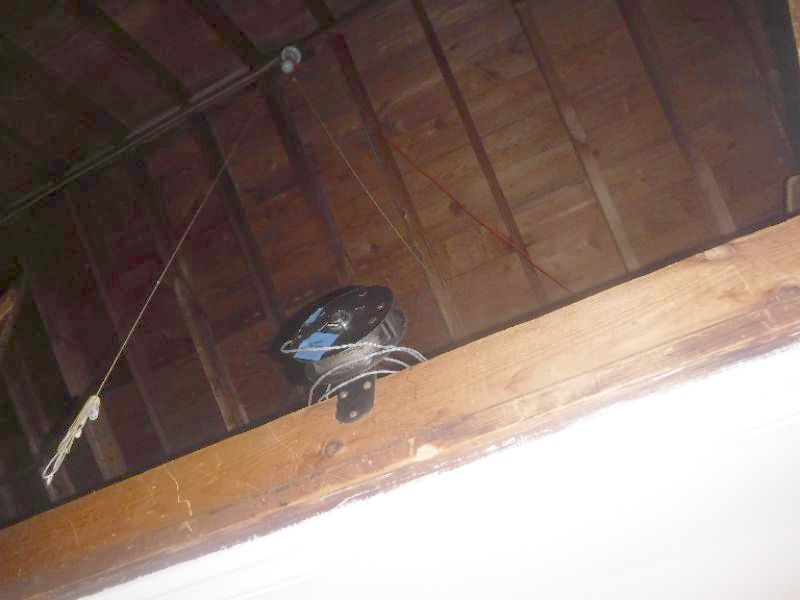
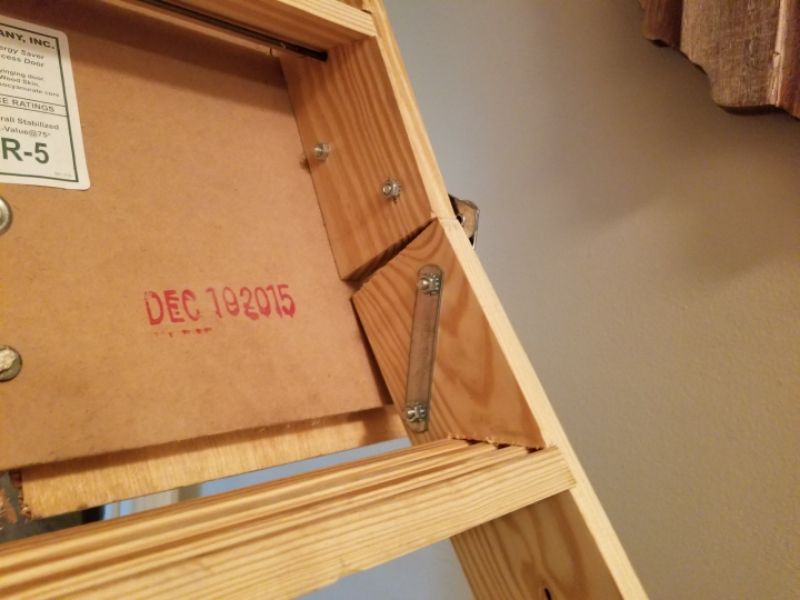
The pull-down stairs are improperly installed. This is a safety hazard. Repair or replace the stairs.

The pull-down stairs are not fire rated. This condition creates a breach in the existing fire rated ceiling. Replace the stairs with a fire-rated model.
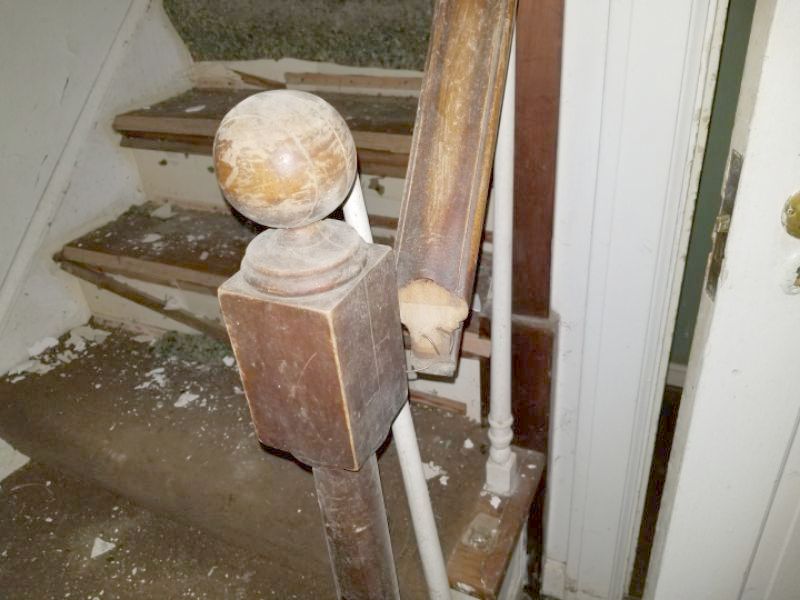
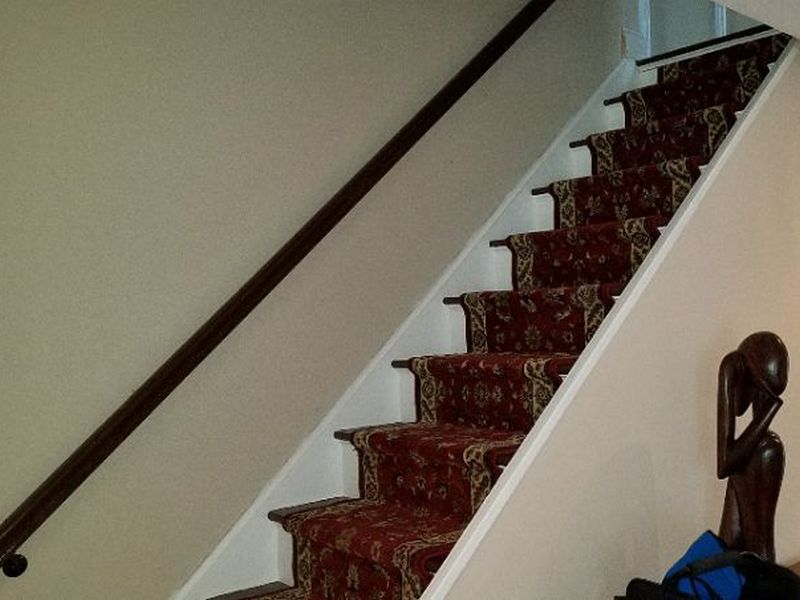
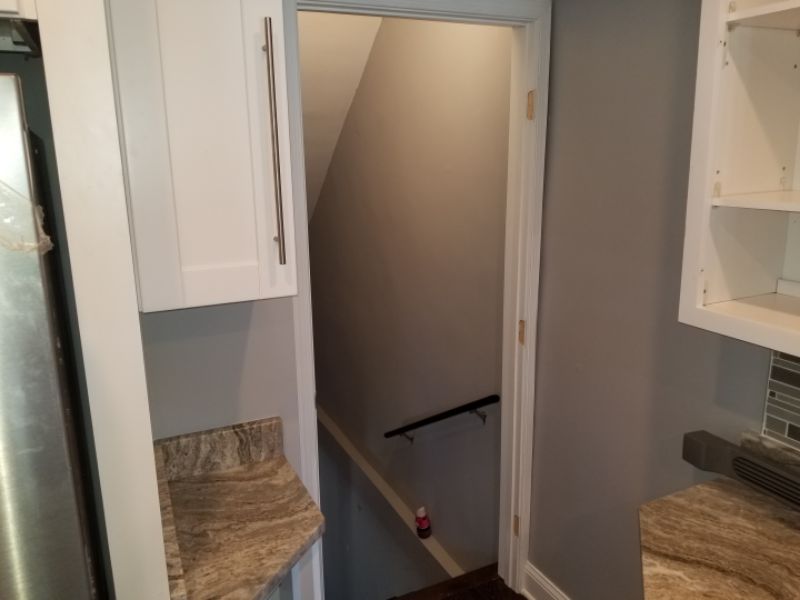
The handrail is loose. This is a safety hazard. Repair or replace the handrail.
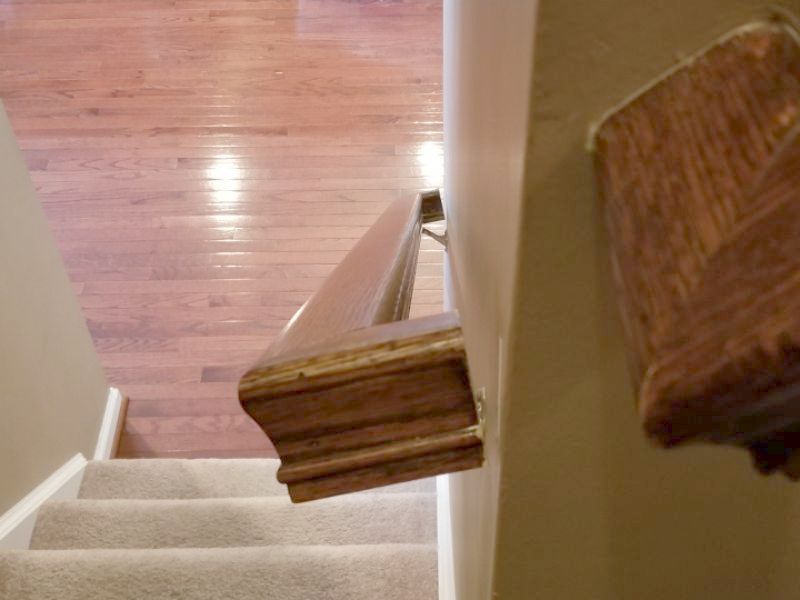
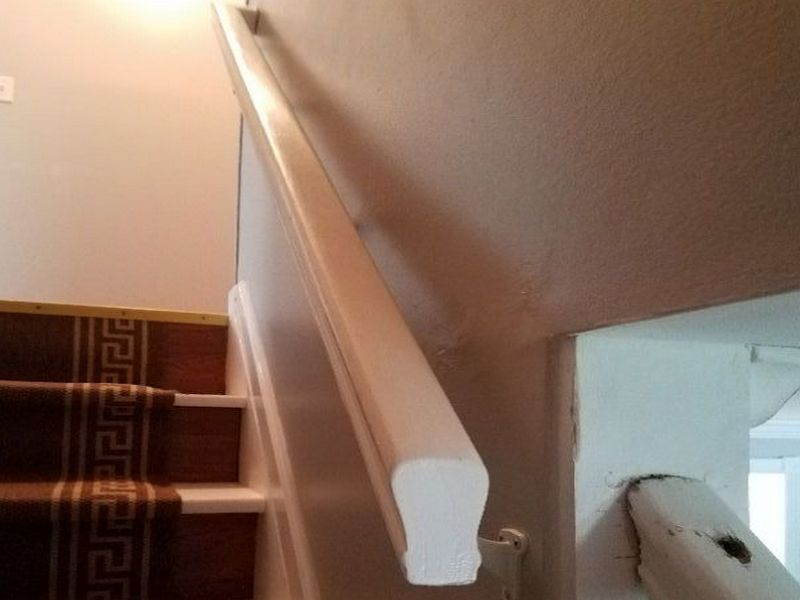
The handrail does not have a return back to the wall. This is a safety hazard. Add a return to the handrail.
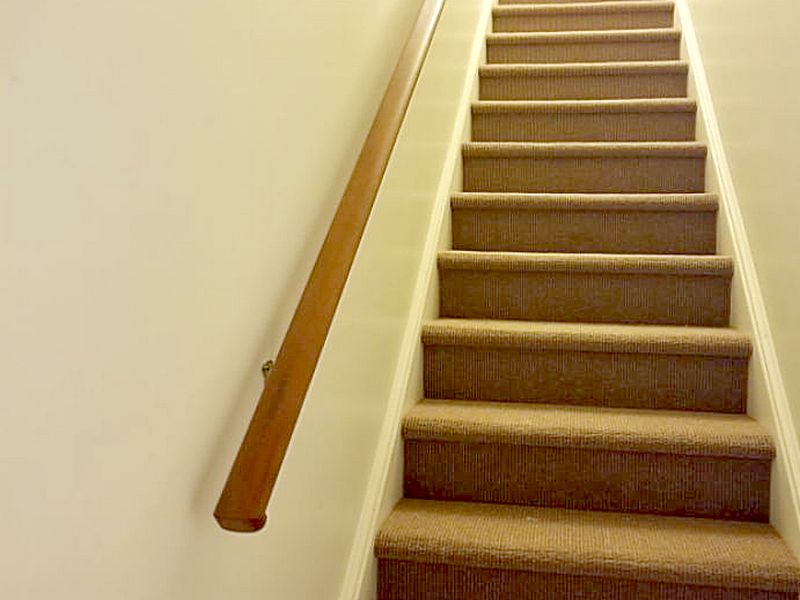
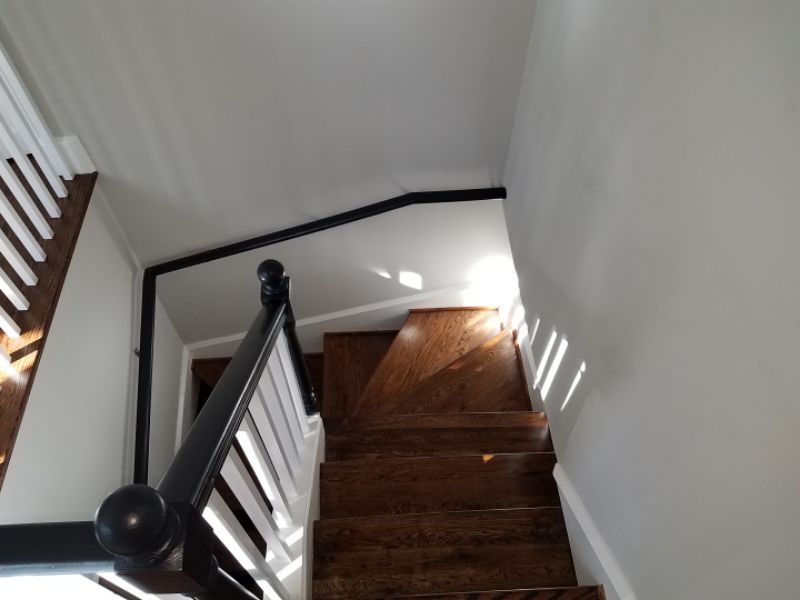
The handrail does not provide coverage for the entire staircase. This is a safety hazard. Add a handrail to the entire staircase.
The handrail is missing. This is a safety hazard. Replace the handrail.
The handrail is damaged or deteriorated. This is a safety hazard. Repair or replace the handrail.
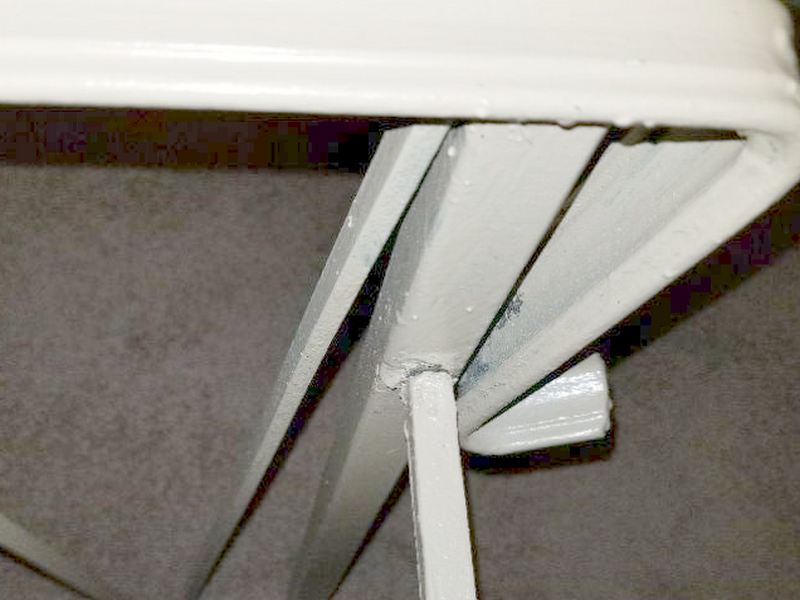
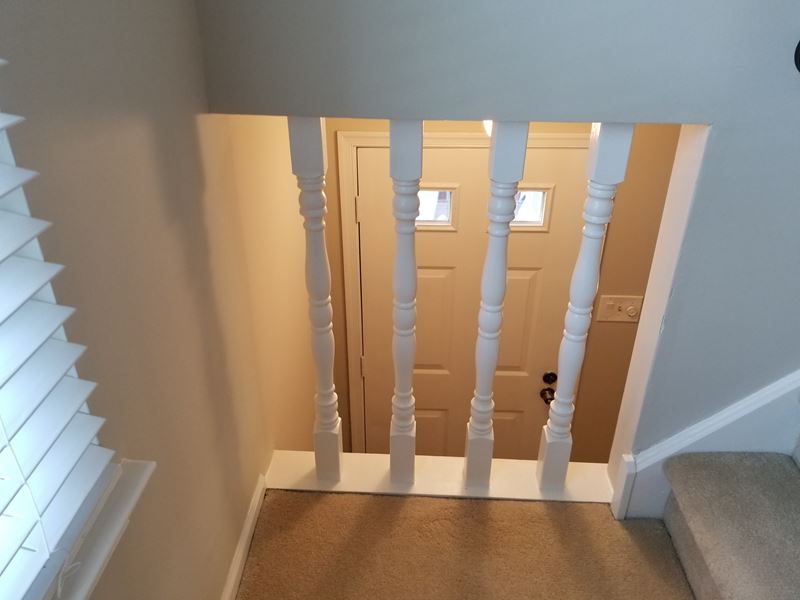
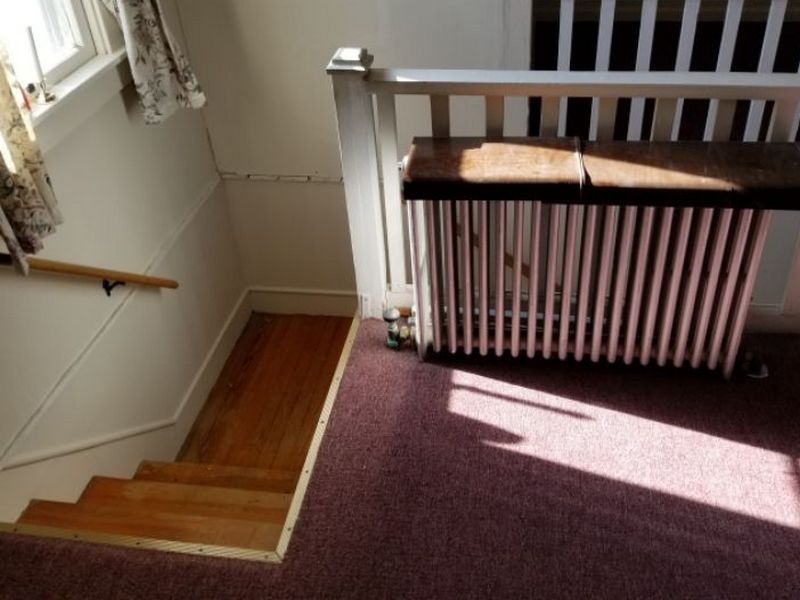
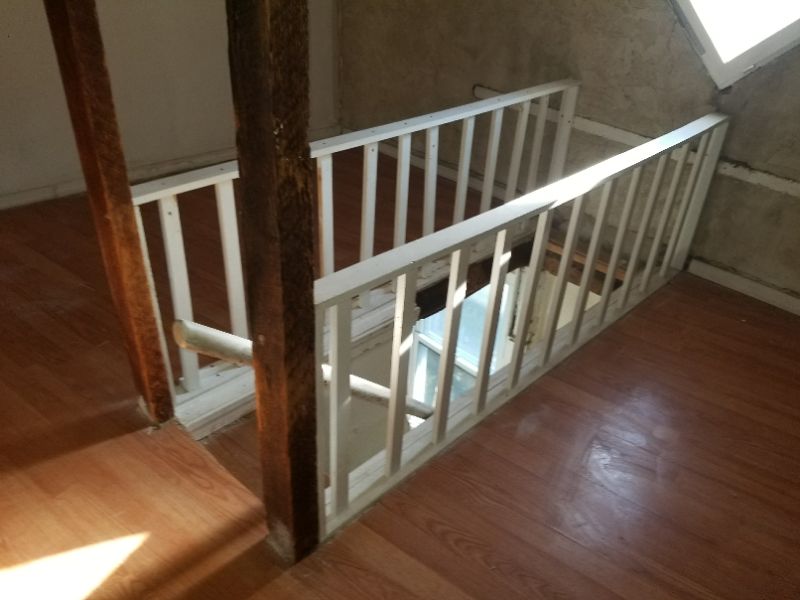
The balusters are improperly spaced at the handrail. The opening between balusters should not exceed 4″. Repair or replace the balusters.
The balusters are improperly spaced at the guardrail. The opening between balusters should not exceed 4″. Repair or replace the balusters.
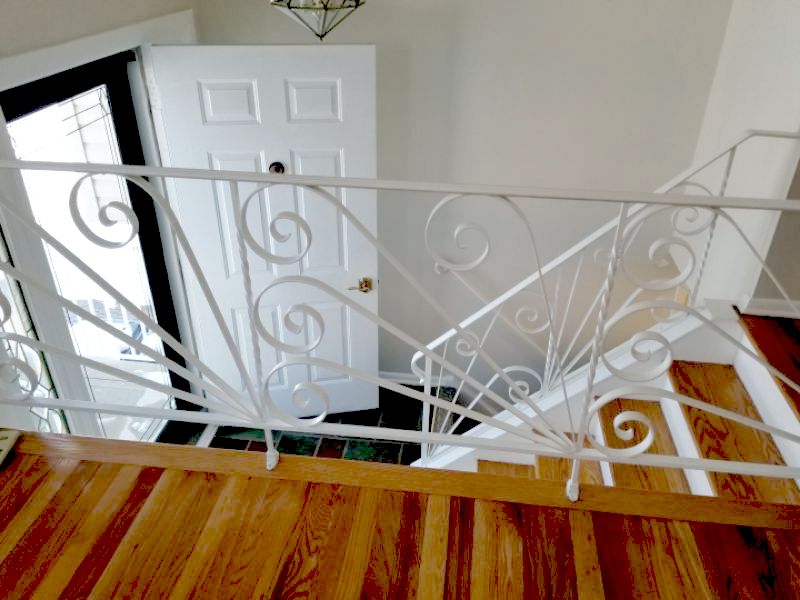
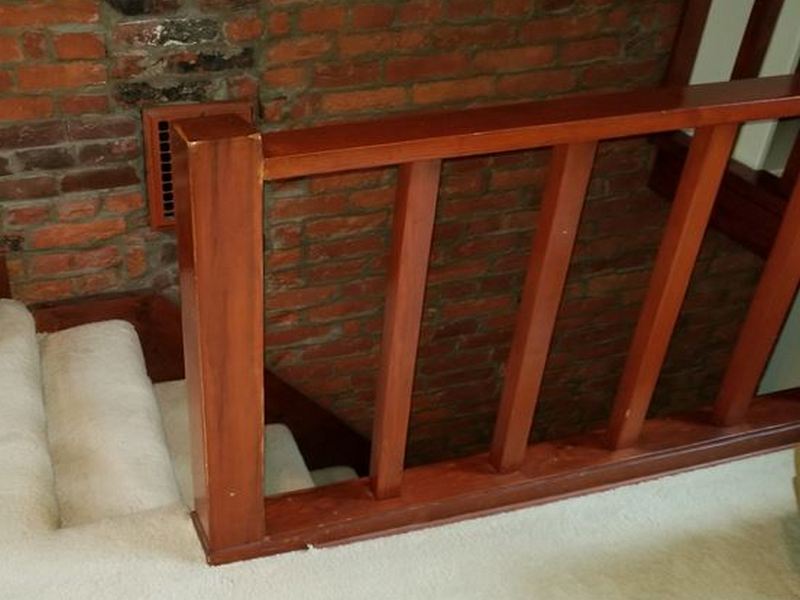
The guardrail is missing. this is a safety hazard. Install a guardrail.
The balusters are horizontal at the guardrail. This is a safety hazard. Horizontal balusters can be used by children to climb onto rail. Repair or replace the balusters.
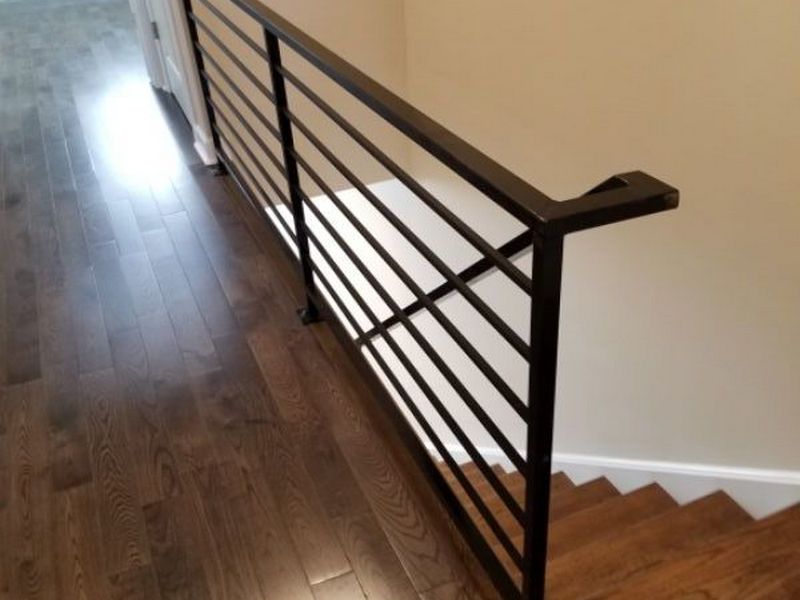
The guardrail at the stairway is too low. Platforms above a 6′ height should have a 42″ guardrail for safety. Hire a contractor for repairs or replacement as needed.
Stairs/Steps Limitation and Information Statements
Private elevator, beyond scope: A private elevator is present within the home or dwelling unit. These are specialized installations and are beyond the scope of this inspection. Hire a qualified technician for a full evaluation and request the service records from the homeowner or building management.
Near/at end useful life, budget for replacement: The stairs/steps are near or at the end of their useful lives. We recommend establishing a budget to replace the stairs/steps.
Past end useful life, budget for replacement: The stairs/steps are past the end of their useful lives. We recommend establishing a budget to replace the stairs/steps.
Open sides of stairways and platforms >30″ in height should have guardrail and handrail systems meeting current safety guidelines: Open sides of steps and elevated platforms >30″ in height should have guardrails for safety. Guardrails should be a minimum of 36″ high for platforms which are <6′ high and a minimum of 42″ high for platforms >6′ high. Balusters should have a maximum of 4″ spacing. Stairs with four or more risers require handrails, which should be mounted 34″ to 38″ high measured from the nosing of the tread. Handrails should be graspable with a maximum width of 2 5/8″ and should be continuous from the top of stairs to the bottom of stairs and be spaced at least 1 1/2″ from the wall. Handrails should return to the wall, terminate at a newel post, or have a 1′ extension at the top and bottom of stairs which is parallel with the floor surface.
Staircase headroom is <6’8″ as required by current standards, caution required: The staircase headroom is less than the 6’8″ required by modern construction standards. Construction of the staircase predates such requirements. Be cautious when using this staircase.
Staircase is more narrow than the 36″ required by current standards: The staircase is more narrow than the 36″ required by modern construction standards. Construction of the staircase predates such requirements.
Staircase has steeper than normal rise between steps with treads that are shallow, caution required: The staircase has a steeper than normal rise between steps, with treads that are shallow. Such construction often is designed to conserve interior space but makes stairs more difficult to use. As correction may not be practical, be cautious when using this staircase.
Glazing at stairway window does not appear to be safety/tempered glass, generally mandated by current standards: The glazing at the stairway window does not appear to be safety glass, which generally is marked with manufacturer’s information at one of the corners. Safety or tempered glass is mandated by current construction standards in these locations. Older homes generally do not employ safety glass and are not required to replace the glass unless there is remodeling.
Cabinets
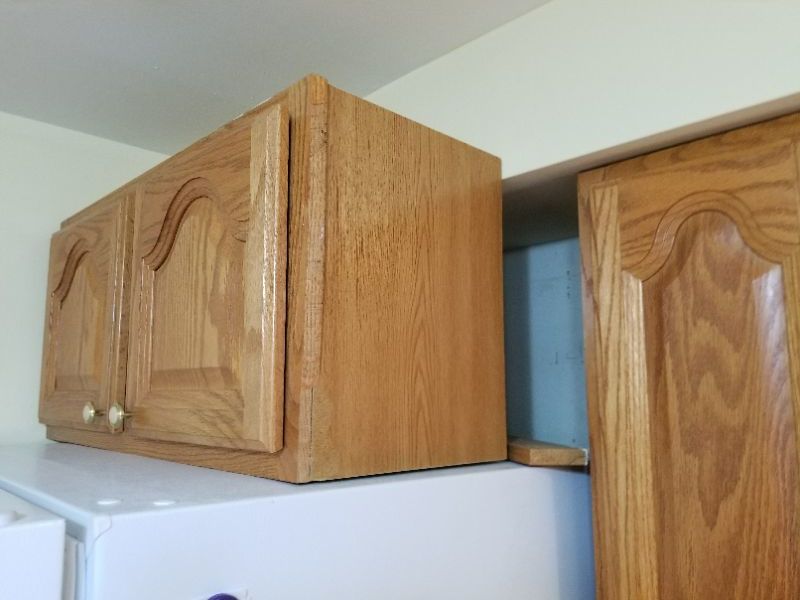
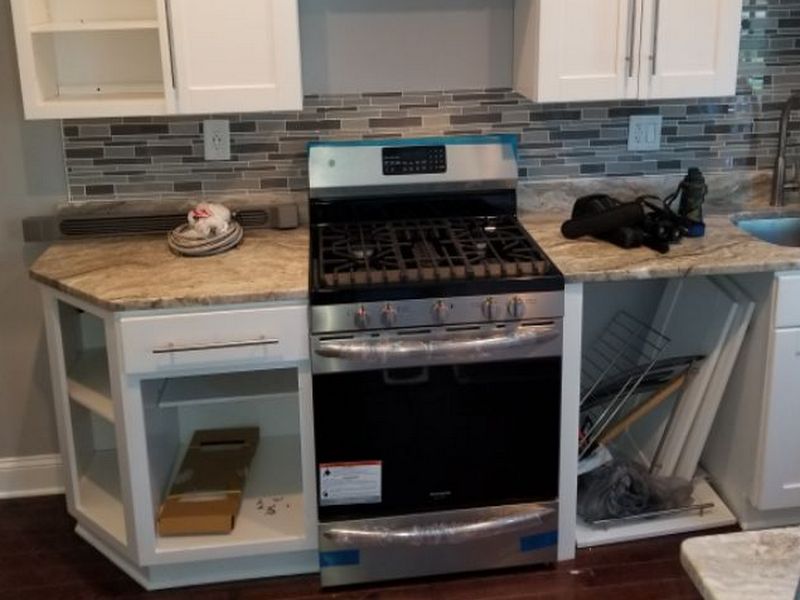
Cabinets are one of the top kitchen and bathroom features that home buyers look for. They want ample amounts of functional, solid storage. We must inspect cabinetry carefully. As they can provide “bang for the bucks”, they may be lower quality. Additionally they are frequently installed improperly. It is not unusual for a large wall cabinet to be loaded with over 100 lbs of dishes. This creates the possibility of significant personal injury if the cabinet falls off of the wall. Base cabinets can tip over if incorrectly installed.
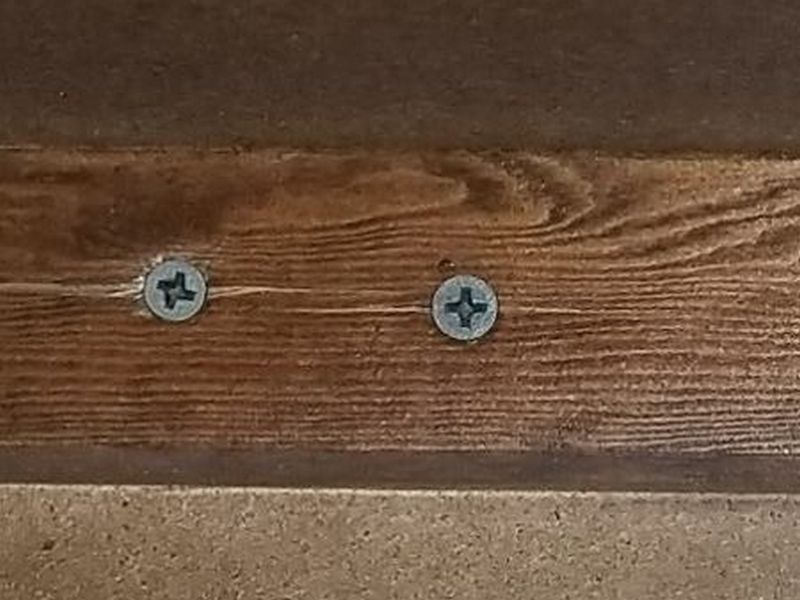
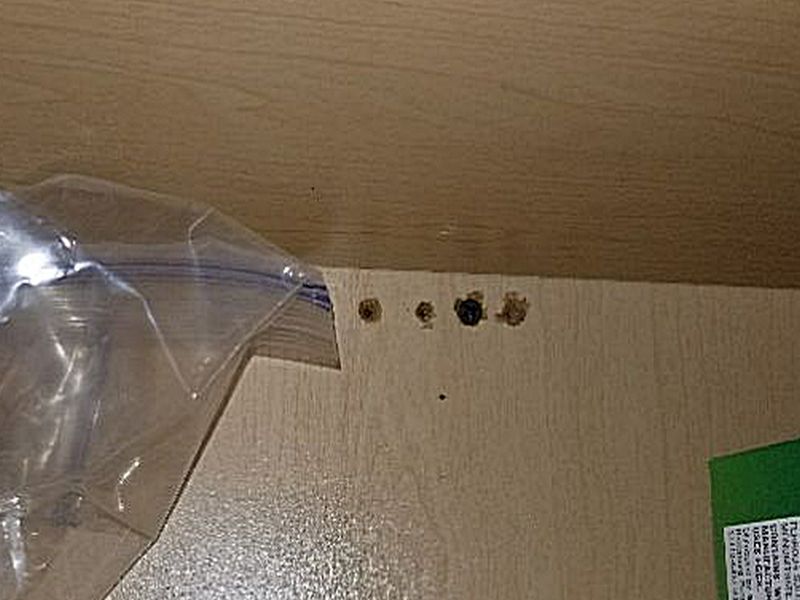
Inspect for the right attachment hardware. Nails and drywall screws are unacceptable. Cabinet screws, or screws utilizing a flat washer base are required. Look for separations in the cabinets’ frame. View from the side: is everything plumb and level? Inspect for indications that the cabinet is pulling away from the wall. Open and close doors and drawers to confirm correct operation and alignment.
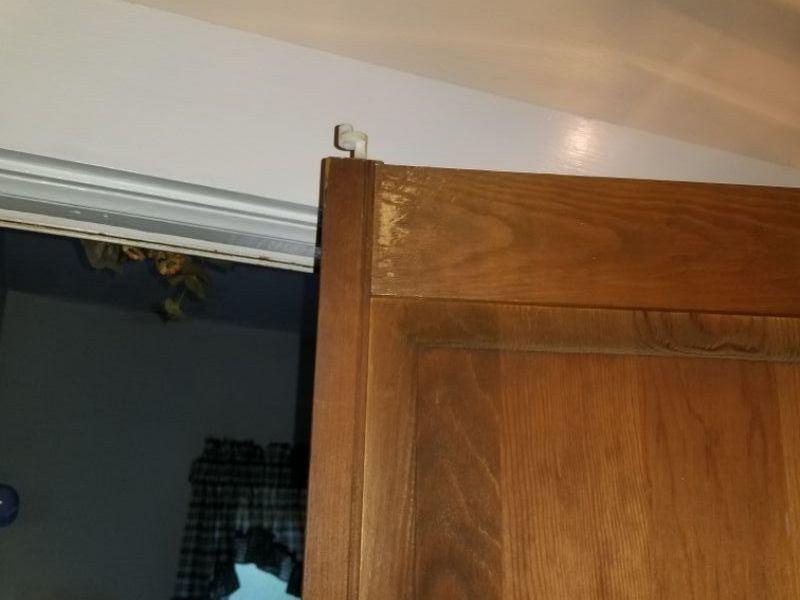
The cabinet is not properly secured. Cabinet screws with a washer head are required. This is a safety hazard. Secure the cabinet using approved fasteners.
The cabinet is damaged. This affects proper function and can be a safety hazard. Repair or replace the cabinet.


The cabinet door requires minor adjustments to work freely and to close properly. Adjust the door.
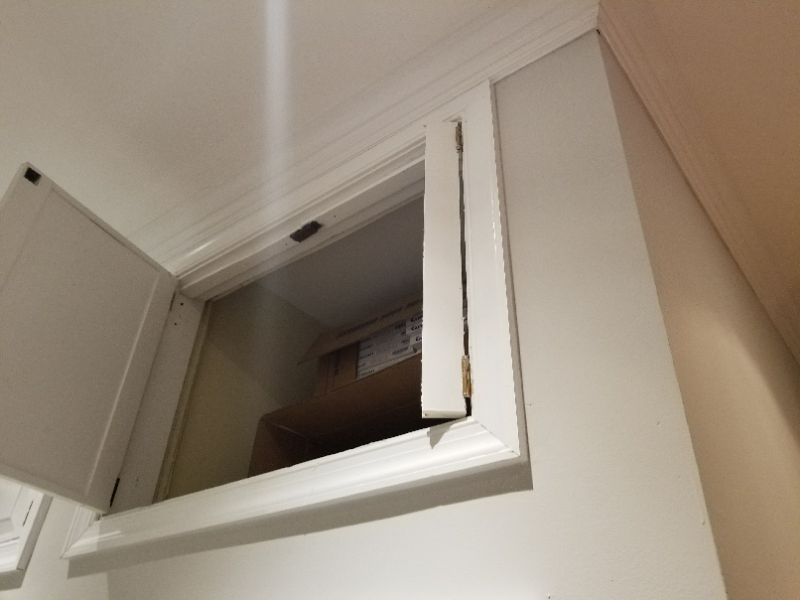
The cabinet door is loose or damaged. Secure or replace the door.
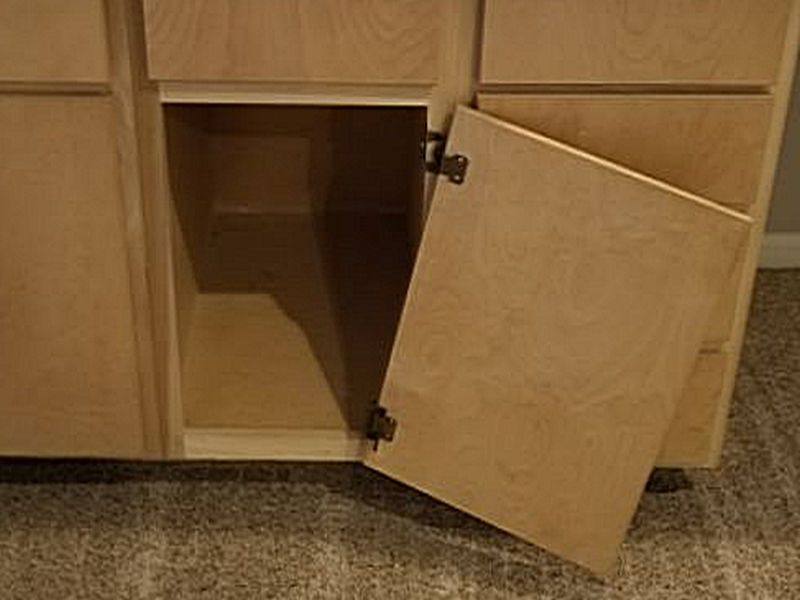
The cabinet door hinge is broken. Replace the door hinge.
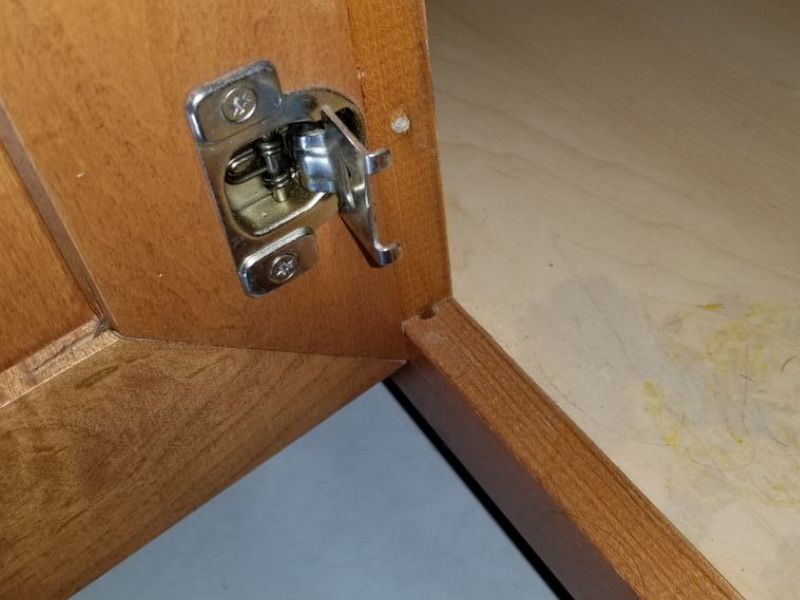
The cabinet door hinge is missing. Replace the door hinge.

The cabinet door pull is loose or damaged. Secure or replace the door pull.
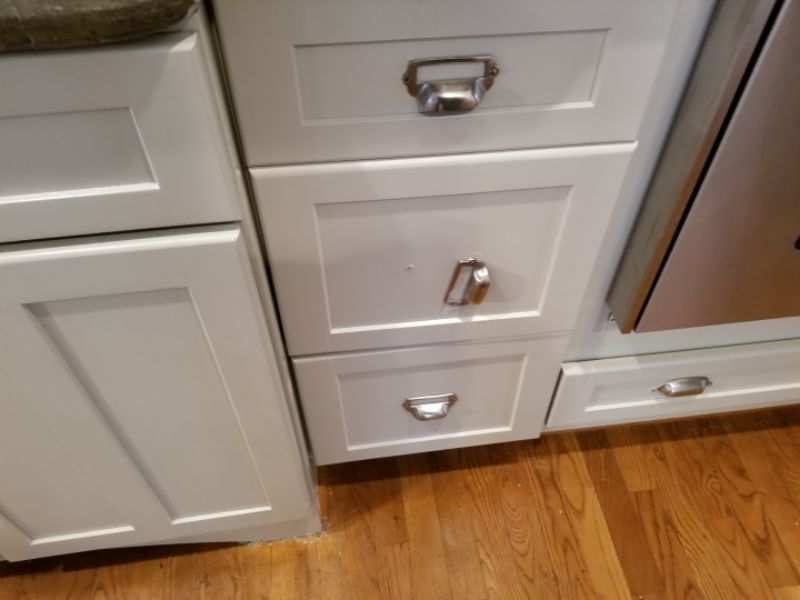
The cabinet door pull is missing. Replace the door pull.

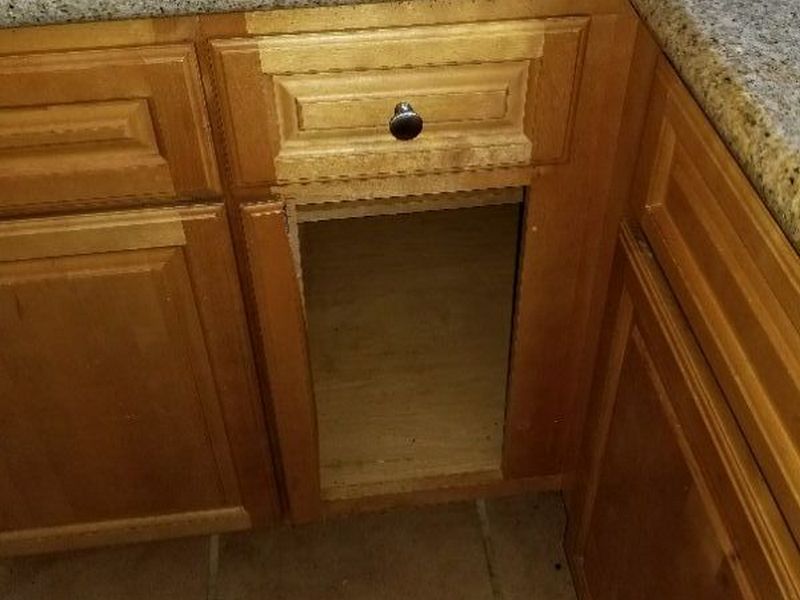
The cabinet door is missing. Replace the door.
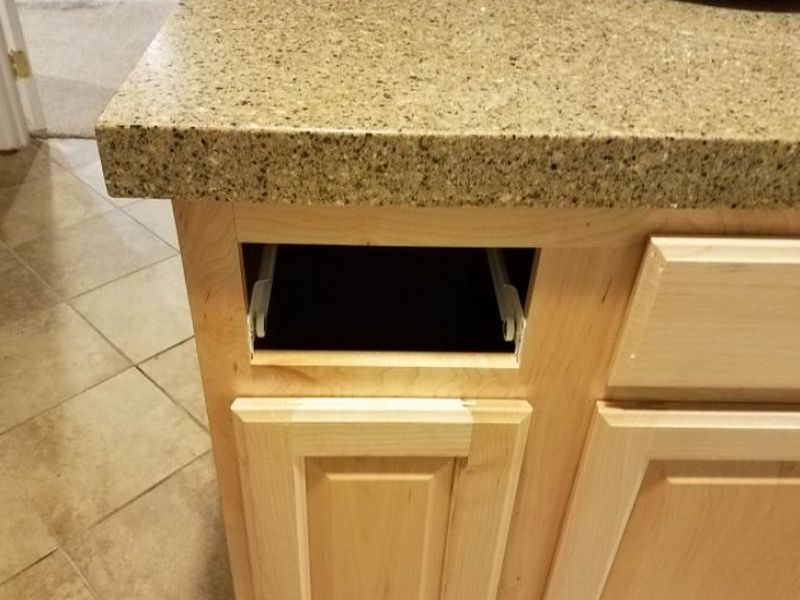
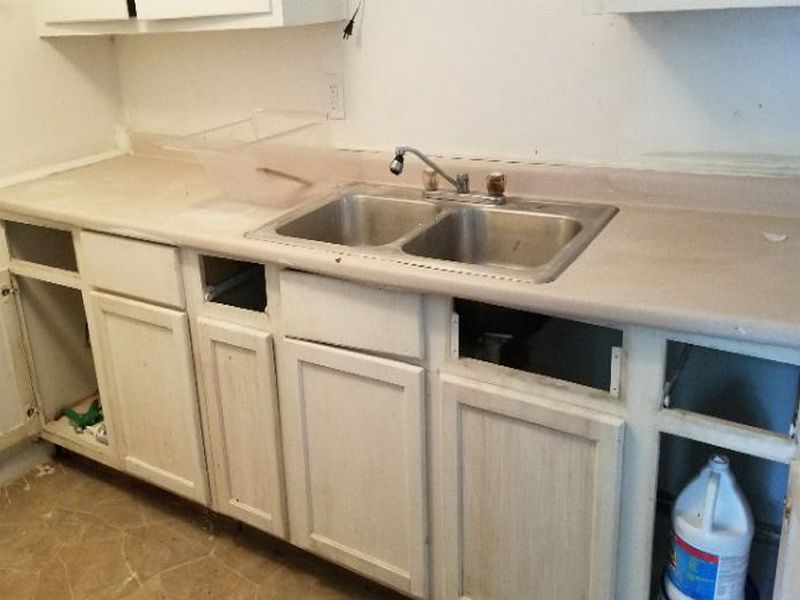
The cabinet drawer is inoperative. Repair or replace the drawer.
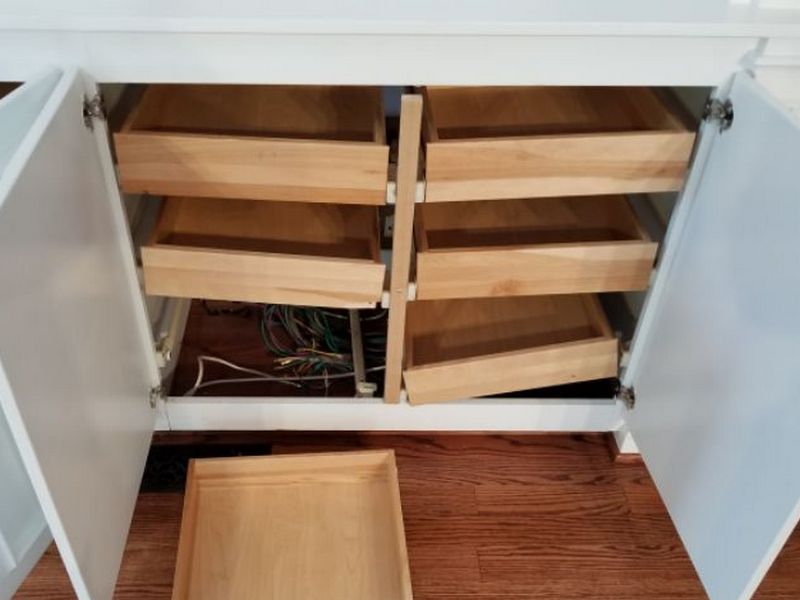
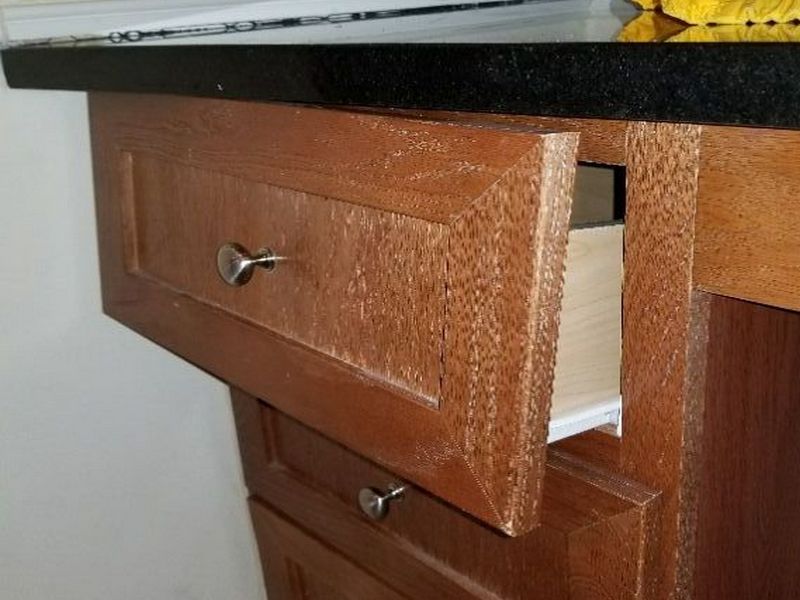
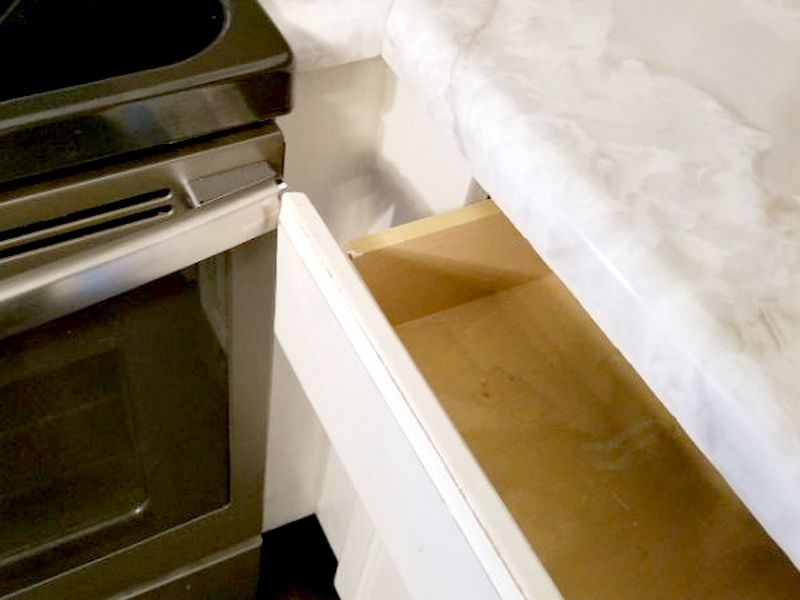
The cabinet drawer is missing. Replace the drawer.
Cabinets Limitation and Information Statements
Locked, not operated/tested: The cabinet is locked and, therefore, is not operated or tested.
Blocked, no entry/inspection: The cabinet is blocked and, therefore, is not operated or tested.
Near/at end useful life, budget for replacement: The cabinets are near or at the end of their useful lives. We recommend establishing a budget to replace the cabinets.
Past end useful life, budget for replacement: The cabinets are past the end of their useful lives. We recommend establishing a budget to replace the cabinets.
Countertops
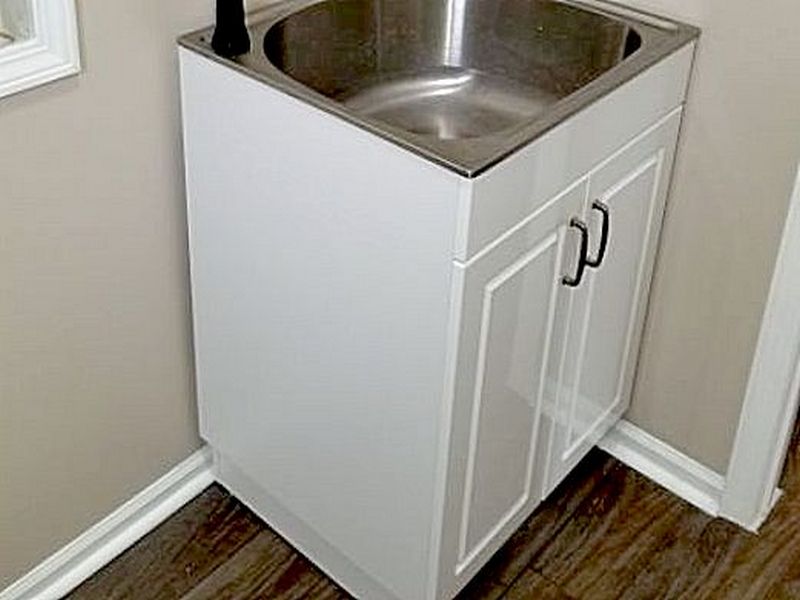
Countertops are more than just beautiful surfaces; they are highly functional. It’s where the work gets done. Heavy, often hot, objects are placed on them. People cut, mix, chop, and lean on them. Children climb up to them (even though they shouldn’t). Built-in sinks must be properly installed to avoid water damage. Countertops that are not level, adequately supported, and secure are a hazard.
Inspect all countertops to ensure that they are free of damage and solidly connected to their base cabinet. You should not be able to shift or lift the top. Countertops must be sealed wherever water penetration can occur, e.g. faucet mountings, backsplashes, and sink bowls. The overall surface should be level, except where water is directed to drain back into the sink. Any seams present should be sealed and fee of deterioration.
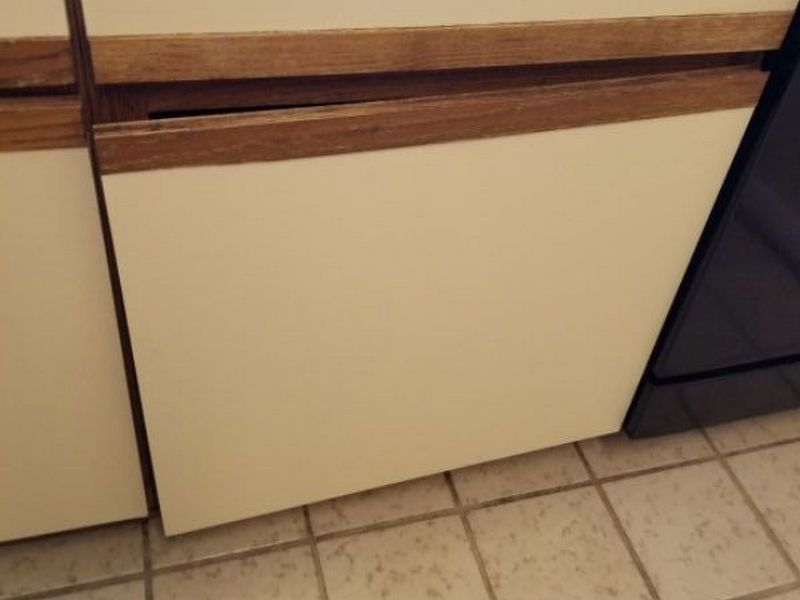
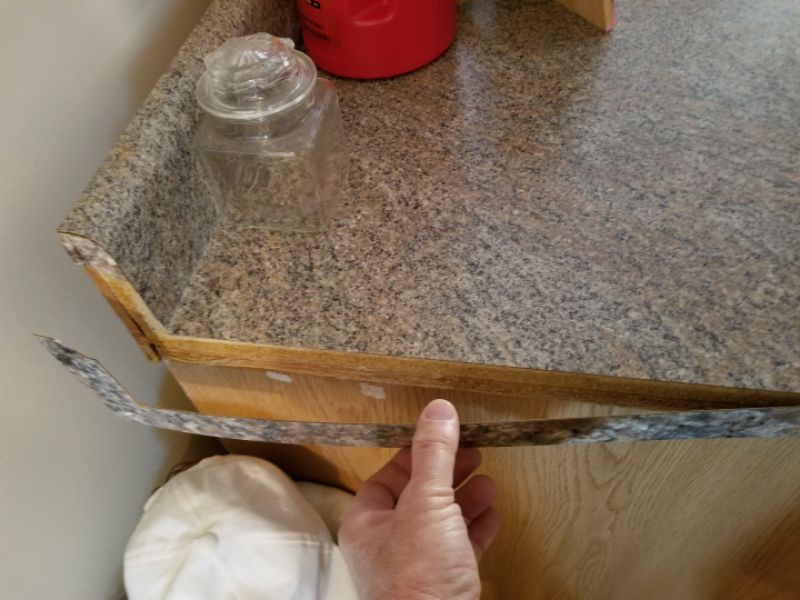
The countertop is not secured properly. This is a safety hazard. Secure the countertop.
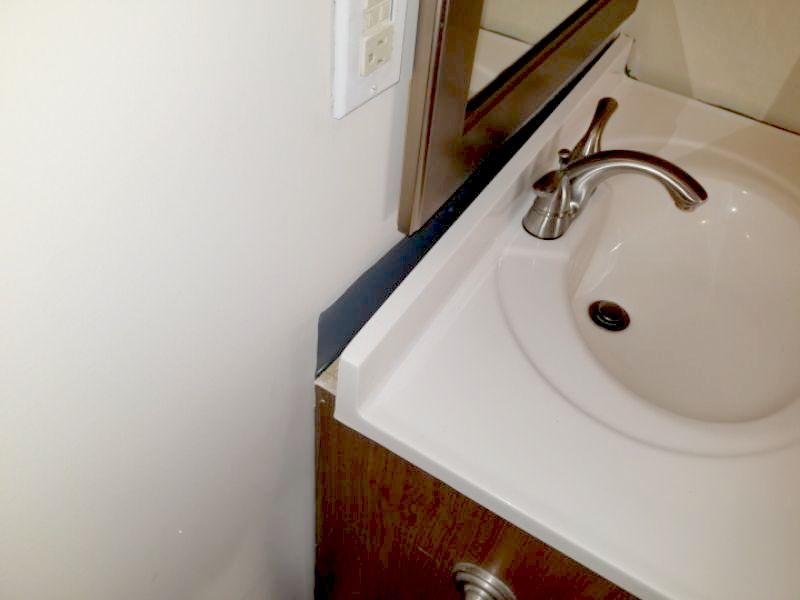

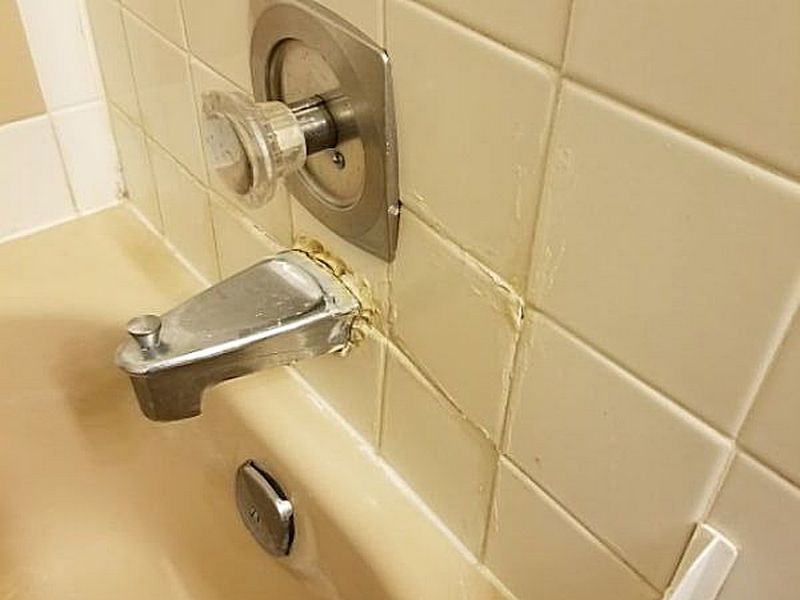
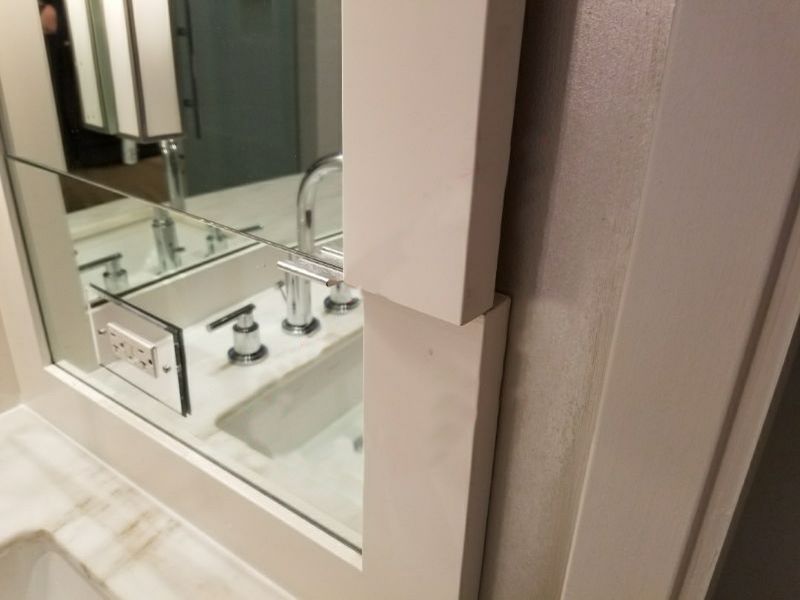
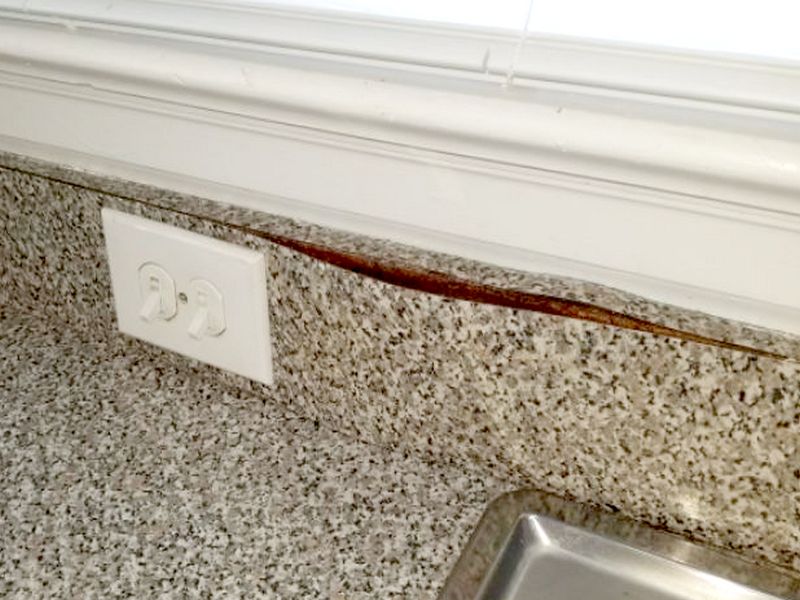
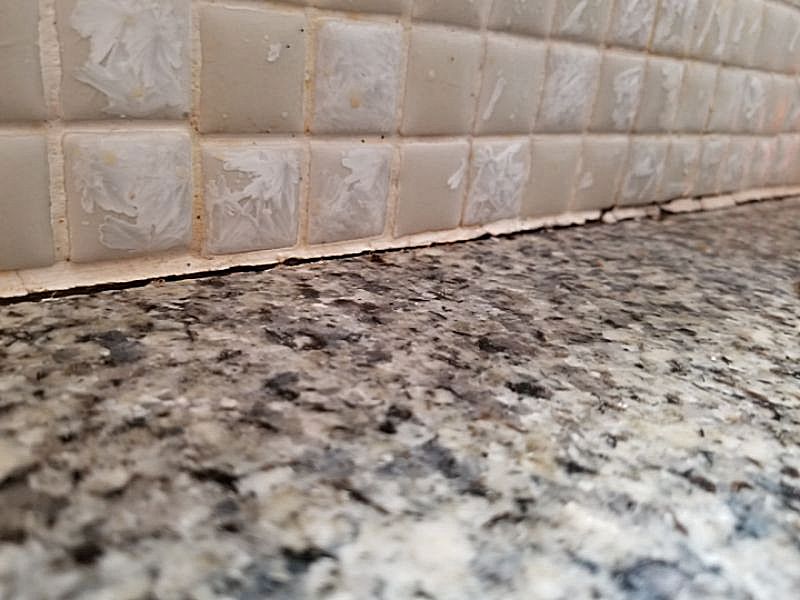
The countertop does not fit properly at the wall. This can permit water to penetrate the wall. Repair or replace the countertop and seal the edges against the wall.

The caulk at the countertop is deteriorated or missing. This permits water penetration and damage. Re-caulk as needed.
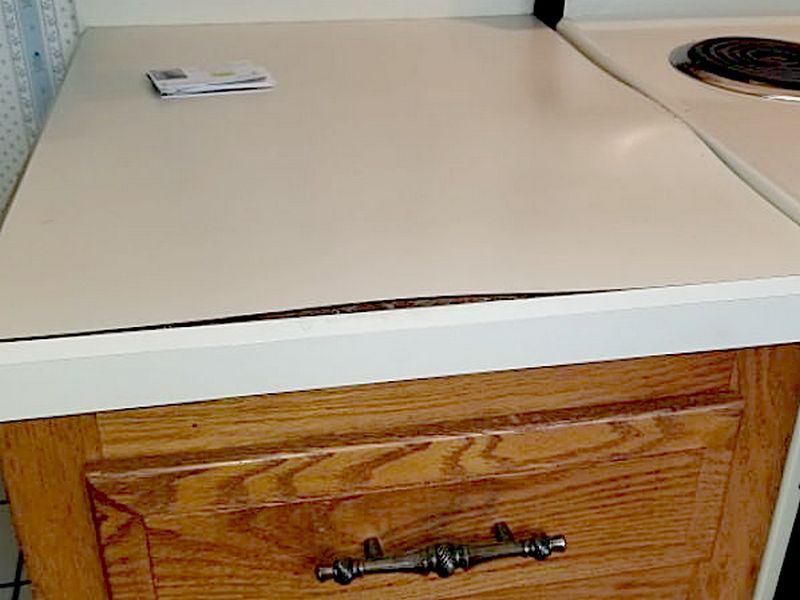
The countertop laminate is loose. This can allow water penetration and further deterioration. Repair or replace the countertop.
The grout has failed at the countertop’s tile junctions. This permits moisture to enter the gaps and cause damage. Regrout the tiles.
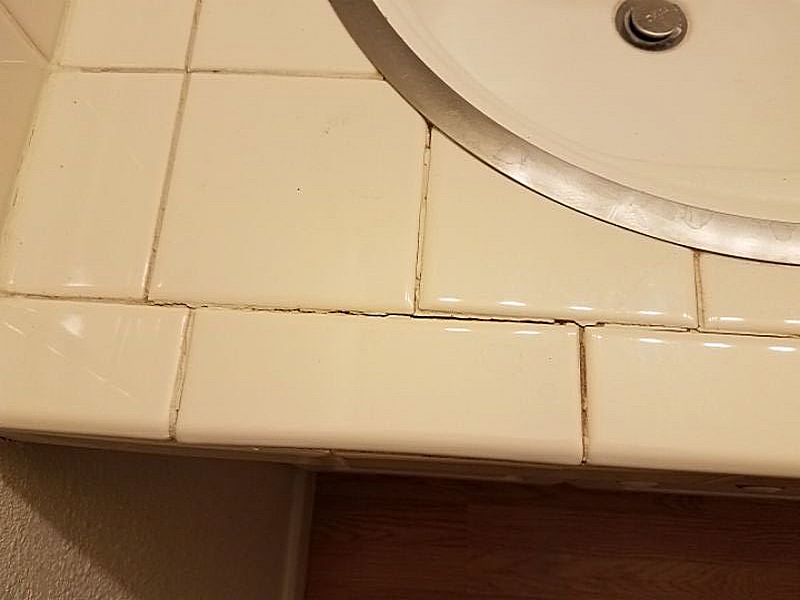
The countertop is damaged. This affects proper and safe function. Repair or replace the countertop as needed.
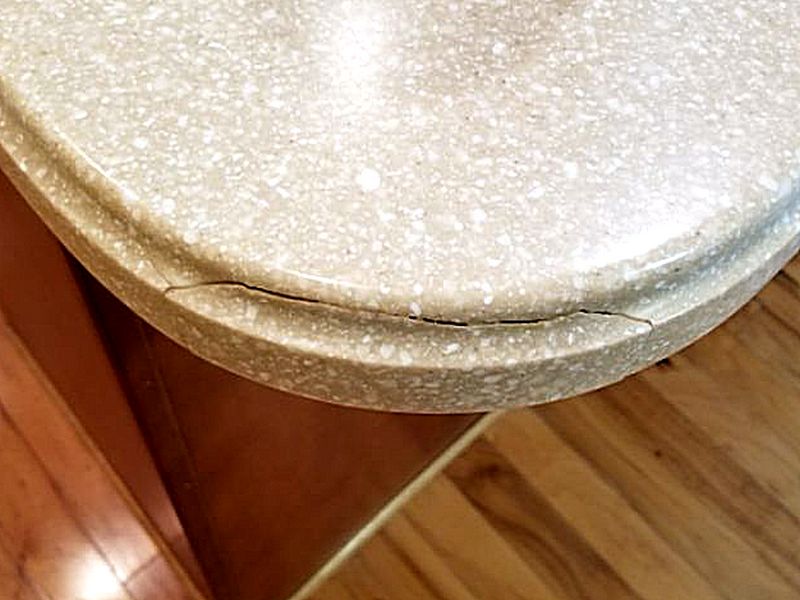
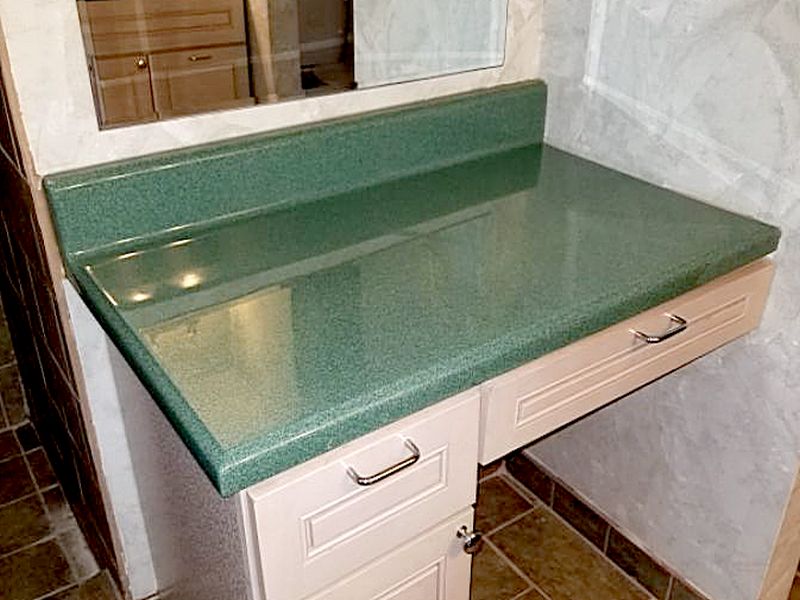
The countertop is warped and out of level. Replace the countertop.

Doors
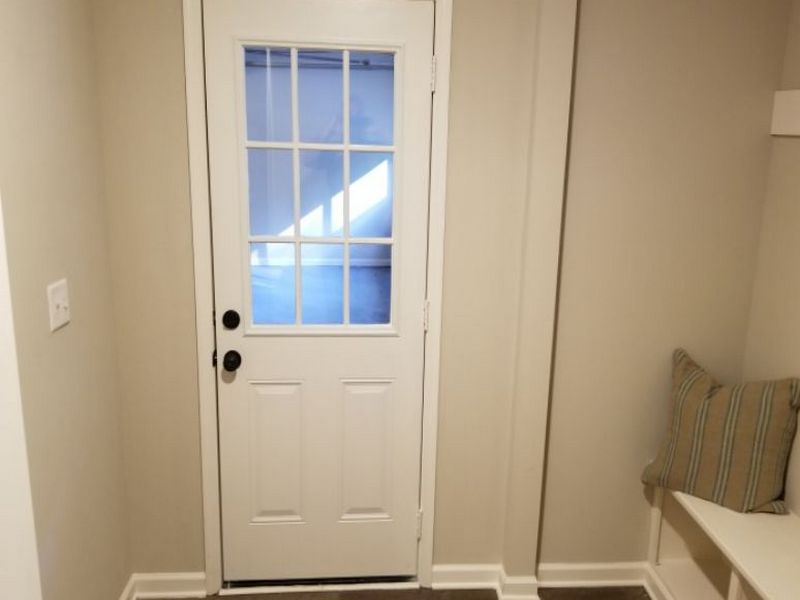
It is easy to take the doors inside our homes for granted; we can open and close them all day without giving a second thought. That is, until something goes wrong. Usually a door’s issues are just an annoyance. Maybe you have to struggle to get into the closet, or you can’t keep a bathroom door closed for privacy, or keep the noise out of your office. But we have to remember that doors are also egress in an emergency, and as such have safety implications. Additionally, a loosely-mounted door, or one with glass installed, can be a personal injury hazard.
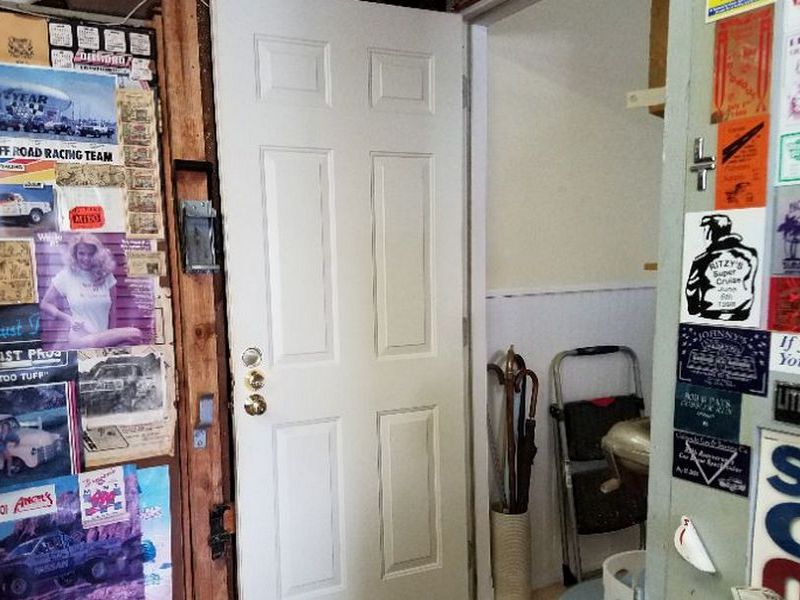
Inspect all doors for smooth operation and secure latching. They shouldn’t bind in the frame, rub the floor or carpet, or have large gaps when closed. Ensure that all hardware is present and in good condition, e.g. hinge pins, hinge screws, strike plates, etc. The glass in a passage door should be safety glass. Doors between garages and the living area should be fire-rated, not have pet openings installed, and in many jurisdictions should be equipped with a self-closer.
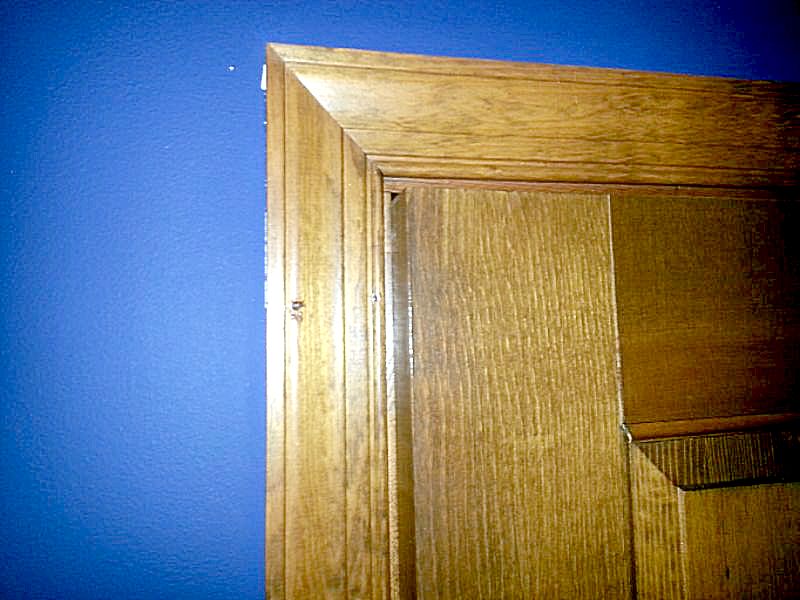
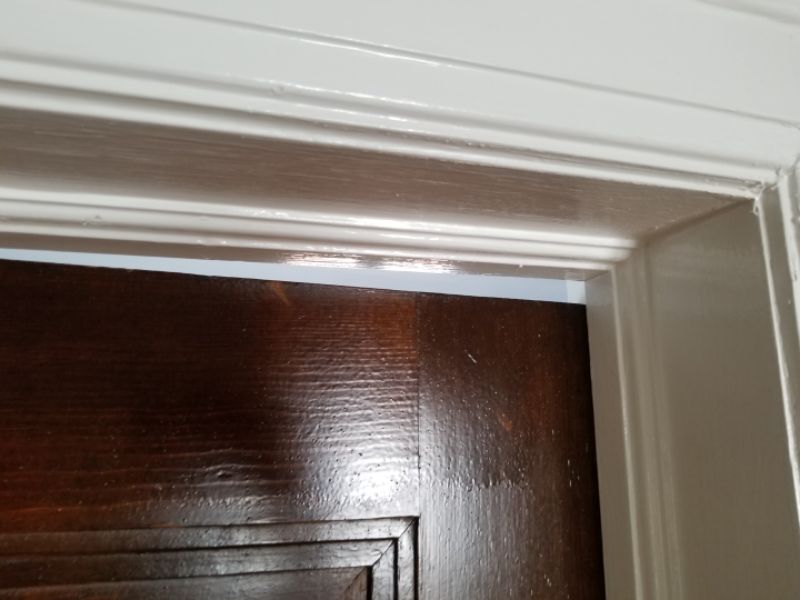
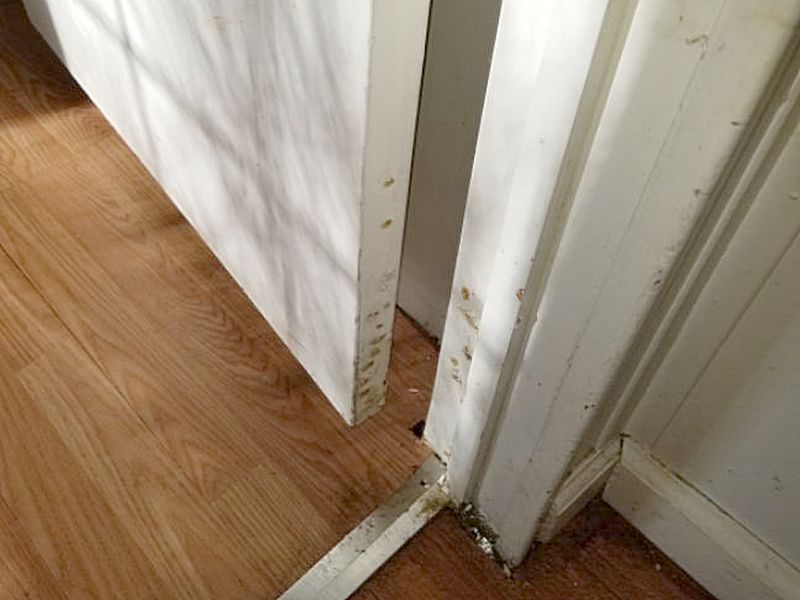
The door does not fit properly within frame. It is binding and/or has large gaps. This affects its function. Adjust or repair the door.
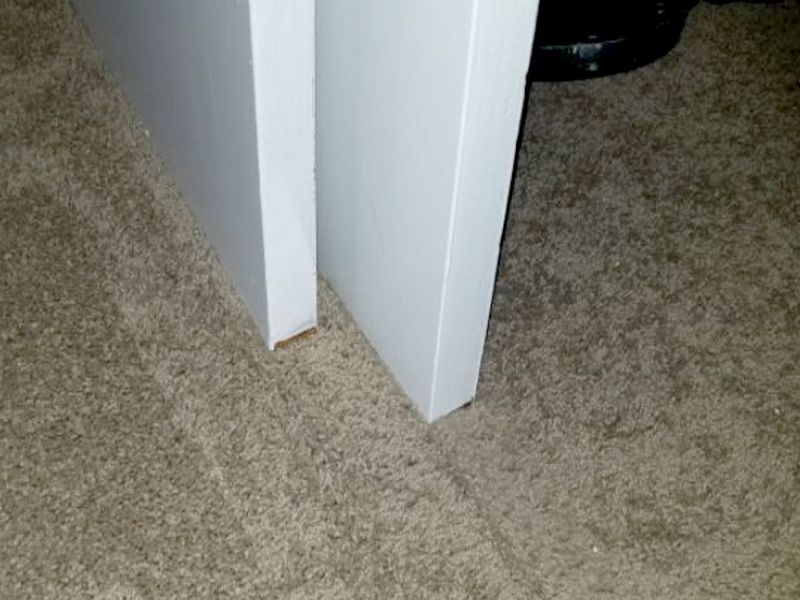
The door rubs on the carpet or floor. This will cause damage. Adjust or replace the door.
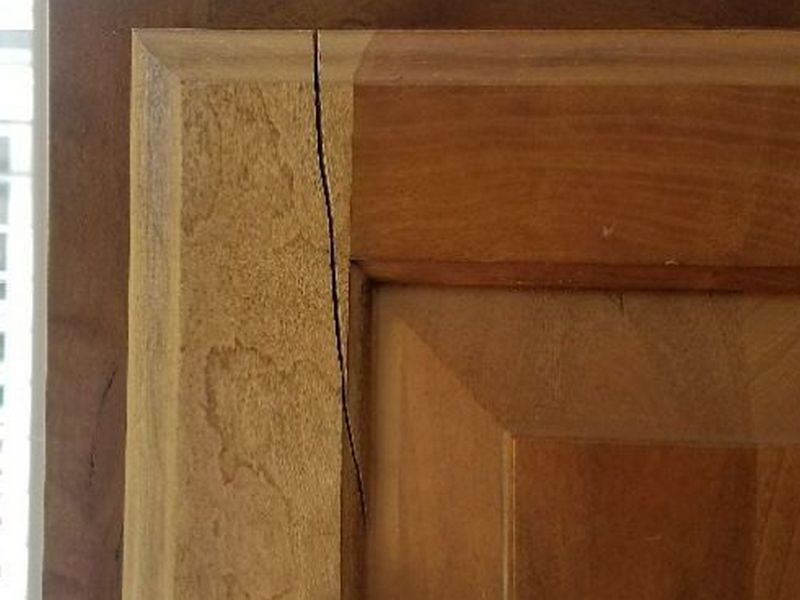
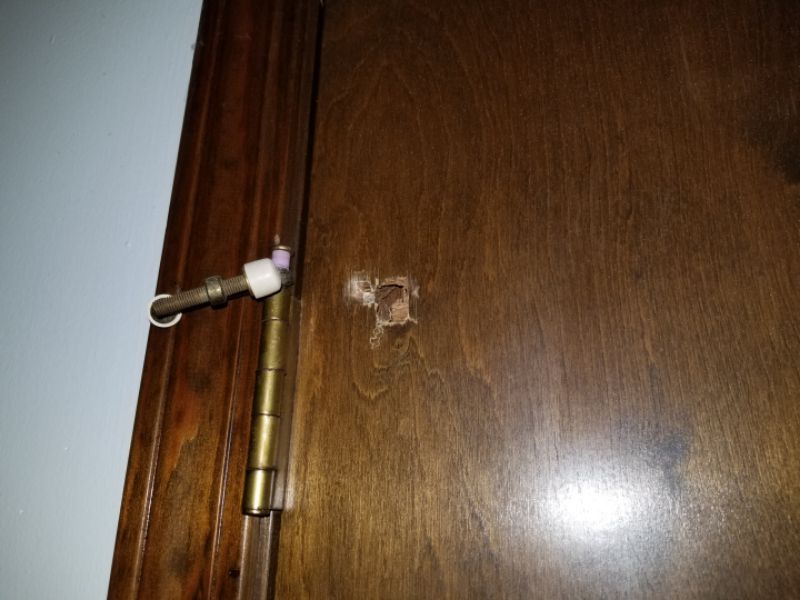
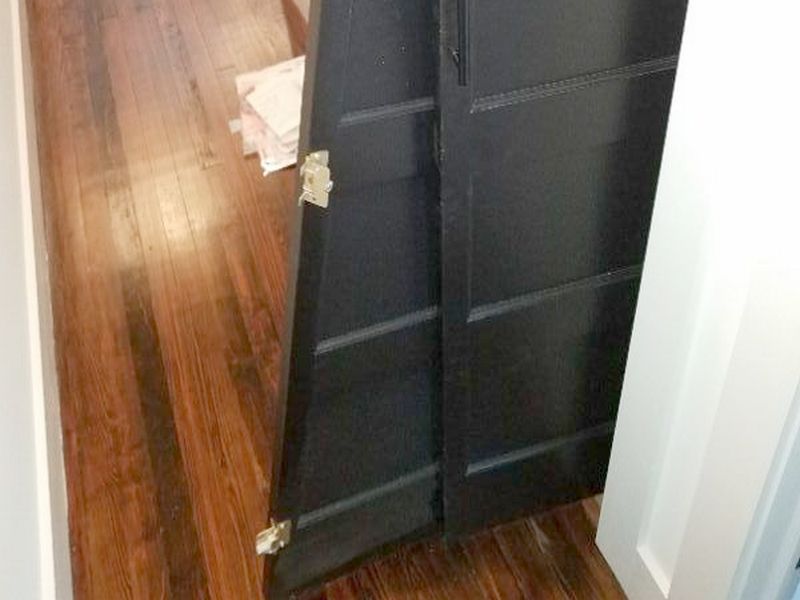
The door is damaged. This can affect proper function. Repair or replace the door.
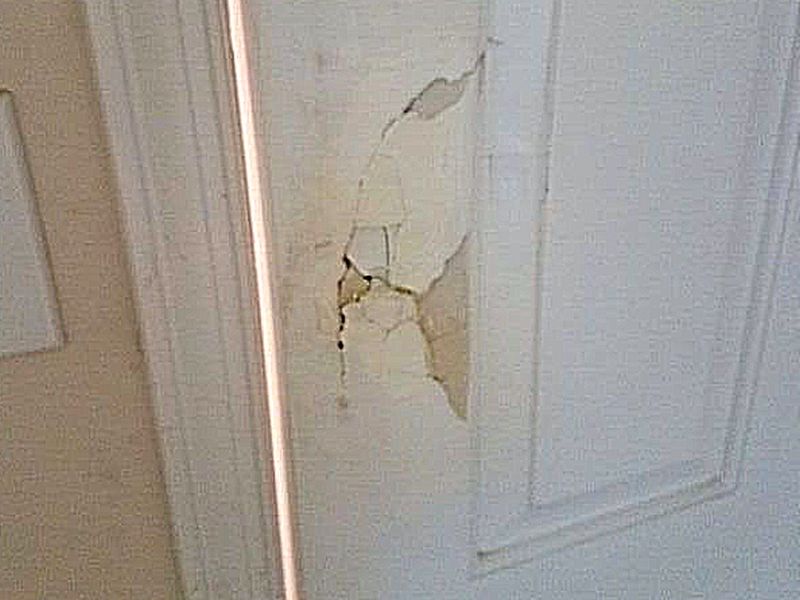
The door is inoperative. Repair or replace the door.
The door is missing. Replace the door.
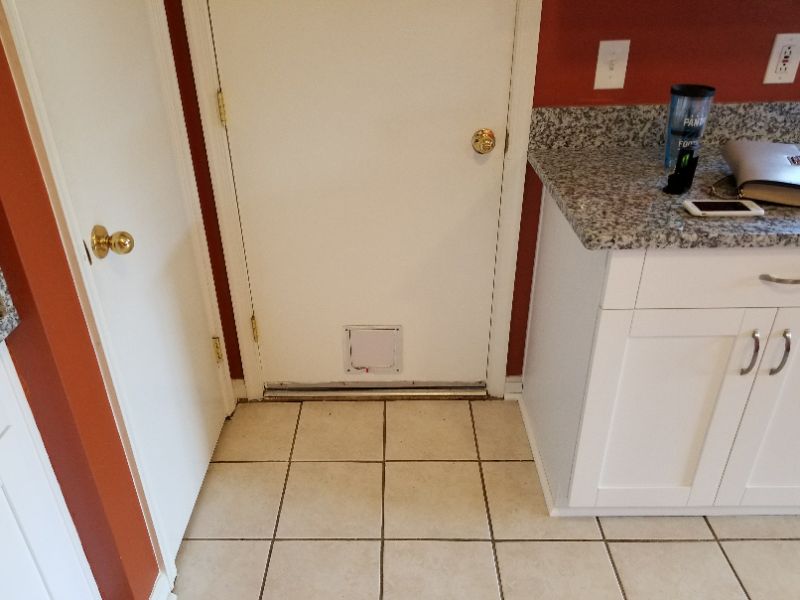
The door between the garage and living space is not fire rated. This is a safety concern. Install a fire-rated door.
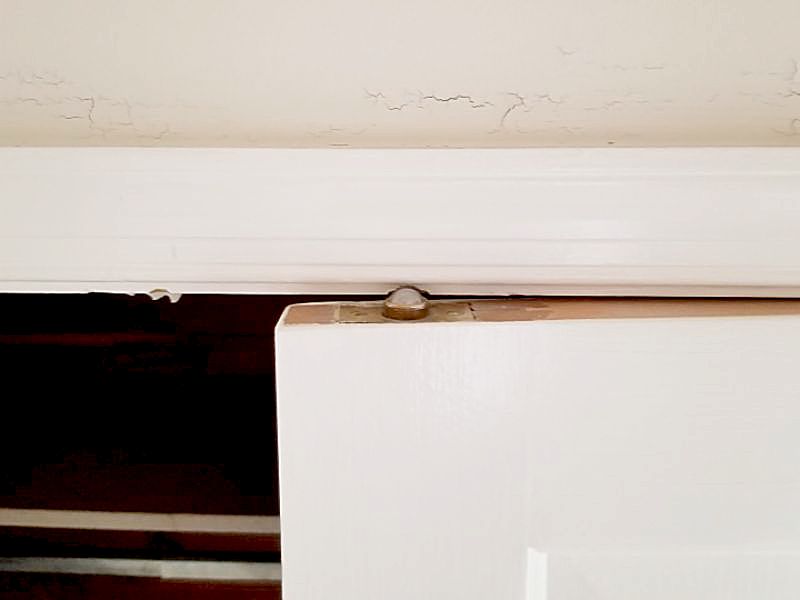
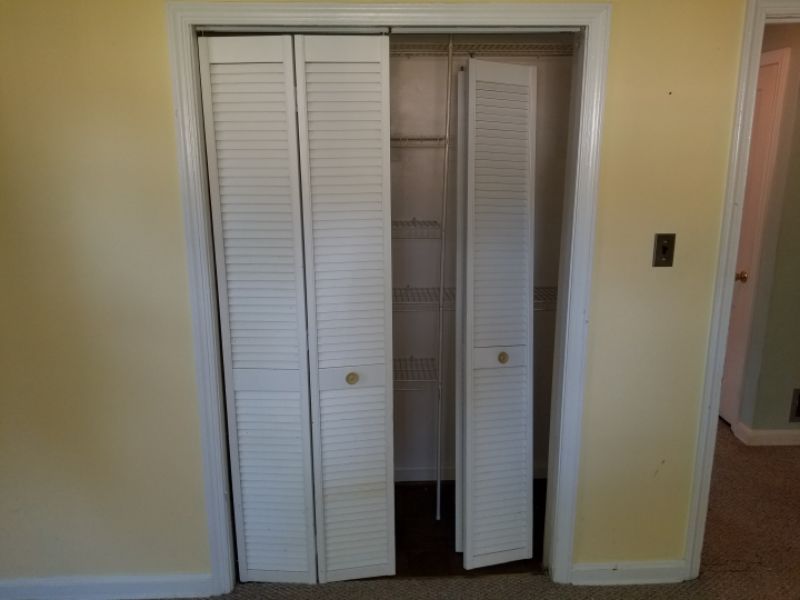
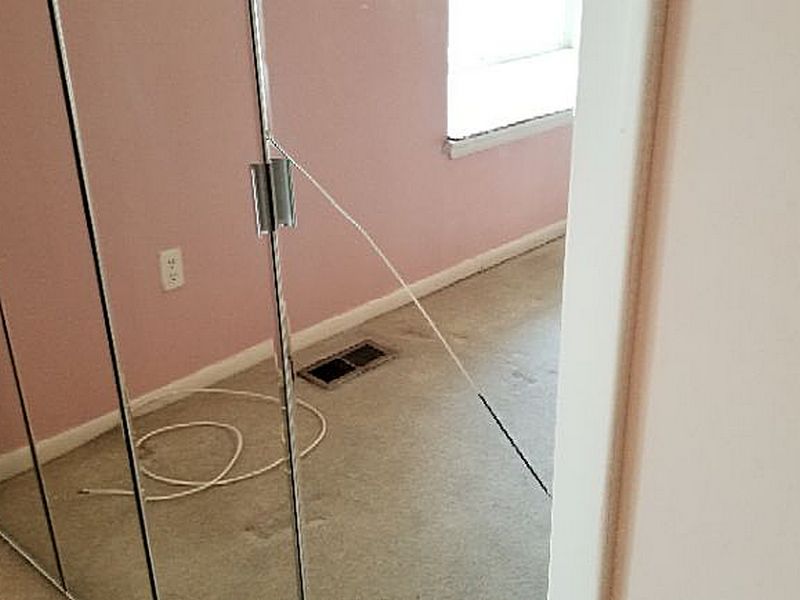
The sliding door floor guides are missing or damaged. This is a safety hazard that can allow the door(s) to come off the track. Replace the floor guides.
The door hardware is damaged or inoperative. This can affect proper operation. Replace the hardware.
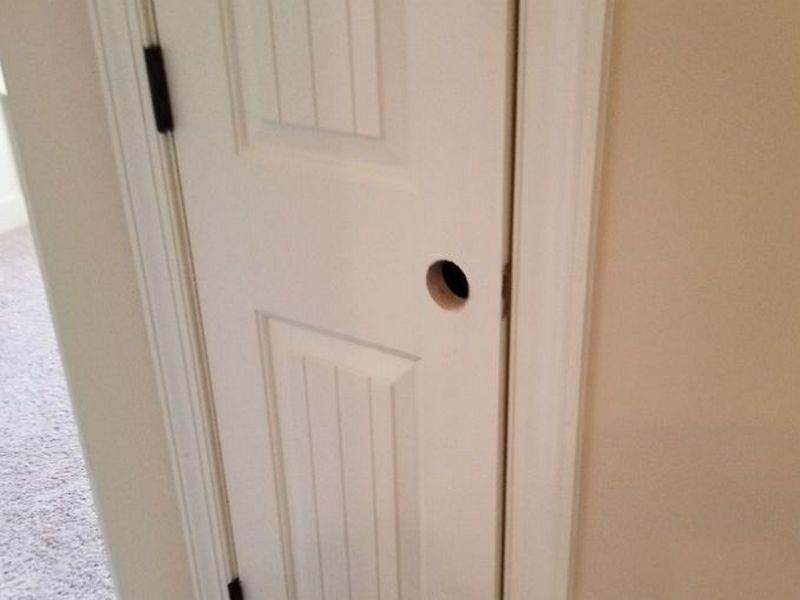
The door hardware is missing. This can affect proper operation. Replace the hardware.
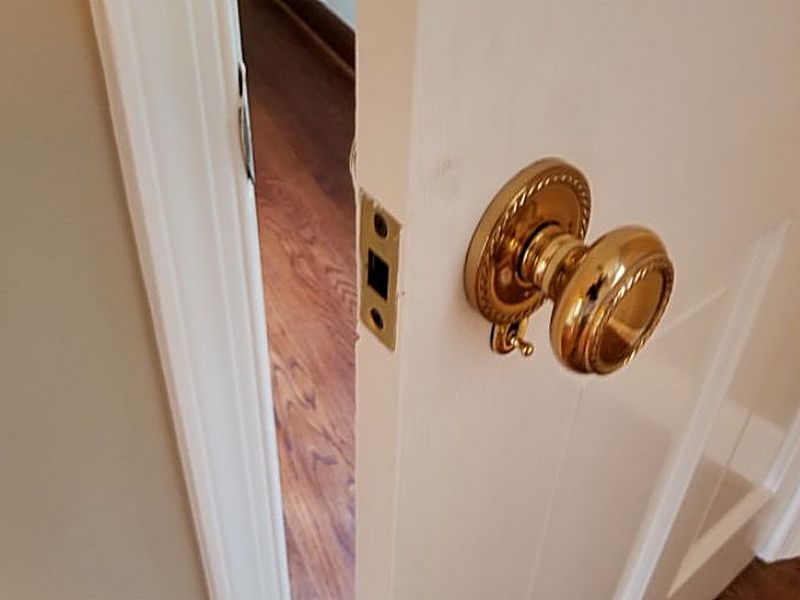
The doorknob is loose or broken. This can affect proper operation. Repair or replace the doorknob.
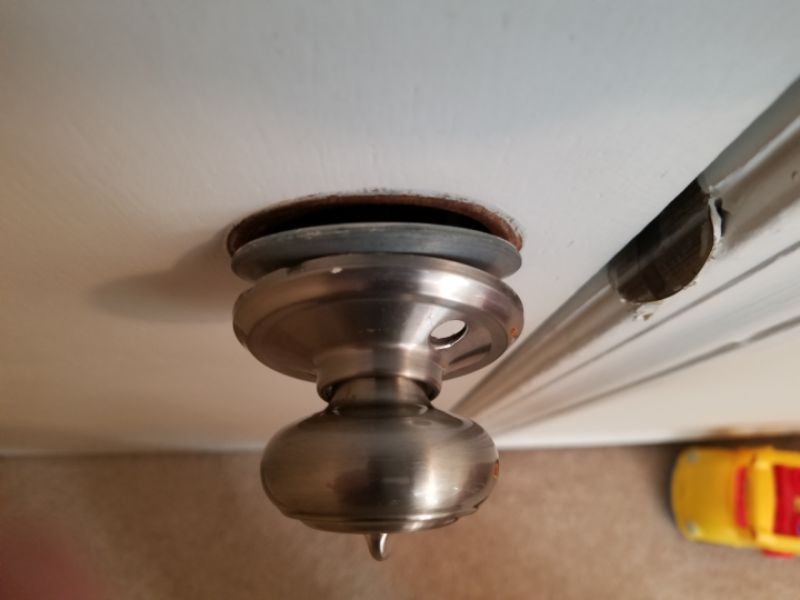
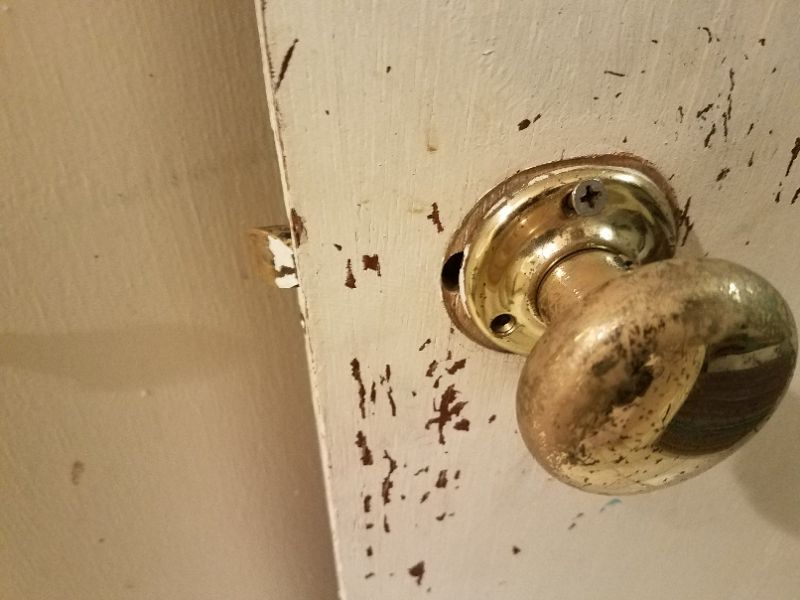
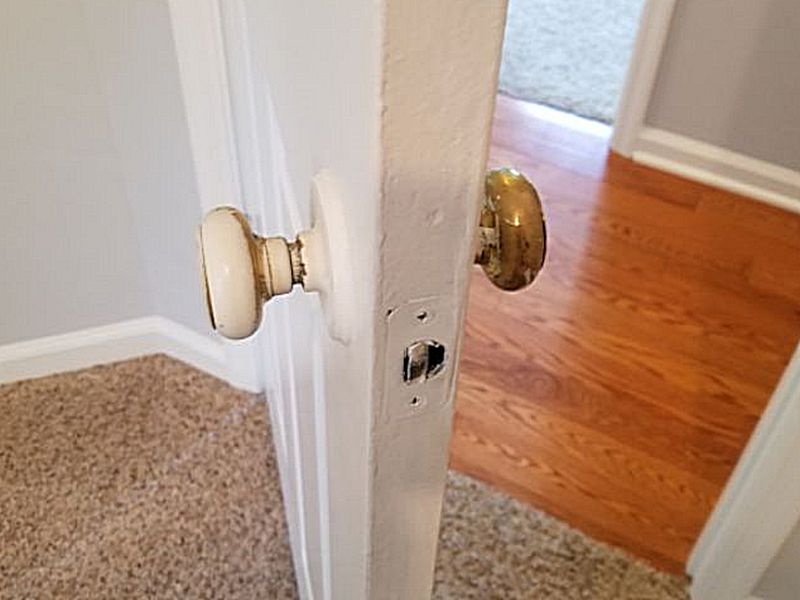
The doorknob is missing. This can affect proper operation. Repair or replace the doorknob.
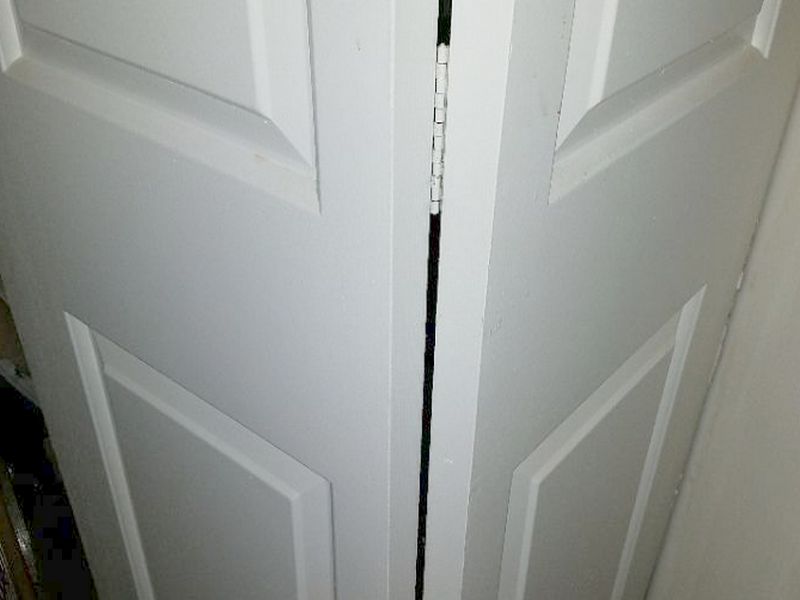
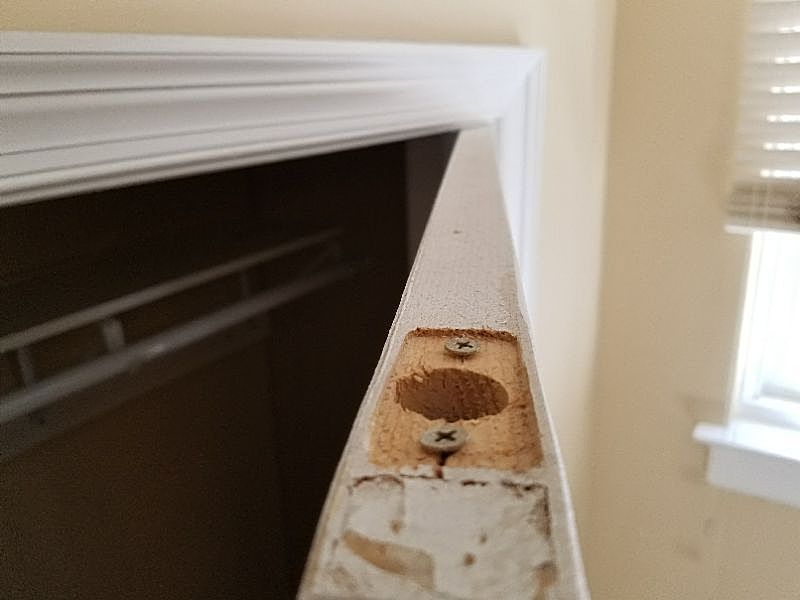
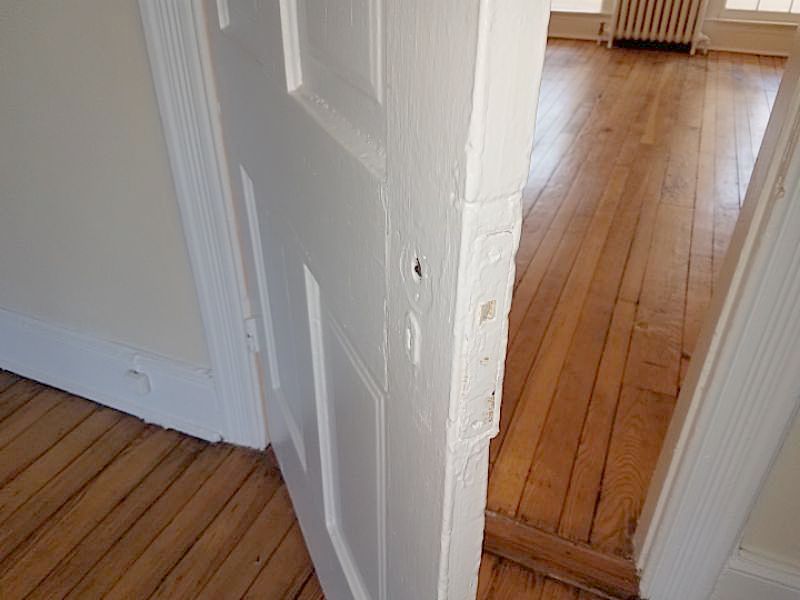
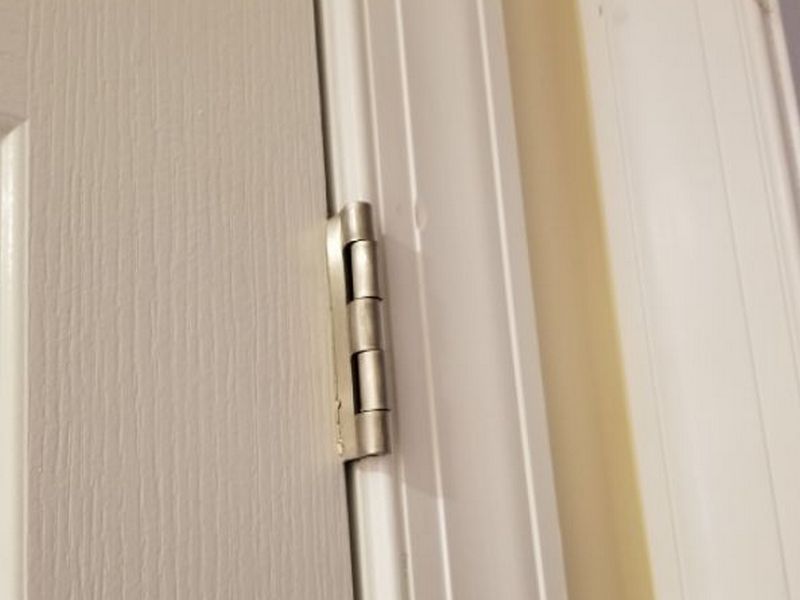
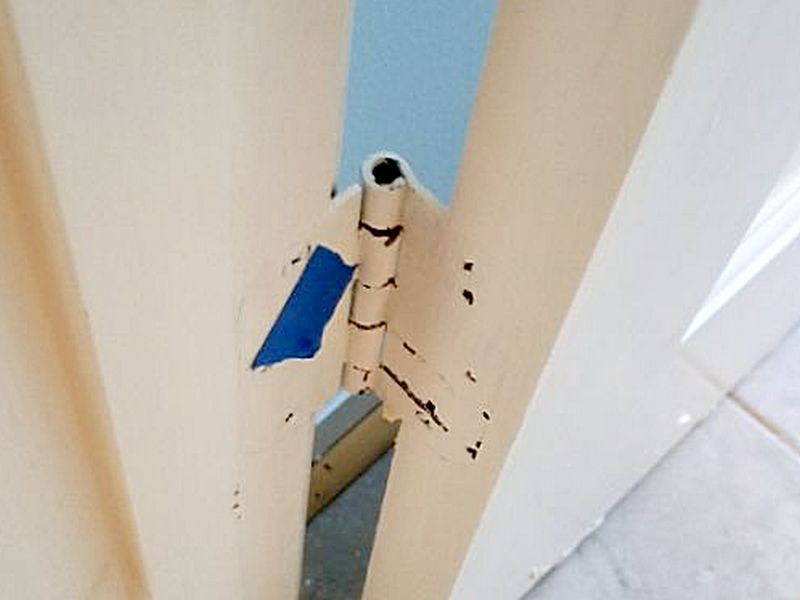
The door hinge is loose or broken. This can affect proper operation. Repair or replace the hinge.
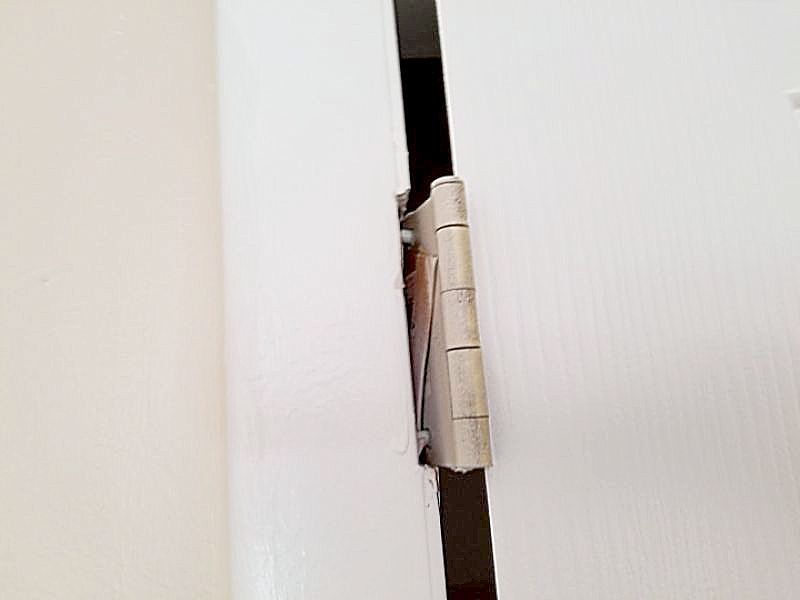
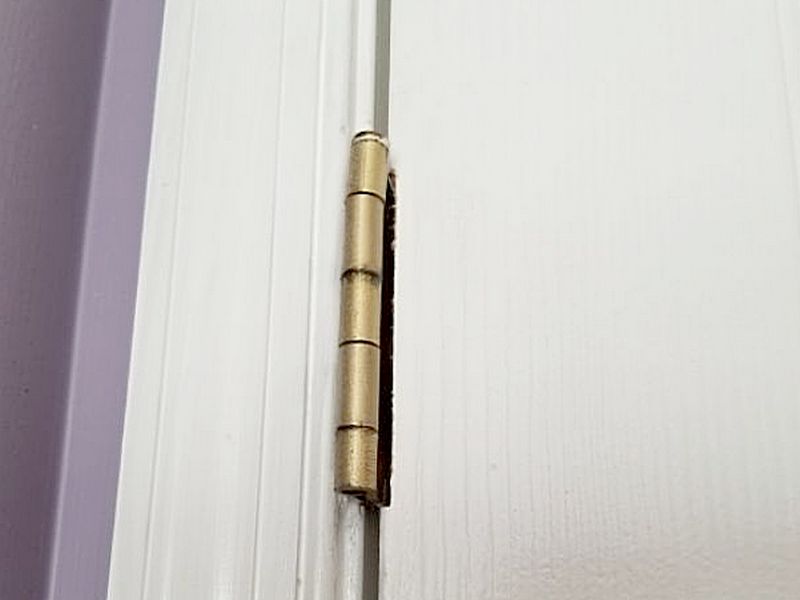
The door hinge is missing. This can affect proper operation. Replace the hinge.
The door hinge pin is missing. This can affect proper operation. Replace the hinge pin.
The door glass is missing. Replace the glass.
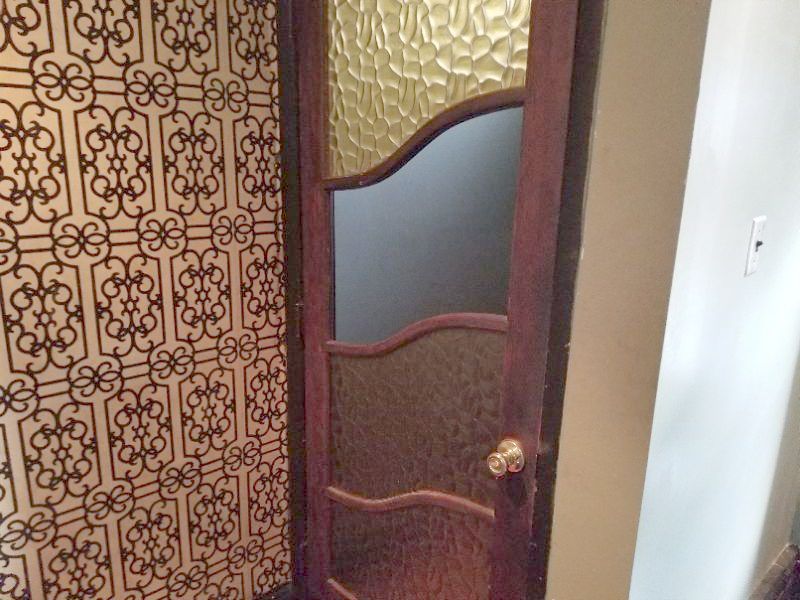
The door glass is broken. This is a safety concern. Replace the glass.
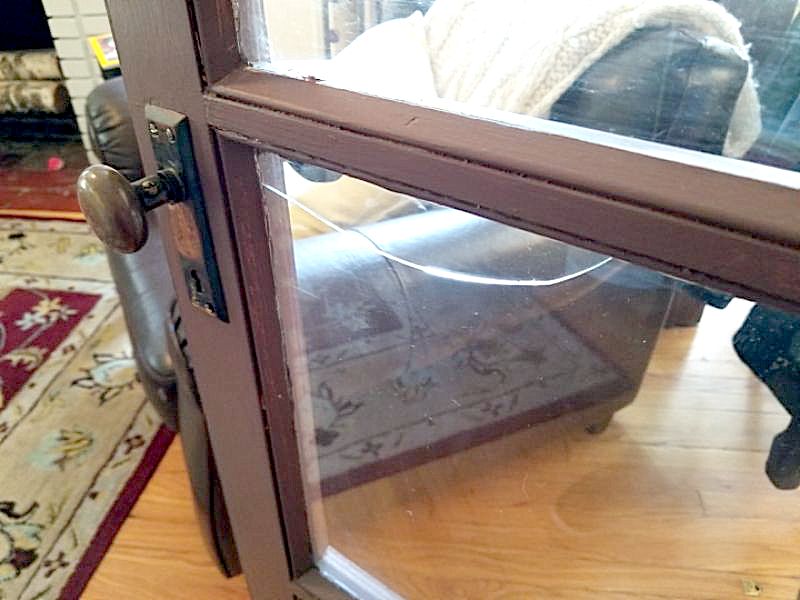
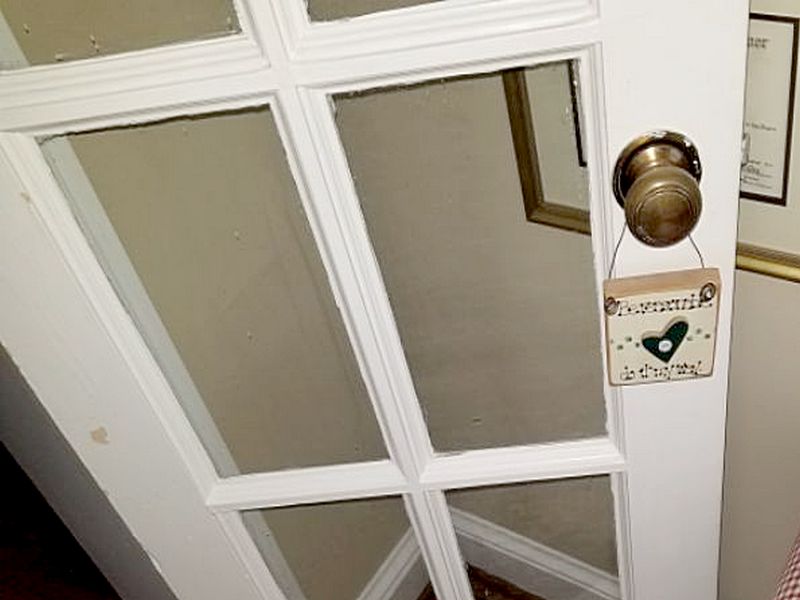
The door glass is not safety rated. While this may not have been required at installation, it is a hazard. Replace the door’s glass with a safety-rated pane.
Doors Limitation and Information Statements
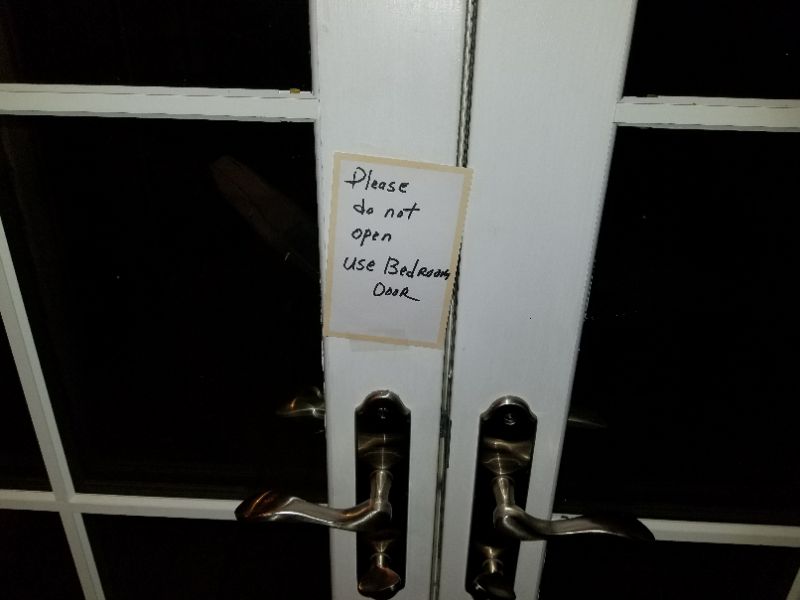
Locked, not operated/tested: The door is locked and, therefore, is not operated or tested.
Blocked, no entry/inspection: The door is blocked and, therefore, is not operated or tested.
Windows
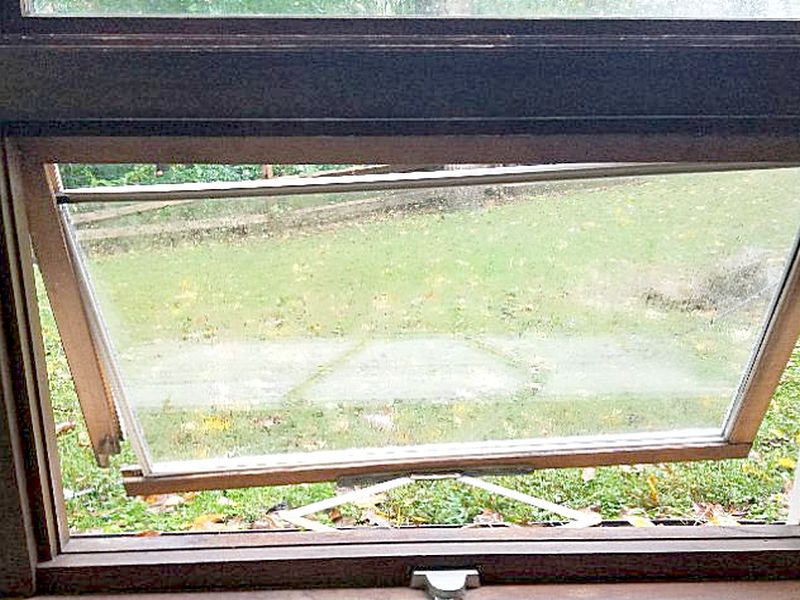
While home inspectors look at windows from the interior and exterior of the house, homeowners generally engage with them while inside. They expect windows to function well; opening, closing, and latching easily. When opened, they should stay in place. While some Realtors® will argue that a failed insulated seal is only “cosmetic” and shouldn’t be in a report, an owner expects to be able to see through a clear pane. Of course, all windows should be weather-tight. Additionally, we must be aware of any safety concerns.
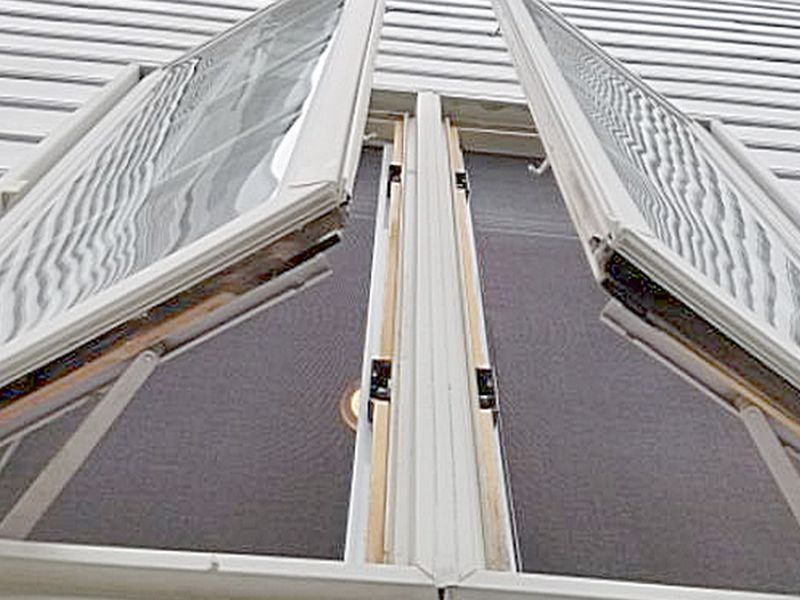
Inspect a “representative sampling” of windows, but get to as many as possible. Look for damage and deterioration. Ensure a good fit and function, intact glass, and clear insulated glass units. Note any windows that should have safety glass that do not. Make sure that your IR scan includes the window area. Windows that provide emergency egress must be compliant, and any security bars must be operative. Don’t forget to inspect any screens present.
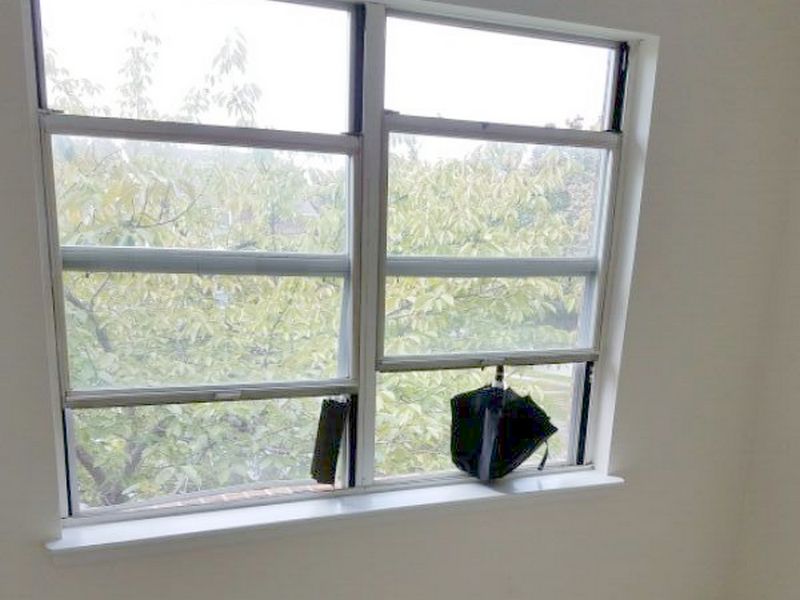
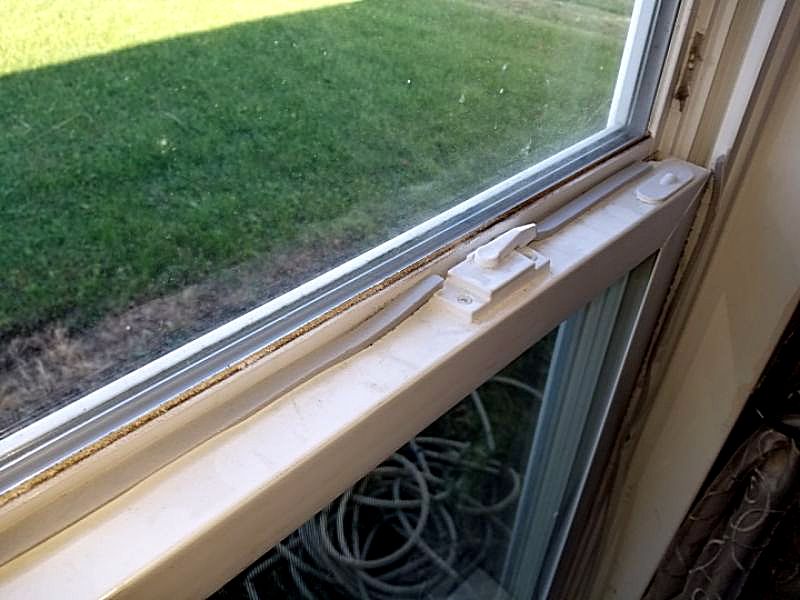
The window sash balance is broken or missing. This is a safety issue. Repair or replace the sash balanced or ropes.
The window is painted/stuck shut. This is a safety hazard. Remove the paint to unstick the window.
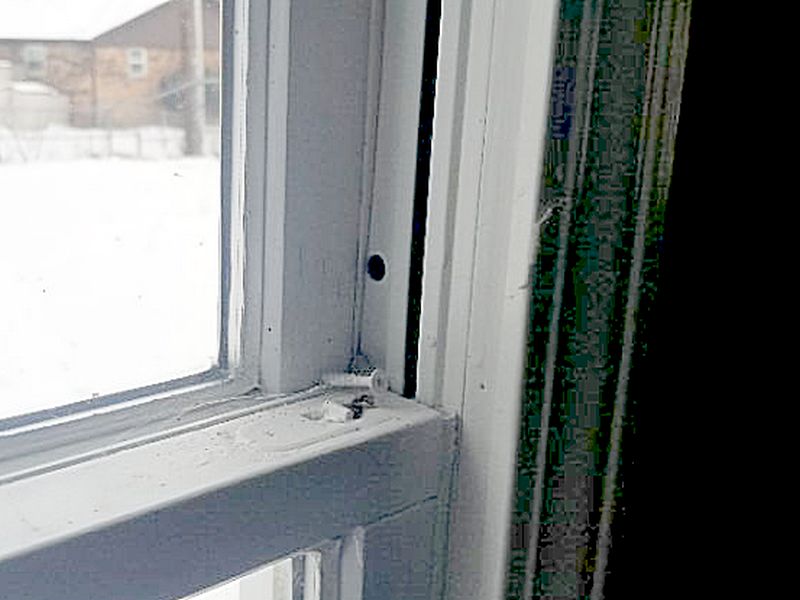
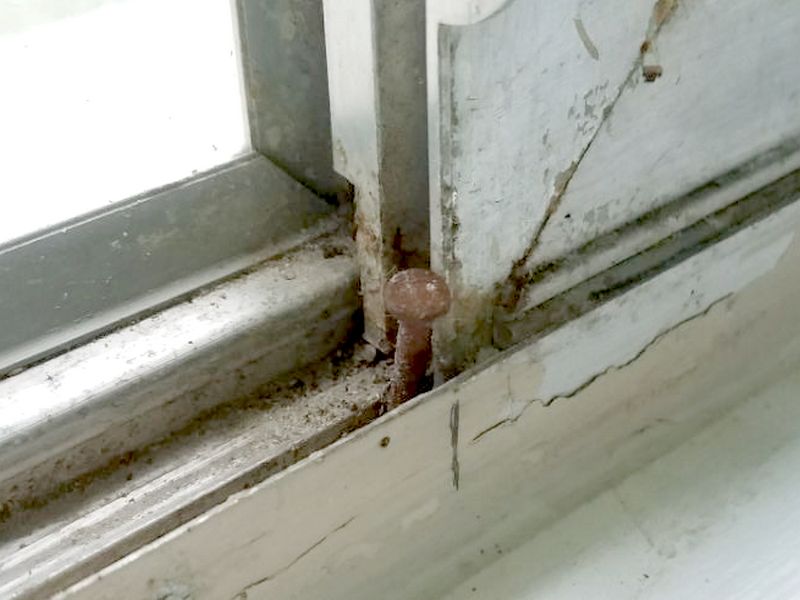
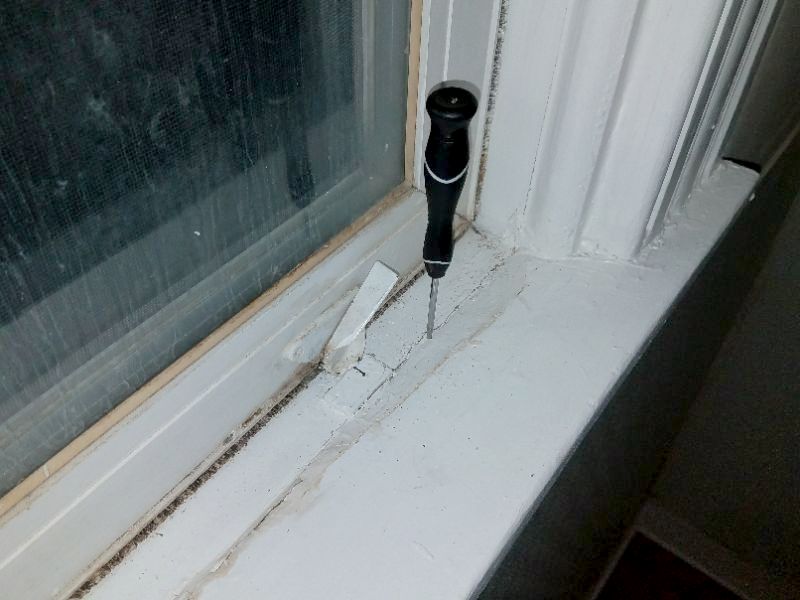
The window is nailed/screwed shut. This is a safety hazard. Remove the nails or screws and fill the holes.
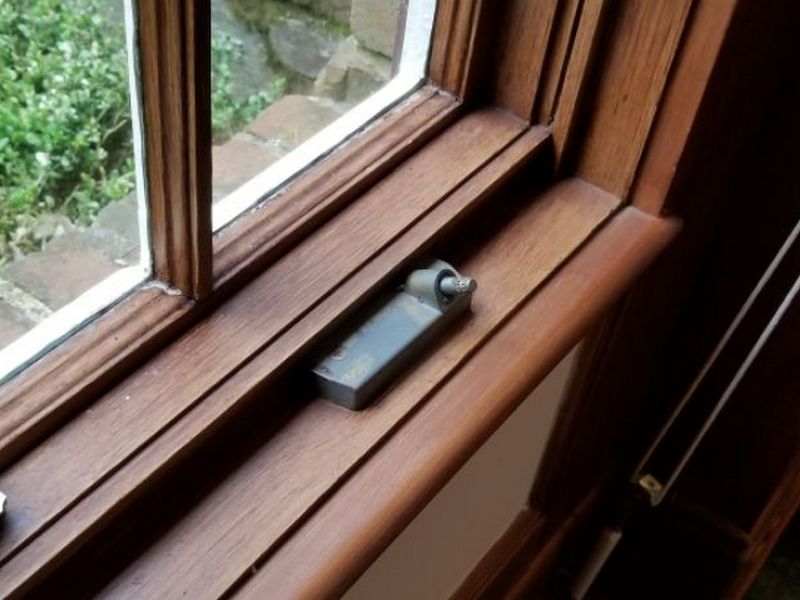
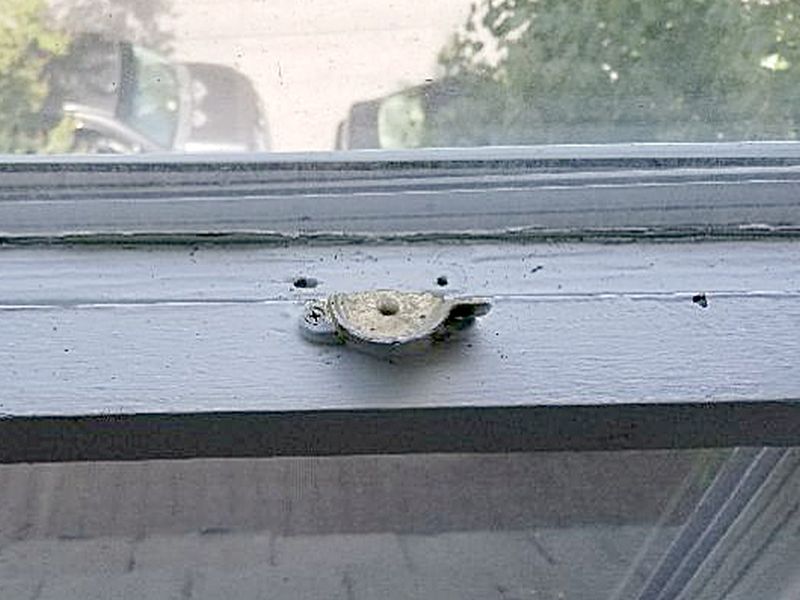
The window hardware is damaged or inoperative. This affects proper function. Repair or replace the hardware.
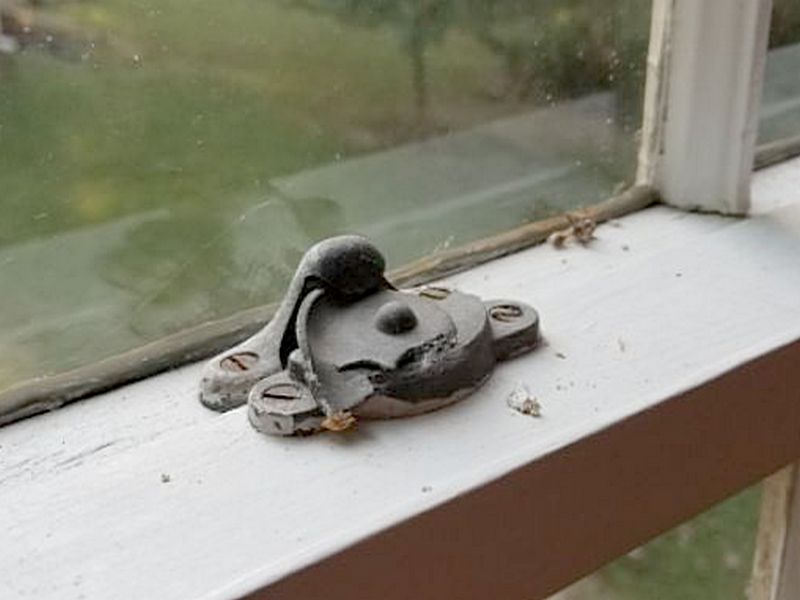
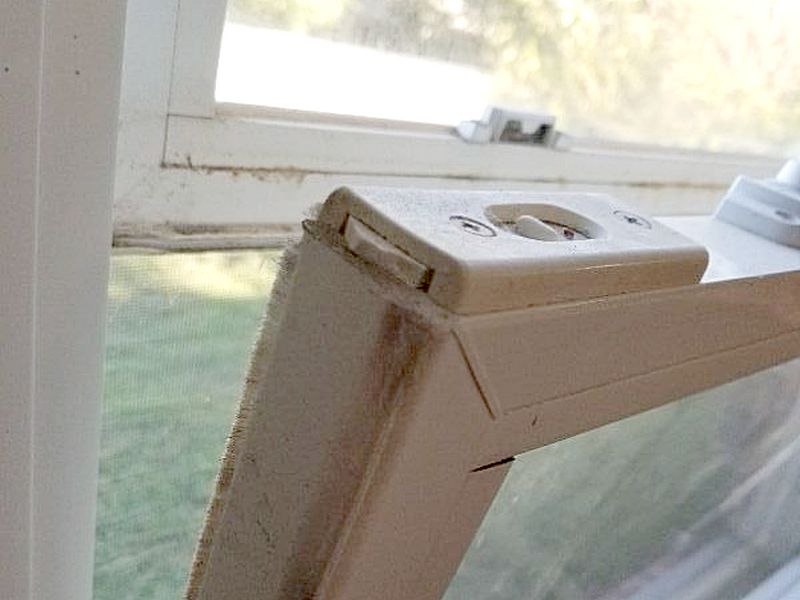
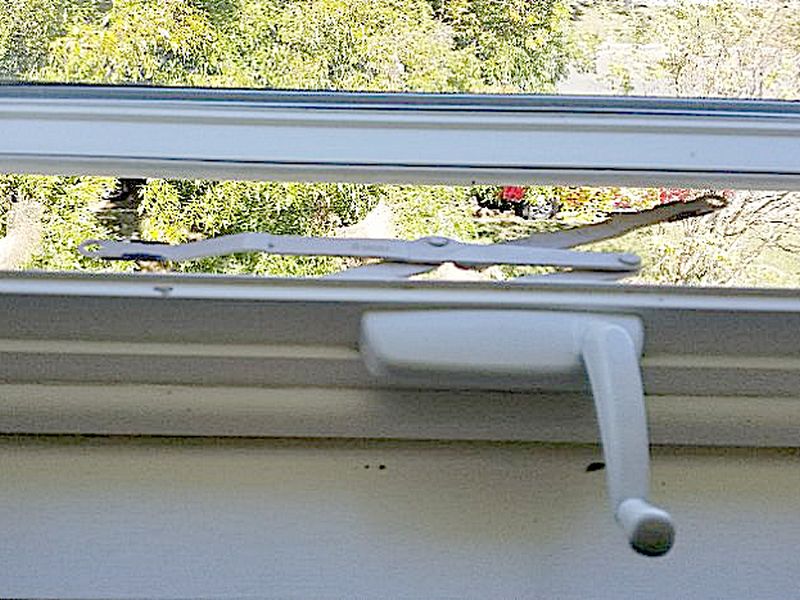
The window hardware is missing. This affects proper function. Replace the hardware.
The window is damaged. This can affect proper operation. Repair or replace the window as needed.
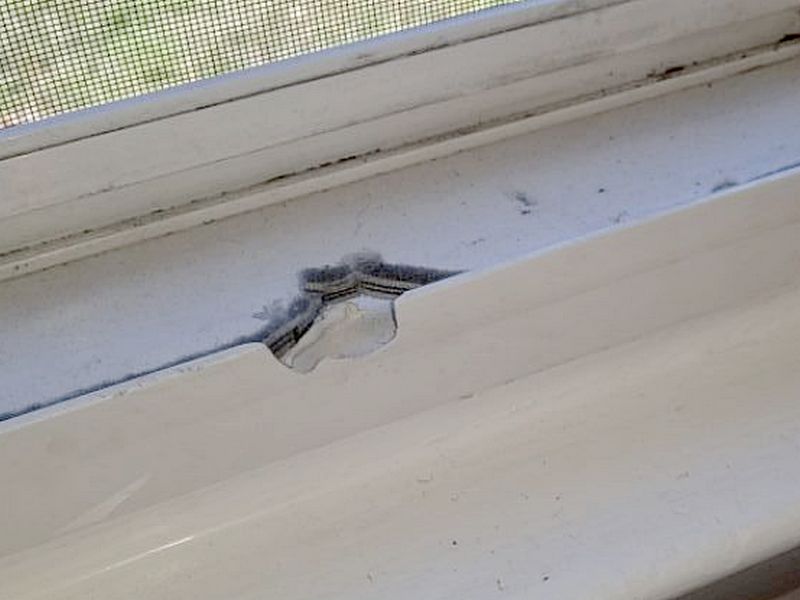
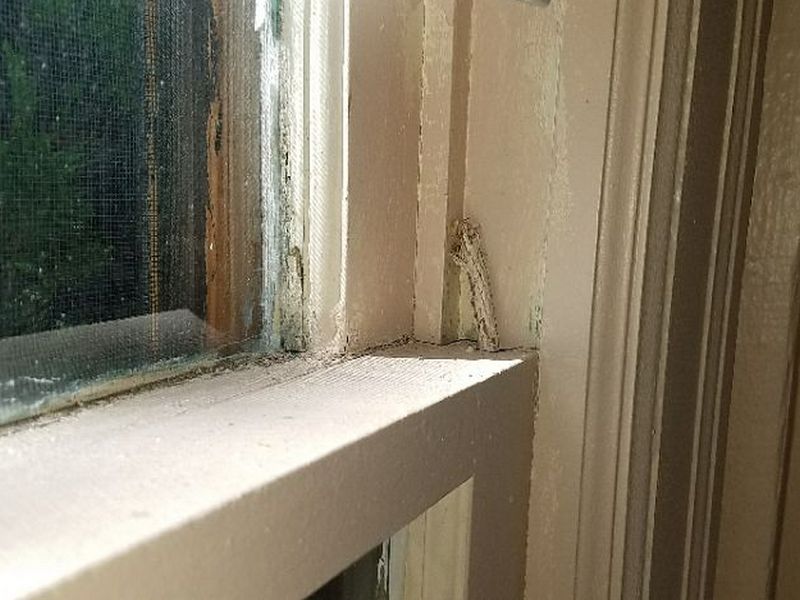
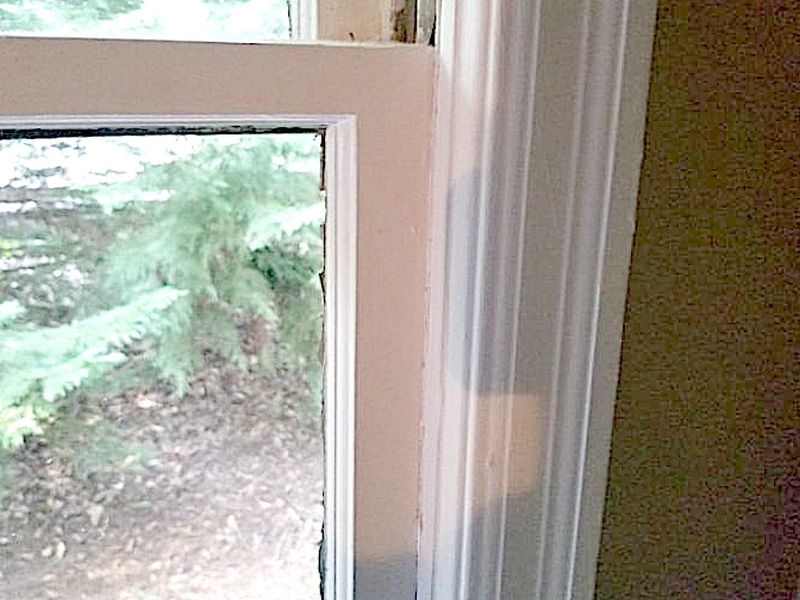
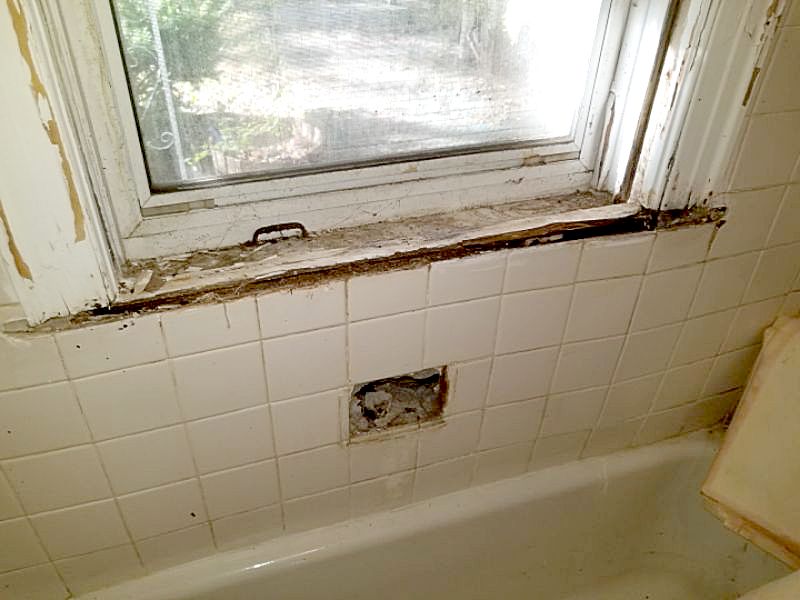
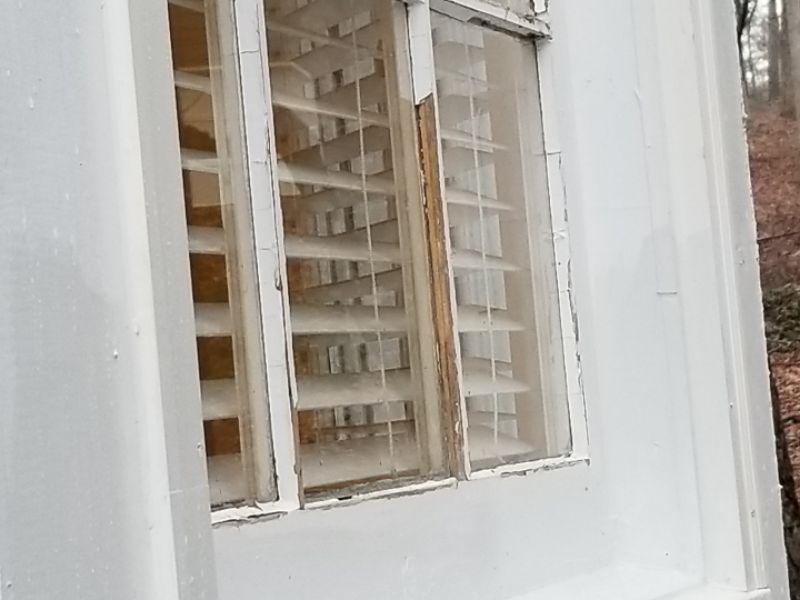
The window is deteriorated. This can affect proper operation and allow water penetration. Repair or replace the window as needed.
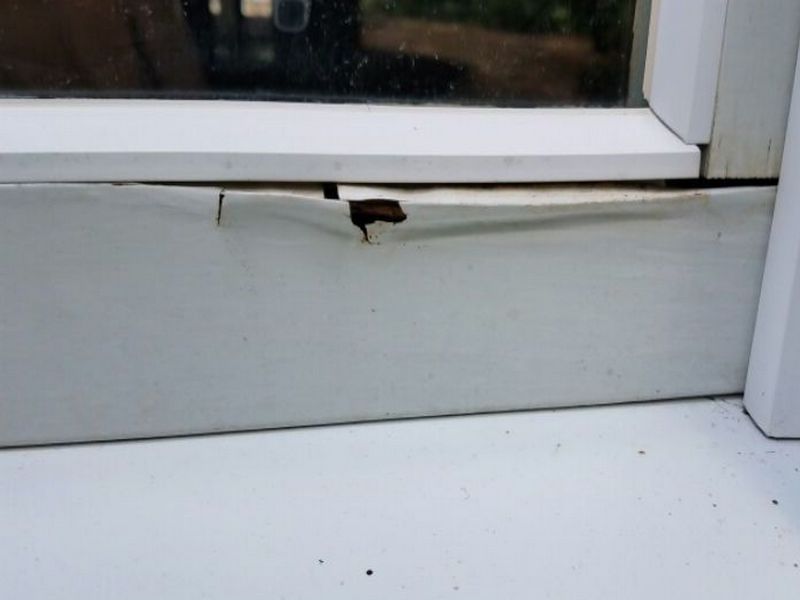
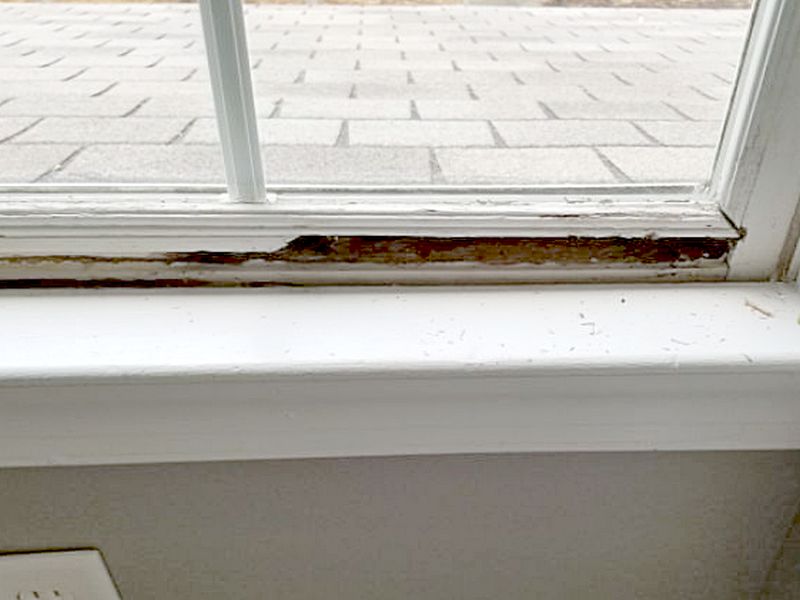
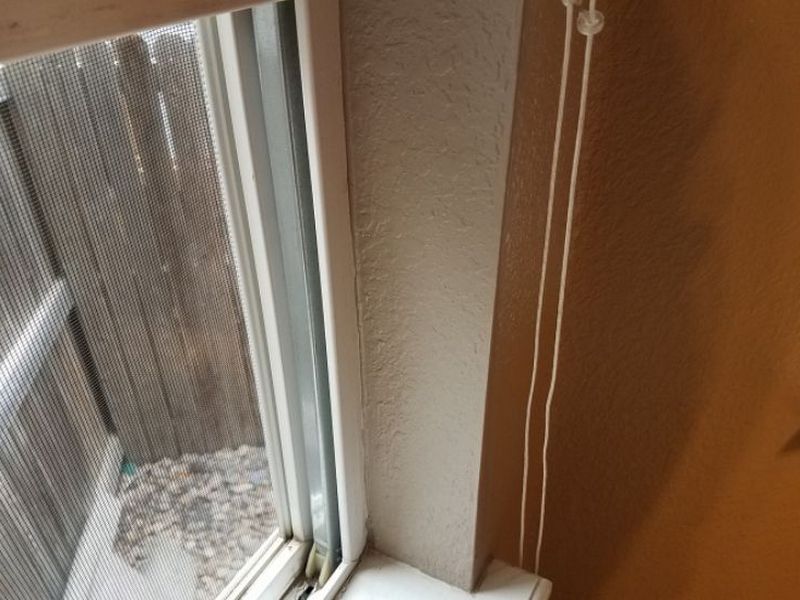
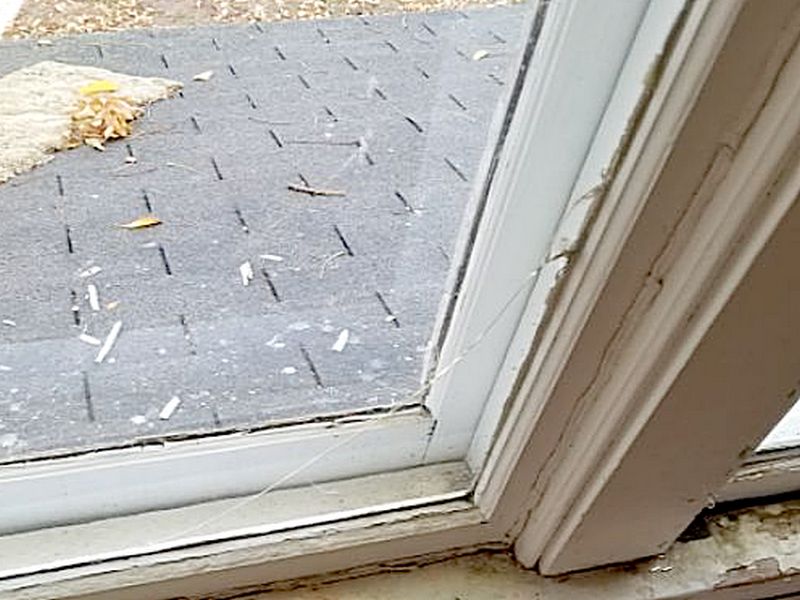
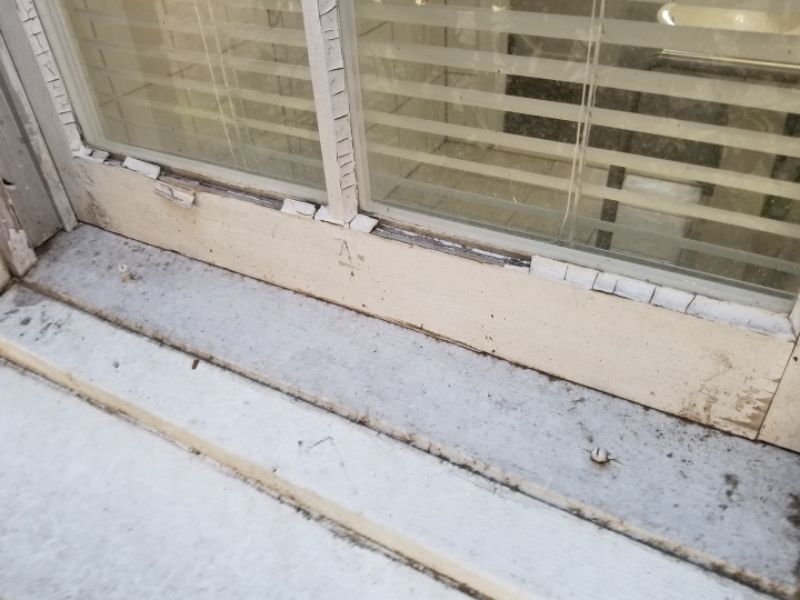
The window sill is damaged or missing. Repair or replace the sill.
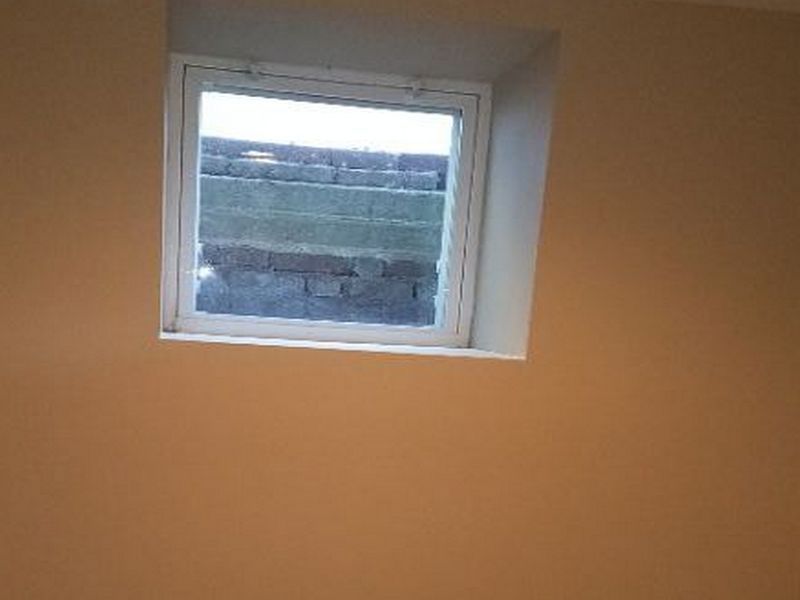
The window does not comply with emergency egress requirements. This is a safety issue. Install a window in compliance with emergency egress requirements.
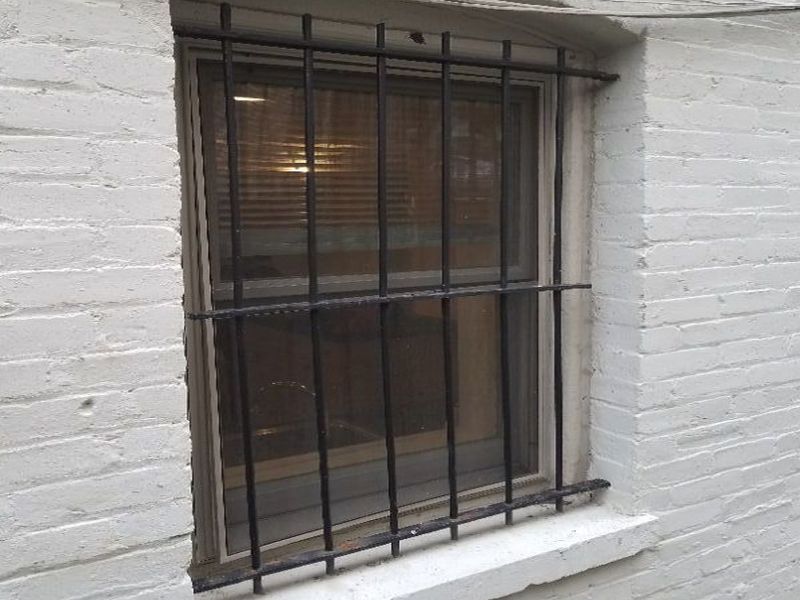
The window security bars are inoperative. This is a safety issue. Repair or replace the security bars.
The window sash is loose when the window is closed. This permits air, and possibly water, to pass through. Repair or replace the sash.

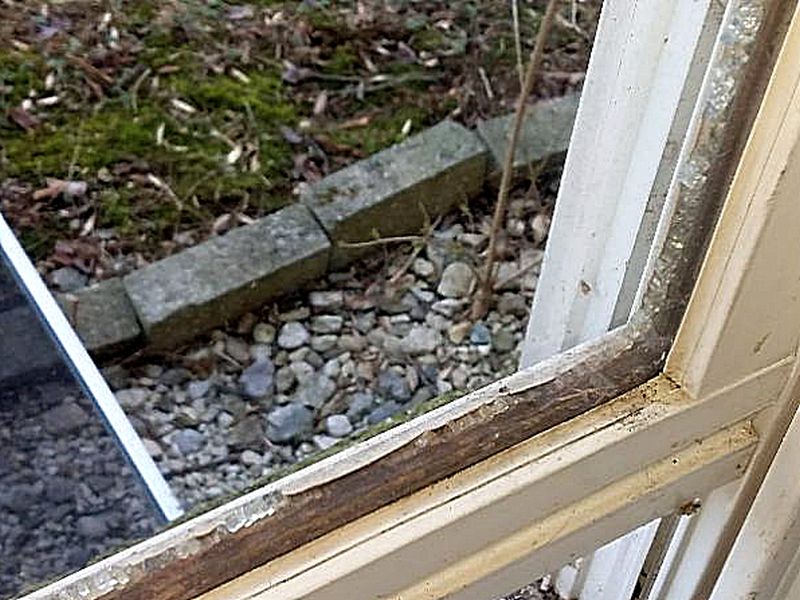
The window glazing (putty) is deteriorated. This will allow air and water penetration, and damage to the sash. Install new glazing.
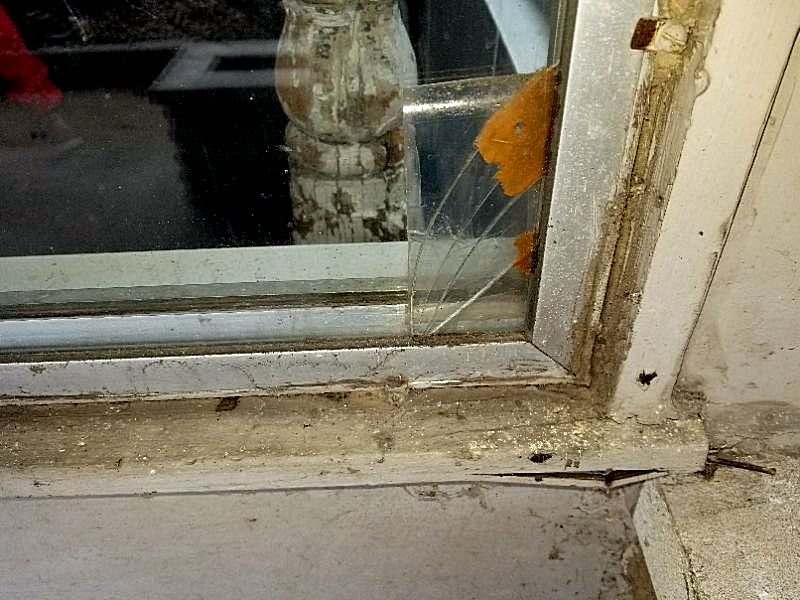
The window pane is broken. This is an energy loss and safety issue. Replace the window pane.
The window pane is missing. This is an energy loss and safety issue. Replace the pane.
The window is missing safety glass. No manufacturer’s mark is visible. While it may not have been required at the time of installation, it is still a safety concern. Replace the glass with safety rated glass.
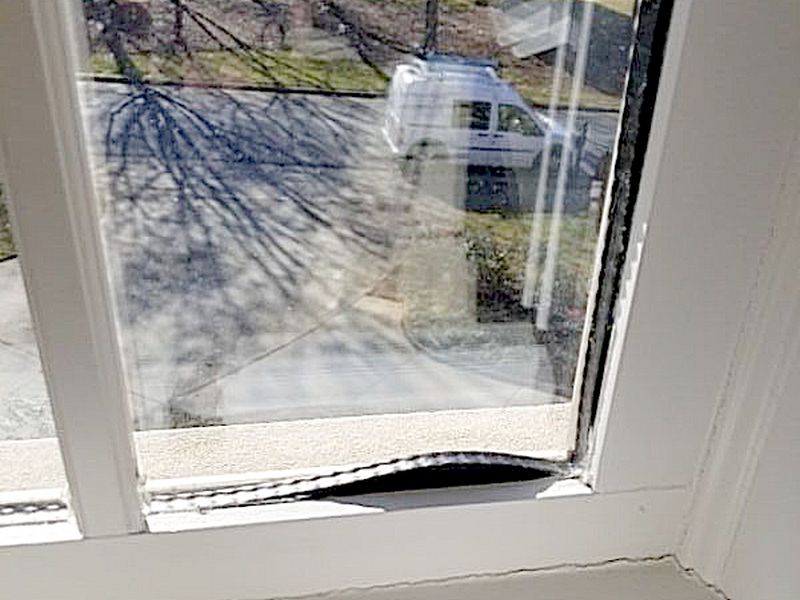
The window has a thermoplastic sealant strip that has shifted out of place between the glass panes. This will likely lead to failure in the seal, resulting in a loss of insulation value, condensation, and fogging. Replace the insulated glass unit or the window as needed.
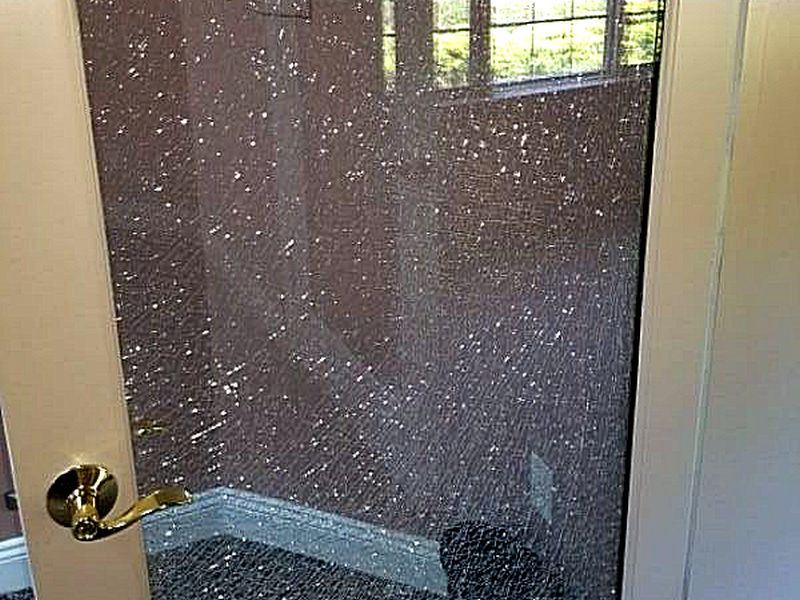
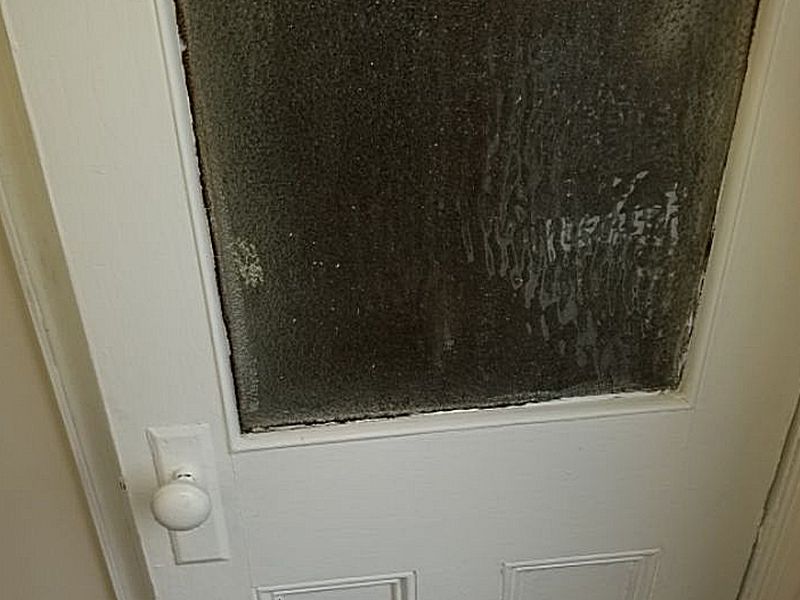
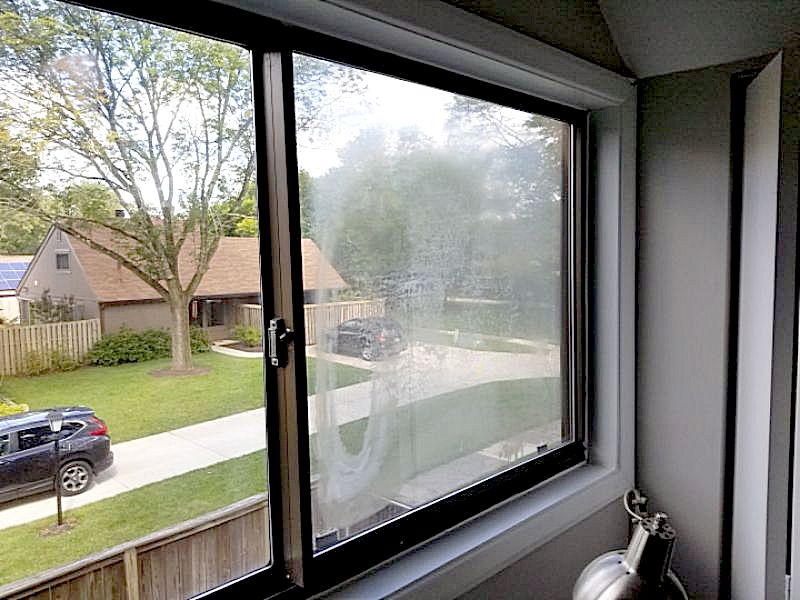
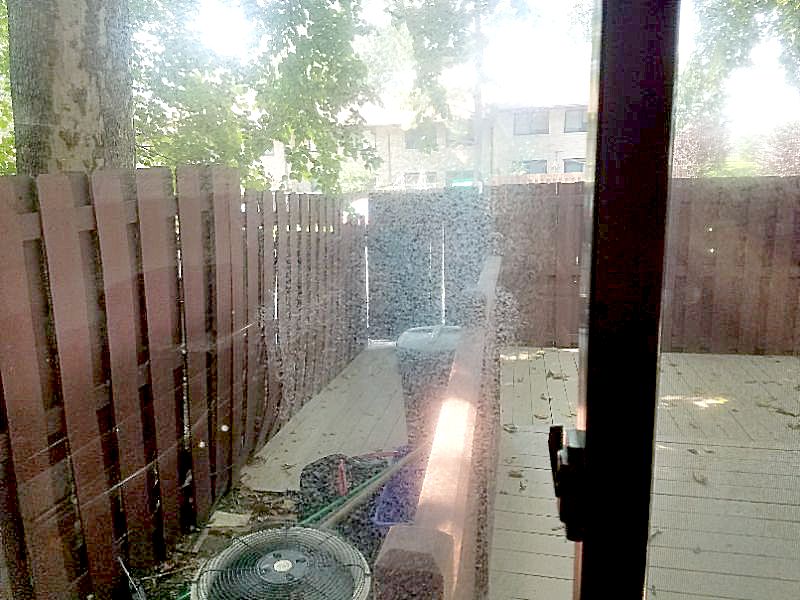
The window has a failed insulated glass seal. This permits condensation stains to develop between the glass panes, and will increasingly compromise the visibility, appearance, and insulation value. Other unidentified windows with the same issue may exist since certain atmospheric conditions must be present to identify them. Replace the insulated glass unit or the window as needed.
Windows Limitation and Information Statements
Locked, not operated/tested: The window is locked and, therefore, is not operated or tested.
Blocked, no entry/inspection: The window is blocked and, therefore, is not operated or tested.
Near/at end useful life, budget for replacement: The windows are near or at the end of their useful lives. We recommend establishing a budget to replace the windows.
Past end useful life, budget for replacement: The windows are past the end of their useful lives. We recommend establishing a budget to replace the windows.
Below-grade windows for emergency egress must have window wells. Clearance dimensions and ladders should meet current accepted safety standards: Below-grade windows which are required for emergency egress must have window wells. Horizontal dimensions required are a minimum net clearance of 9 square feet with a width of 36″. Window wells with a vertical depth >44″ below the adjacent ground level need to be equipped with a ladder or steps permanently affixed and accessible with the window in the fully open position. The width of the ladder should be a minimum of 12″ and it should project at least 3″ from the wall. Rungs should not be spaced >18″ on center vertically for the full height of the window well.
Safety glass required in individual fixed/operable windows with four conditions: Safety glass is required in individual fixed or operable windows which meet four conditions: i) exposed area of an individual panel is >9 square feet, ii) exposed bottom edge is <18″ above the floor, iii) exposed top edge is >36″ above the floor, iv) there are one or more walking surfaces within 36″ of the glazing. Safety glass also is required at fixed and sliding door panels and at bi-fold or sliding closet doors, storm doors, enclosures for showers and bathtubs, saunas and steam baths in which glass is <60″ from floor or walking surface, near all hinged doors where the glass is within a 24″ arc of the door and <60″ from floor or walking surface. Railings and guardrails utilizing glass must also be safety glass. Any glass in a door which permits a sphere of >3″ to pass through also requires safety glass. Older homes often do not have safety glass and there is generally no requirement to replace glass unless remodeling is performed.
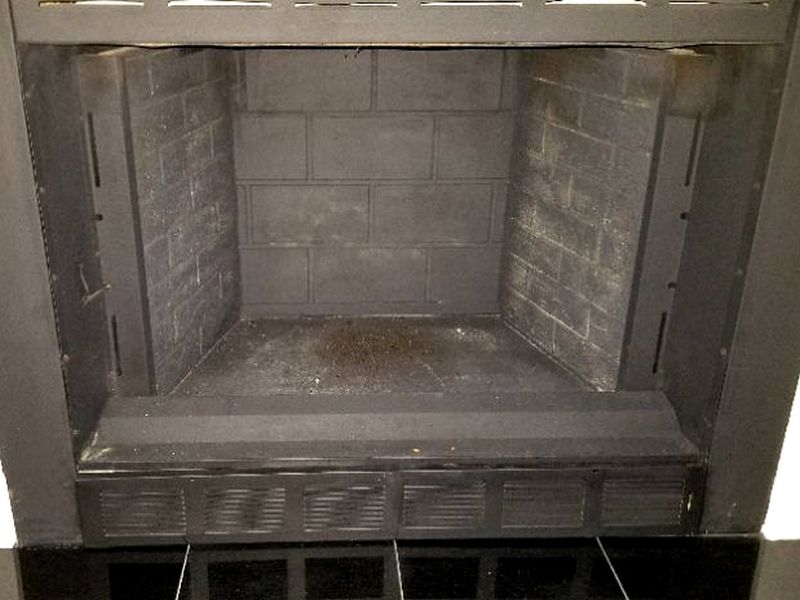
Fireplace
Fireplaces are a coveted upgrade on many home buyers’ wish list. As their purpose is to allow and contain an open fire inside the house, a fireplace demands our close attention to ensure safety for the occupants and the structure. While we can evaluate many features, we must respect the limits of a visual inspection and know when to call for a further assessment by a specialist. A cleaning, a Level II video inspection, or even an invasive Level III inspection may be required to determine the extent or existence of concerns.
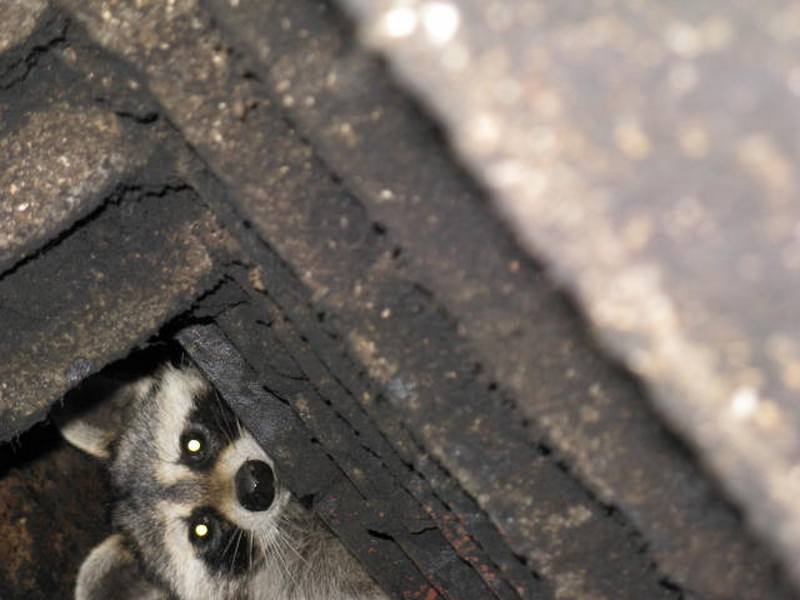
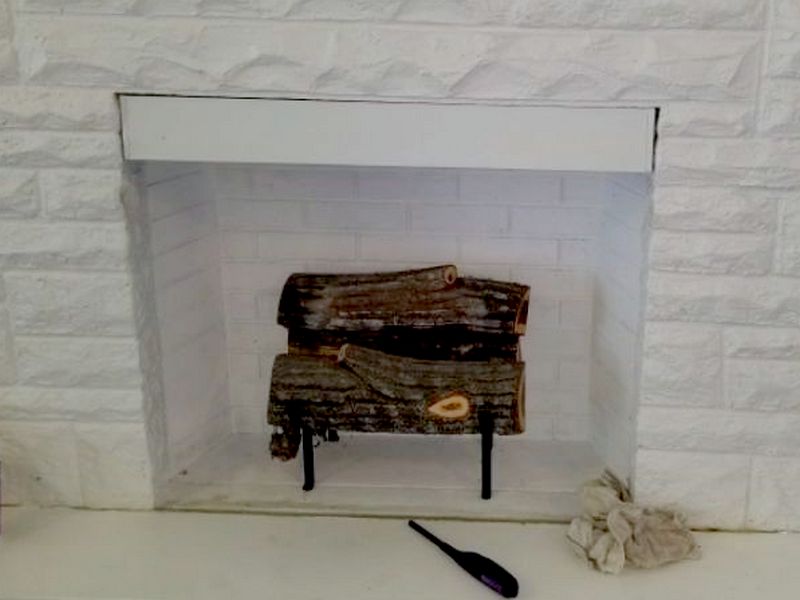
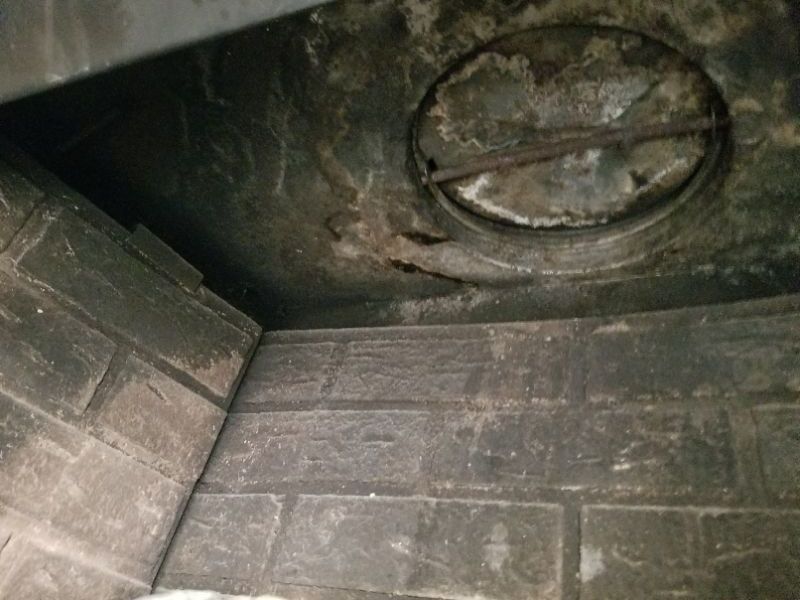
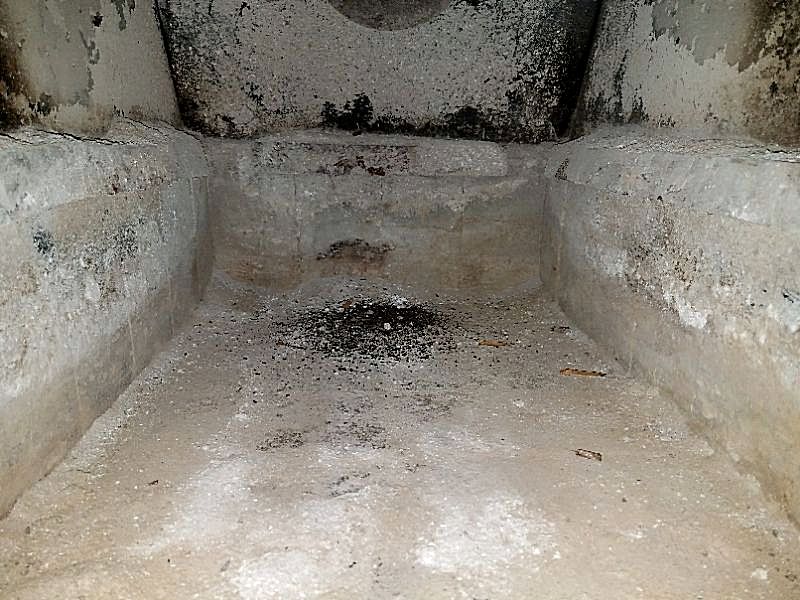
Evaluating a fireplace should be a “hands and knees” affair: you must be willing to look inside the firebox, and upwards as well. Protect your eyes from possible falling debris (or nesting animals!), but use your flashlight and perform a thorough visual inspection. Include the walls or panels of the firebox, the damper, and any visible portions of the flue. The condition and configuration of the hearth and surround must be assessed, as well as any accessories, inserts, or appliances.
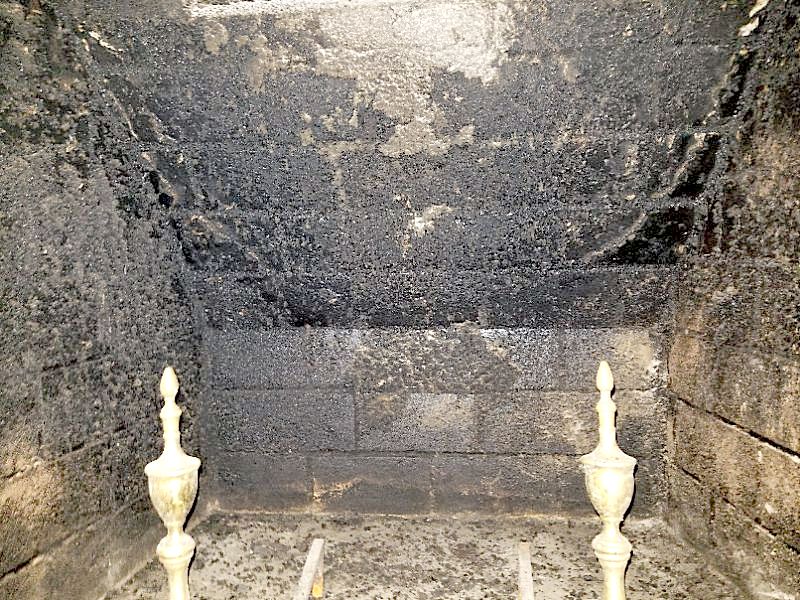
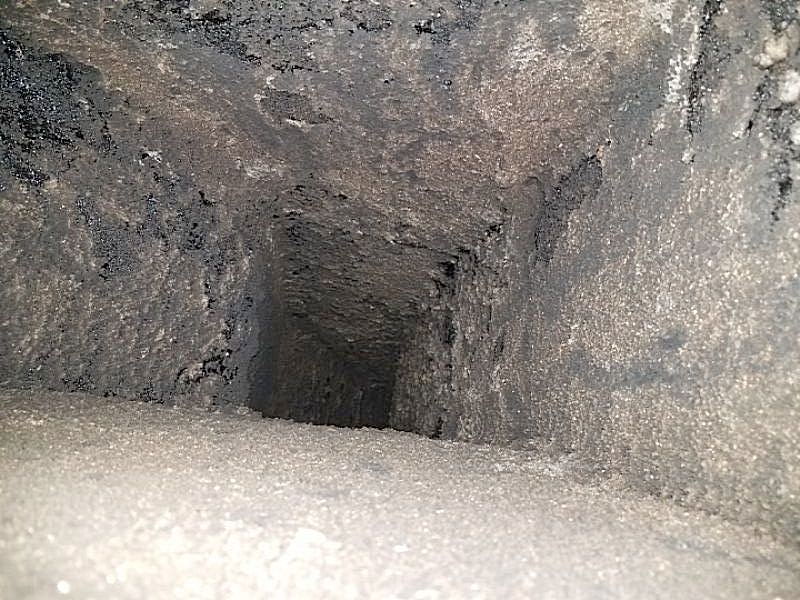
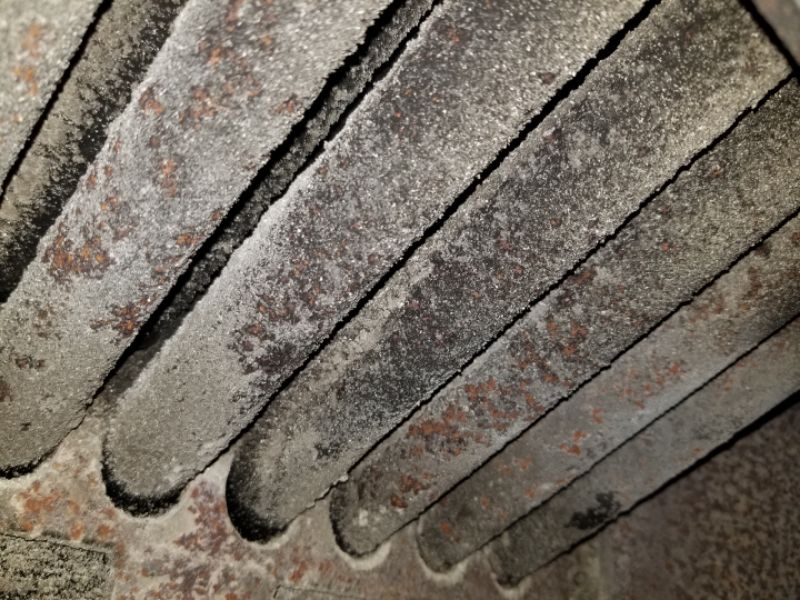
There is creosote build-up in the firebox, damper and at the smoke shelf above the firebox. This is a safety issue. Hire a contractor to clean the chimney and conduct a detailed inspection.

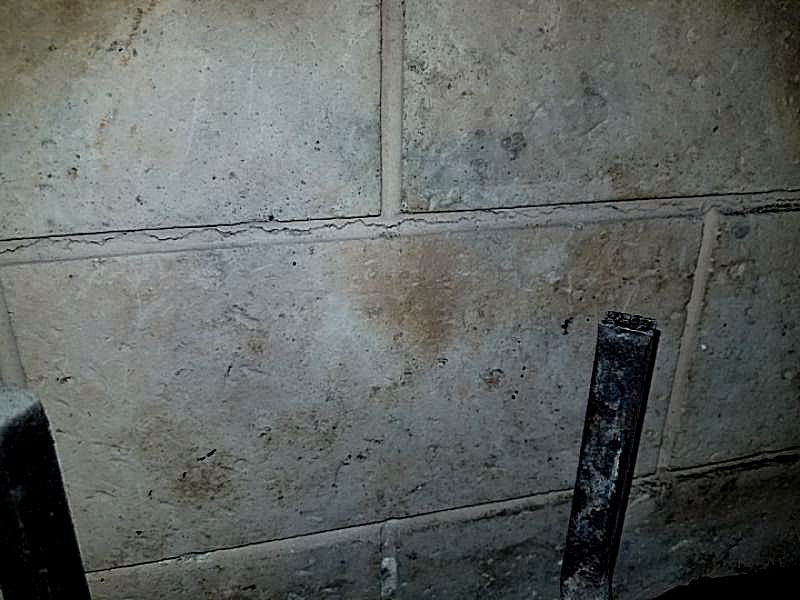
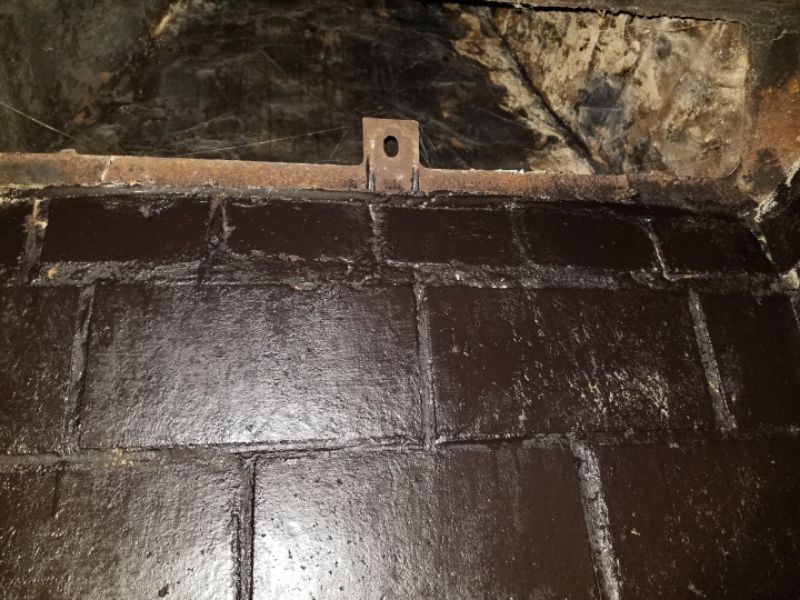
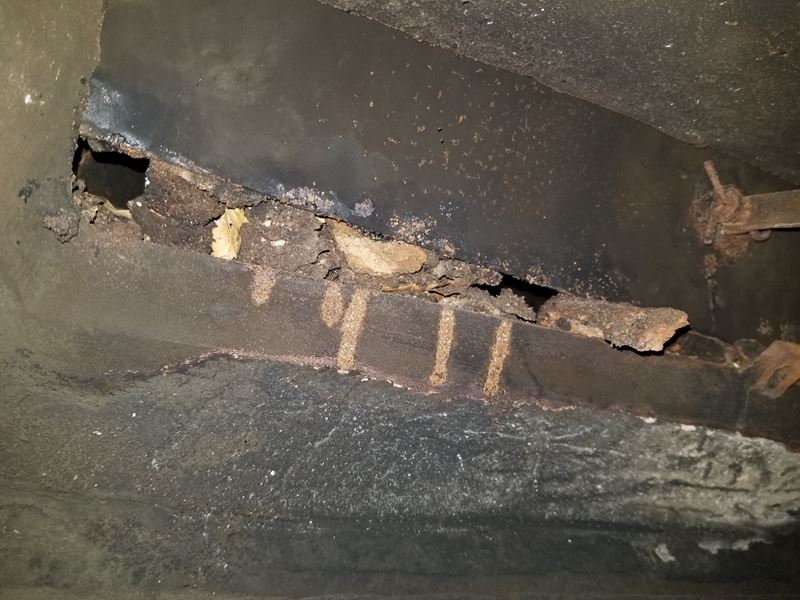
There are deteriorated mortar joints inside the fireplace. This is a fire hazard. Repair the mortar joints.

The fireplace has a cracked prefabricated panel. This is a fire hazard. Replace the panel.
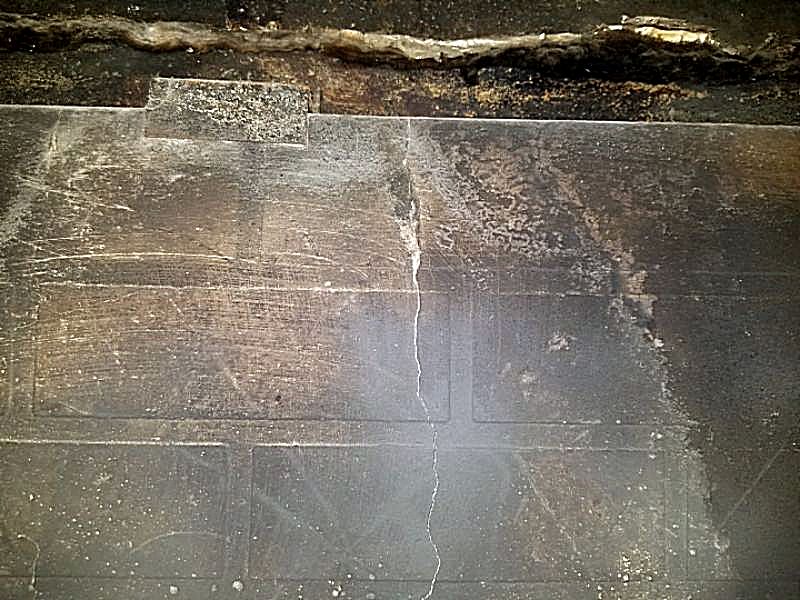
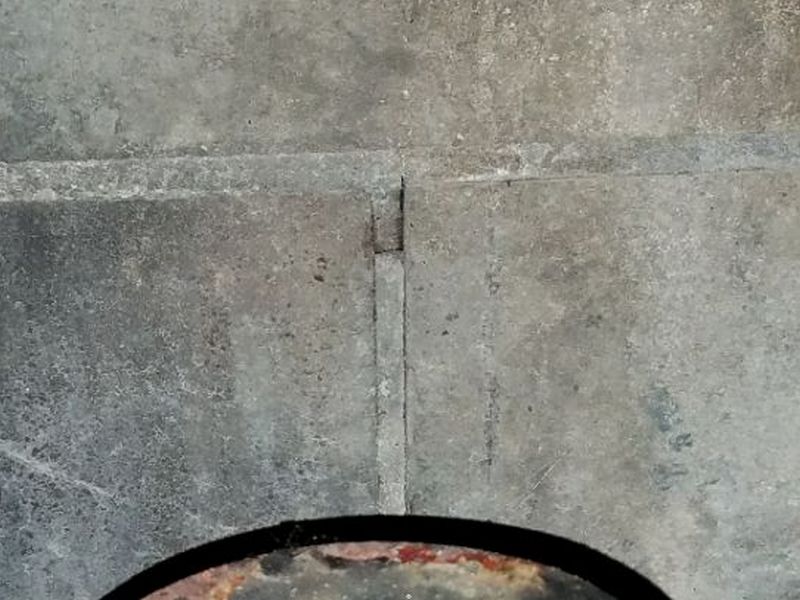
There are cracks in the firebox. This is a fire hazard. Repair and seal the cracks.

There are deteriorated bricks inside the fireplace. This is a fire hazard. Replace the bricks.
The firebox is deteriorated. This is a fire hazard. Replace the firebox.
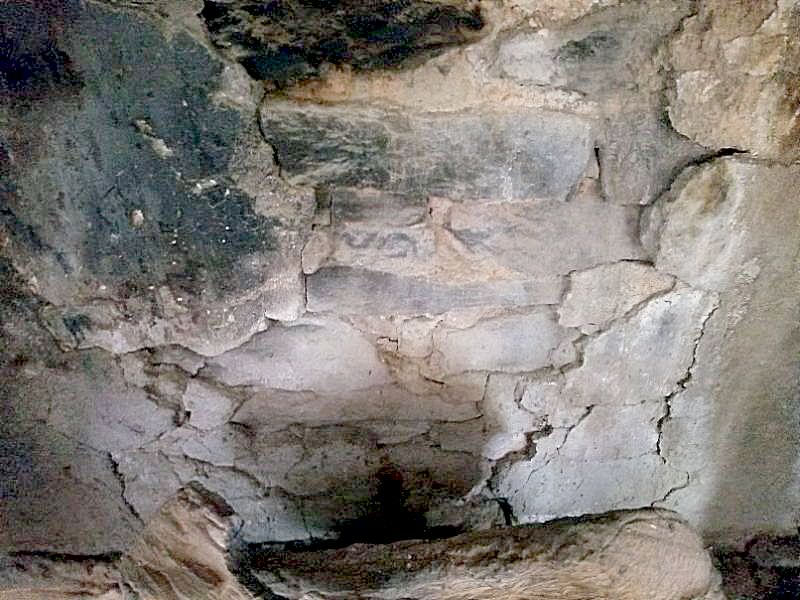
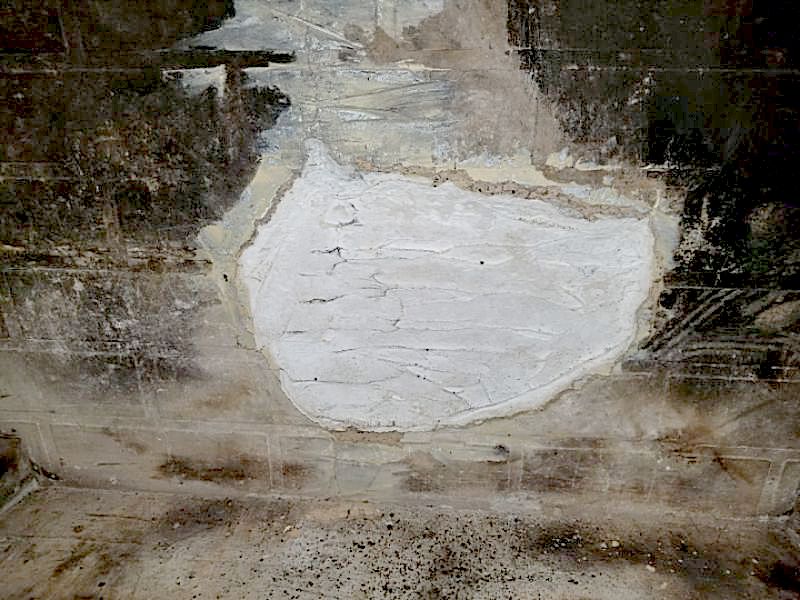
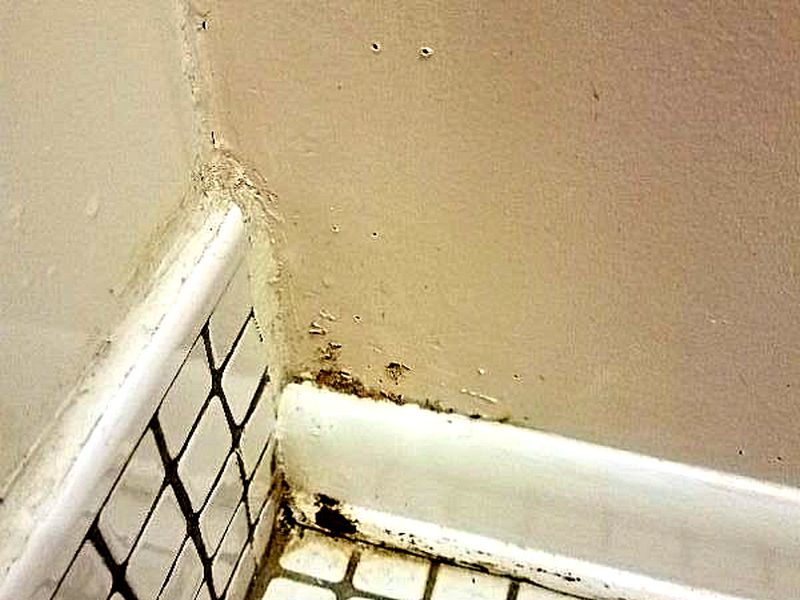
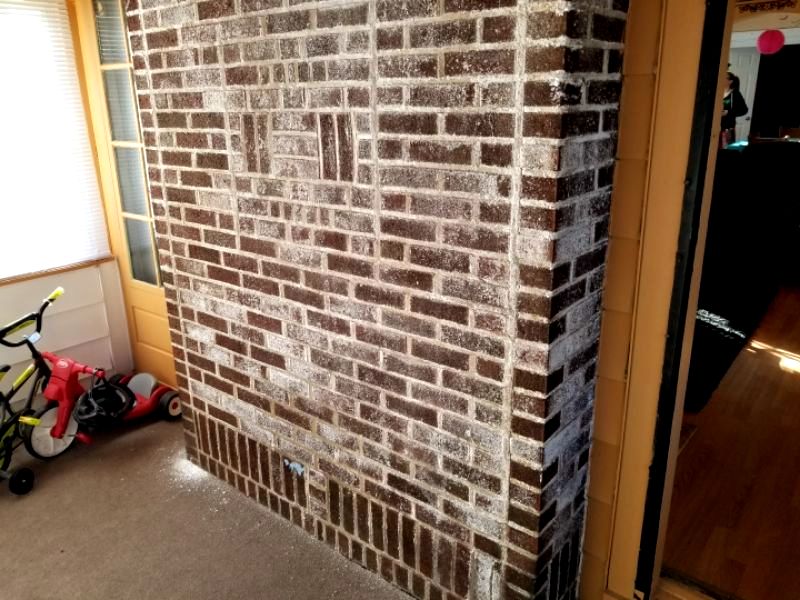
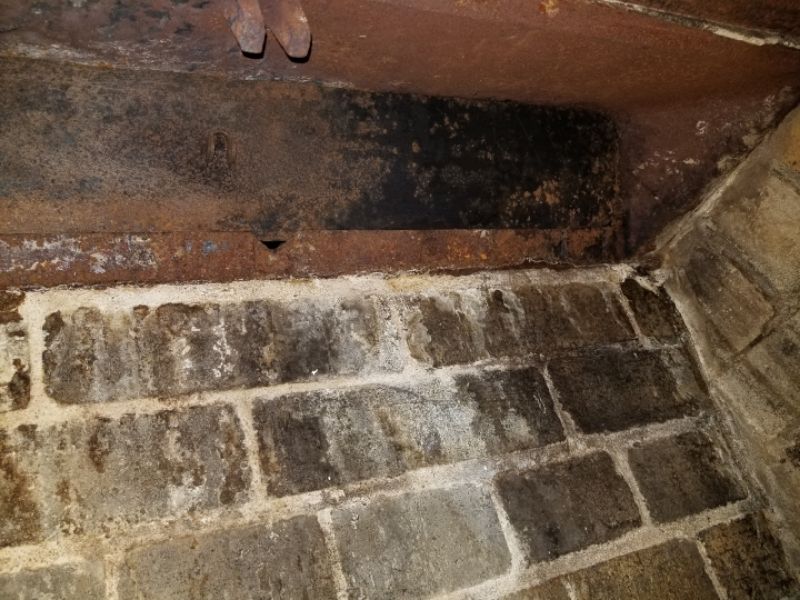
There is efflorescence in the fireplace. White crystalline deposits are an indication of water penetration. The source of the moisture must be identified. Identify the source of water penetration; repair any damage which is revealed.
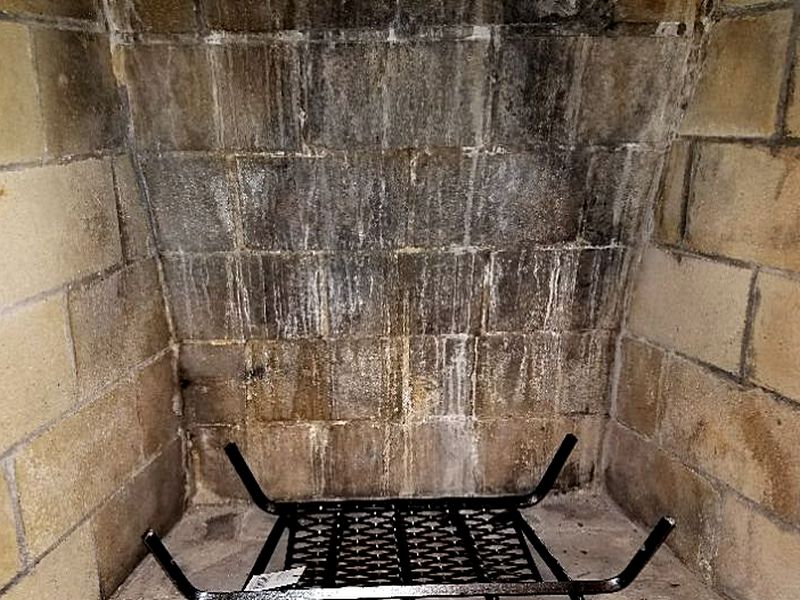
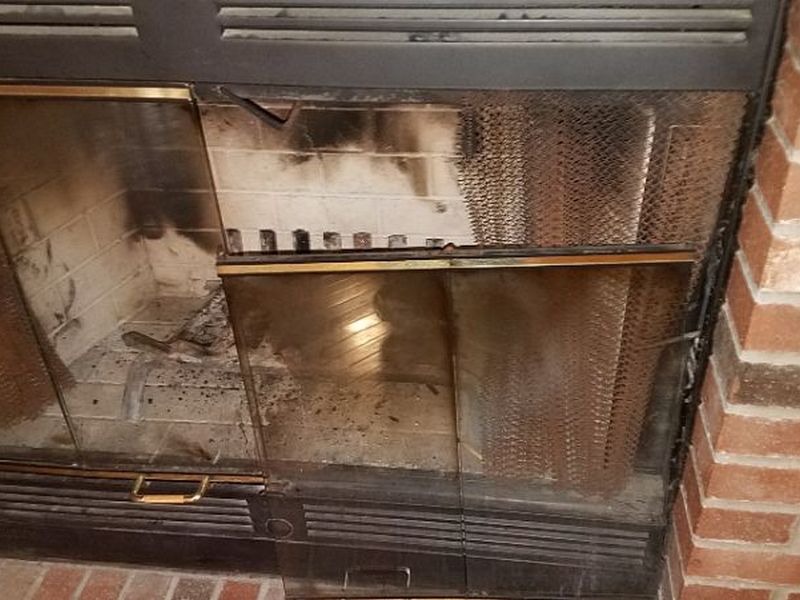
There are smoke stains above the fireplace. This indicates a drafting problem that permits combustion gases to enter the living area. Identify the source of smoke stains; hire a contractor to evaluate the issue and make repairs as required.
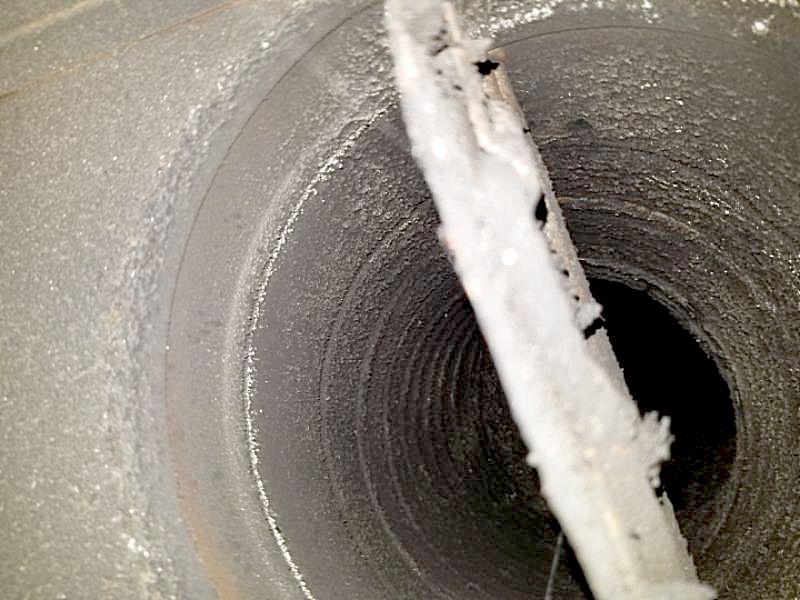
There flue liner has gaps or is deteriorated. This is a fire hazard. Hire a contractor for an evaluation and repairs as needed.

The flue liner is missing; smoke and flue gases may enter the living area. This is a safety hazard. Hire a contractor for an evaluation and repairs as needed.
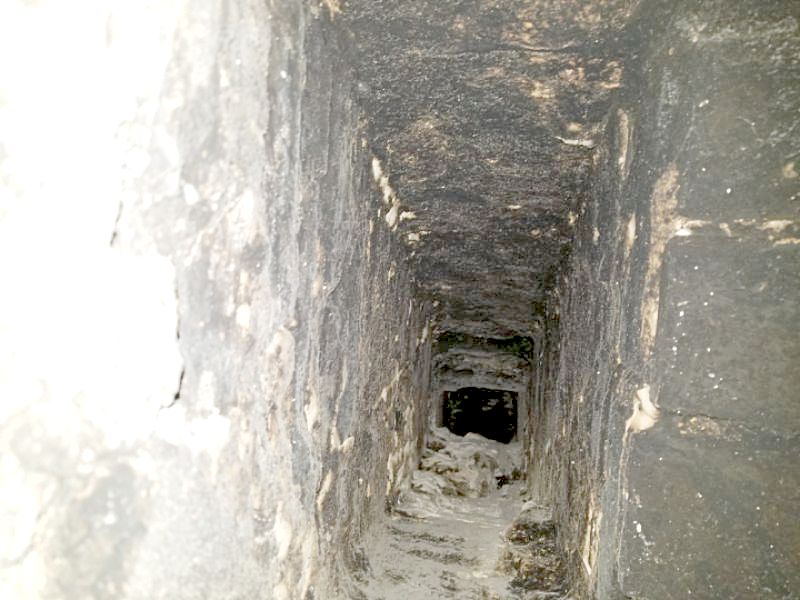
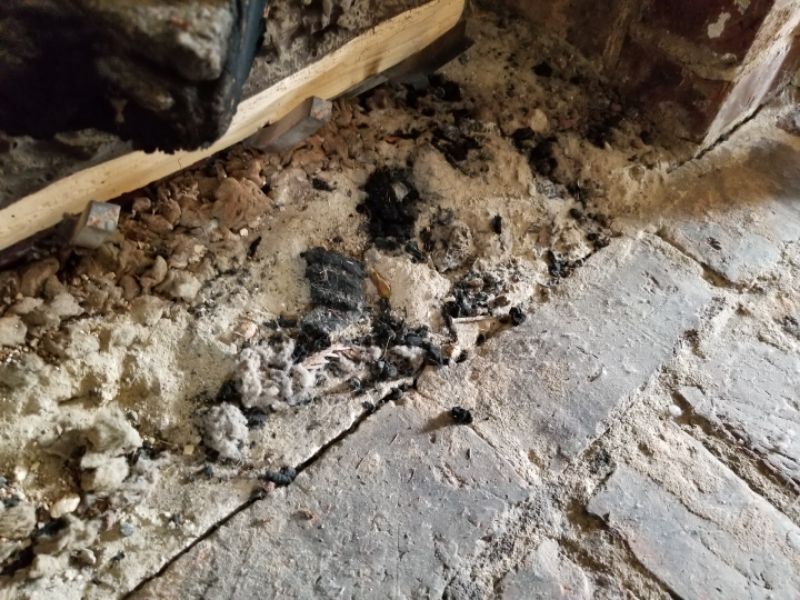
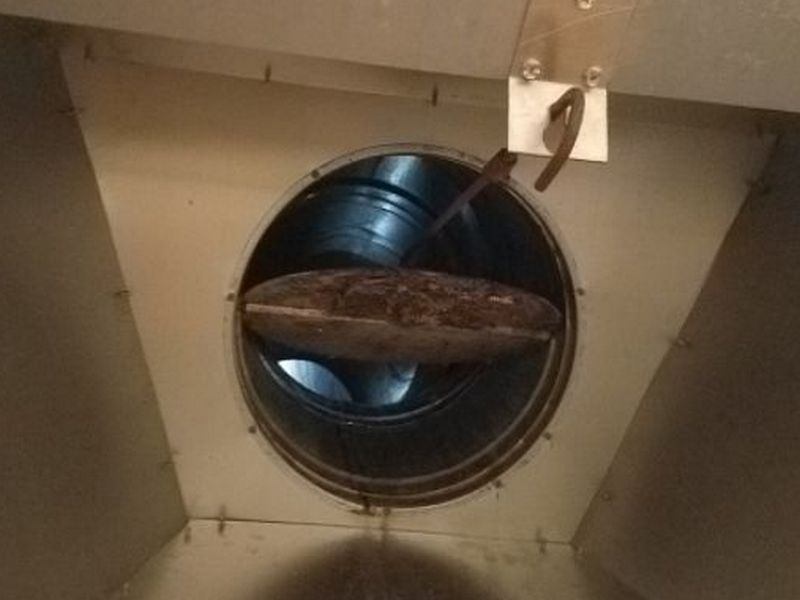
The flue is blocked by nesting activity. This is a safety and health hazard. Hire a contractor for an evaluation and repairs as needed.
The fireplace is decorative and cannot be used for burning wood or other fossil fuels. Do not use the fireplace.
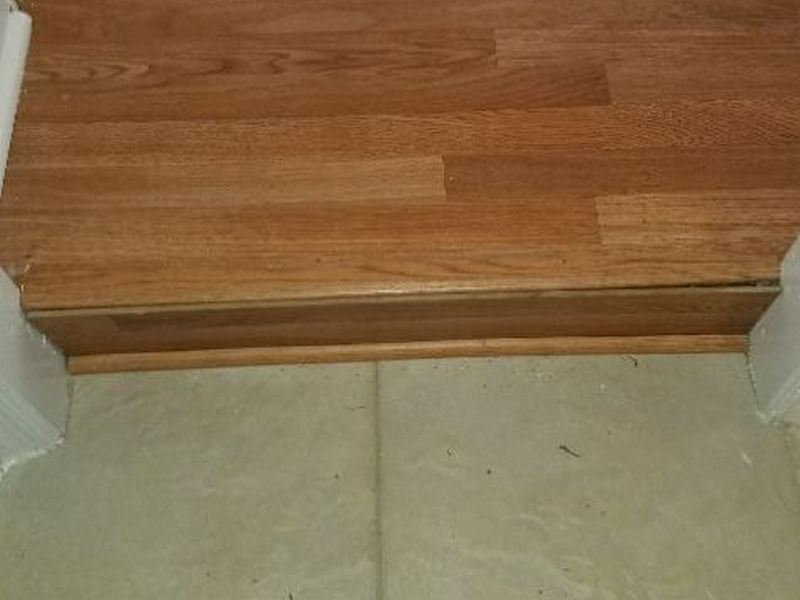
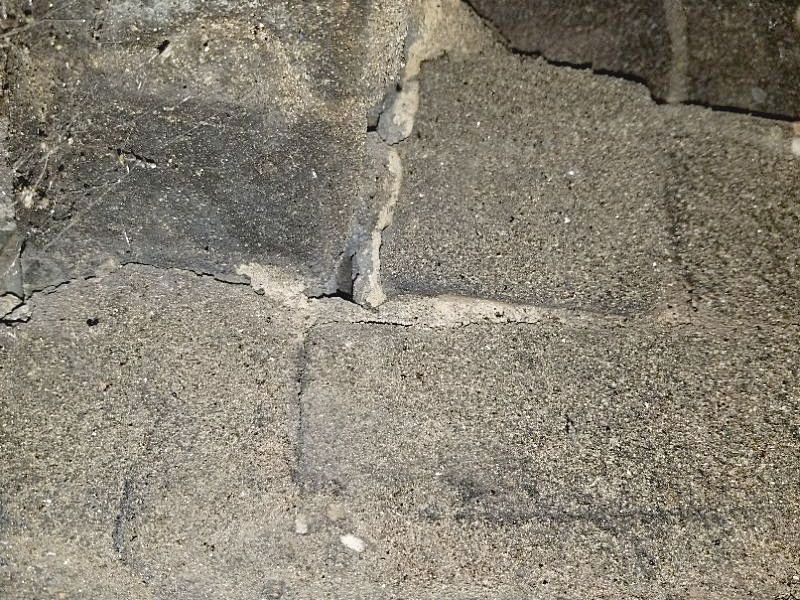
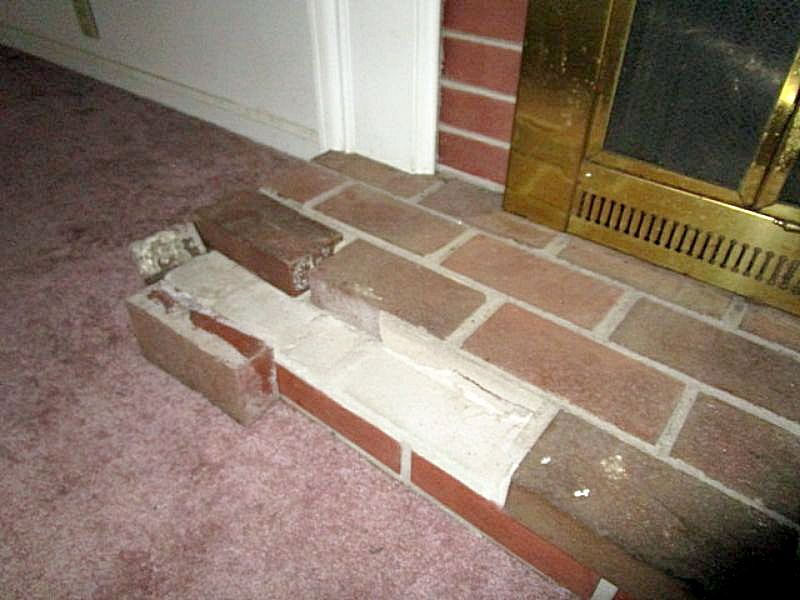
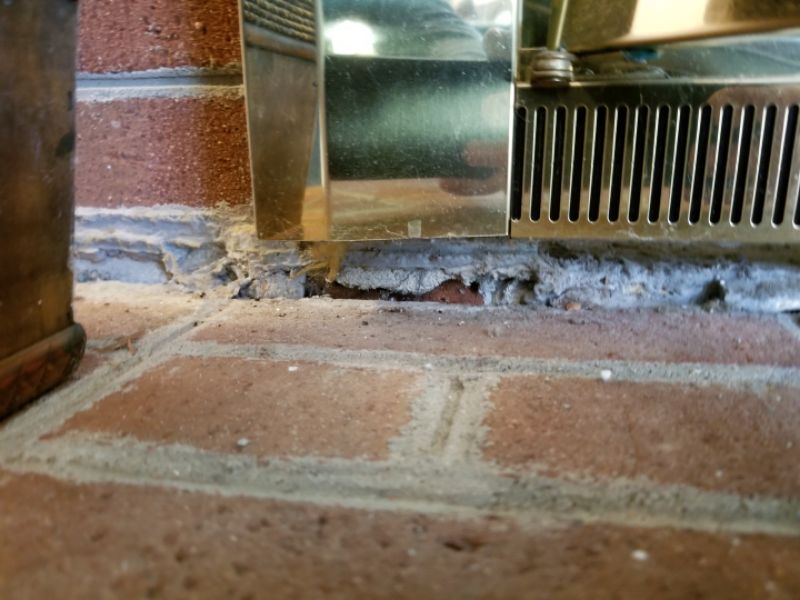
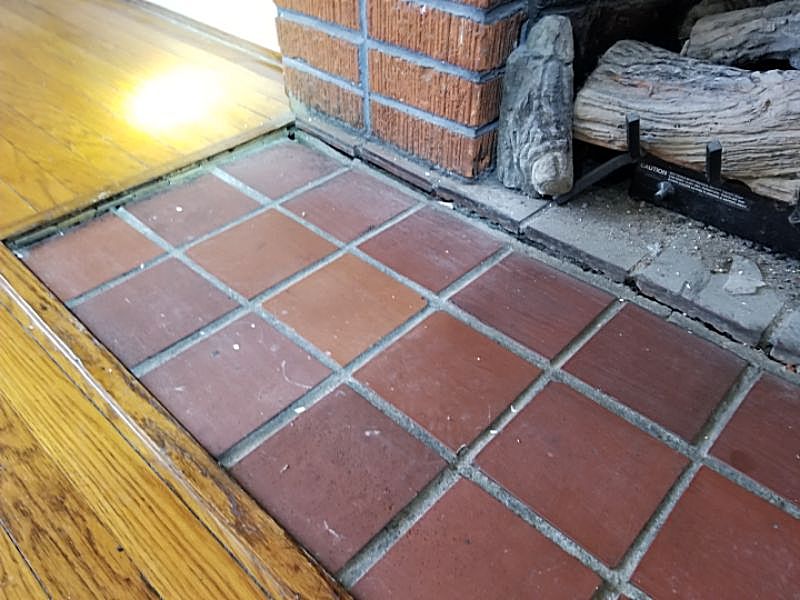
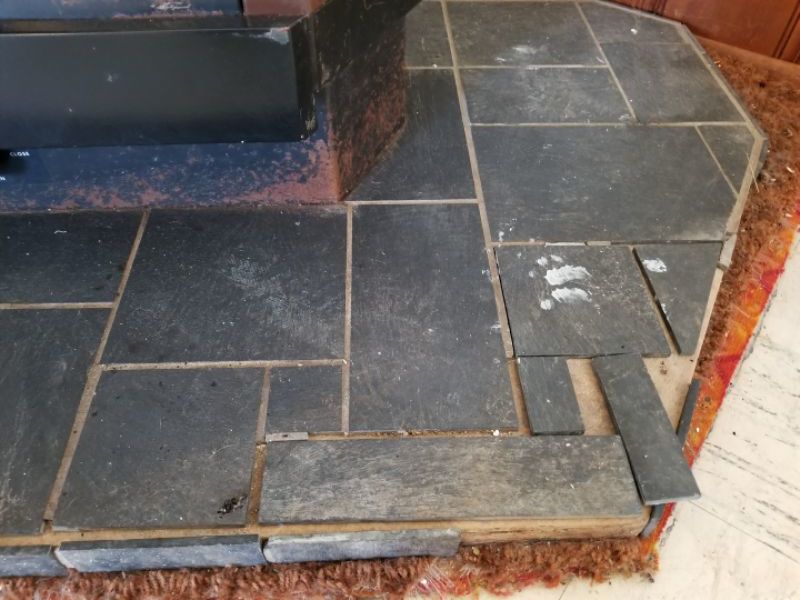
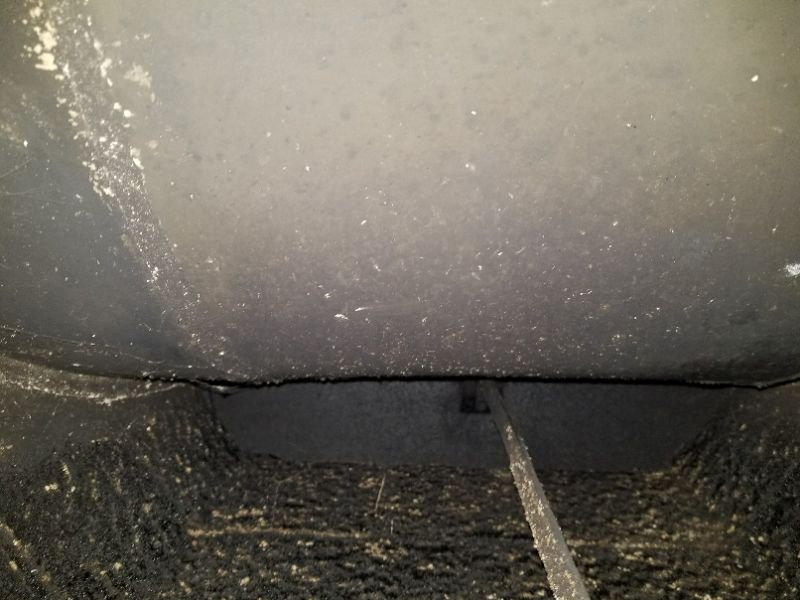
There is a gap between the fireplace and the hearth. This is a fire hazard. Repair and seal the gap.
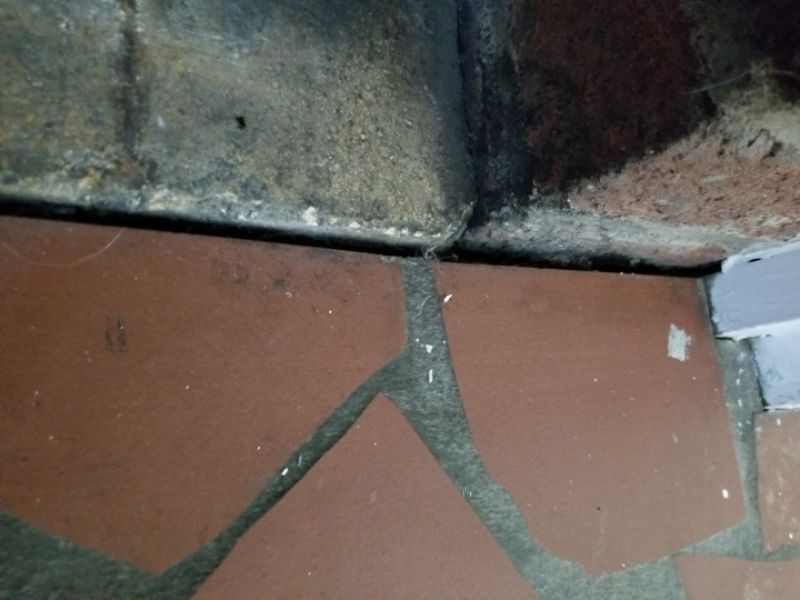
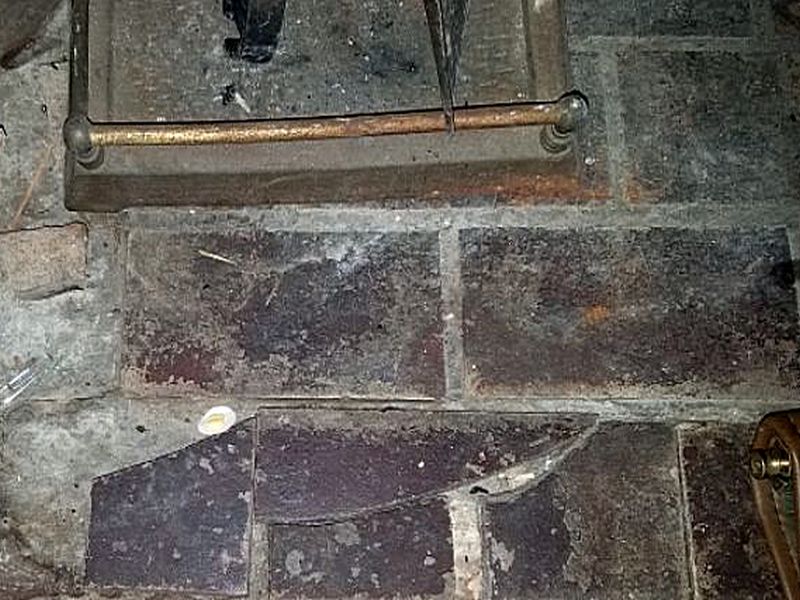
The hearth mortar joints are deteriorated. This is a safety concern. Repair the mortar joints.
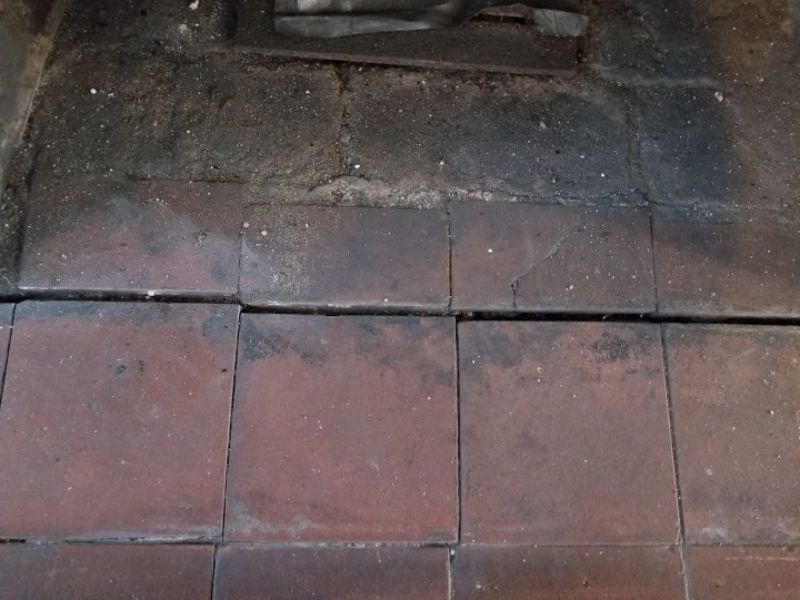
The hearth bricks are cracked/loose. This is a safety concern. Replace the bricks.
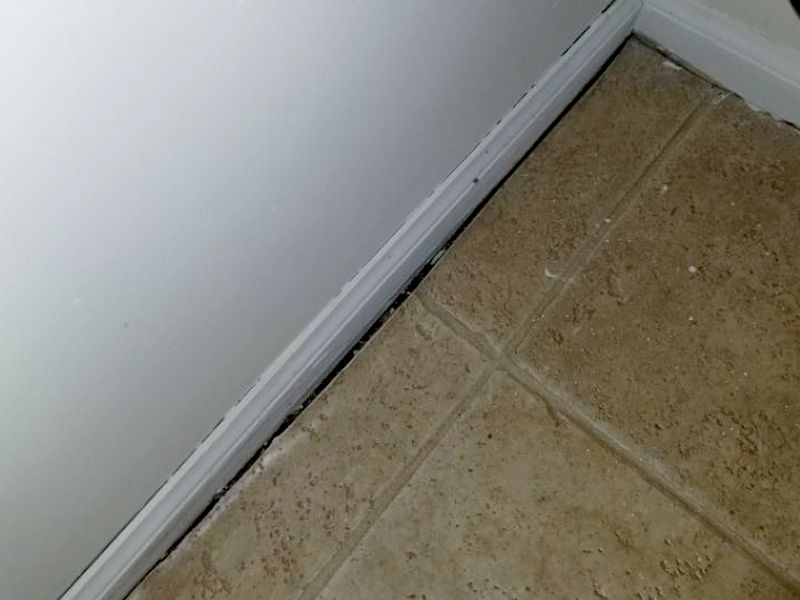
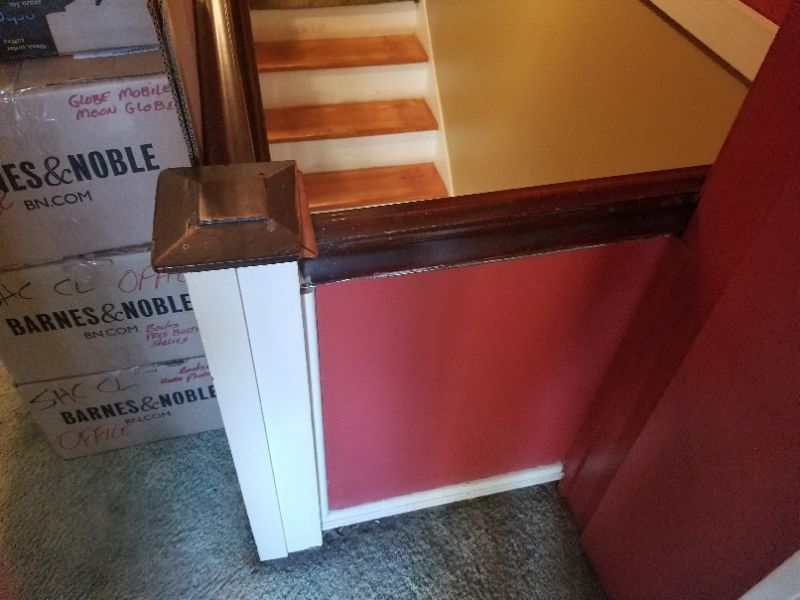
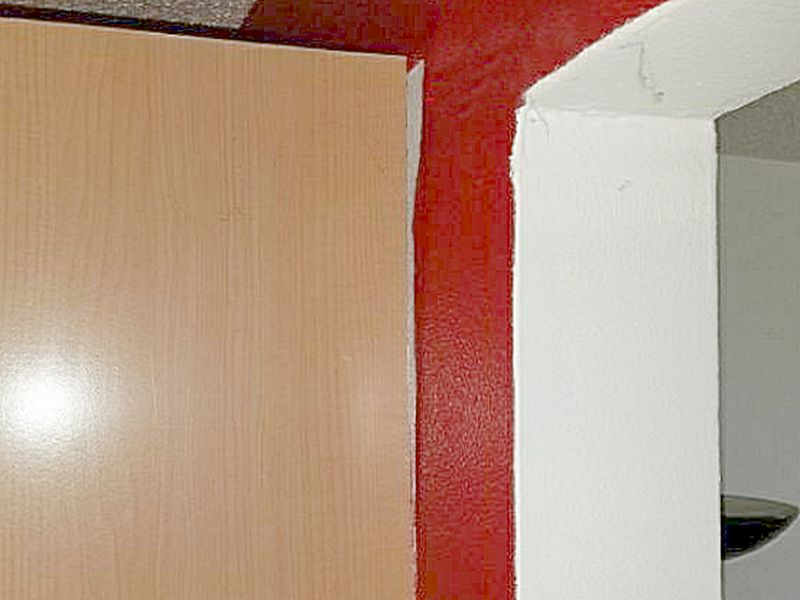
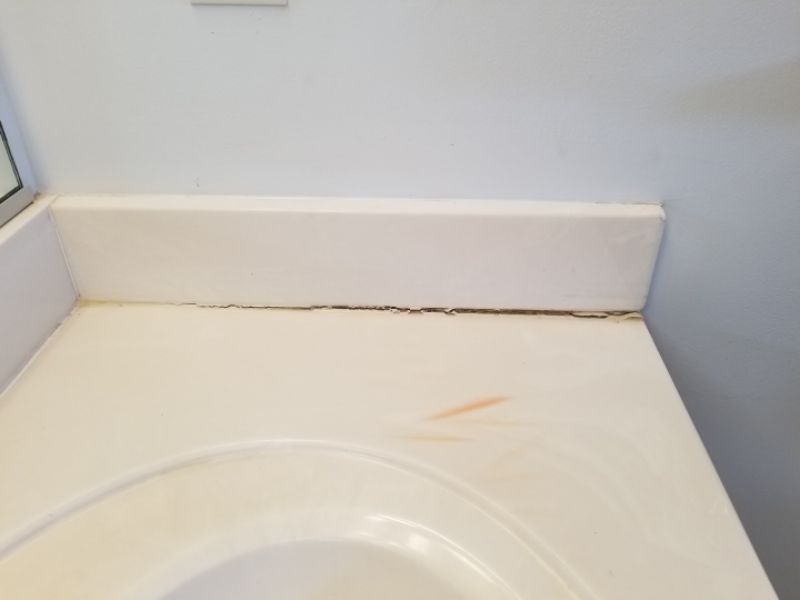
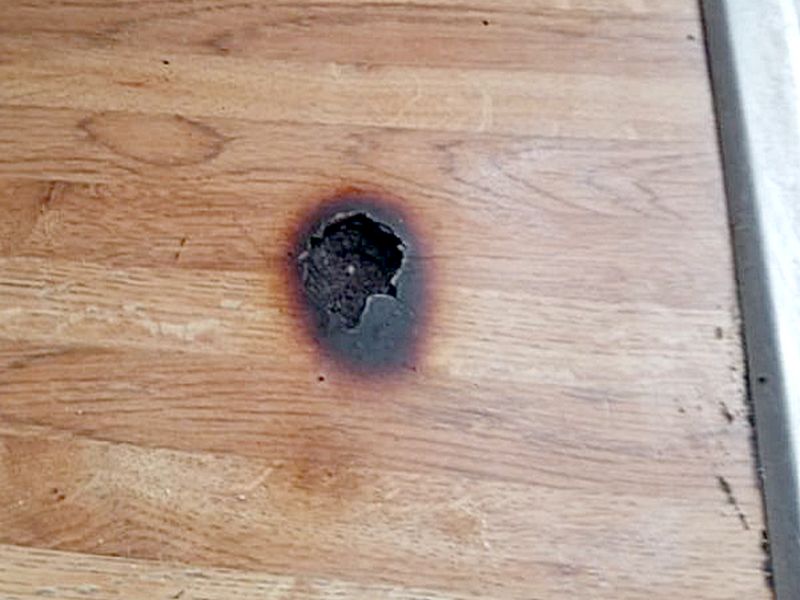
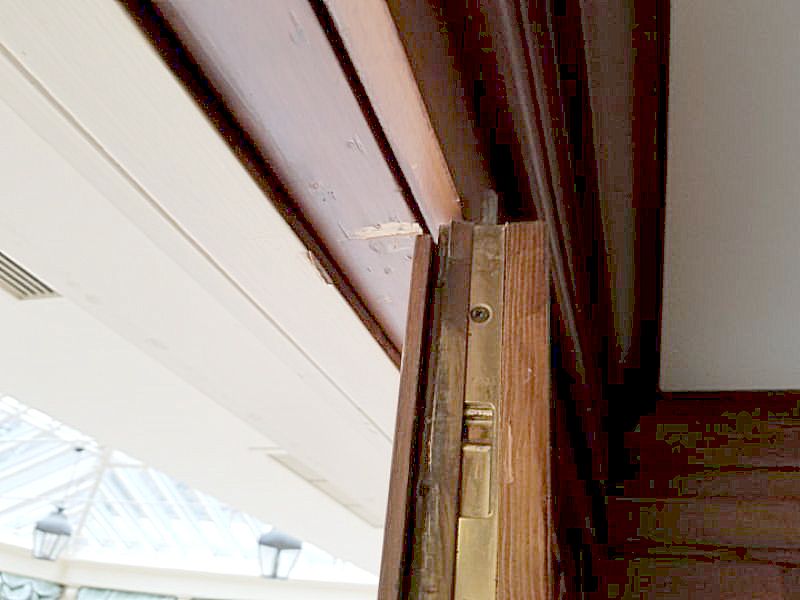
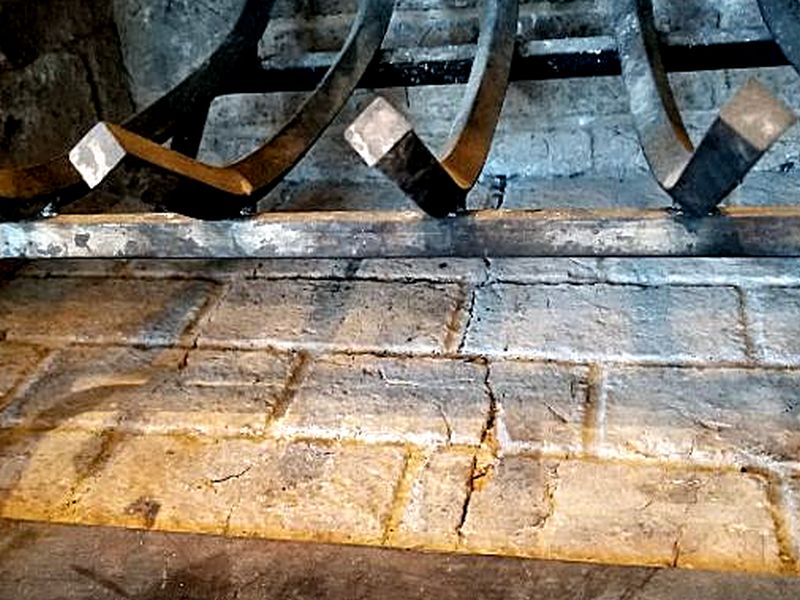
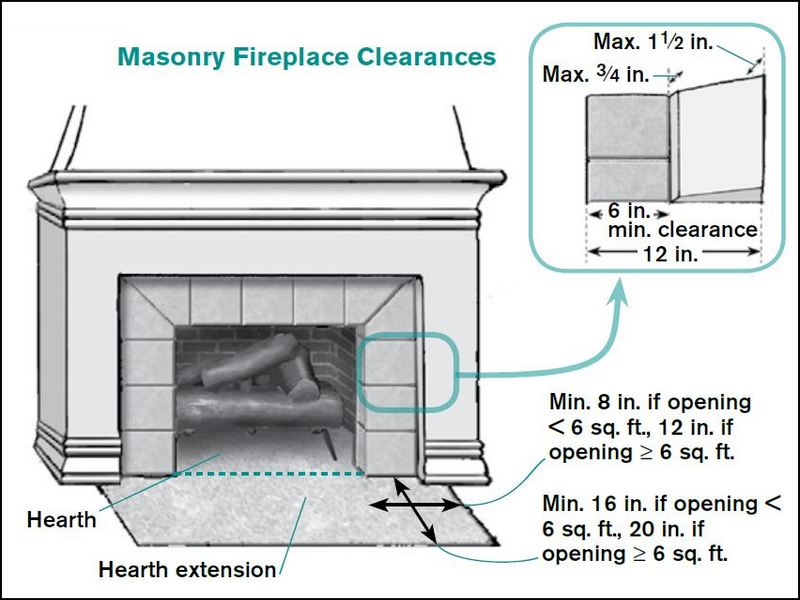
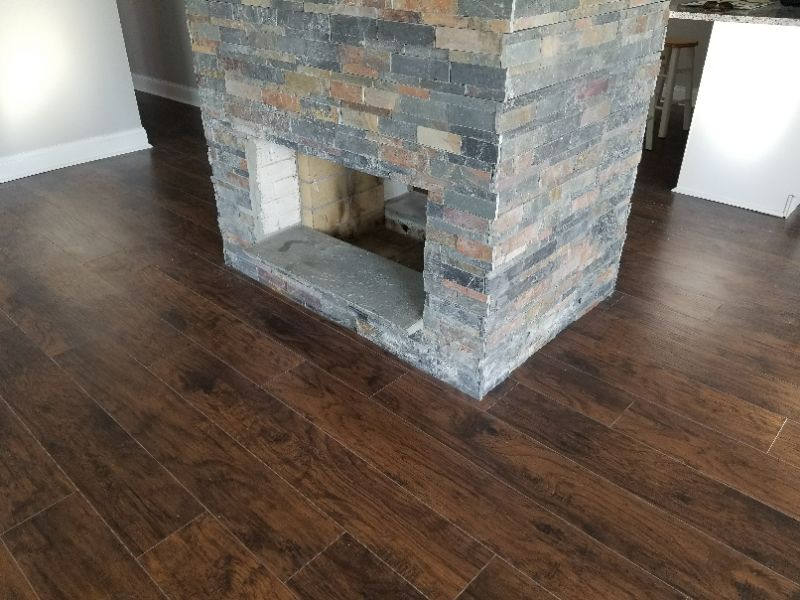
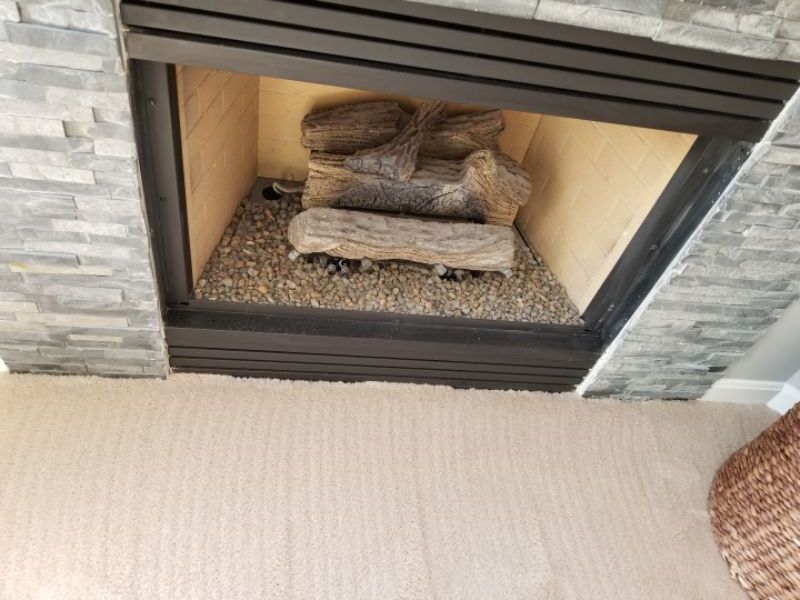
There is inadequate clearance between the hearth opening and the fireplace surround. This is a fire hazard that allows combustible materials to be too close to the fireplace. Extend the hearth or remove the combustible materials.
![]()
![]()
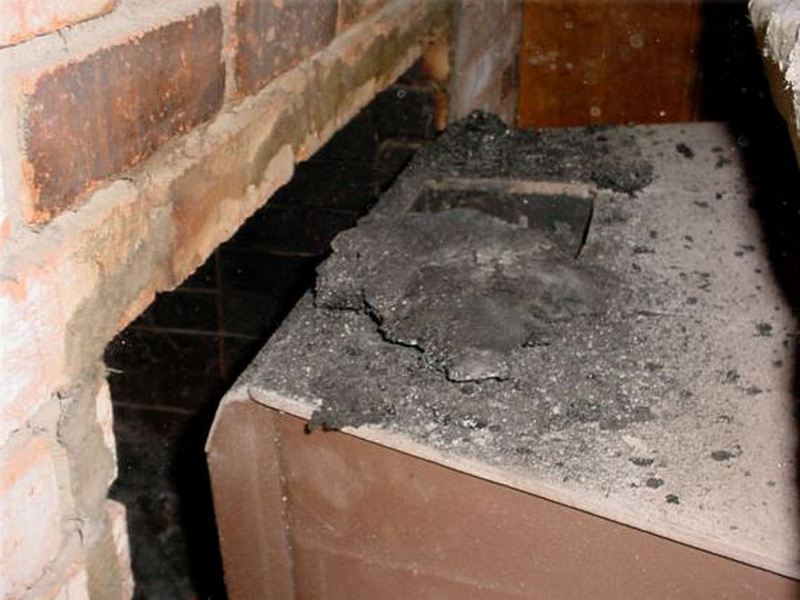
The hearth is settled. This is a fire hazard. The reason for the settlement is not known. Hire a contractor for an evaluation and repairs as needed.
The hearth is missing. The outer hearth is a safety feature of the fireplace and prevents sparks and excessive heat from contacting combustible floor materials. This is a fire hazard. Install a hearth.
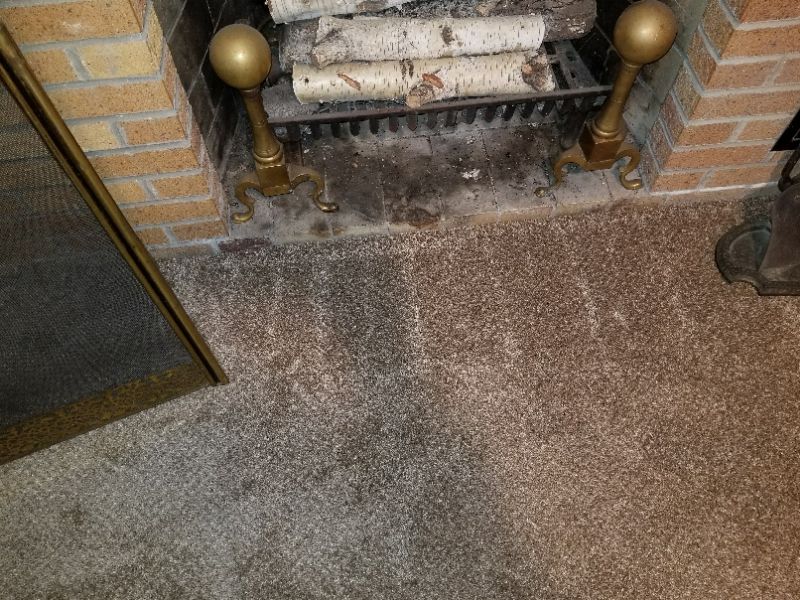
The hearth is constructed of wood. This is a fire hazard. Remove the wood and replace it with non-flammable materials.

NFPA 211 is the basis of applicable chimney and fireplace safety codes. The actual adoption of a given code varies by state and locality. However, the Chimney Safety Institute of America (www.CSIA.org), the leading educational and certification organization for chimney professionals, fully recognizes NFPA 211. This includes its standards for chimney and fireplace inspections. These protocols are designated Level I, II, and III Inspections.
DEFINITIONS:
Readily Accessible:
Exposed, or capable of being exposed, for operation, inspection, maintenance, or repair without the use of tools to open or remove doors, panels, or coverings.
Accessible:
Capable of being exposed for inspection, maintenance, or repair, without damage to the chimney or building structure or finish, but which may require the removal of doors, panels, or coverings using commonly available tools.
LEVEL I INSPECTION
Scope: Readily accessible areas of chimney, structure, and flue; lack of flue obstructions or combustible deposits; basic appliance installation and connections.
Access required: Readily accessible portions of chimney exterior and interior; accessible portions of appliance and chimney connection.
Circumstances: Annual inspection during routine flue cleaning; upon direct replacement of connected appliance with one of similar type, input rating, and efficiency.
LEVEL II INSPECTION
Scope: All subjects of a Level I inspection; proper construction and condition of accessible chimney structure and flue; proper clearances from combustibles in accessible locations; size and suitability of flues for connected appliances.
Access required: All accessible portions of chimney exterior and interior, including accessible areas of attics, crawl spaces and basements; accessible portions of appliances and chimney connections; includes flue inspection by video scanning or other means.
Circumstances: Upon removal of one or more connected appliances and replacement with one of dissimilar type, input rating, or efficiency; prior to relining or replacement of flue lining; upon sale or transfer of the property; after operating appliance malfunction or external event, e.g. earthquake, severe weather event, likely to have caused chimney damage.
LEVEL III INSPECTION
Scope: All subjects of Level I and Level II inspections; proper construction and condition of concealed portions of chimney structure and enclosed flues; proper clearances from combustibles.
Access required: Internal and external portion of chimney structure including concealed areas of the building or chimney; includes removal of components of the building or chimney where necessary, but only as necessary to gain access to areas that are the subject of the inspection.
Circumstances: When necessary for the investigation of an incident that has caused damage to the chimney or building; where a hazard detected or suspected as the result of a Level I or II inspection cannot be fully evaluated without access to concealed areas.
Fireplace Limitation and Information Statements
In use, not inspected: The fireplace is in use and, therefore, is not inspected.
Creosote build-up, limited interior visibility: Visibility of chimney interior is limited due to creosote build-up.
Cannot determine proper drafting, consult specialist prior to closing as needed: It is not possible to tell if a fireplace and flue can properly “draft”, i.e., carry smoke and combustion exhaust gases fully and safely to the exterior. Absent soot and/or stains on the fireplace exterior, this can only be determined when the fireplace is in use. Consult a chimney specialist for a comprehensive evaluation prior to closing as needed.
Near/at end useful life, budget for replacement: The fireplace is near or at the end of its useful life. We recommend establishing a budget to replace the fireplace.
Past end useful life, budget for replacement: The fireplace is past the end of its useful life. We recommend establishing a budget to replace the fireplace.
Clean/service fireplaces, flue pipe, and chimney annually: Clean and service fireplaces annually. The flue pipe and chimney also should be cleaned and examined regularly.
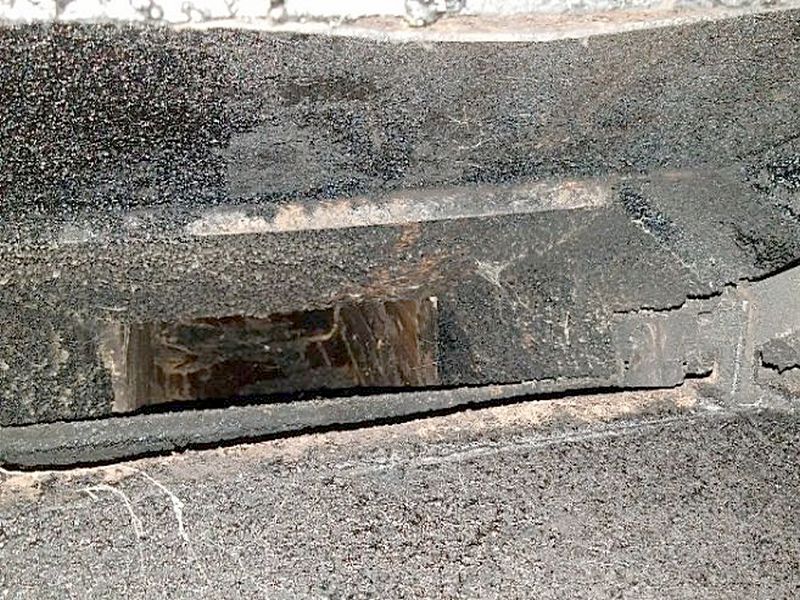
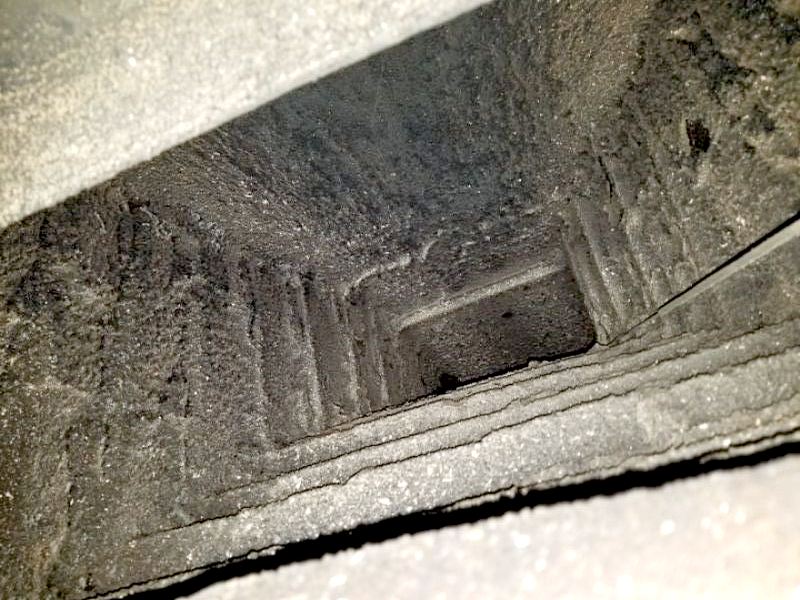
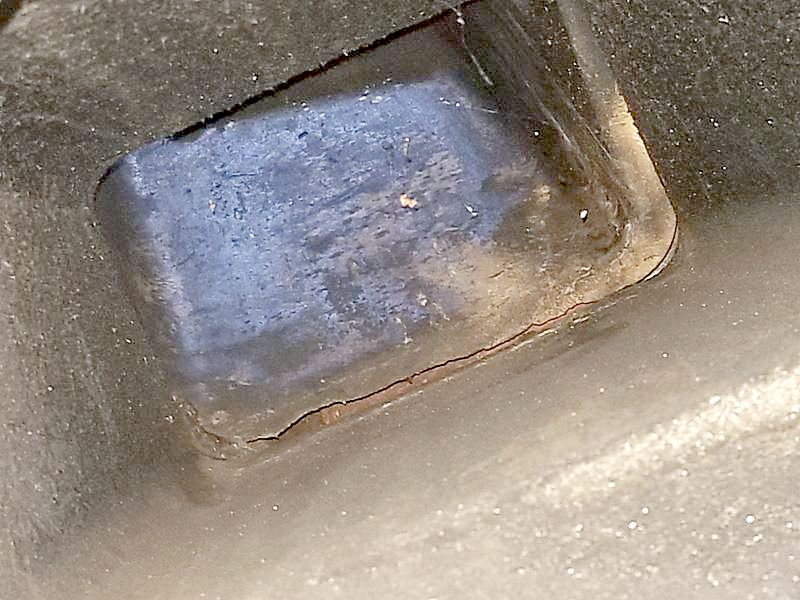
Fireplace Damper
Dampers serve to control the draft out of a fireplace and into the flue. Generally speaking, they must be wide open when burning anything. But that’s a double-edged sword. We want them open to let the smoke out and not fill up the room. On the other hand, we need them closed when the fireplace isn’t in use to prevent heat loss. Additionally, any fireplace with a gas appliance installed must never be closed completely when the gas flames are on.
Inspecting the dampers must be a “hands and knees” affair. Get down, use your flashlight, and carefully look up. Report missing or damaged/displaced dampers.
The damper is inoperative. This prevents proper function, and can be a safety hazard. Repair or replace the damper.
The damper is missing, which permits conditioned air to escape up the flue. This is an energy loss issue. Replace the damper.

The damper door is not seated properly. This prevents proper function. Repair or replace the door.
The damper is obstructed and will not open or close properly. Remove the obstruction or replace the door.
The damper door handle is missing. This is needed to open and close the damper. Replace the door handle.
Fireplace Damper Limitation and Information Statements
Limited visibility and accessibility: Visibility of, and accessibility to, the fireplace damper limits the inspection.
In use, not inspected: The fireplace is in use and, therefore, the damper is not inspected.
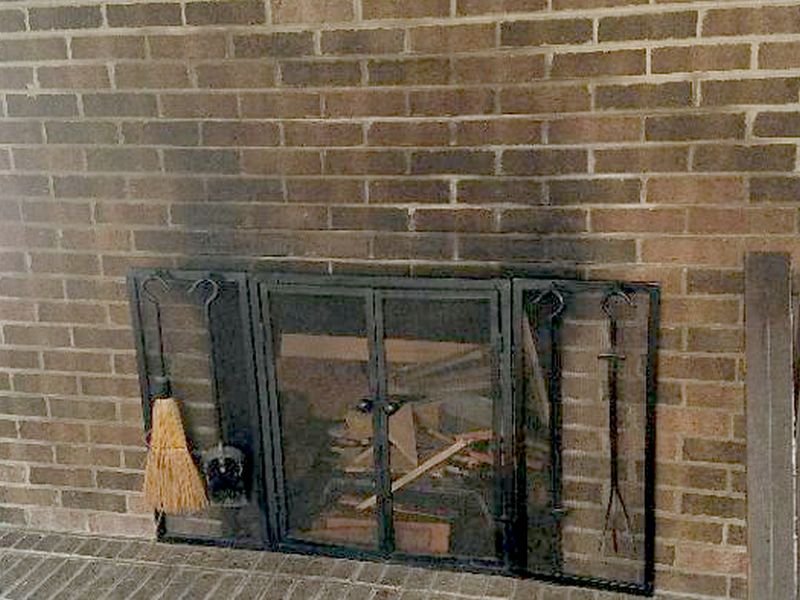
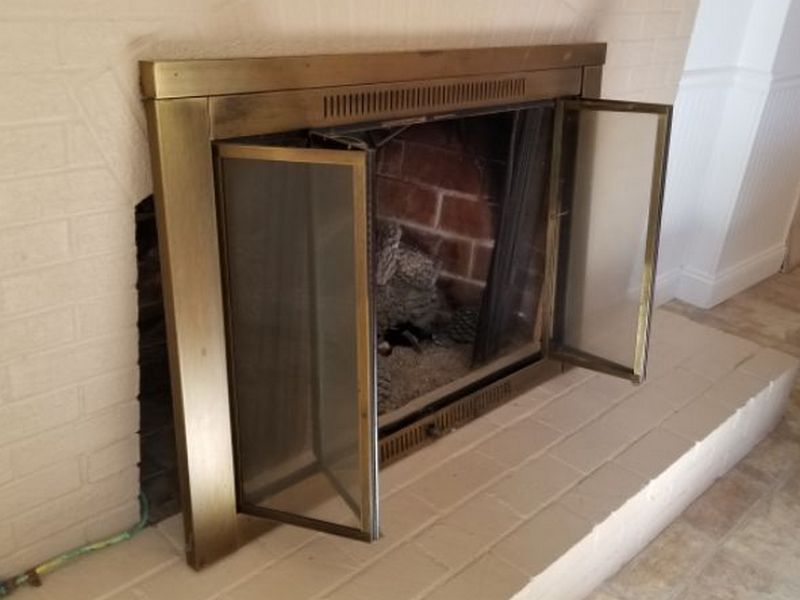
Fireplace Doors/Screens
Some fireplace doors and screens are integral safety features. They prevent sparks and embers from escaping the firebox when burning wood. In other installations, they are more decorative. Regardless, if a screen or door is present, it must be in good repair. It important to inspect carefully to determine if something that was originally there appears to be missing. This becomes easier with time, exposure, and experience.
Inspect for loose doors, broken or missing glass or screens. Everything present should be secure and operate smoothly.
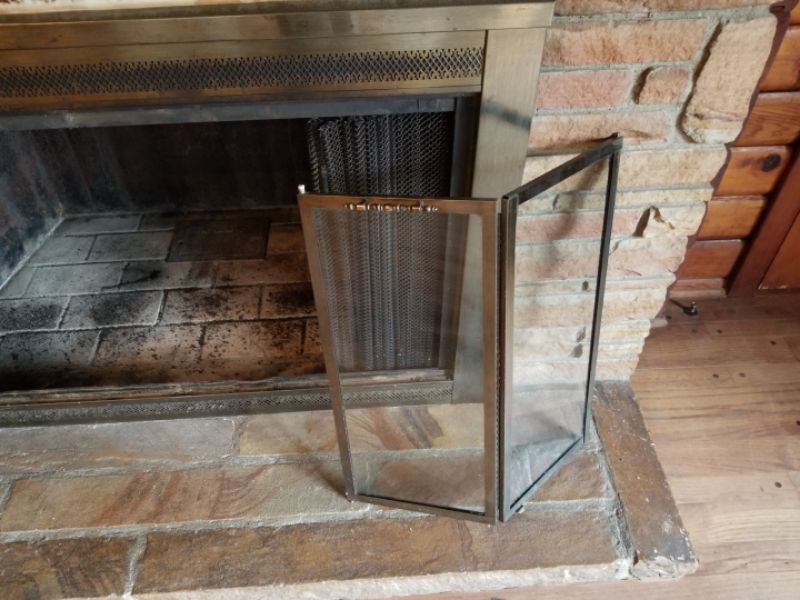
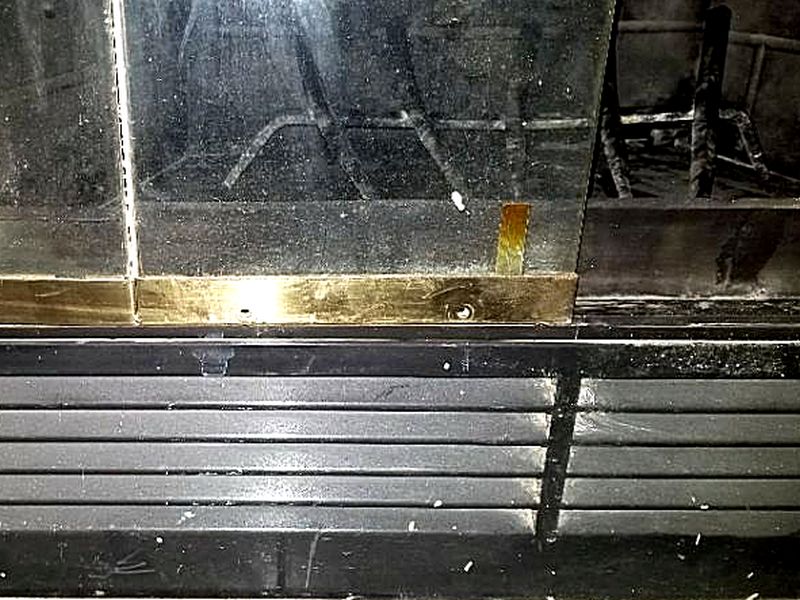
The fireplace door is broken. This prevents proper function and can be a safety hazard. Repair or replace the door.
The fireplace door hardware is broken or missing. This prevents proper function and can be a safety hazard. Repair or replace the door.

The fireplace door’s glass panel is missing. This affects proper function and can be a safety hazard . Repair or replace the door.
The fireplace door’s glass panel is broken. This affect proper function and is a safety hazard. Replace the panel.
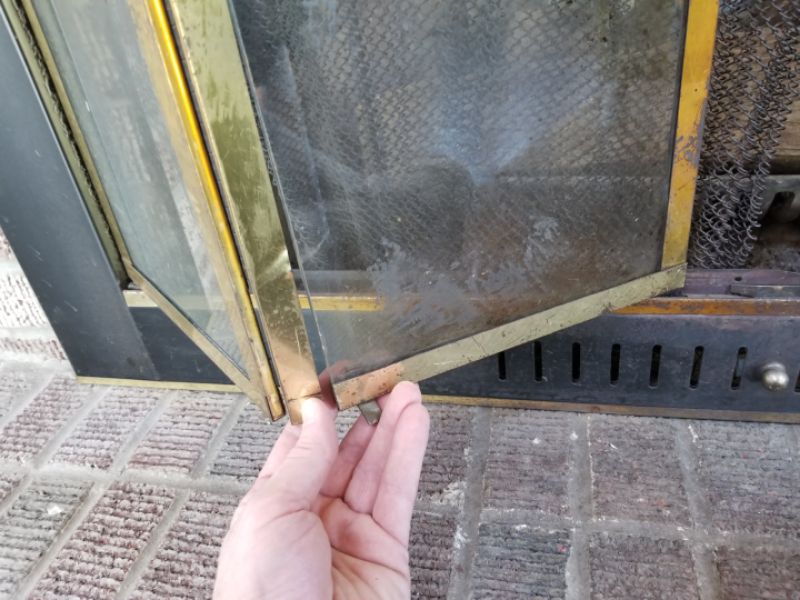
The door does not fit the fireplace. This is a safety issue. Replace the door.
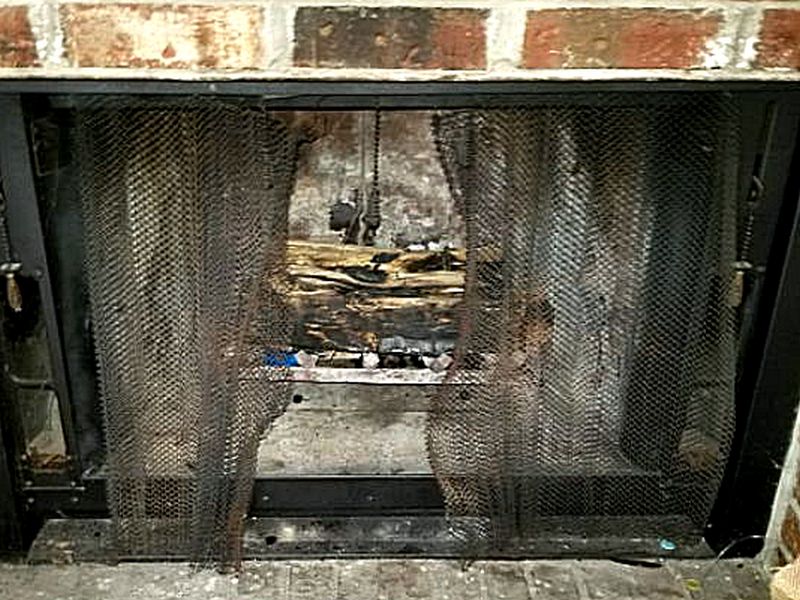
The fireplace screen is damaged or missing. This is a safety issue. Replace the screen.
Fireplace Doors/Screens Limitation and Information Statements
Locked, not operated/tested: The door is locked and, therefore, is not operated or tested.
Blocked, not operated/tested: The door is blocked and, therefore, is not operated or tested.
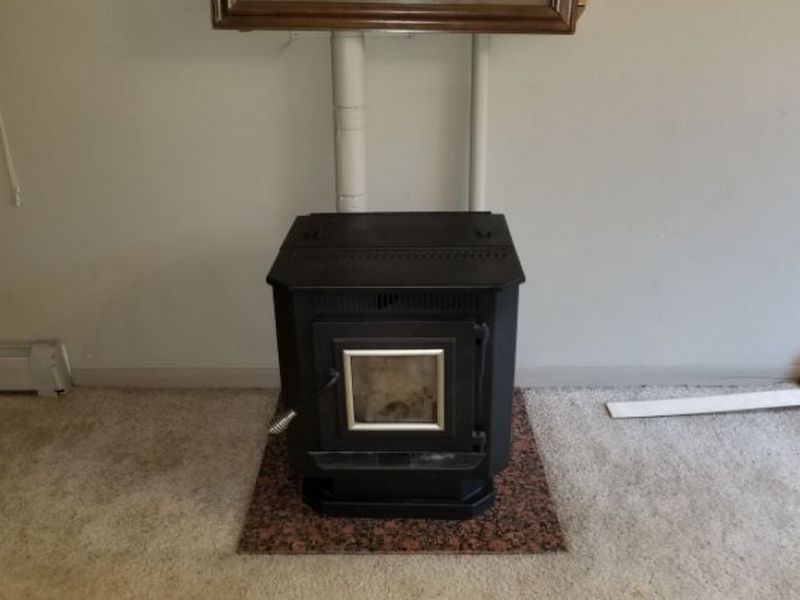
Fuel Burning Appliances
“Fuel Burning Appliances” have all of the concerns of fireplaces and then some. Free-standing stoves bring the fire out into the room, along with its flue pipe. With an insert, we are marrying a combustion appliance with an existing fireplace. We must be concerned with how they are connected even though we often cannot see that part of the installation. Additionally, wood stoves and inserts can load considerably more combustion byproducts into the system than a simple fireplace.
As with fireplaces, safety comes first. But you must make the effort as needed to inspect inside a stove or insert. If possible, look behind the insert’s front to view the flue connections. Inspect any exposed flue pipes for correct connections. Evaluate the clearances around the appliances and their vents. Assess the doors, dampers, and the combustion chamber. If it’s a gas device, make sure that all appropriate valves and pipes are workmanlike.
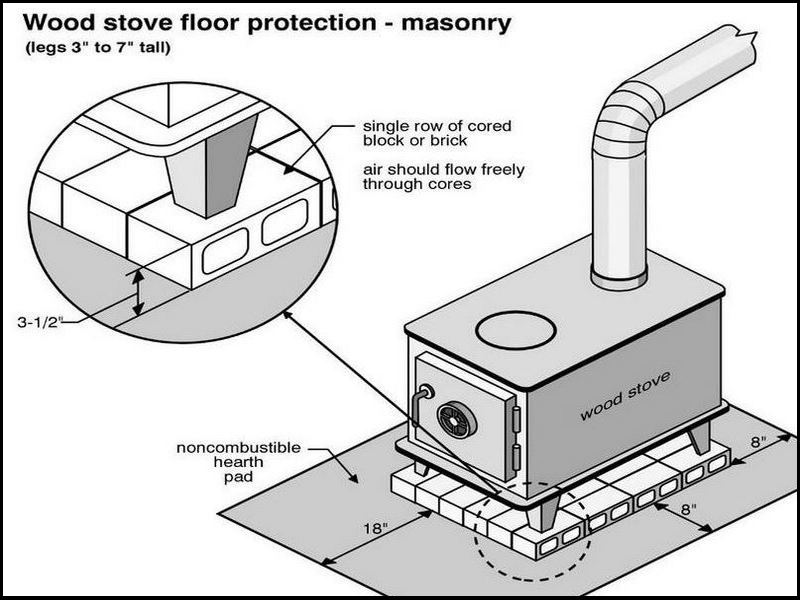
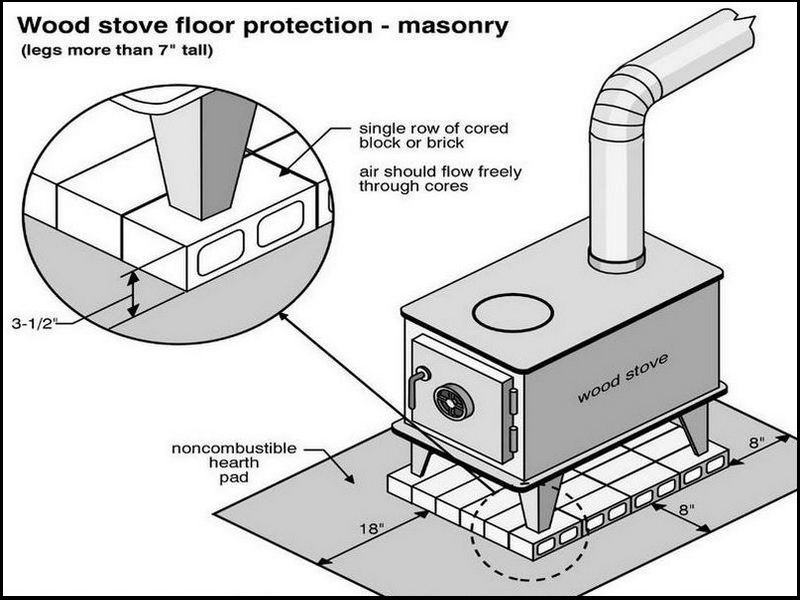
What follows in this section are general guidelines on the clearances required around a wood stove installation. It is important to understand that there are not hard and fast rules that can be applied in any case. What always take precedence is “AMI”, or “in accordance with manufacturer’s instructions.” In short, if the maker says their stove can be installed this way, it almost always overrules “code.”
Additionally, in the absence of AMI, or an “unlisted” device, the rules vary depending on many details. These include the actual appliance, the surrounding installation, and what specific code applied at the time. Use common sense, and when in doubt call for a specialist’s opinion.
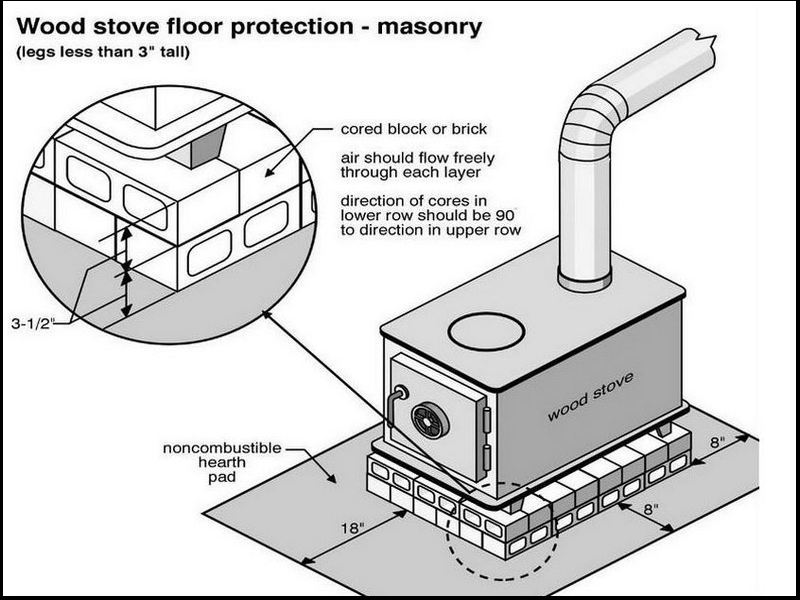
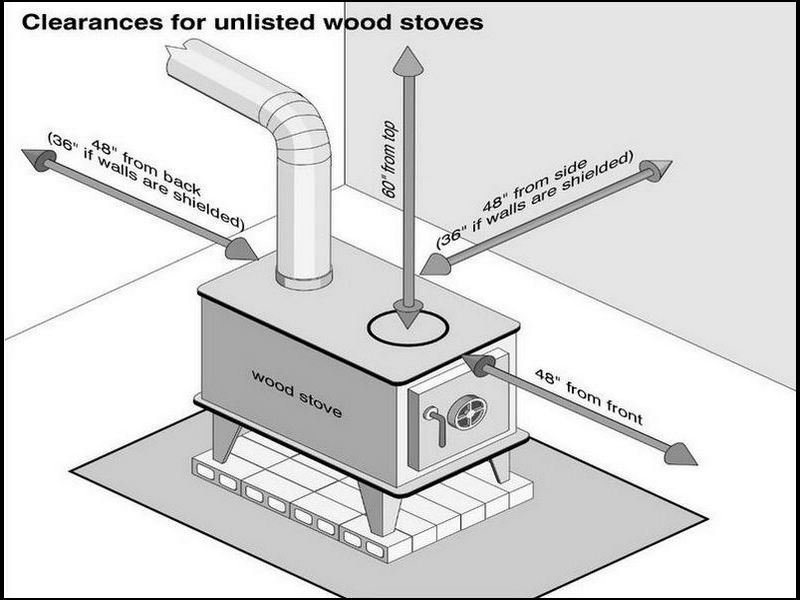

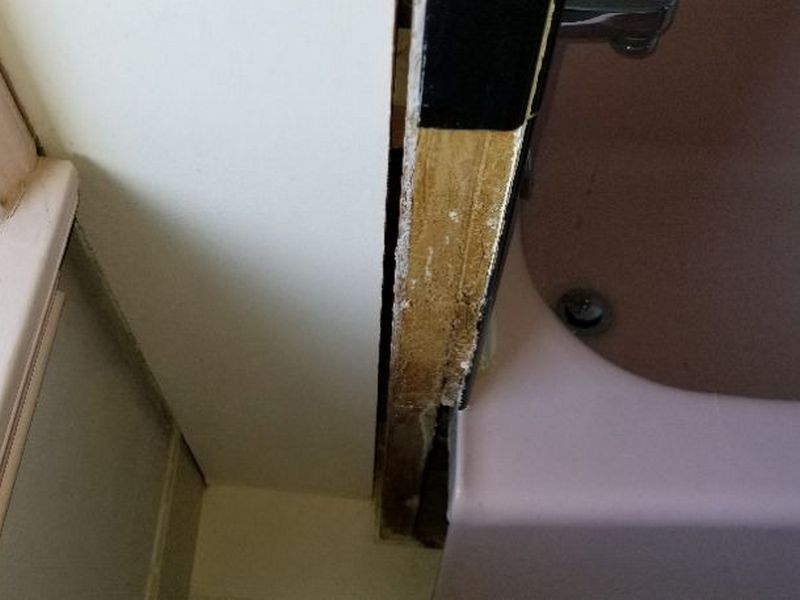
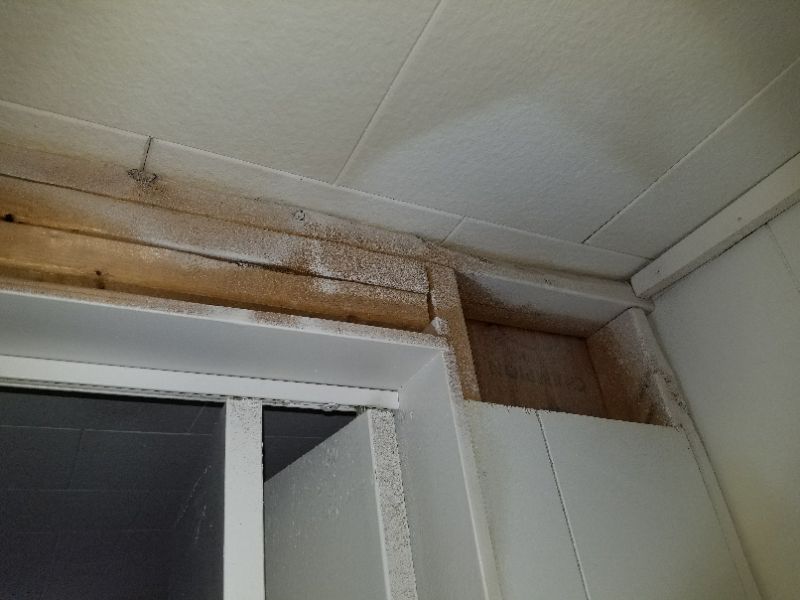
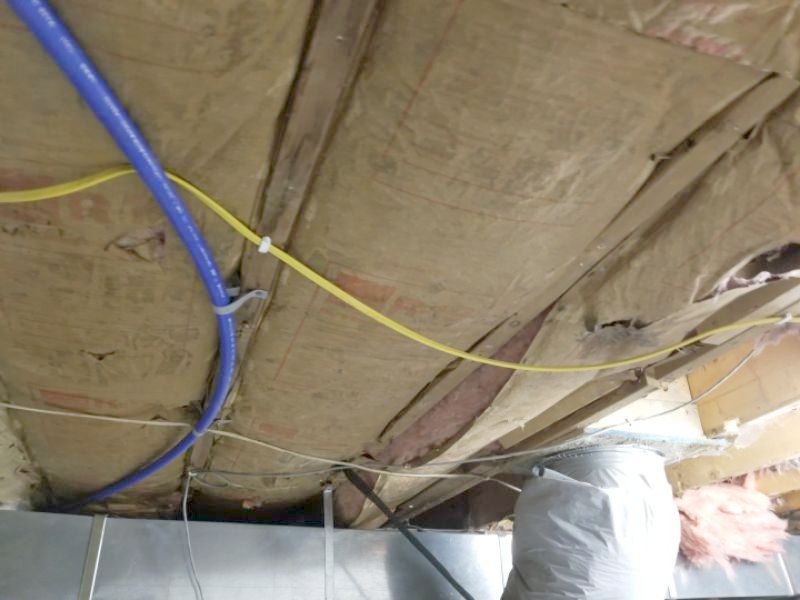
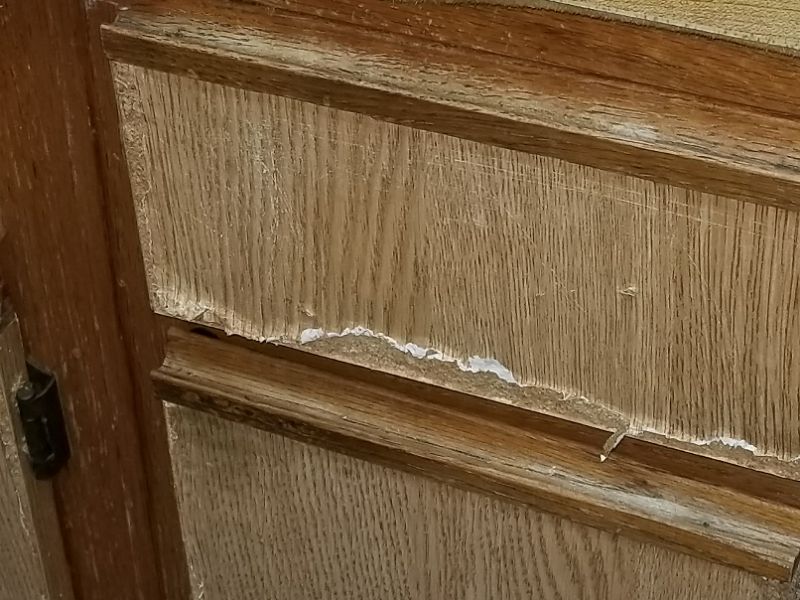
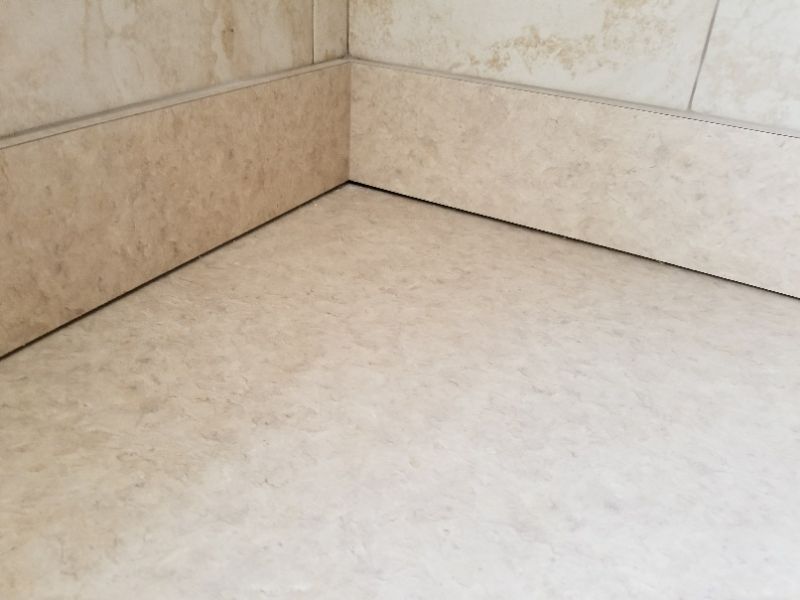
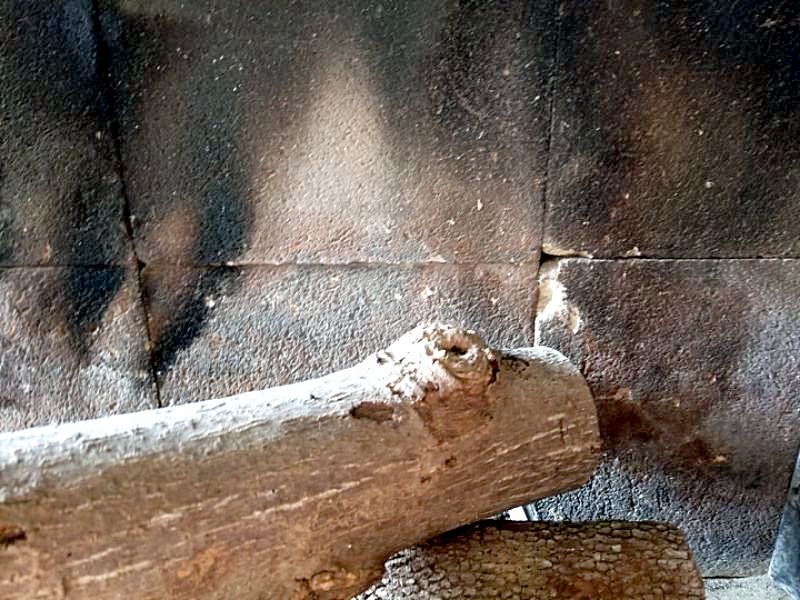
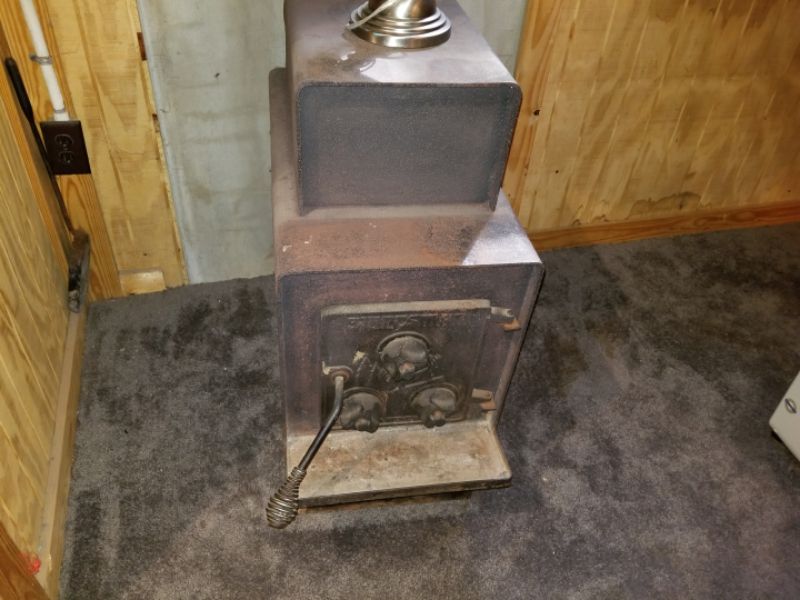
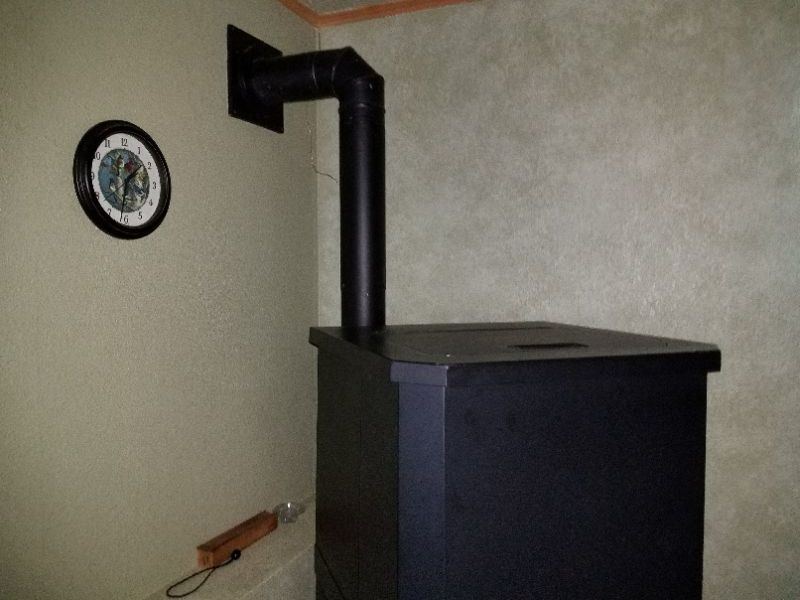
The appliance is too close to combustible material. This is a safety issue. Remove the combustible materials or relocate the appliance.
![]()
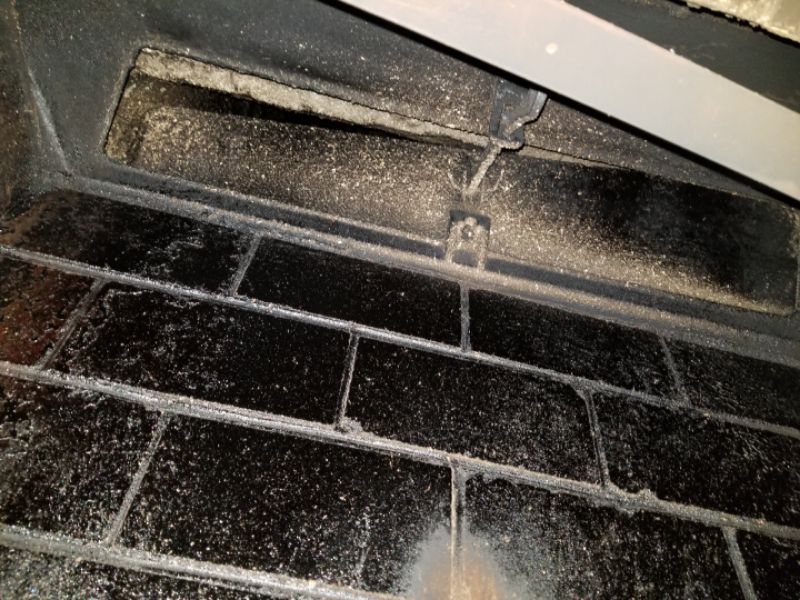
There are cracks in the firebox. This is a fire hazard. Repair and seal the cracks.
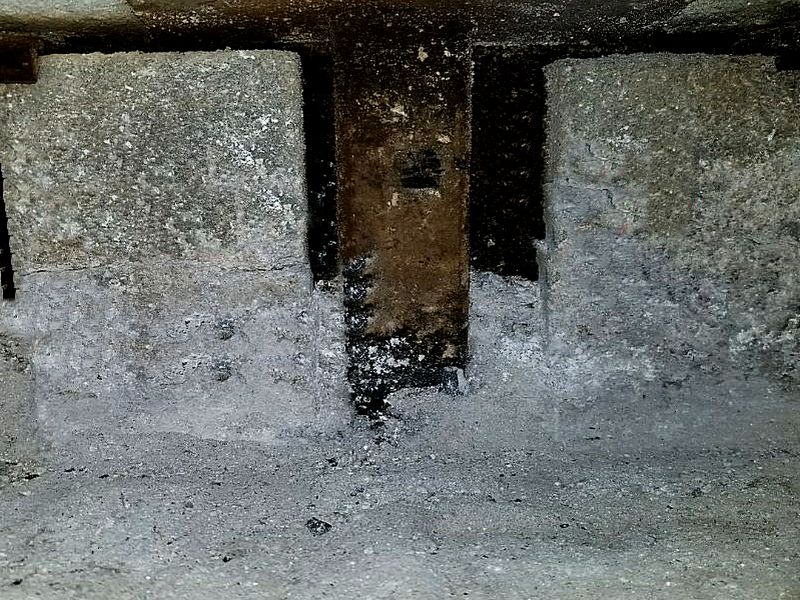
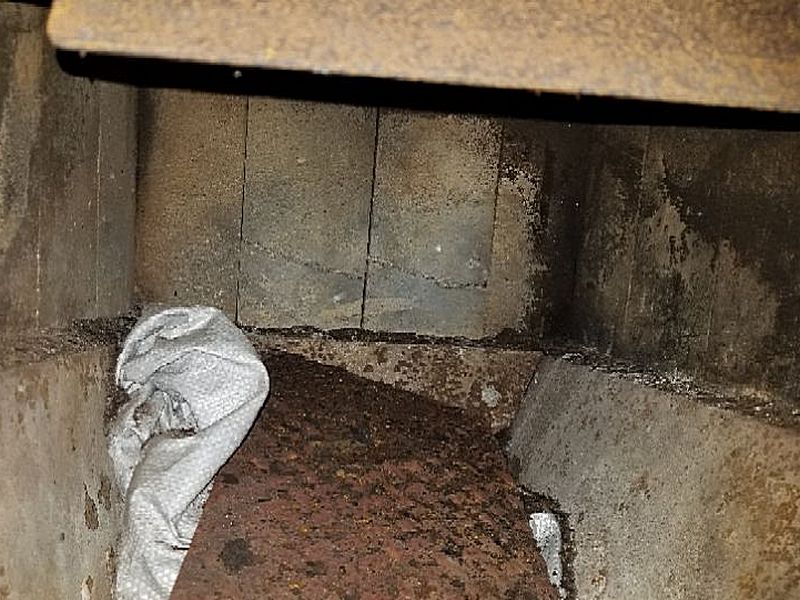
The firebox is deteriorated. This is a fire hazard. Replace the firebox or the liner.

The vent pipe is too close to combustible material. This is a safety issue. Remove the combustible materials or relocate the vent pipe.
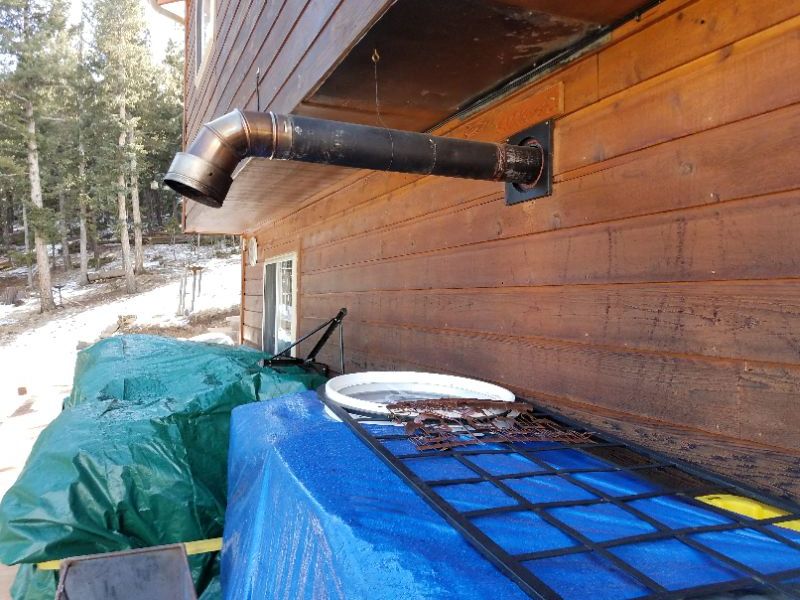
There are gaps in the vent pipe. This is a fire hazard. Repair and seal the gaps.
The vent pipe is improperly sloped. This is a safety hazard. Reinstall the vent pipe with a proper slope.
The vent pipe is damaged or deteriorated. This is a safety hazard. Replace the vent pipe.

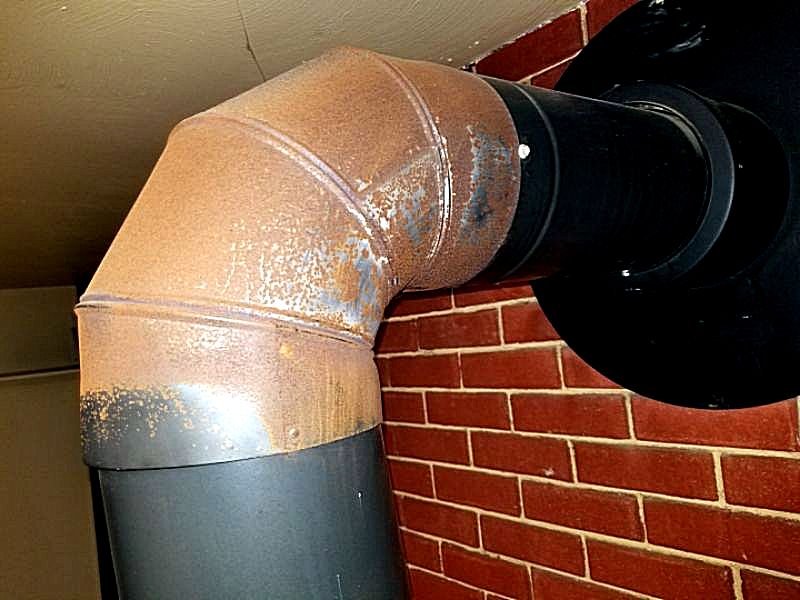
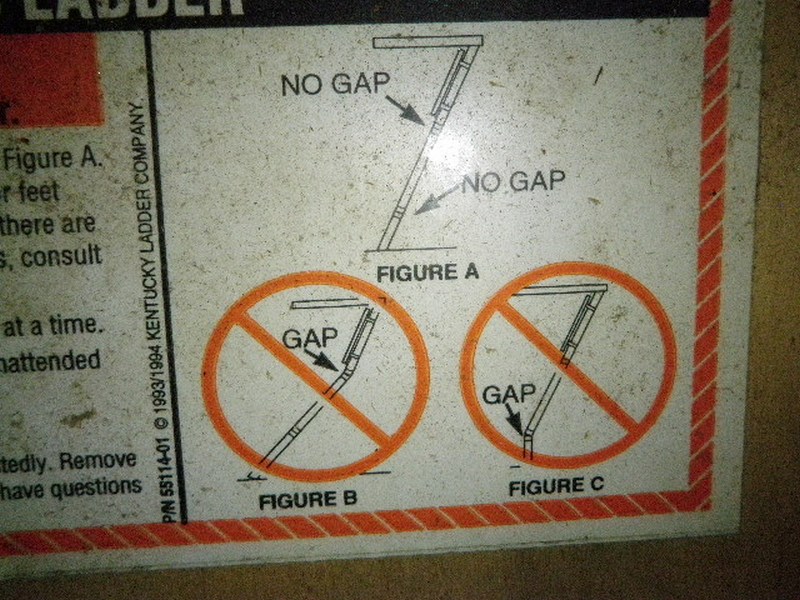
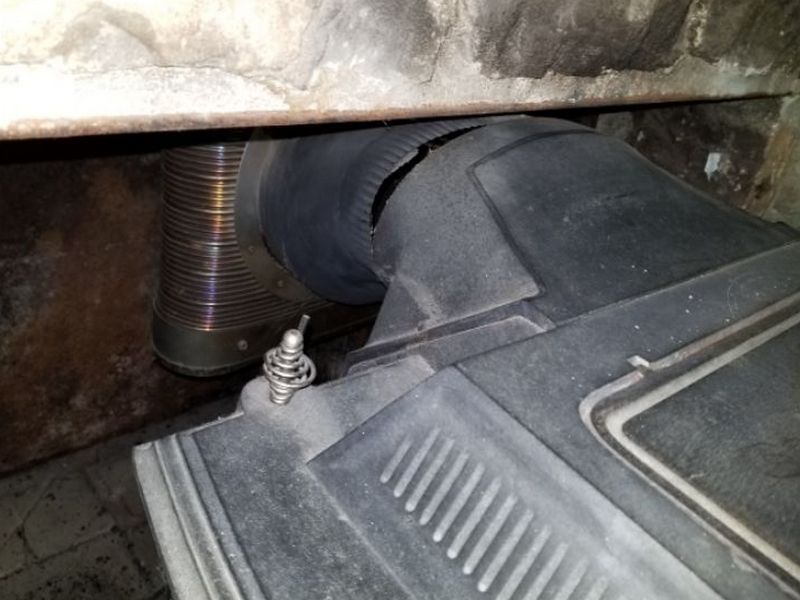
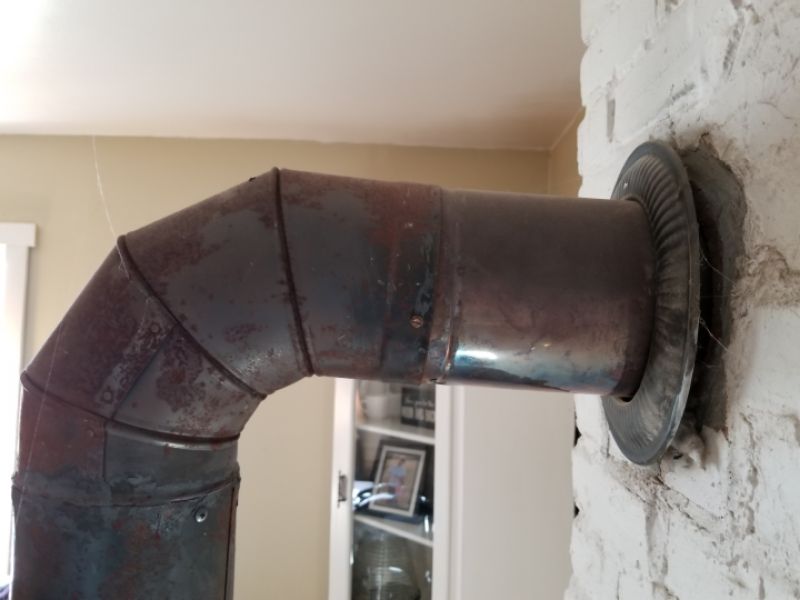
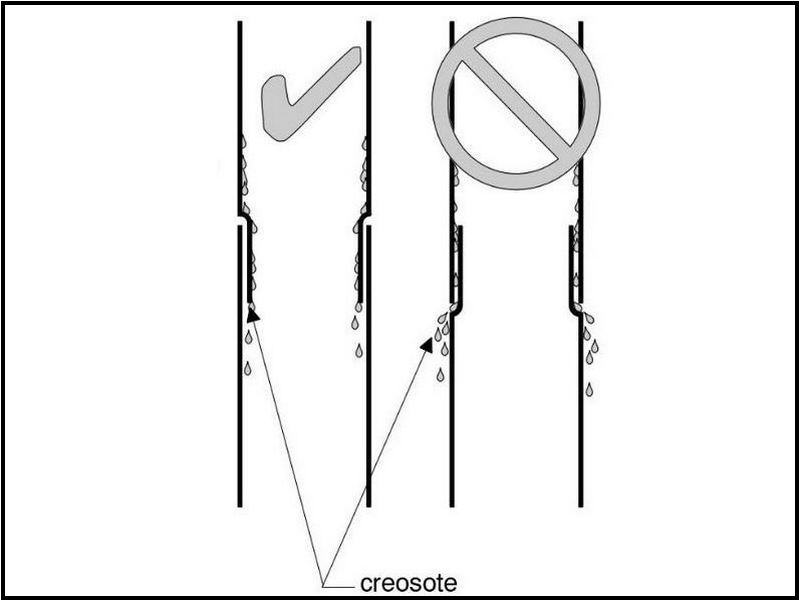
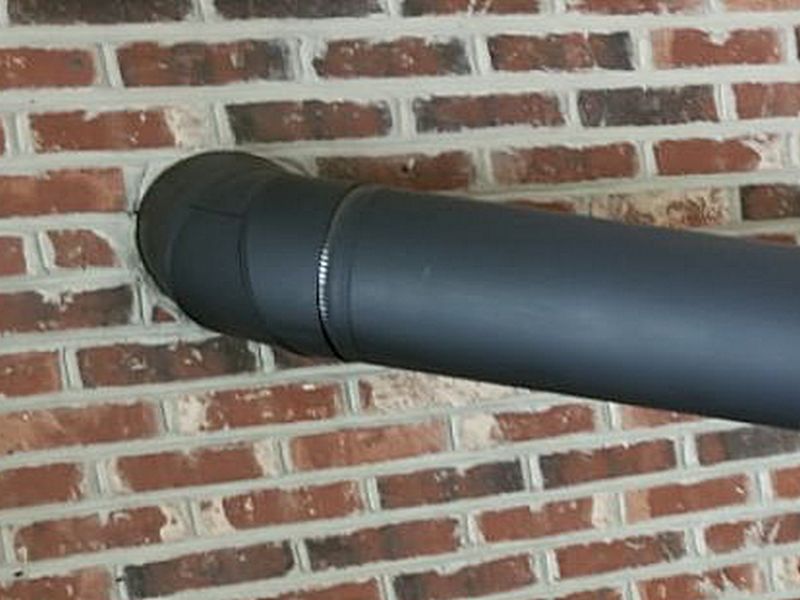
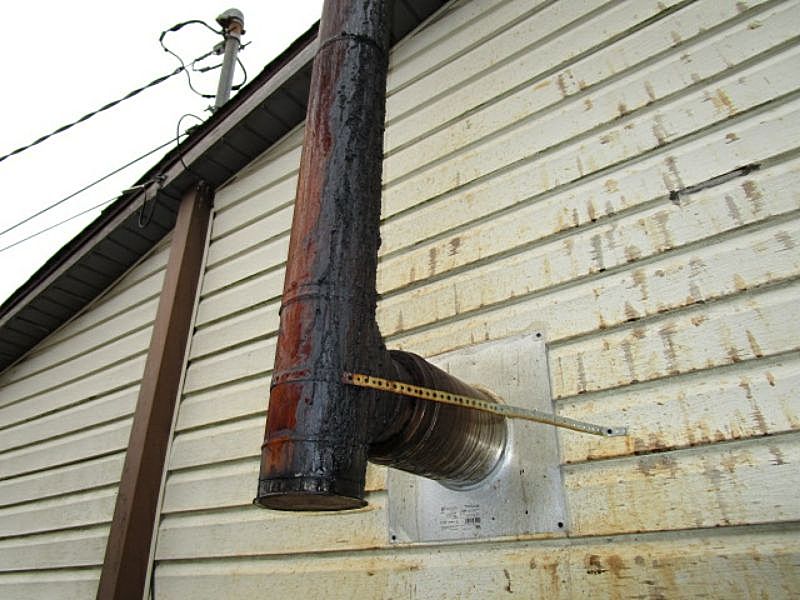
The wood stove’s vent sections are improperly connected. The crimped, male connection should be at the top and inserted downward into the female connection. Otherwise, the solid fuel resins and condensation can leak through the joints. This is a safety concern. Hire a contractor to reinstall the vent with reversed connections.
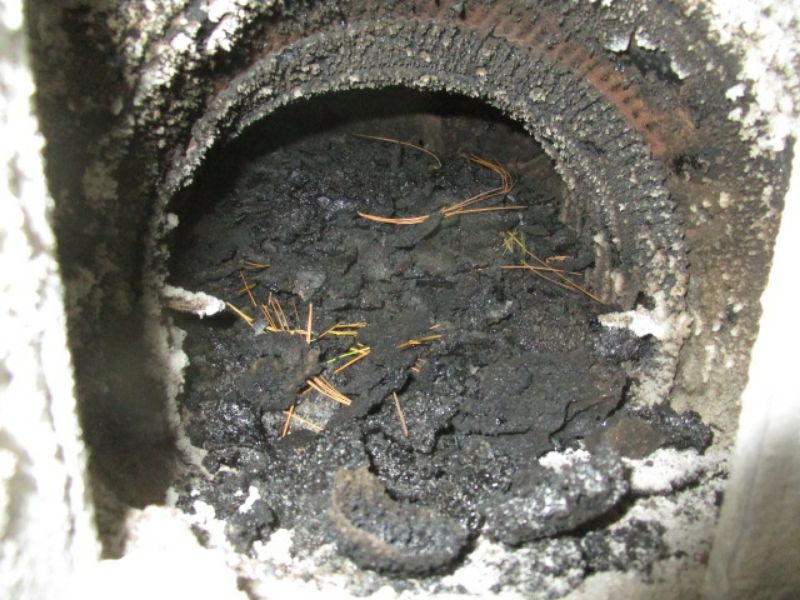
There is creosote accumulation in the firebox and vent pipe. This is a fire hazard. Hire a contractor to clean the chimney and conduct a detailed inspection.
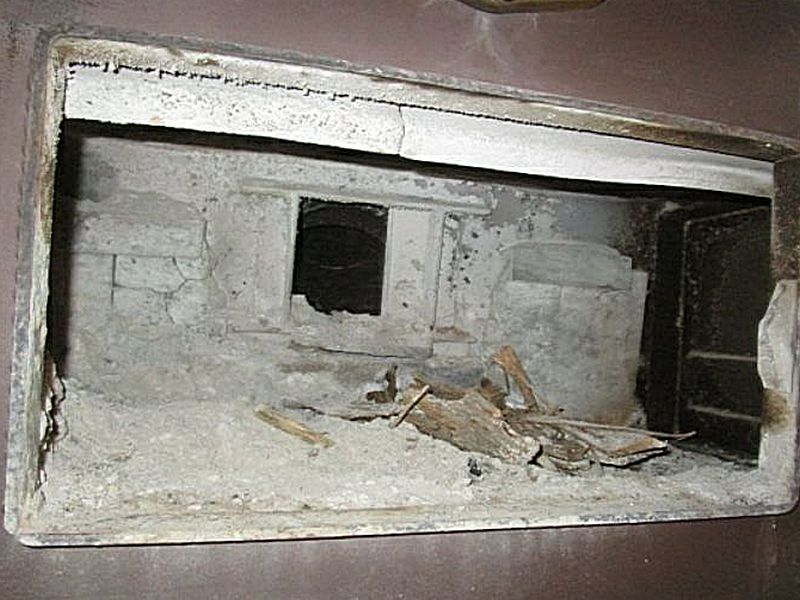
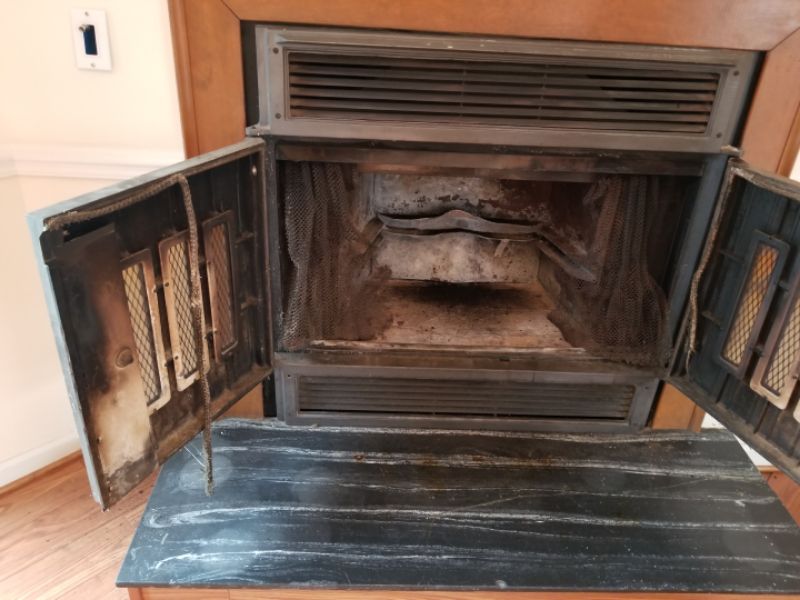
Wood stove inserts are inspected for many of the same concerns as a free-standing stoves. The main difference, and the primary limitation, is that the entire back half is “inserted” into the existing fireplace. It is not visible. We do not slide inserts out of the fireplace. As such, any problems with the flue connections are hard to see, although you can sometimes look behind the surround cover plate.
Wood stove installations must have a continuous flue connection from the stove to the existing chimney flue. An ideal method is to use an approved metal flue pipe that extends all the way to the exterior. Exhausting the stove directly into the fireplace’s firebox or smoke shelf instead of sealing the pipe to the chimney flue is unsafe.
The wood stove insert lacks a direct and sealed connection to the chimney flue. This is sometimes referred to as a “slammer.” This is contrary to accepted practice and is unsafe. Hire a contractor to install a connection to the chimney flue.
The wood stove insert is installed in a system designed for a pre-fabricated fireplace. This is contrary to accepted practice and is unsafe. Hire a contractor for an evaluation and repairs or replacements as needed.
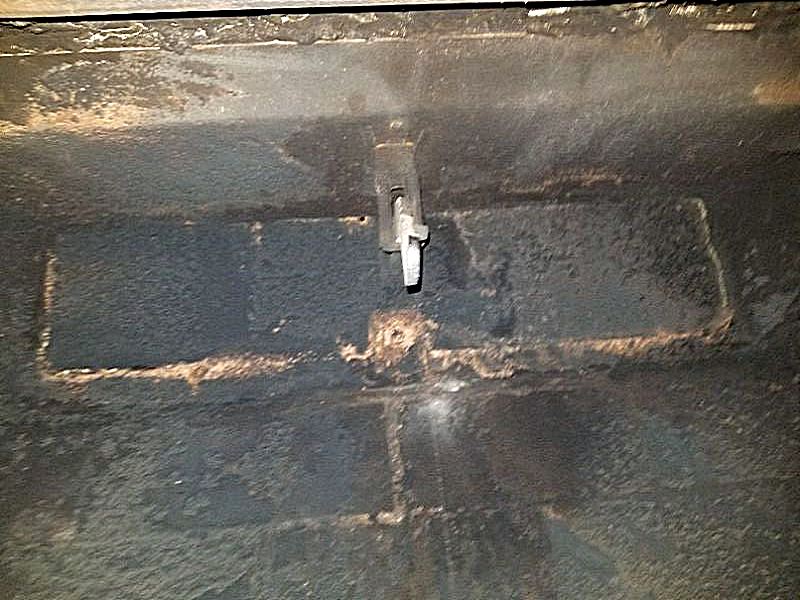
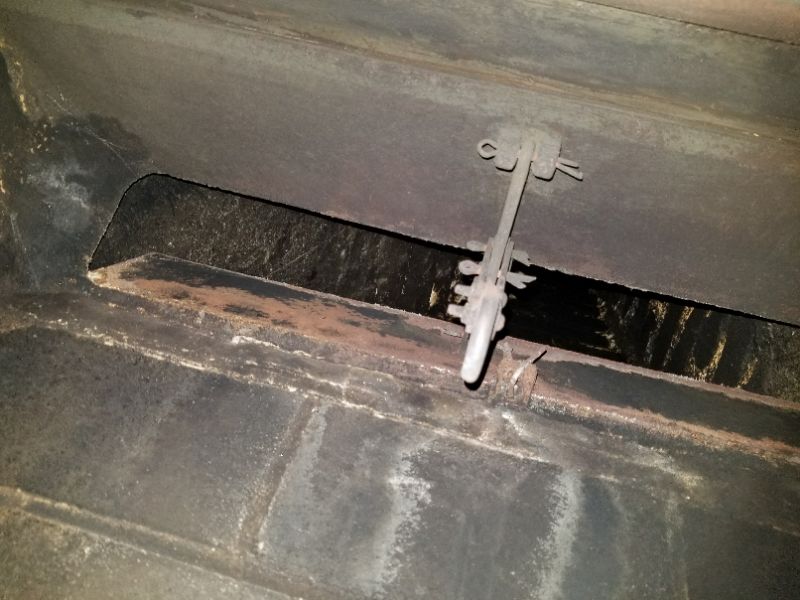
The gas fireplace insert has an operable damper without a clamp that prevents the damper from closing completely. This is a safety hazard. Install a damper clamp.
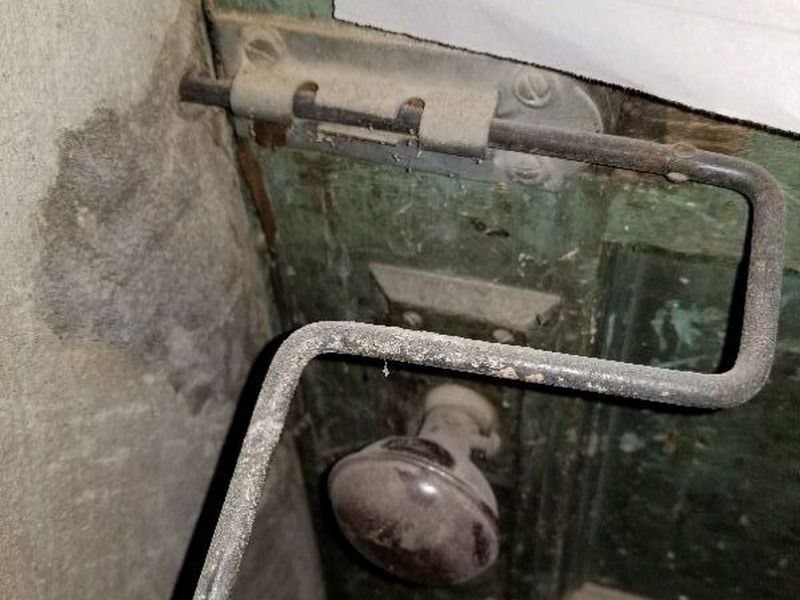
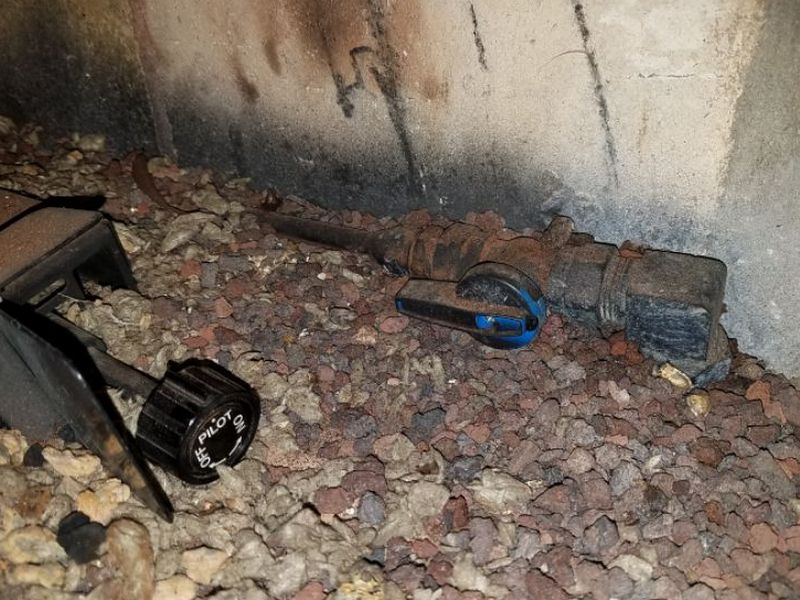
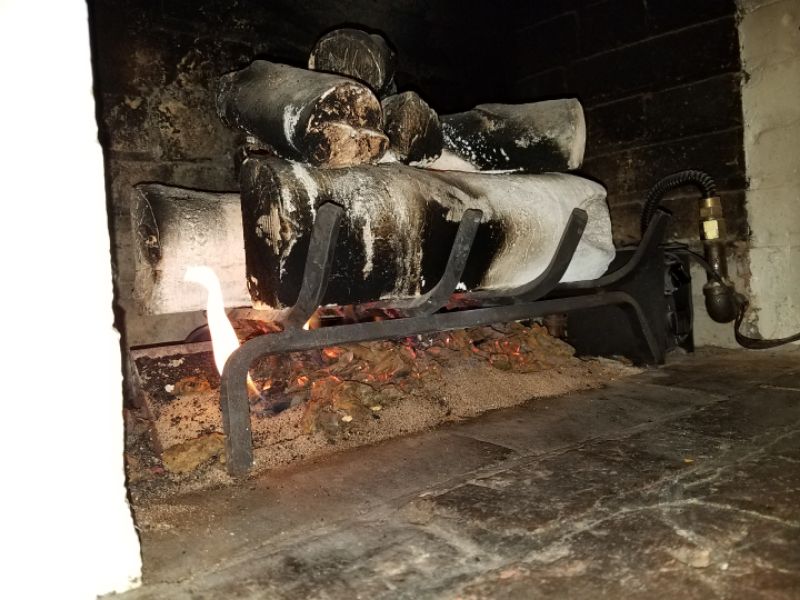
The valve is installed inside the fireplace. This is a safety hazard. The appliance should have master shut-off valve that is outside of the firebox and readily accessible (i.e., in the same room). Hire a contractor to relocate the valve to outside of the fireplace.

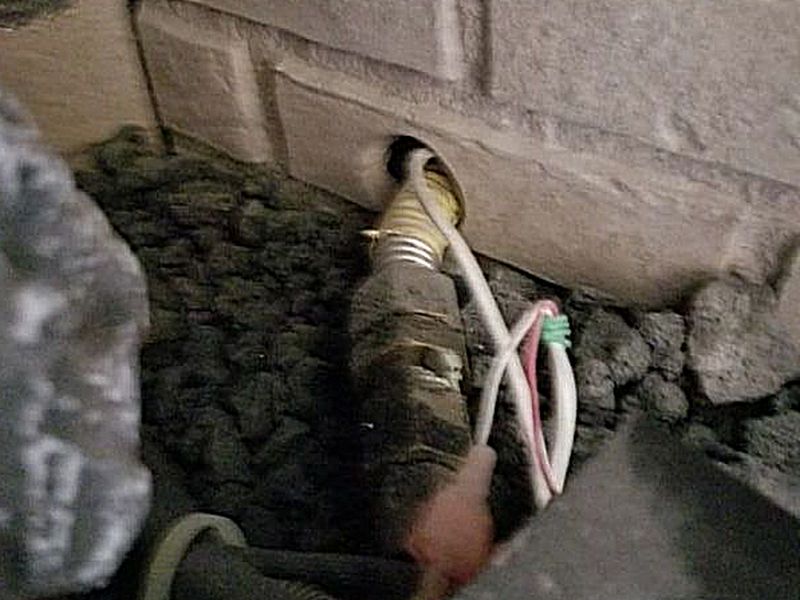
The opening is not sealed in the firebox where the gas appliance’s fuel line enters. This is a fire hazard. Seal the opening.
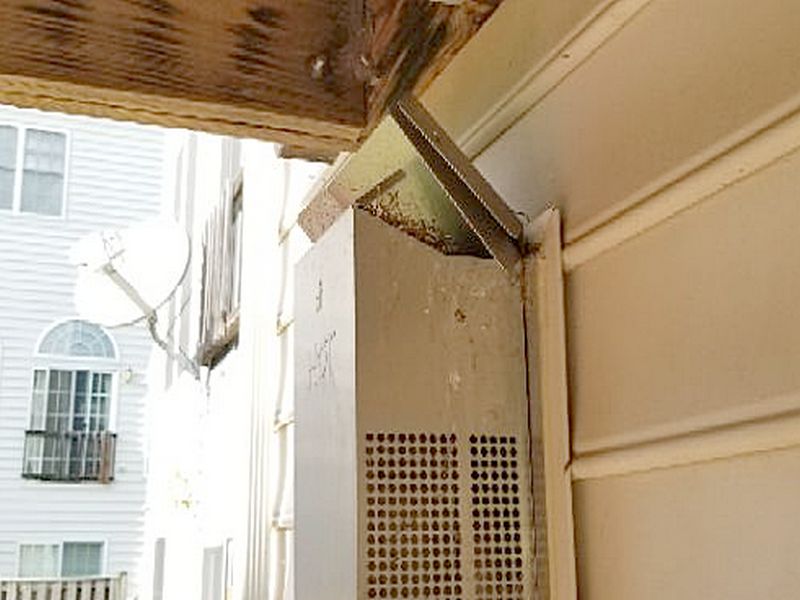
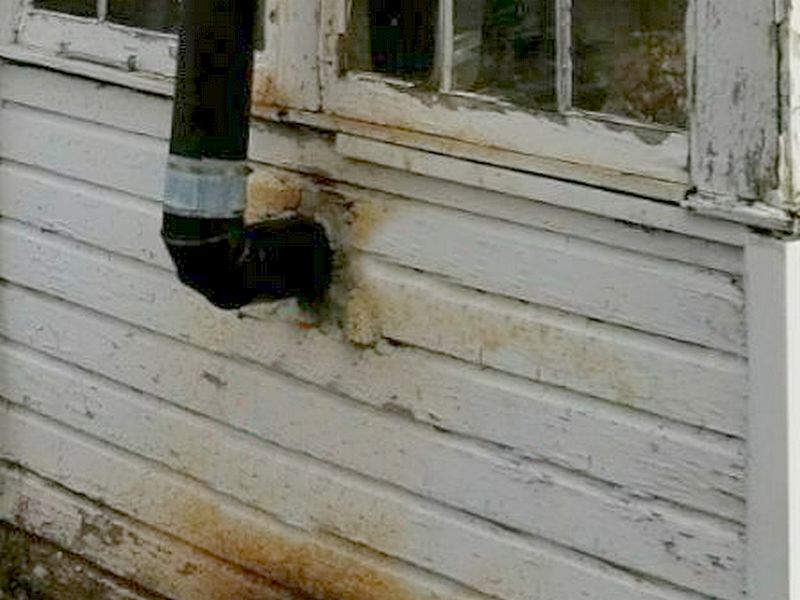
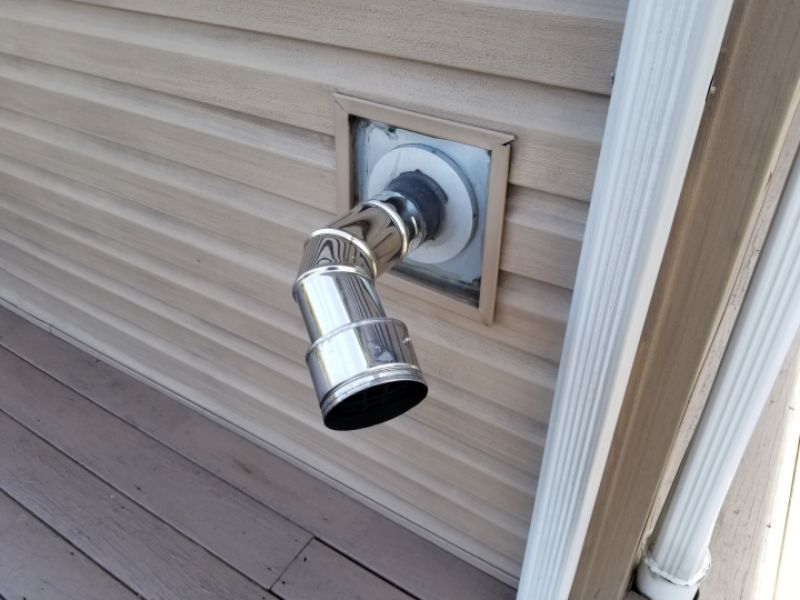
 The fireplace’s direct vent terminates in a readily-accessible location. This is a safety hazard, especially for small children. Install an after-market protective vent cover.

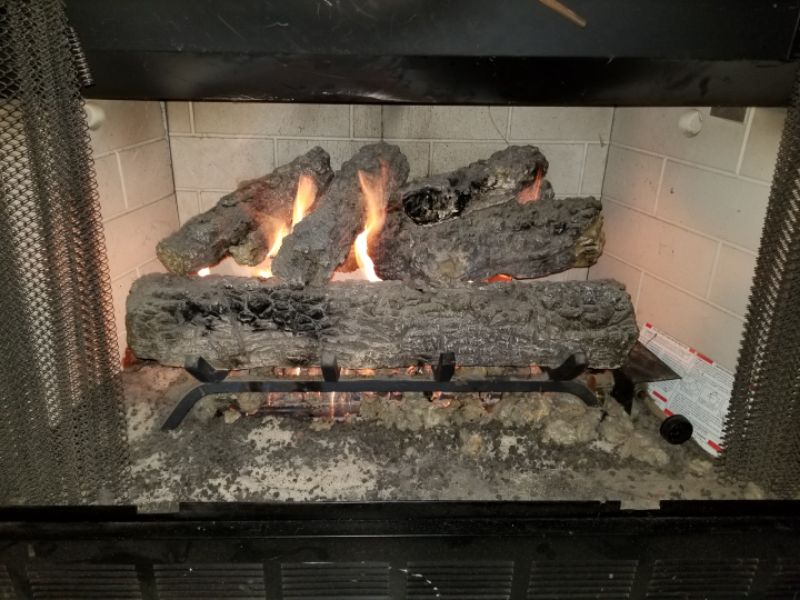
The gas flame is yellow, too high, and is burning on the gas logs. This is a safety hazard that indicates improper adjustment and operation. Hire a contractor for an evaluation and repairs as needed.
NFPA 211 is the basis of applicable chimney and fireplace safety codes. The actual adoption of a given code varies by state and locality. However, the Chimney Safety Institute of America (www.CSIA.org), the leading educational and certification organization for chimney professionals, fully recognizes NFPA 211. This includes its standards for chimney and fireplace inspections. These protocols are designated Level I, II, and III Inspections.
DEFINITIONS:
Readily Accessible:
Exposed, or capable of being exposed, for operation, inspection, maintenance, or repair without the use of tools to open or remove doors, panels, or coverings.
Accessible:
Capable of being exposed for inspection, maintenance, or repair, without damage to the chimney or building structure or finish, but which may require the removal of doors, panels, or coverings using commonly available tools.
LEVEL I INSPECTION
Scope: Readily accessible areas of chimney, structure, and flue; lack of flue obstructions or combustible deposits; basic appliance installation and connections.
Access required: Readily accessible portions of chimney exterior and interior; accessible portions of appliance and chimney connection.
Circumstances: Annual inspection during routine flue cleaning; upon direct replacement of connected appliance with one of similar type, input rating, and efficiency.
LEVEL II INSPECTION
Scope: All subjects of a Level I inspection; proper construction and condition of accessible chimney structure and flue; proper clearances from combustibles in accessible locations; size and suitability of flues for connected appliances.
Access required: All accessible portions of chimney exterior and interior, including accessible areas of attics, crawl spaces and basements; accessible portions of appliances and chimney connections; includes flue inspection by video scanning or other means.
Circumstances: Upon removal of one or more connected appliances and replacement with one of dissimilar type, input rating, or efficiency; prior to relining or replacement of flue lining; upon sale or transfer of the property; after operating appliance malfunction or external event, e.g. earthquake, severe weather event, likely to have caused chimney damage.
LEVEL III INSPECTION
Scope: All subjects of Level I and Level II inspections; proper construction and condition of concealed portions of chimney structure and enclosed flues; proper clearances from combustibles.
Access required: Internal and external portion of chimney structure including concealed areas of the building or chimney; includes removal of components of the building or chimney where necessary, but only as necessary to gain access to areas that are the subject of the inspection.
Circumstances: When necessary for the investigation of an incident that has caused damage to the chimney or building; where a hazard detected or suspected as the result of a Level I or II inspection cannot be fully evaluated without access to concealed areas.
Fuel Burning Appliances Limitation and Information Statements
In use, not inspected: The fuel-burning appliance is in use and, therefore, is not inspected.
Creosote build-up, limited interior visibility: Visibility of chimney interior is limited due to creosote build-up.
Near/at end useful life, budget for replacement: The fuel burning appliance is near or at the end of its useful life. We recommend establishing a budget to replace the fuel-burning appliance.
Past end useful life, budget for replacement: The fuel burning appliance is past the end of its useful life. We recommend establishing a budget to replace the fuel-burning appliance.
Clean/service combustion appliances, flue pipe and chimney annually: Clean and service combustion appliances annually. The flue pipe and chimney also should be cleaned and examined regularly.